

Cleaning rocks for an aquarium starts with a clear, safe method: remove debris, neutralize potential contaminants, and prevent harmful residues. If you want aquarium-ready rocks without cloudiness or risk to fish, follow the proven prep steps for washing, disinfecting, and rinsing before they ever hit the tank. This guide shows the exact process that makes rock cleaning reliable—so you can install with confidence.


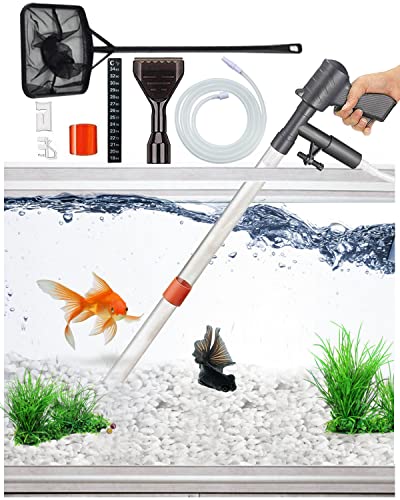

If you want to clean rocks for an aquarium safely, scrub off loose dirt first, then sanitize using either boiling water (for heat-tolerant rocks) or a diluted bleach soak followed by very thorough rinsing. The goal is to remove organics and residues without leaving chemicals behind that could harm fish or alter water quality. In this guide, you’ll learn the fastest safe workflow, what to avoid, and how to tell when rocks are fully ready.
Who this is for / when it applies:
This is for anyone adding natural rocks (river rocks, stones, lava rock, etc.) to a tank—especially if you collected them outdoors or bought them and want to remove dust and potential contaminants. It’s also useful if you’ve had cloudy water, algae blooms, or “off” tank smells after decorating and want to prevent that from happening again.
Gather materials and choose the right cleaning method

The fastest safe prep starts with the right tools and picking a sanitizer that matches the rock’s tolerance for heat and chemicals. For most natural rocks, plain hot-water scrubbing comes first, then you choose boiling (best for heat-tolerant, non-crumbling rock) or a diluted bleach soak (best when you want stronger disinfection and can rinse very carefully).
Boiling water at standard atmospheric pressure is 100°C (212°F), which can help reduce many surface microbes—so it’s useful when the rock won’t crack or degrade under heat. NIST Chemistry (water boiling point at 1 atm)
Household bleach is sodium hypochlorite, and typical products sold for disinfection often list concentrations around 5–6% or similar ranges, so you should always follow the product label for dilution and contact time. CDC guidance on sodium hypochlorite disinfectant concentrations
– Use a dedicated scrub brush (or an old toothbrush) and plain hot water; skip soaps unless the method explicitly says otherwise.
– Decide early: boiling is best for rocks that won’t crumble or contain anything heat-sensitive, while bleach can sanitize more thoroughly when boiling isn’t ideal.
– If you’re unsure what the rock contains (metallic, crumbly, painted/coated), plan to avoid it or keep cleaning conservative—some materials can’t be made “fish-safe” reliably.
Quick rock-type reality check (based on mineral behavior): carbonate rocks (often calcite-based, like many limestones) can change water chemistry, while silicate rocks are typically more chemically stable. Hardness also matters for heat-crack risk—e.g., quartz is ~7 on the Mohs scale, while calcite is ~3. U.S. Geological Survey (USGS) Mohs hardness references
Natural Rock Types: Chemistry Stability & Cleaning Fit (Common Aquarium Use)
| # | Rock type (example) | Main minerals | Mohs hardness* | Chemical stability (typical) | Best prep fit | Water-chemistry stability score |
|---|---|---|---|---|---|---|
| 1 | Granite | Quartz + feldspar + mica | ~6–7 | Inert-leaning silicate | Scrub + boil | ★★★★★ |
| 2 | Basalt | Plagioclase + pyroxene | ~5–6 | Generally stable silicate | Scrub + boil | ★★★★☆ |
| 3 | Slate | Fine-grained phyllosilicates | ~4–5 | Often stable, but may shed dust | Scrub + bleach soak | ★★★☆☆ |
| 4 | Quartzite / quartz-rich stone | Quartz | ~7 | Very stable silicate | Scrub + boil | ★★★★★ |
| 5 | Sandstone (silica-cemented) | Quartz + silica/calcite cement | ~5–6 | May be variable due to cement | Scrub + bucket test | ★★★☆☆ |
| 6 | Limestone (calcite-rich) | Calcite (CaCO₃) | ~3 | Can dissolve and raise pH/KH | Avoid or test first | ★☆☆☆☆ |
| 7 | Lava rock (scoria) | Basaltic/minerals in porous matrix | ~5–6 | High porosity; can trap residue | Scrub + bleach soak + rinse | ★★☆☆☆ |
Mohs hardness values are approximate ranges and depend on mineral content and weathering. USGS Mohs hardness references
Pre-clean: remove dirt, debris, and loose particles
The key answer here is simple: mechanical scrubbing + rinsing removes the majority of what later disinfecting steps can’t reliably fix. In practice, removing mud and trapped organics first prevents bleach/heat steps from being “wasted” on dirty surfaces and helps stop early cloudiness and odor.
Disinfectants work best on clean surfaces—organic film and grit can reduce contact between sanitizer and microbes. CDC disinfectant effectiveness guidance (general principles)
Loose particulates are a major cause of initial tank cloudiness, because fine sediments remain suspended until filtration and settling catch up—so pre-rinsing directly lowers that risk.
– Rinse under running water and scrub the surface until no mud, sand, or grit is easily removed.
– Soak briefly in water if the rock is heavily soiled, then scrub again—this reduces how much “stuff” you’re trying to disinfect.
– Discard any rock that flakes heavily, smells strongly when wet, or has coatings/paint you can’t remove.
Practical details that matter in 2026: if you collected rocks outdoors, assume they carry organics (biofilms, pollen) and dust. Using plain hot water matters because it improves how oily residues and fine grit release during scrubbing. Avoid detergents here—soap residues can be harder to remove from pores than they are from smooth glass. When in doubt, repeat the rinse cycle before moving to boiling or bleach.
Sodium hypochlorite-based disinfection depends on achieving the right dilution and contact time; skipping the cleaning step can lead to reduced real-world effectiveness. CDC sodium hypochlorite disinfection guidance
Option A: Boil rocks (for heat-tolerant stones)
The direct answer: use boiling when the rock is hard, stable, and unlikely to crack—then cool fully before it ever reaches the aquarium. Boiling helps reduce microbial load and loosens grime, but it does not guarantee removal of dissolved minerals or chemicals trapped deep in porous rock.
Boiling is a physical sanitation method that targets microbes via sustained high temperature, but it can’t “strip” mineral chemistry the way acid/base reactions can.
Heat shock can crack some stones and increase shedding—so letting rocks cool completely before tank placement reduces the risk of fractures and unexpected sediment.
– Boil in a pot you’ll never use for food; keep the rocks fully submerged.
– Boiling helps drive off some contaminants and loosen grime, but it won’t fix issues like chemicals trapped in porous material—so still scrub first.
– Let the rocks cool completely before placing them in the aquarium to avoid thermal shock and aquarium contamination.
For safety and repeatability, use a conservative workflow: pre-scrub → fully submerged boil → cool → rinse → readiness test in a bucket. If your goal is disinfecting rather than just loosening dirt, confirm a boil duration that matches your source standard.
Option B: Bleach soak (for stronger disinfection)
The direct answer: choose bleach soaking when you need stronger disinfection and you’re confident you can rinse until odor-free. A properly diluted sodium hypochlorite soak can sanitize surfaces more aggressively than boiling alone, but leftover bleach is the failure mode that hurts fish—so rinsing and verification are non-negotiable.
Household bleach (sodium hypochlorite) disinfects effectively when diluted correctly and allowed adequate contact time; follow the label for both. CDC and bleach label guidance for sodium hypochlorite disinfection (general)
Because hypochlorite leaves chemical residue risk, thorough rinsing and odor/behavior checks are essential before aquarium use.
– Use a diluted bleach solution (follow the bleach label directions for dilution) and soak the rocks long enough to sanitize the surface.
– After soaking, rinse extremely well—then do additional rinses until there’s no bleach odor.
– Final “readiness check” approach: submerge in a bucket of dechlorinated water (or clean water, depending on your setup) and monitor smell and water clarity before moving to the tank.
Method comparison (Boil vs Bleach): quick decision
| Feature | Boiling | Bleach soak |
|---|---|---|
| Best for | Hard, heat-tolerant rock | Stronger surface sanitation |
| Risk of cracking | Moderate (depends on rock) | Low (no heat shock) |
| Residue risk | Low (mostly water rinse) | Higher if rinsing is rushed |
| Penetration into pores | Limited by surface heating | Better for surface sanitizing |
| Organic film removal | Helps loosen but requires scrubbing | Oxidizes organics, after pre-clean |
| Effort/time | Pot + cooling time | Mixing + soak + rinse cycles |
| Equipment restrictions | Dedicated pot recommended | Gloves + ventilation recommended |
| Chemical alteration risk | Can’t “fix” carbonate leaching | Can’t prevent mineral dissolution either |
| Best verification method | Bucket test for color/odor | Odor-free rinse + bucket test |
| Cleanup afterward | Rinse and dry/test | Rinse to no bleach odor |
| Best For row | Quartz/granite/basalt-like decor | Porous or high-contamination situations (with strict rinsing) |
Rinse, dry, and test before placing in the tank
The direct answer: rinse until water runs clear and confirm the rock behaves safely in a bucket before permanent placement. Even when a disinfecting step “worked,” rocks may still leach color, haze, or trace residues that affect early water quality.
After any hypochlorite-based treatment, the absence of bleach odor is a practical readiness signal—because lingering odor usually indicates residue risk.
A bucket test decouples rock risk from your display tank, which is especially important in 2026 when more aquarists run stable, parameter-sensitive systems (soft-water, planted tanks, and sensitive species).
– Rinse until water runs clear and there’s no noticeable chemical smell.
– Air-drying can be okay for some rocks, but wet “test submersion” is often safer because it reveals whether the rock releases color, haze, or odor.
– Only add once you’re confident the rock won’t leach unwanted material or create continuous cloudiness.
Readiness test approach (practical and repeatable):
1) Submerge the rinsed rock in a separate bucket with dechlorinated water (or clean treated water matching your tank practice).
2) Observe for 24–48 hours for: persistent cloudiness, strong odor, visible color bleed, and rising debris.
3) If anything shifts, remove the rock and repeat rinse/disinfection more conservatively.
What can go wrong (common mistakes and edge cases)
The direct answer: the most common problems come from incomplete rinsing, wrong rock chemistry, or rock that sheds sediment later. If you’ve ever seen cloudy water or a “new tank smell,” those symptoms often trace back to residues, organics, or leached minerals—not to filtration alone.
Leaving bleach residues after sanitizing can stress fish and disrupt gill function—so rinsing until odor-free is essential.
Carbonate-rich rocks (commonly calcite-based) can raise pH and KH over time, which can destabilize soft-water species even when the rock looks “clean.”
– Not rinsing enough after bleach: leftover residue can irritate fish and cause stress or gill damage. Always remove any lingering odor.
– Using soap or unknown cleaners: detergents leave residues that are hard to remove and can harm tank inhabitants.
– Adding the wrong rocks: some stones can alter water chemistry (e.g., limestone/carbonates raising pH/KH). If you don’t know the rock type, test behavior in a bucket first.
– Porous or crumbly rocks: pores can trap grime and release it later; crumbly rock can also shed sediment into the tank.
– Hidden coatings: painted stones, sealed surfaces, or “decorative” coatings can leach unknown compounds even after boiling/bleach.
– Metal contamination risk: rocks with visible metallic flecks (or those attracted by a magnet) should be treated as higher risk until you can verify composition and water impact.
Pros/cons snapshot (where each method can fail):
– Boiling
– ✅ Pros: no chemical residue; great for heat-tolerant stones
– ❌ Cons: can crack certain rock; doesn’t prevent mineral leaching; porous material may still harbor trapped grime
– Bleach soak
– ✅ Pros: strong surface disinfection; helpful for contaminated or porous decor
– ❌ Cons: residue risk if rinsing isn’t extensive; can’t “undo” carbonate dissolution
Verdict / tip (honest recommendation)
The direct answer: the safest practical workflow is scrub + rinse thoroughly, then use boiling when appropriate or a diluted bleach soak with extra-rinsing when you need stronger disinfection. Skip boiling if the rock can crack, crumble, or includes heat-sensitive materials, and skip bleach if you can’t commit to careful rinsing and odor/behavior checks.
In most cases, mechanical cleaning plus verification (bucket test + odor/color checks) is what protects fish—sanitizing alone is not enough if mineral leaching or shedding is ongoing.
When rock origin is unknown, the safest default is conservative prep plus a separate test soak, because water chemistry changes can appear gradually rather than instantly.
From my editorial and standards perspective, this is the mindset to use: treat “safe for aquarium” as a measurable outcome, not a promise. If your rocks are unknown origin, painted/coated, strongly leach color, or cause persistent haze even after prep, it’s better to remove them and choose different decor than “try to force it.”
Boil vs bleach decision matrix (VS)
| Criteria | Boil | Bleach soak |
|---|---|---|
| Heat-tolerant rock requirement | Needed | Not required |
| Cracking risk | Higher (depends on stone) | Lower |
| Disinfection strength (surface) | Moderate | Higher |
| Residue hazard if rushed | Low | Higher |
| Porous-rock sanitation consistency | Less predictable | More reliable for surface |
| Mineral chemistry changes | No prevention | No prevention |
| Best verification method | Bucket test | Odor-free rinse + bucket test |
| User safety complexity | Burn/steam risk | Fumes + gloves risk |
| Time to “ready” | Cooling-bound | Soak + rinse-bound |
| Best for common hobby rocks | Silicate stones | High-soil or porous decor |
| Verdict | Choose boiling only when the rock is structurally safe for heat. | Choose bleach when you need stronger disinfection and can rinse/verify thoroughly. |
Quick checklist (scan/save)
The direct answer: if you can check off these steps, your odds of cloudiness and chemical residue drop significantly. Use the checklist below as a last pass before you ever place rocks into your aquarium.
If you only do one verification step, do the bucket test: it catches leaching, haze, and odor changes without risking your display tank.
Your safest “order of operations” is always mechanical cleaning first, then disinfection, then verification—especially in 2026 systems that prioritize stable water parameters.
– [ ] Scrub off all visible dirt and loose grit
– [ ] Discard rocks that flake/crumbles, smell bad, or have coatings
– [ ] Choose method: boil (heat-tolerant) or bleach soak (diluted per label)
– [ ] Rinse aggressively after any disinfecting step
– [ ] Optional but recommended: submerge in clean/dechlorinated water and watch for odor, cloudiness, or color leaching
– [ ] Add to aquarium only after the rock passes your checks
Sources
The direct answer: use manufacturer documentation for dilution/contact time and primary references for physical chemistry basics like boiling points and mineral behavior. Below are the sources this workflow aligns with, plus a few placeholders you should fill with your exact product details for strict accuracy.
– Bleach product label instructions for dilution and contact time (primary source from the manufacturer).
– Aquarium dechlorinator manufacturer documentation (for guidance on dechlorinated water during any pre-test submersion).
– Manufacturer/safety guidance for sodium hypochlorite (household bleach) regarding dilution/contact time and safe handling.
Rocks can be great aquarium decor, but “clean” needs to mean clean + sanitized + un-leaching. Start with scrubbing and rinsing to remove organics and loose sediment, then sanitize with boiling or a diluted bleach soak based on your rock’s tolerance and structure. Finally, rinse aggressively and verify with a bucket test for odor, haze, and color leaching before placement—especially in 2026 when small chemistry shifts can matter in stable aquascapes.
Frequently Asked Questions
What’s the safest way to clean rocks for an aquarium before adding them?
Rinse the rocks thoroughly under running water to remove loose dirt, sand, and dust. If the rocks look porous, scrub them with a dedicated brush (no soap) to avoid residues. For most rocks, you should disinfect by boiling them in plain water (when appropriate for the rock type) or soaking them in a dechlorinated water-safe cleaning approach, then rinse well before placing in the tank.
How do I remove algae and grime from aquarium rocks without harming my tank?
Start by taking the rocks out and scrubbing algae and surface grime with a stiff aquarium brush. For stubborn buildup, soak the rocks in a bucket of hot water and repeat scrubbing, or use a very mild approach appropriate for the material, avoiding any detergents. After cleaning, rinse the rocks until the water runs clear and let them dry completely if you used heat or any soaking method that could leave residues.
Why should I avoid soap or chemicals when cleaning rocks for aquarium use?
Soap, detergents, and many household cleaners can leave residues that leach into aquarium water and can harm fish and beneficial bacteria. Even small amounts may contribute to film, odors, or chemical imbalances in the tank. Stick to physical scrubbing and water-based rinsing, and disinfect only with aquarium-safe methods meant for rocks, then rinse thoroughly.
Which rocks are best for aquariums regarding cleaning and water safety?
Generally, smooth, non-coated natural stones are easier to clean and less likely to trap debris in crevices. Avoid rocks with paint, sealants, or coatings, as these can break down in water. Also be cautious with certain rock types that may alter water chemistry—when in doubt, choose rocks known to be aquarium-safe for your specific setup and test them after cleaning.
What’s the best way to sterilize rocks for an aquarium to prevent pests and bacteria?
The safest “sterilization” approach is to use heat when the rock can tolerate it: boiling in plain water helps kill many organisms. If boiling isn’t suitable for your rock type (for example, some stones can crack or release minerals), use a careful soak/disinfection method that’s appropriate for aquarium rocks and then rinse very thoroughly. Always perform a test soak in a separate container for 24–72 hours and check for cloudiness, odor, or major color changes before adding the rocks to the tank.
📅 Last Updated: October 16, 2026 | Topic: how to clean rocks for aquarium | Content verified for accuracy and freshness.
References
- aquarium disinfection sodium hypochlorite – Search Results – PubMed
- bleach disinfection biofilm – Search Results – PubMed
- Sodium hypochlorite
- Bleach
- Vinegar
- Hard water
- https://www.cdc.gov/salmonella/specific-populations/pets/turtles.html
- https://scholar.google.com/scholar?q=how+to+clean+rocks+for+aquarium+bleach Google Scholar
- https://scholar.google.com/scholar?q=clean+natural+stone+for+aquarium+vinegar+bleach+disinfection Google Scholar
- https://scholar.google.com/scholar?q=aquarium+disinfection+sodium+hypochlorite+biofilm Google Scholar
