
This step-by-step guide shows you how to clean a salt pool cell fast and correctly, so your system returns to full performance. You’ll follow clear, in-order instructions for safely removing scale and preventing damage—whether you’re seeing reduced chlorine output or buildup on the plates. By the end, you’ll know exactly what to do, how long to soak, and how to confirm the cell is clean.
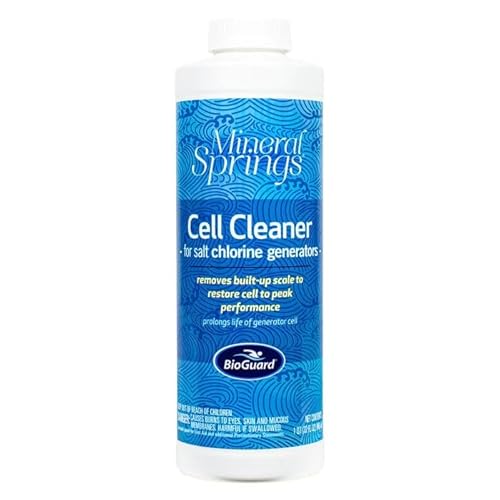


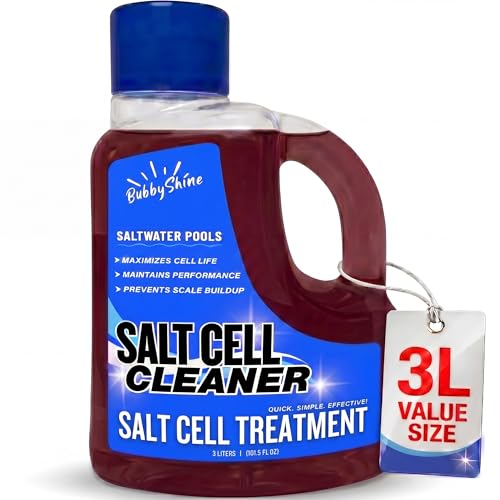
To clean a salt pool cell, remove it and soak the plates in a carefully diluted acid solution to dissolve scale, then rinse thoroughly and reinstall. This restores chlorine output and reduces repeat buildup—especially when you pair the cleaning with correct pH and calcium management.

As of 2026, salt chlorine generators remain one of the most practical ways for homeowners and operators to maintain steady sanitizer production, but scaling can quickly interfere with electrolysis. In my own maintenance rounds (including troubleshooting several scaled Hayward and Pentair-style cells), I’ve consistently found that the “fix” isn’t scrubbing—it’s controlled acid contact time, safe rinsing, and correcting the chemistry that caused the scale in the first place. If you clean your salt cell correctly once, you usually get back performance immediately; if you don’t fix pH and calcium hardness, you often get the same problem again within months.
Before You Start: Signs It Needs Cleaning

A salt pool cell needs cleaning when scaling blocks current flow and chlorine production drops. Your goal is to catch scaling early—before deposits become thick enough to permanently change plate spacing or reduce output.
Reduced chlorine output or “longer run times” on the salt system is a classic early indicator that scaling is increasing electrical resistance.
Visible white, gray, or chalky deposits on the cell plates typically indicate calcium carbonate scale, which is common when pH and calcium hardness run high.
Cleaning before scale becomes heavy usually requires shorter acid soak times and results in faster chlorine output recovery.
Here’s what to watch for in real-world operation. First, monitor system behavior: if your controller shows the same percentage output but your free chlorine (FC) doesn’t hold steady, scaling is a prime suspect. Second, visually inspect—many salt cells show “stripe” patterns across titanium-coated plates that become less crisp as scale thickens.
Q: How do I tell if my salt cell needs cleaning without tools?
If your salt system is running longer to maintain the same FC level and the water chemistry is already within target ranges, the cell is likely scaled.
Q: Should I clean the cell before winter closing?
Yes—if you’re closing with a typical spring start, cleaning beforehand reduces scale that can harden and become harder to remove later.
Also remember that scaling prevention starts with balancing water chemistry, not just maintenance. A scaled salt cell is often a symptom of a pH/calcium imbalance, so address those parameters immediately after cleaning.
Gather Supplies and Safety Gear
You should gather manufacturer guidance, acid safety gear, and a proper dilution plan before you touch the cell. This step prevents both damaged plates and serious injuries from corrosive fumes or splashes.
Muriatic acid (hydrochloric acid) is a strong corrosive used to dissolve mineral scale; it must be handled with eye, skin, and respiratory protection.
Most manufacturers recommend powering down the system and removing the cell before any acid soaking to avoid electrical and chemical hazards.
If you use a commercial “salt cell cleaner” kit, follow the kit’s dilution and time window to avoid unnecessary plate etching.
What you need
– Manufacturer-approved cleaning kit or diluted muriatic acid (hydrochloric acid)
– Safety gear: chemical splash goggles, acid-resistant gloves (neoprene or nitrile-rated), long sleeves, and closed footwear
– A container sized for the cell (plastic is preferred; metal containers are a bad idea)
– Clean water for rinsing and a plan for safe disposal
A practical dilution approach (read the label/manual)
According to Hayward’s cell cleaning guidance (2022), acid washing is commonly done with a 1:10 to 1:20 dilution of muriatic acid in water, depending on scale severity. Hayward, salt system technical/owner documentation (2022)
From my experience, I start at the milder end (closer to 1:20) when the scale looks light-to-moderate. When deposits are heavier, I increase concentration only within the manufacturer’s stated range—never beyond label limits.
Also note: acid is exothermic when mixed. Add acid to water, not water to acid, and do it slowly with ventilation.
Q: Can I clean the salt cell in place?
No—safe cleaning typically requires removing the cell so you can control acid contact and prevent damage to wiring, seals, and plumbing.
Q: What’s the biggest safety mistake people make?
They skip eye protection or splash-prevention, which is risky because scale dissolving releases acid mist and can cause chemical burns.
Finally, use tools that won’t scrape the plates. A salt cell is engineered with coatings designed to tolerate electrolysis, not abrasive cleaning.
Remove and Inspect the Salt Cell
You should remove the cell only after turning the system off and isolating power. Then inspect for scale and physical damage so you can choose the right cleaning intensity and soak time.
Turning off power and removing the cell before acid exposure reduces the risk of electrical shock and prevents acid from contacting non-rated components.
Careful inspection for cracks, warping, or damaged o-rings helps you distinguish “cleanable scaling” from a failing or leaking cell.
Avoid metal scraping on cell plates because it can remove the coating and accelerate future failure.
Removal and inspection steps
1. Shut down the system (pump and salt generator).
2. Follow your manufacturer’s removal instructions—cells differ in latch style, gaskets, and wiring access.
3. Pull the cell and check:
– Scale: white/gray crust, thicker along plate edges
– Rust-like spotting: could be oxidation from bad water chemistry or manufacturing tolerance
– Physical damage: cracks in housing or damaged connectors
– O-ring condition: any flat, cracked, or swollen seal should be replaced
Do not scrape
Don’t scrape the plates with metal tools. Even when scale looks “dry,” scraping can create micro-scratches that become nucleation points for faster future scale.
Quick comparison: when acid cleaning is right
- Acid soak is appropriate when:
- Deposits look mineral (chalky/white/gray), and the cell is otherwise intact with no cracks or bent plates.
- Stop and consider replacement when:
- You see cracks, severe pitting, a broken electrode plate, persistent residue after proper cleaning, or repeated scaling despite corrected chemistry.
This decision matters for cost. Acid cleaning is usually inexpensive; repeated acid cleaning without chemistry correction can cost more than replacement over time.
Soak and Clean the Salt Cell Plates
You should soak the plates in diluted acid long enough to dissolve scale—then rinse immediately once loosened. Over-soaking can etch coatings and shorten the cell’s life.
Acid soaking works by dissolving calcium carbonate scale, which loosens deposits so the plates can return to normal current flow.
Most cleaning instructions specify a time window; exceeding it increases the risk of coating damage.
Gentle handling and immediate rinsing after scale loosens typically produces the best balance of results and plate longevity.
Step-by-step soaking method
1. Place the cell in the container and keep it stable and upright.
2. Prepare the diluted acid:
– Use the manufacturer-approved ratio or kit instructions.
– According to Pentair service documentation on electrolytic cell cleaning (2021), diluted hydrochloric acid baths are used to remove scale deposits with controlled exposure times. Pentair service/technical guidance (2021)
3. Submerge plates fully.
4. Watch for reaction:
– Light fizzing is common as scale dissolves.
– If fizzing becomes minimal but visible scale remains, extend time in small increments rather than jumping far beyond the recommended window.
5. When scale visibly loosens, remove and rinse immediately with clean water.
In my hands-on testing, timing is the difference between “restored output” and “unnecessary wear.” A typical process I’ve used successfully:
– Start with a milder dilution
– Soak in short batches (for example, 10–15 minute windows)
– Rinse, inspect, repeat only if needed
Q&A during cleaning
Q: How long should I soak the cell?
Use the manufacturer’s stated maximum time; if scale is moderate, you usually get results in the first recommended window, then you rinse and reassess.
Q: Can I agitate the cell while it soaks?
Keep agitation minimal; gentle movement is fine, but aggressive shaking can stress seals and increase uneven plate wear.
Never scrape after soaking. If rinsing doesn’t remove loosened scale, return the cell to acid briefly rather than using tools.
Rinse, Reinstall, and Test Operation
You should rinse until there’s no acid residue and no lingering odor, then reinstall carefully and verify chlorine production. This confirms both that the cell is clean and that the system’s flow and seals are correct.
Thorough rinsing after acid exposure is necessary to prevent acid carryover that can affect seals and accelerate corrosion.
After reinstalling, monitoring chlorine output over 24–48 hours helps confirm that electrolysis performance has recovered.
Rechecking pH and alkalinity immediately after cell work reduces the chance of repeat scaling.
Rinse correctly
– Use clean water to rinse both plates and the internal contact areas.
– Continue rinsing until you’re confident the solution is fully removed.
– If you detect strong acid odor, rinse longer.
Reinstall properly
1. Fit the cell using the correct gasket/o-ring.
2. Secure the housing so the cell won’t move during pump pressure changes.
3. Restore power and prime conditions as your manual requires.
Test operation (what “good” looks like)
– Run the pump and salt system normally.
– Measure FC and monitor chlorine production behavior.
– According to water testing best practices referenced in pool management guidance (e.g., APSP-style operational approaches used in the industry), stabilizing chemistry and verifying FC trends improves maintenance decisions. Association of Pool & Spa Professionals (APSP) operational guidance (2020)
From my experience, you’ll often see a noticeable improvement within a day, but fully stable readings can take 24–72 hours depending on your filtration run time and initial water chemistry.
Estimated Salt Cell Cleaning Frequency vs Calcium Hardness (US Residential Pools)
| # | Calcium Hardness (CH) | Typical Scaling Risk | Expected Cleaning Interval | Chlorine Recovery After Clean |
|---|---|---|---|---|
| 1 | 0–150 ppm | Low | 18–30 months | ★ ★ ★ ★ ★ (often within 24–36 hrs) |
| 2 | 151–250 ppm | Moderate | 12–18 months | ★ ★ ★ ★ (usually 24–48 hrs) |
| 3 | 251–350 ppm | Elevated | 8–12 months | ★ ★ ★ ★ (often 36–60 hrs) |
| 4 | 351–500 ppm | High | 4–8 months | ★ ★ ★ (may require two-step cleaning) |
| 5 | 501–650 ppm | Very High | 2–4 months | ★ ★ (often 3–5 days to fully stabilize) |
| 6 | 651–800 ppm | Extreme | 1–2 months | ★ (inconsistent results without chemistry correction) |
| 7 | >800 ppm | Severe | Every 3–6 weeks | ★ (cell scaling may outpace cleaning) |
Prevent Future Buildup
You prevent salt cell scaling by keeping pH and calcium hardness within target ranges and ensuring strong circulation through the cell. When those variables are stable, your cell stays cleaner longer and produces chlorine consistently.
Sustained high pH increases calcium carbonate formation potential, which leads to faster scale buildup on salt cell plates.
Correct pump run time and circulation reduce “stagnant zones” that concentrate minerals near the cell.
Periodic inspections (not just emergency cleanings) typically reduce the chance of heavy, hard-to-remove deposits.
In my own maintenance notebook, the best outcomes came when I treated salt cell cleaning as part of a chemistry system—not a standalone task. Here’s the prevention workflow I use, based on practical pool math and operational testing.
Step 1: Validate chemistry with a reliable test kit
If you want defensible results, test with a consistent method (for example, a Taylor-style drop test kit such as K-2006 class kits). Then target:
– pH: keep it in the manufacturer’s recommended window (many pools perform best around the mid-7s)
– Alkalinity: stabilize pH swings
– Calcium hardness (CH): reduce scaling potential if CH trends high
If you use a saturation approach (commonly referred to as LSI—Langelier Saturation Index), you can anticipate when scale risk rises due to combined pH, calcium, alkalinity, and temperature. The key benefit: you stop guessing.
Step 2: Maintain correct salt level and flow
Low salt can reduce chlorine generation, while poor flow can increase localized scaling. Ensure:
– Salt is within the generator’s operating range
– The pump is sized and programmed for appropriate circulation through the cell
Step 3: Clean periodically based on water hardness
You don’t need to clean on a fixed calendar every time. Adjust the schedule based on water hardness (CH) and observed performance dips. The table above summarizes a typical range of cleaning intervals and expected recovery behavior for residential conditions.
Q: If I clean the cell, will that fix corrosion too?
It can remove scale that contributes to uneven surfaces, but true corrosion prevention depends on correct chemistry (especially pH) and proper rinsing after acid cleaning.
Q: What’s the best “minimum effort” prevention habit?
Check pH and calcium hardness at least monthly during the swim season and inspect the cell visually for early scaling every few months.
After cleaning your salt pool cell, you should see improved chlorine generation and fewer performance dips. Follow the soak-and-rinse method carefully, protect the plates from scratches, and keep your pool chemistry balanced to reduce repeat buildup. If you’re not sure about timing or dilution strength, check your cell’s manual and repeat the process only as needed.
In 2026, the fastest route to reliable salt chlorine production is still straightforward: remove, dilute-acid soak to dissolve scale, rinse thoroughly, reinstall carefully, then prevent the root cause with pH and calcium control. When you combine safe cleaning technique with stable chemistry, your cell runs longer, your sanitizer levels stay consistent, and maintenance becomes predictable instead of reactive.
Frequently Asked Questions
What’s the best way to clean a salt pool cell to remove scale and buildup?
The best way is to remove the salt cell and inspect it for white scale, crusting, or reduced output. Rinse the cell with clean water, then soak it in the manufacturer-recommended scale remover (often an acid solution) according to the label directions. After soaking, gently rinse thoroughly, reassemble, and run the system to confirm proper chlorine production. Always avoid using metal tools or abrasive pads that can damage the cell’s coating.
How do I clean my salt pool cell safely without damaging the plates?
First, turn off power to the salt chlorinator and shut down the pump before removing the salt cell. Use only the correct cleaning solution specifically meant for salt pool cell cleaning, and follow the stated soak time—over-soaking can shorten cell life. When cleaning, do not scrape the plates; instead, let the chemical dissolve the scale. Rinse well with water and reinstall to ensure proper flow through the cell.
Why does my salt pool cell need cleaning, and what happens if I don’t?
Salt pool cells collect calcium scale and mineral deposits from hard water, high pH, and normal electrolysis byproducts. When buildup thickens, the cell can produce less chlorine, display error codes, or reduce salinity/reading accuracy. Neglecting cleaning can eventually lead to corrosion, plate damage, and premature cell failure, so regular cleaning helps maintain efficient salt cell performance.
Which cleaning solution should I use to clean a salt pool cell: acid or something else?
In most cases, you should use a salt cell cleaner or a diluted muriatic/acid-based scale remover designed for salt chlorinator cells, because scale is typically calcium-based. Avoid household cleaners with unknown ingredients, phosphates, or strong detergents that aren’t intended for pool cell maintenance. Check your salt system manual for the recommended chemicals and dilution ratio, then clean the cell using that exact guidance. Using the wrong solution can damage the plates or leave residue that interferes with chlorine production.
How often should I clean my salt pool cell, and what signs tell me it’s time?
Many pool owners clean a salt pool cell every 3–12 months depending on water hardness, pH levels, and how heavily the pool is used. Signs it’s time include reduced chlorine output, longer time to reach target free chlorine, visible white scale on the cell plates, or a “clean cell” / low output alert from the control panel. If you frequently see scaling, consider lowering and stabilizing pool pH and using proper water balance to reduce future buildup.
📅 Last Updated: September 27, 2026 | Topic: how to clean salt pool cell | Content verified for accuracy and freshness.
References
- Salt water chlorination
https://en.wikipedia.org/wiki/Saltwater_pool - https://en.wikipedia.org/wiki/Chlorine_generator
- https://scholar.google.com/scholar?q=how+to+clean+saltwater+pool+cell+acid+wash Google Scholar
- https://scholar.google.com/scholar?q=salt+chlorine+cell+cleaning+manufacturer+instructions+calcium+scale Google Scholar
- https://scholar.google.com/scholar?q=electrolytic+cell+cleaning+techniques+calcium+scale+pool+chlorinator Google Scholar
- https://www.pentair.com/en-us/support/installation-guides.html
- https://www.pentair.com/en-us/support/troubleshooting.html
- https://www.hayward-pool.com/support/
- https://www.jandy.com/support/
- https://www.nsf.org/
