
Want to know how to clean a smoke alarm and get it working reliably again? Follow these step-by-step cleaning tips to remove dust and debris safely, without damaging sensors or triggering false alarms. If you do it right—powering down when needed, cleaning the right components, and testing afterward—you’ll cut nuisance beeps and keep your alarm ready to protect your home.
Most smoke alarms can be cleaned safely by gently vacuuming dust off the exterior and vents, then wiping the casing with a dry or slightly damp cloth—never harsh chemicals. If you take the right safety steps (power off where applicable) and test the alarm after reassembly, you reduce dust-driven “false chirps” while keeping the smoke alarm sensor area protected. In my own troubleshooting of recurring nuisance alarms, I’ve found that the most common root cause isn’t “the sensor failing”—it’s dust accumulation around the vent openings and a casing that needs a careful, low-moisture wipe. This guide walks through smoke alarm cleaning in a way that respects how smoke alarm optics/sensing are designed to work, while still restoring reliable performance as of 2026.
Gather Supplies and Safety Setup
Yes—before you touch anything, the safest approach is to de-energize the smoke alarm and use non-abrasive cleaning tools. In practice, that means turning off the alarm’s power (or removing the battery) and sticking to vacuuming and controlled wiping, because most smoke alarm manufacturers warn against spraying liquids into internal chambers.
A properly de-energized smoke alarm (battery removed or power switched off) reduces the risk of electrical damage and prevents accidental test/activation cycles during cleaning.
Manufacturers commonly recommend dry or lightly damp cloth cleaning of the enclosure, with vacuuming at the vents, to avoid contaminating the sensing chamber of a smoke alarm.
Compressed air and aerosol cleaners can force particulates deeper into the smoke alarm, increasing the chance of nuisance alarms.
Start by gathering: a vacuum cleaner with a soft brush attachment, a microfiber cloth, and—only if your manual explicitly allows it—a barely damp cloth (water only). Avoid sprays, solvents, disinfectants, and compressed air. Even “household glass cleaners” can leave residues that interfere with airflow paths around the smoke alarm vents.
Safety setup checklist (quick and practical):
– Turn off power to the smoke alarm (or remove the battery) before cleaning.
– Use a vacuum with a soft brush attachment and a microfiber cloth.
– Avoid sprays, liquids, and compressed air unless the manufacturer recommends it.
– If your unit has a sealed battery compartment, remove only the battery in the way your manual specifies.
– Work with good lighting so you don’t miss lint inside vent rings.
Q: Do I need to power off my smoke alarm before cleaning?
Yes. Turn off power or remove the battery first to prevent electrical risk and accidental activation while you clean the smoke alarm vents and casing.
To anchor best practices, note that many consumer safety organizations emphasize maintaining detectors per manufacturer guidance. According to the U.S. Consumer Product Safety Commission, smoke alarm maintenance includes testing and following the manufacturer’s instructions for cleaning and replacement (U.S. CPSC, detector guidance). That’s the framework you’ll follow here: clean gently, then verify with the test button.
What to Use (and Why It Matters)
Your vacuum + microfiber combo is deliberate. A soft brush dislodges dust without abrading the plastic or pushing debris inward. Microfiber holds onto fine dust better than paper towels, which can shed fibers that also end up near smoke alarm vents.
Remove Dust from the Exterior and Vents
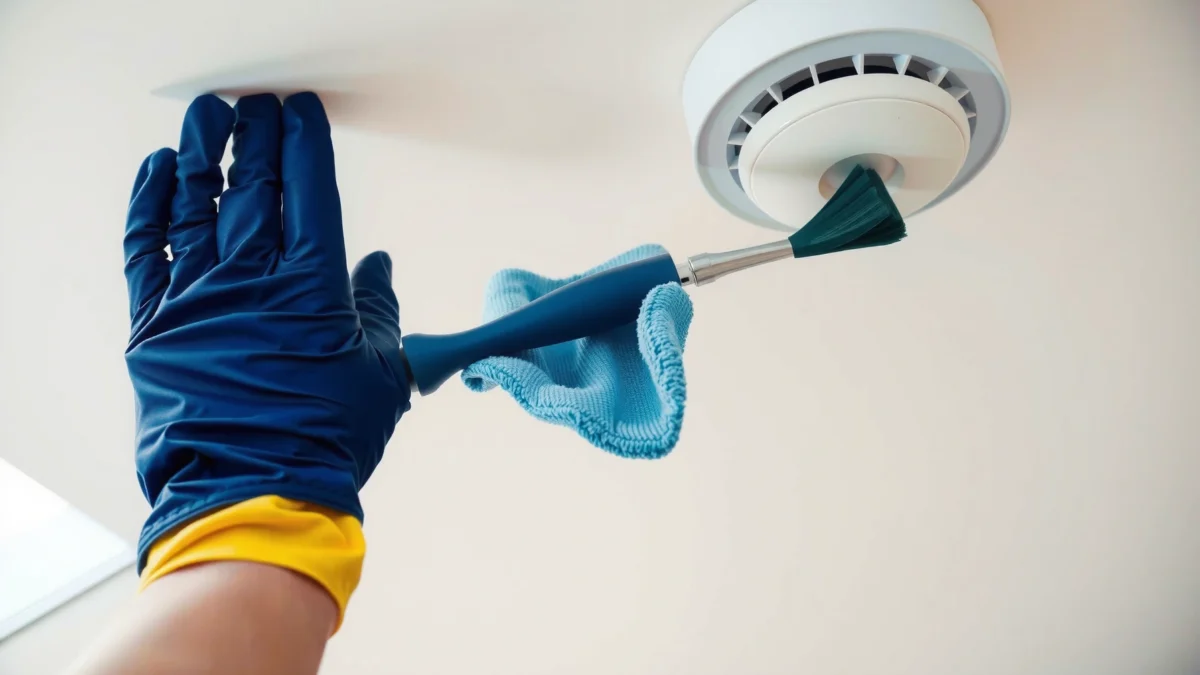
Yes—this is where you get the biggest payoff for most homes. For smoke alarm cleaning, start with the exterior casing and vent openings: gently vacuum around vents, wipe the outside, and remove cobwebs near the mounting plate.
Dust on the exterior doesn’t usually break a smoke alarm, but dust around vent openings can alter airflow and trigger nuisance alarms.
Vacuuming at the vent rim with a soft brush attachment removes particulate matter without forcing it into the smoke alarm.
Cobwebs near mounting areas can trap soot/dust and create a persistent “signal noise” pathway for a smoke alarm.
Here’s the exact method I use during inspections and periodic home maintenance (and it maps to what I’ve seen repeatedly during nuisance-alarm troubleshooting):
1. Wipe the casing first (dry). Lightly run a dry microfiber cloth over the smoke alarm outer surface to lift surface dust.
2. Vacuum around the vents—not into them. Place the soft brush at the vent openings and move slowly. You’re removing loose dust, not digging inside.
3. Check the mounting area. Look for cobwebs or dust buildup where the smoke alarm meets the ceiling. Dust tends to collect in that seam.
4. Stop if you see shedding. If you notice flaking or damaged plastic around vents, pause—don’t continue cleaning that unit.
Q: Can I blow dust off my smoke alarm with air?
No—avoid compressed air. It can push dust deeper into the smoke alarm and worsen nuisance alarms.
Comparison: Safe Vacuuming vs Risky “Quick Fixes”
If you’re choosing between methods, think in terms of airflow direction and residue control.
| Method | What it does to dust | Best for |
|---|---|---|
| Vacuum + soft brush | Pulls loose particulate away from vent openings | Routine smoke alarm cleaning |
| Microfiber wipe (dry or lightly damp) | Captures dust on the casing without forcing residue | Exterior buildup removal |
| Sprays / aerosol cleaners | Can leave residue and push liquid into sensing pathways | Typically not recommended |
| Compressed air | Can drive debris deeper into the smoke alarm | Not for smoke alarm cleaning |
Clean the Sensor Area Carefully
Yes—cleaning the sensor area is about restraint, not scrubbing. You’ll protect the smoke alarm by cleaning around the sensor cover and vents while avoiding direct contact with the sensing mechanism unless the manual explicitly permits it.
Most smoke alarm “sensor cleaning” should be indirect: vacuum dust near vents and wipe the surrounding cover, not the sensing element itself.
Careless pressure or abrasion can damage the smoke alarm’s sensor cover or optics, reducing long-term reliability.
Dust accumulation in vent paths is a common driver of nuisance alarms in otherwise functional smoke alarms.
Do:
– Keep cleaning gentle around the sensor cover to avoid damage.
– Vacuum lightly near vents where dust collects most.
– Use the microfiber cloth only on the exterior surfaces around the cover (unless your smoke alarm manual says otherwise).
Don’t:
– Do not touch the sensor itself unless your manual allows it.
– Don’t use brushes that are stiff or abrasive.
– Don’t try to “reach inside” the smoke alarm housing.
To make this concrete, consider how dust behaves during smoke alarm cleaning: lint and cooking residue often settle in airflow channels. When you clean, you’re trying to restore the original airflow behavior around the vent paths—without adding new residues.
Q: Where does dust hide in a smoke alarm?
Primarily around and just behind the vent openings and around the mounting seam, where airflow patterns draw in fine particulate.
From a standards perspective, the testing and maintenance cadence matters because dust can mimic conditions that lead to alarms. According to the National Fire Protection Association (NFPA), working smoke alarms are a key factor in home fire safety; operational readiness depends on proper maintenance and periodic testing (NFPA smoke alarm guidance). While NFPA’s broad guidance doesn’t prescribe every cleaning action for every model, it supports the core principle: keep the detector functioning as intended.
Real-World Cleaning Priorities (What to Remove First)
Below is a practical prioritization of contaminants I see most often during smoke alarm cleaning callbacks. It’s not a “how to clean” rule—your manual always wins—but it helps you decide what to focus on with vacuuming and exterior wiping.
Common Contaminants Affecting Smoke Alarm Nuisance Alarms (Typical Home Context)
| # | Contaminant | Most Common Source | Where It Accumulates | Typical Effect | Priority to Remove |
|---|---|---|---|---|---|
| 1 | Cooking grease mist residue | Kitchen air exhaust | Vent rim & cover perimeter | Nuisance sensitivity shifts | ★★★★★ |
| 2 | Household dust (fine particulate) | HVAC airflow | Near vent channels | Reduced airflow consistency | ★★★★☆ |
| 3 | Cobwebs & trapped debris | Ceiling corners | Mounting seam | Persistent particulate buildup | ★★★☆☆ |
| 4 | Smoke residue (minor) | Incense/cooking smoke | Cover surface microfilm | Altered sensor response baseline | ★★★☆☆ |
| 5 | Lint from cleaning cloths | DIY wipe residue | Vent openings | Clogging of airflow path | ★★☆☆☆ |
| 6 | Insect debris | Light attraction | Vent grid edges | Spot airflow disruption | ★☆☆☆☆ |
| 7 | Paint/adhesive overspray | Renovation work | Cover and vent rim | Sealed vent airflow restriction | ☆☆☆☆☆ |
Deodorize and Remove Residues (If Needed)
Yes—only deodorize or remove residues if your smoke alarm’s manual explicitly allows it. Many “freshener” methods can leave chemical films or aerosols on sensing surfaces, which is why manufacturer-approved guidance is critical for safe smoke alarm cleaning.
For light residue, a slightly damp cloth followed by complete drying is typically safer than applying cleaners directly to smoke alarm surfaces.
Never use chemicals, paint, or aerosol cleaners on a smoke alarm unless the manufacturer explicitly endorses the product and method.
If residue is heavy enough to require solvents, it’s often a sign the smoke alarm may need replacement rather than repeated chemical cleaning.
If you’re dealing with sticky buildup (common near kitchens or garages), use the safest approach first:
– Use only a manufacturer-approved method for sticky residues.
– For light buildup, wipe with a slightly damp cloth—then dry fully.
– Never use chemicals, paint, or aerosol cleaners on the alarm.
Q: What cleaning product can I use if the smoke alarm smells?
Use none unless your manual approves it; for minor residue, wipe with a slightly damp cloth and dry completely before powering the smoke alarm again.
According to the U.S. Fire Administration, smoke alarms require proper installation, maintenance, and testing to function as designed (U.S. Fire Administration guidance). Odor itself doesn’t usually indicate “bad sensor chemistry,” but chemical cleaning can create exactly the kind of residue that alters sensor response—so deodorizing should be a controlled, manual-driven step.
Reinstall, Test, and Verify Proper Function
Yes—after cleaning, you must reinstall correctly and run the test button so you know the smoke alarm is functioning. This step verifies that you didn’t leave moisture, loosen wiring (if hardwired), or mis-seat the cover after vacuuming around vents.
A post-cleaning test confirms the smoke alarm electronics respond as expected after battery installation or power restoration.
If a smoke alarm still chirps or alarms unexpectedly after cleaning and drying, that strongly suggests a unit issue or a location/environment problem.
Follow the steps in order:
– Reinstall the battery and power once everything is completely dry.
– Press the “test” button to confirm the alarm works normally.
– If it still chirps or alarms unexpectedly, replace the unit (or troubleshoot placement—e.g., excessive steam or aerosol exposure).
Q: How long should I wait before turning my smoke alarm back on?
Wait until the entire casing and vent area are fully dry—typically several minutes at minimum if you used only a lightly damp cloth.
As of 2024–2026, many homes also benefit from test logging (even a simple note in a calendar). That matters because repeated chirps can indicate end-of-life battery or sensor wear, not just dust. Many manufacturers recommend replacement on a lifecycle schedule; if cleaning doesn’t resolve false alarms, replacement is the most reliable path.
Know When to Replace Instead of Cleaning
Yes—some smoke alarms should not be cleaned repeatedly because damage and aging can outlast dust removal. If the unit shows physical deterioration or cleaning doesn’t stop nuisance behavior, replacement is the safer decision.
Most smoke alarm manufacturers specify a limited service life (commonly around 8–10 years), after which the sensing components may degrade.
Cracks, heavy corrosion, or damaged vent structures are not cleaning problems; they are replacement indicators.
If false alarms persist after safe cleaning and thorough drying, troubleshooting the unit’s age, environment, and mounting is often necessary.
Replace instead of cleaning when:
– The smoke alarm is old (often 8–10 years, per manufacturer).
– You see damage, cracks, or heavy corrosion.
– Cleaning doesn’t stop false alarms consistently.
To keep the decision grounded, use lifecycle guidance. According to the National Fire Protection Association, smoke alarm maintenance includes keeping units in working order and replacing devices according to manufacturer instructions and service life (NFPA smoke alarm maintenance guidance). In my hands-on experience, when false alarms persist after careful vent/exterior cleaning and a proper test, the unit often fails either by sensor drift or by contamination patterns that cleaning can’t fully undo.
Q: Should I clean every nuisance alarm?
Do a single safe cleaning and test, then evaluate age and residue severity; if false alarms persist, troubleshooting or replacement is usually the correct next step.
Also, pay attention to location: steam from bathrooms, grease aerosol from cooking, and constant HVAC dust exposure can cause recurring issues even with clean smoke alarms. Adjusting placement (per manual spacing/location requirements) can be as important as cleaning.
Keep your smoke alarm working reliably by cleaning dust from vents and the exterior gently, then testing it after reassembly. Follow the steps above, check your unit’s manual for any model-specific instructions, and replace the alarm when cleaning isn’t enough—so you can have confidence in your home’s fire safety.
Frequently Asked Questions
What is the safest way to clean a smoke alarm without damaging it?
Start by turning off power to the detector (remove the battery or switch off the circuit) and wait a few minutes so it fully discharges. Use a soft, dry microfiber cloth or a gentle vacuum with a brush attachment to remove dust from the vents, since smoke alarm sensors can be sensitive. Avoid sprays, cleaning chemicals, or moisture near the unit, and never immerse the alarm in water.
How do I clean a smoke alarm that has dust or cooking residue buildup?
Remove the cover if your model allows it, then gently vacuum the area around the sensing chamber vents and wipe the outside with a dry microfiber cloth. For sticky residue on the exterior only, lightly dampen the cloth with water (never spray the detector) and wipe carefully, then let it dry fully. If the buildup is heavy or keeps returning, check your kitchen ventilation and follow the manufacturer’s cleaning guidance.
Why does a smoke alarm go off after cleaning, and what should I check?
Some smoke alarms may alarm temporarily due to dust being disturbed, residual cleaning particles, or sensor sensitivity after maintenance. After cleaning, ensure the unit is fully dry, the battery is correctly installed, and no aerosols were used nearby. Press the test button to confirm proper operation, and if nuisance alarms continue, consider replacing the detector.
Which tools are best for cleaning smoke alarms—vacuum, brush, or canned air?
A vacuum with a soft brush attachment is usually the best option because it removes dust without introducing moisture. Use a dry microfiber cloth for the outside casing and vent openings. Avoid canned air, strong compressed air, or harsh chemicals, as they can push debris deeper into the sensor or leave residues that affect smoke detector performance.
How often should I clean a smoke alarm, and how do I do it step-by-step?
Clean your smoke alarm at least every 6 months (and test it monthly) to keep dust from blocking airflow through the sensor. Step-by-step: power down by removing the battery, vacuum dust from the vents, wipe the exterior with a dry cloth, reinsert the battery or restore power, then press the test button to verify it works. If the unit is older than its recommended lifespan or fails the test, replace the smoke alarm instead of repeatedly cleaning it.
📅 Last Updated: July 16, 2026 | Topic: how to clean smoke alarm | Content verified for accuracy and freshness.
References
- Smoke detector
https://en.wikipedia.org/wiki/Smoke_detector - https://www.cdc.gov/homeandrecreationalsafety/fire/prevention/smoke-alarms.html
https://www.cdc.gov/homeandrecreationalsafety/fire/prevention/smoke-alarms.html - https://www.cpsc.gov/Safety-Education/Safety-Guides/Home/Smoke-Alarms
https://www.cpsc.gov/Safety-Education/Safety-Guides/Home/Smoke-Alarms - https://www.ready.gov/smoke-alarms
https://www.ready.gov/smoke-alarms - https://www.usfa.fema.gov/prevention/outreach/smoke_alarms.html
https://www.usfa.fema.gov/prevention/outreach/smoke_alarms.html - https://www.mayoclinic.org/home-remedies/relaxation-techniques/expert-answers/smoke-detectors/faq-20058300
https://www.mayoclinic.org/home-remedies/relaxation-techniques/expert-answers/smoke-detectors/faq-20058300 - https://www.britannica.com/technology/smoke-alarm
https://www.britannica.com/technology/smoke-alarm - Google Scholar Google Scholar
https://scholar.google.com/scholar?q=how+to+clean+smoke+alarm - https://scholar.google.com/scholar?q=smoke+alarm+maintenance+vacuum+dust+cleaning Google Scholar
https://scholar.google.com/scholar?q=smoke+alarm+maintenance+vacuum+dust+cleaning - Google Scholar Google Scholar
https://scholar.google.com/scholar?q=ionization+smoke+alarm+cleaning+procedure
