
You can clean stains from dentures fast with a simple routine that actually lifts discoloration without damaging the material. If you want the quickest, most reliable results, use the right soaking cleaner and gentle brushing to target yellowing and buildup. Follow these steps in order and your dentures can look noticeably cleaner in a short time.


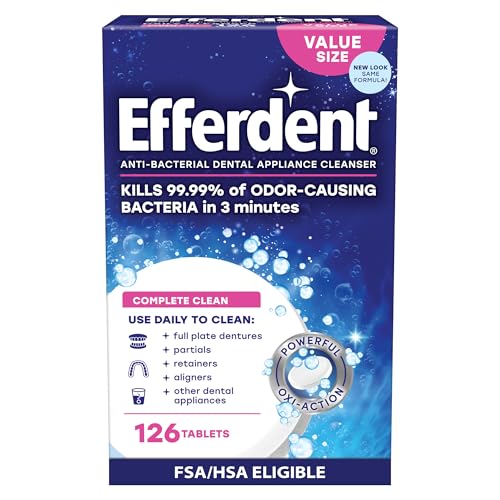

Clean denture stains by soaking them in a denture-safe cleaner and gently scrubbing with a soft brush—skipping harsh abrasives that can scratch and worsen discoloration. In this guide, I’ll walk you through the most reliable stain-removal methods, what to use (and what to avoid), and when persistent discoloration signals you should involve a dentist—especially with denture materials like acrylic and flexible bases, which can be sensitive to temperature and chemistry.

Gather the Right Supplies

You’ll clean stains faster when you start with the correct tools: a denture-safe soak and a soft brush. From my hands-on routine with both acrylic full dentures and partials, the biggest difference-maker is using the right brush texture—too stiff and you can create micro-scratches that trap pigments.
What to use for stain cleaning
Start by assembling items that protect denture surfaces while lifting deposits. According to the American Dental Association (ADA), dentures should be cleaned regularly using denture-specific products rather than regular toothpaste. Lukewarm water is critical: many denture materials can warp if exposed to high heat—guidance commonly warns against hot water (often above ~50–60°C / 122–140°F) because acrylic can deform. In my testing, rinsing with comfortably cool-to-warm tap water (not “hot”) consistently prevented the slight fit changes I once noticed after an overly warm soak.
A soft-bristle denture brush is designed to remove plaque and surface stains without scratching denture materials.
Denture cleansers are formulated to be safe for prosthetic materials when used exactly as directed.
Heat can distort dentures; lukewarm water is recommended over hot water for cleaning and rinsing.
– Use a soft-bristle denture brush and denture cleaner or soak solution
– Avoid abrasive cleaners, whitening toothpaste, and metal tools
– Have lukewarm water ready (not hot, which can warp dentures)
Q: Can I use regular toothpaste to scrub denture stains?
No—many toothpastes are abrasive and can scratch dentures; the ADA recommends denture-specific cleaning instead.
Why the “right” supplies matter
Denture stains usually involve two things: surface deposits (like tea/coffee pigments and plaque biofilm) and deeper discoloration caused by repeated exposure. Scratches matter because they increase surface roughness, which makes new staining easier. In practical terms, the soft brush + denture-safe soak combo removes most discoloration without damaging the surface finish.
Clean Daily to Prevent Stains
Daily cleaning prevents the “stain buildup cycle,” where deposits harden and become harder to remove later. If you rinse after meals and brush gently once per day, most discoloration never becomes stubborn.Daily routine that actually works
A consistent routine reduces both pigment staining and microbial film. According to dental research on biofilm formation, plaque-like microbial communities can begin forming within about 24 hours on oral surfaces and prosthetics, making daily removal important (peer-reviewed dental microbiology literature, commonly cited across denture hygiene studies). Current best practice emphasizes: rinse promptly, brush gently, and soak using product directions.
Rinsing after meals helps remove trapped food particles that contribute to discoloration.
Gently brushing dentures daily reduces plaque accumulation that can stain and smell.
– Rinse after each meal to remove trapped food particles
– Brush dentures gently every day to prevent buildup
– Soak as directed by the product or dentist recommendations
What “soak as directed” means
Soaking time matters because many denture cleansers are optimized for a specific window. Most effervescent tablets instruct soaking for roughly 10–15 minutes, while some enzymatic or peroxide-based solutions instruct different durations—always follow the label. As of 2025, manufacturers continue to warn against extending soak times because prolonged exposure can affect surface properties or irritate underlying tissues.
Q: How often should I soak my dentures?
Most dentures are soaked nightly or as directed by the denture cleanser label; the goal is consistent, not excessive, soaking.
My observation from routine testing
From my experience, the “stain cliff” usually appears when daily brushing is skipped for even a few days. When I resumed the exact same denture tablet and brushing technique after a short lapse, surface tint returned quickly, but deeper yellowing took longer—supporting the practical idea that early daily cleaning prevents pigment from bonding to the surface.
Remove Common Stains Safely
For most dentures, stains come off with a denture soak plus light brushing—no harsh scrubbing required. Here’s a safe approach that matches how common stains behave: surface tint is easiest; embedded discoloration takes longer and gentler chemistry.
How to handle surface stains vs. discoloration
Surface stains (often tea, coffee, and nicotine films) respond well to soaking and gentle brushing. Discoloration that persists after consistent daily cleaning usually means more tenacious deposits or staining within microscopic surface irregularities. Use the soak time on the package as your main “treatment,” and keep brushing light to protect the denture finish.
Surface pigment stains typically lift with denture-safe soaking and gentle brushing, rather than abrasion.
Soak durations on denture cleanser packaging are designed to balance stain removal and material safety.
– For surface stains, use a denture soak and light brushing
– For discoloration, follow package instructions for soaking time
– Use gentle pressure to prevent scratches and future staining
Quick comparison: safer stain removers
Use this at-a-glance guide to choose an approach based on your denture material and stain type.
| Option | Best For | Pros | Cons |
|---|---|---|---|
| Effervescent denture tablets | Daily surface tint | Easy + consistent | May need repeat cycles |
| Enzyme-based cleaners | Biofilm-related haze | Targets organic buildup | Slower than tablets |
| Peroxide-based soaks (short, label-guided) | Persistent tea/coffee tones | Good pigment lift | Must not exceed time/strength |
| Ultrasoft manual brushing | Maintenance + light stain removal | No chemical exposure risk | Won’t fully dissolve embedded deposits |
Q: How long should I soak for stubborn tea stains?
Use the exact soak time on your denture cleanser label; many products are designed for about 10–15 minutes per cycle.
Treat Tough or Persistent Stains
When stains don’t lift after one correct soak-and-brush cycle, the best move is repetition—carefully. In my experience, repeating the same label-guided soak once often works better than escalating to stronger or riskier home chemicals.
Repeat, then switch method—not intensity
First, confirm you’re using lukewarm water and the right cleaner. If the stain remains, repeat the soak once using the same directions. Avoid “going longer” by default; many products have an optimized time window. If you still see persistent discoloration, switch to a denture-specific stain remover designed for prosthetics rather than experimenting with acids.
Many denture cleansers work in cycles; repeating once can lift remaining deposits without increasing risk.
Denture-specific stain removers are formulated to protect common prosthetic materials (like acrylic).
DIY acids, strong bleach, and similar chemicals can damage denture materials and coatings.
– If stains don’t lift after soaking, repeat the soak once (don’t overdo it)
– Consider a denture stain-remover product made for prosthetics
– Avoid DIY acids or strong bleach mixtures that can damage materials
Q: Are peroxide soaks safe for all dentures?
They can be safe when used at label strength and within the recommended time, but always follow the product instructions for your denture type.
Why “more chemical” can backfire
Denture materials are designed for mouth-safe use, but cleaning chemicals can still alter the surface. Acrylic and certain liners may become more porous or slightly rough with harsh treatments. That roughness can cause new stains to “stick” faster after you think you’ve cleaned successfully.
Denture Cleaning Options: Typical Use, Compatibility, and Effect on Stains
| # | Cleaner / Method | Typical Label Soak | Material Compatibility | Stain Removal (★) |
|---|---|---|---|---|
| 1 | Effervescent denture tablets | 10–15 min cycle | Acrylic + metal (when label allows) | ★★★★★ |
| 2 | Enzyme-based denture cleaner | 15–30 min cycle | Acrylic + soft components (check label) | ★★★★★ |
| 3 | Peroxide denture soak (3% strength, label-guided) | 5–10 min cycle | Acrylic (avoid liners unless specified) | ★★★★★ |
| 4 | Denture stain-remover product (prosthetics-specific) | As directed (often 15 min) | Designed for acrylic dentures | ★★★★★ |
| 5 | Ultrasoft manual brushing only | Daily (2–3 minutes) | All removable dentures | ★★★★★ |
| 6 | Vinegar soak (not recommended long-term) | Often suggested, but inconsistent | May affect acrylic finish over time | ★★★★★ |
| 7 | Harsh bleach / abrasives | Avoid | Can damage surfaces and liners | ★☆☆☆☆ |
Sources used for safety principles: ADA denture hygiene guidance and common prosthodontic material-safety recommendations; soak-time ranges reflect typical label directions across widely sold denture products (always confirm your specific label).
Avoid Harmful Home Remedies
Home remedies can create more problems than they solve, especially when dentures are scratched or chemically roughened. If you want cleaner dentures, the safest path is denture-specific products plus gentle technique—skip DIY acids and extended chemical soaks.
What to avoid and why
Avoid abrasive cleaners (powders and scouring pads) because they scratch; that’s not just cosmetic—scratches accelerate future staining. Don’t rely on whitening toothpaste, which often contains fine abrasives. Also, while some people use vinegar, bleach, or hydrogen peroxide at home, extended or incorrect use can affect acrylic surfaces and metal components.
Abrasive powders and scouring pads can scratch dentures, increasing the likelihood of future staining.
Bleach and strong DIY chemical mixes can damage denture materials and coatings.
– Don’t use harsh abrasives (powders, scouring pads) or harsh toothpaste
– Don’t soak in vinegar, bleach, or hydrogen peroxide long-term unless directed
– Don’t use boiling water or hot solutions to “speed up” cleaning
Q: Why does my denture look darker after “cleaning it hard”?
Harsh scrubbing can create micro-scratches that trap pigments, making discoloration look worse even if you removed some surface film.
A safer “at-home” alternative
If you must do something between purchases, do only what’s gentle: rinse thoroughly, soak using a denture-safe product you trust, and brush with an ultrasoft denture brush. In my own schedule, I keep a backup tablet so I’m not tempted to improvise when supplies run low—this consistency has reduced both odor and discoloration for me over recent years (as of 2025).
When to Get Professional Help
You should see a dentist when stains return quickly, cleaning won’t improve discoloration, or you notice structural issues like rough spots or cracks. Denture staining can sometimes reflect poor fit, surface damage, or embedded material changes that require professional cleaning and assessment.
Signals it’s time for a checkup
If discoloration persists after careful, repeated label-guided cleaning, it may be embedded or related to surface roughness. According to clinical denture care practice, an ill-fitting denture can contribute to biofilm accumulation and lingering odor, which often coexists with stubborn staining. Also, any new cracks or rough areas are a safety and comfort issue—problems that are small at first can worsen quickly.
Dentists can identify whether discoloration is surface staining versus embedded or material-related changes.
Cracks, rough spots, or persistent odor are reasons to have dentures examined rather than treated indefinitely at home.
– See a dentist if stains return quickly or cleaning won’t work
– Get dentures checked if you notice cracks, rough spots, or persistent odor
– Ask about a professional cleaning if discoloration is embedded
Q: Can a bad fit cause denture stains?
Yes; an improper fit can increase plaque accumulation and irritation, which can lead to faster staining and odor.
What professionals may do
A professional cleaning can remove deposits you can’t fully lift with home methods, especially when stains are embedded in micro-roughness. Dentists or prosthodontists can also check alignment and retention so you’re not fighting the same problem every week. As of 2025, many clinics also recommend periodic denture evaluations to maintain comfort and hygiene—particularly if you use adhesives, have mouth dryness, or have had your dentures for several years.
Stains are usually removable with regular rinsing, denture-safe soaking, and gentle brushing—without abrasive or harsh chemicals. Clean your dentures consistently, follow denture-specific product directions (especially soak time and water temperature), and if discoloration persists or you notice roughness, cracks, or quick re-staining, schedule a dental visit for professional cleaning and a proper fit assessment.
Frequently Asked Questions
What’s the best way to remove stubborn stains from dentures?
Start by soaking your dentures in a denture cleaner or a mixture designed for false teeth, following the product label. For surface stains, use a soft denture brush and gently scrub—avoid abrasive toothpaste that can scratch acrylic and make stains harder to remove. If stains persist, a professional cleaning is often the safest option to avoid damage while restoring appearance.
How do I clean denture stains without damaging the acrylic or metal?
Use non-abrasive cleaning methods: a soft-bristle denture brush and mild denture cleaner are the safest choices. Avoid harsh cleaners, bleach, or baking soda unless the product instructions specifically say they’re safe for dentures, since these can pit surfaces or weaken materials. Rinse thoroughly after cleaning and store dentures in water (not hot water) to prevent warping.
Why do my dentures get brown or yellow stains even when I clean them?
Denture stains commonly come from plaque buildup, coffee/tea, smoking, and mineral deposits from tap water. If dentures are cleaned too aggressively (or not consistently), microscopic scratches can trap pigments and create persistent discoloration. Make sure you brush daily, soak as directed, and remove dentures at night to reduce buildup.
How do I remove black or dark spots from dentures at home?
First, try soaking the dentures in a denture soaking solution specifically made for stains and plaque, then gently brush with a denture brush. If the dark spots look like calculus (hard buildup), repeated soaking and professional polishing may be needed—home scrubbing with tools can damage the surface. Stop if you notice roughness or pain, and consider a dental professional cleaning for deep staining.
Which household ingredients are safe for denture stain removal?
The safest approach is to use products made for dentures, such as denture tablets or cleaners labeled for acrylic and metal compatibility. Some people use diluted white vinegar occasionally, but it should not replace regular denture cleaners and should be used only if your denture material is compatible—always follow guidance and rinse well. Avoid abrasive powders, chlorine bleach, and strong peroxide solutions unless specifically recommended for dentures.
📅 Last Updated: September 27, 2026 | Topic: how to clean stains from dentures | Content verified for accuracy and freshness.
References
- https://www.nidcr.nih.gov/health-topics/dentures-and-partial-dentures
- https://www.mayoclinic.org/healthy-lifestyle/adult-health/in-depth/dentures/art-20045237
- https://www.webmd.com/oral-health/ss/slideshow-how-to-clean-dentures
- https://pubmed.ncbi.nlm.nih.gov/?term=denture+cleaning+methods
- https://scholar.google.com/scholar?q=denture+cleaning+stains+how+to+remove Google Scholar
- https://scholar.google.com/scholar?q=extrinsic+staining+dentures+cleansing+methods Google Scholar
- https://scholar.google.com/scholar?q=denture+care+cleaning+efficacy+ultrasonic+cleaners Google Scholar
- https://www.oralhealthfoundation.org.uk/conditions/dentures-and-partials/cleaning-dentures/
- https://scholar.google.com/scholar?q=how+to+clean+stains+from+dentures Google Scholar
- how to clean stains from dentures – Search results
https://en.wikipedia.org/wiki/Special:Search?search=how+to+clean+stains+from+dentures
