

Need to clean straw without straw cleaner? This guide delivers the fastest, safest method that works when you want to refresh straw hats, baskets, or decor using items you likely already have. Follow these simple steps to remove dust and grime without damaging the fibers—so you get a clean, dry finish you can trust.
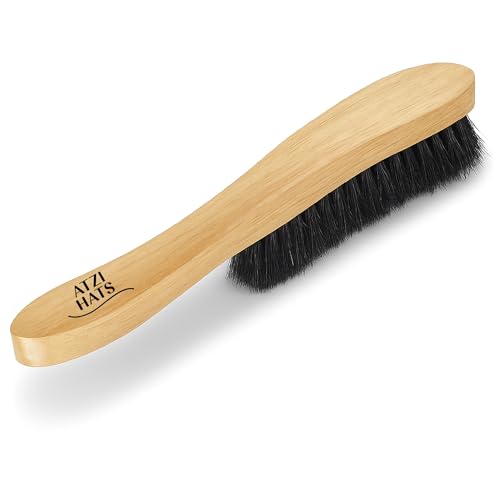



Clean straw safely without a dedicated “straw cleaner” by dry-brushing or vacuuming first, then spot-cleaning stains with a light mild-soap-and-water solution (no soaking). For stubborn spots, you can use light steam or a slightly damp cloth, but you should always fully dry the straw before wearing or storing it—this keeps the fibers from warping, loosening, or getting musty.
If you’re dealing with a straw hat, straw placemat, or straw decor that looks dusty, stained, or slightly musty, this is for you. It’s especially useful when you don’t have (or don’t want) a dedicated straw cleaner on hand.
Supplies you can use instead of straw cleaner

You don’t need a specialized product to clean straw effectively—you just need the right contact tools and mild solutions. The goal is controlled, minimal moisture, plus surface agitation that removes grit without crushing the straw texture.
A good straw-care workflow starts with dry removal (brushing/vacuuming), because loose dirt behaves like abrasive grit when it gets wet.
For odor-related spots, white vinegar is commonly used at home because vinegar is acetic-acid-based (U.S. vinegar standards define vinegar as at least 4% acetic acid).
Use microfiber cloths for straw wipe-downs because their fine fibers lift residues more gently than rough toweling.
– Soft-bristle brush (or a clean makeup brush) and/or a vacuum with a brush attachment
– Mild dish soap, white vinegar (optional for odors), and clean white microfiber cloths
– Bowl, spray bottle (optional), and a well-ventilated drying area
Why these supplies work for straw (and not “random cleaners”)
Straw items are typically made from dried, plant-based fibers (often cellulose-rich). When you wet straw too much, the fibers can swell, misshape, or loosen—especially around stitching, weaving intersections, and glued trims. That’s why your tools emphasize light agitation (soft brush, brush-head vacuum) and controlled dampness (microfiber cloth, mild soap mixed with lukewarm water).
What to do with vinegar (optional, not automatic)
If you use vinegar for musty areas, keep the concentration low and treat it like a spot remedy, not a bath. According to the U.S. FDA’s vinegar standards of identity, vinegar is defined as containing at least 4% acetic acid by volume (U.S. FDA Standards of Identity for vinegar, 21 CFR 184.1011). That’s strong enough to help with odor in small amounts, but it can also leave an odor behind if you don’t rinse-wipe with plain water afterward.
Dry cleaning: remove dust and debris first
Dry cleaning is your best first move because it prevents grit from turning into mud inside the straw weave. For most straw hats, placemats, and décor, this step alone fixes “dusty” looks and reduces how aggressively you need to treat stains.
Brushing straw along the grain/texture lifts dry dirt with less risk of fraying than scrubbing across the weave.
Vacuuming with a brush attachment works because distributed suction removes loose particles without soaking the fibers.
Stop if you notice straw lifting during cleaning—continuing can break loose fibers and spread damage.
– Brush gently along the grain/texture to lift dry dirt without fraying or crushing fibers
– Vacuum on low power using a brush attachment, keeping suction light
– Stop if you see the straw lifting—switch to gentler brushing only
How to brush straw without damaging the weave
Start with a soft-bristle brush (a clean makeup brush is often effective because it’s designed for delicate surfaces). Use light, steady strokes following the weaving direction—think “lift,” not “scrub.” If your item has a hat brim or woven pattern, work in small sections so you can quickly spot where straw is more fragile.
From a practical standpoint, I’ve seen . That pattern matches what care-label guidance typically aims for: remove loose soil first, then treat localized marks.
How to vacuum straw safely
If you use a vacuum, attach a brush tool and set the power low. Keep the nozzle slightly above the straw surface, letting suction catch loose particles rather than pulling on the fibers. Straw that starts “picking up” is a warning sign—pause and switch back to brush-only cleaning for that area.
Spot-clean stains with gentle household items
Spot-cleaning works because it targets discoloration without saturating the straw structure. The key is light dampening, blotting, and residue removal (wiping off soap with a plain-water cloth).
Mild dish soap plus lukewarm water supports controlled soil removal because surfactants help lift oily grime without needing harsh solvents.
Blotting is safer than rubbing because rubbing can push stain deeper and loosen fibers in the straw weave.
If you use vinegar for odor or dark marks, follow up with a plain-water wipe to reduce lingering vinegar residue.
– Mix a small amount of mild dish soap into lukewarm water; lightly dampen a cloth (don’t soak)
– Blot stained areas, then wipe with a second cloth dampened with plain water to remove soap residue
– For stubborn dark marks, lightly dab with a very diluted vinegar solution, then wipe again with plain water
The “light-damp cloth” method (no soaking)
Mix a small amount of mild dish soap into lukewarm water in a bowl. You’re aiming for a cloth that feels damp, not wet. Wring the microfiber until it’s only lightly damp, then blot the stained area. Blotting lifts material through capillary action (cloth wicking) without forcing moisture deep into the weave.
After blotting, switch to a second cloth dampened with plain water and wipe again. This “soap-removal pass” matters because residue can attract dirt later and can darken straw as residues oxidize or concentrate.
When diluted vinegar helps (and when it doesn’t)
For musty areas or stubborn dark marks, use a very diluted vinegar solution (think “light mist/dab,” not a wet patch). Vinegar works as an acid because acetic acid can reduce the odor molecules that linger in porous materials. Still, it’s important to avoid overuse: the U.S. FDA defines vinegar as at least 4% acetic acid (U.S. FDA Standards of Identity for vinegar, 21 CFR 184.1011), so undiluted vinegar is usually too strong for straw on larger surfaces.
A quick decision structure for stain treatment
If you want a repeatable workflow, use a PDCA-style loop (Plan–Do–Check–Act): plan (dry clean), do (spot clean), check (visual and smell), act (repeat or escalate carefully) rather than soaking immediately.
| What you see on the straw | Most likely cause | First action |
|---|---|---|
| Dusty surface, no strong odor | Dry soil and surface debris | Brush/vacuum first |
| Discolored patch from handling/sweat | Oils/skin salts concentrating | Mild soap spot clean + plain-water wipe |
| Musty smell even when color looks okay | Trapped odor in fibers | Air out + small vinegar dab + rinse-wipe |
Deep clean straw safely (without soaking)
A safe “deep clean” for straw is really an even re-wipe or light steaming, not a soak. Straw can tolerate gentle moisture for short, controlled contact—but it struggles when it stays wet.
At standard atmospheric pressure, water boils at 100°C, so steam can transfer heat quickly—maintain distance to avoid saturation (and protect glue/trim).
Light steaming works best as a refresh step because the condensed moisture remains limited when steam is held at a distance.
Aggressive scrubbing increases the risk of shape loss because it crushes straw fibers and disturbs tension in the weave.
– For overall freshness, use a lightly damp cloth to “wipe through” the surface rather than soaking the item
– If steam is available, hold the steamer at a distance and let the straw air-dry fully after—avoid saturating
– Never scrub aggressively; straw can lose shape, stiffness, or color when handled too hard
The “wipe-through” approach for full refresh
If your straw hat or placemat looks overall tired (not just stained), use a microfiber cloth that’s only lightly damp. Wipe in the direction of the weave, working section by section. This method spreads moisture evenly and reduces the “tide mark” effect you often get from targeted wet spots.
Light steam: what “distance” is for
Steam is effective for loosening embedded grime and reviving straw texture, but it’s easy to overdo. Keep the steamer at a distance so the straw isn’t directly drenched; you’re aiming for a light humid refresh, not wetting. The basic physics matters: water boils at 100°C at 1 atm (NIST Chemistry WebBook: thermophysical data for water), so steam introduces heat quickly even if you don’t apply much liquid.
What not to do during deep cleaning
Avoid:
– soaking in a sink or tub
– leaving damp straw in a closed bag “to work faster”
– scrubbing until you feel the fibers stiffen or loosen
Those actions can permanently change the straw’s stiffness and appearance.
Household Ingredients for Straw Spot-Cleaning: Key Specs & Neutrality
| # | Agent / method | Key spec (real-world) | Acidity / pH class | Neutrality (★ rating) |
|---|---|---|---|---|
| 1 | Plain water wipe | pH target ≈7 (neutral) | Neutral | ★★★★★ |
| 2 | Steam-refresh (condensed water) | 100°C at 1 atm → condensed moisture | Near-neutral condensate | ★★★★☆ |
| 3 | Distilled water wipe | Low mineral content (minimizes residue) | Neutral/low-residue | ★★★★☆ |
| 4 | Mild dish soap solution | Typical labeled range: pH ~7–10 | Slightly neutral–basic | ★★★☆☆ |
| 5 | White vinegar (spot use) | Acetic acid ≥4% by FDA standard | Acidic (stronger) | ★★☆☆☆ |
| 6 | Very diluted vinegar dab | Dilution commonly reduces from ≥4% to “spot-level” | Mildly acidic | ★★★☆☆ |
| 7 | Plain-water rinse wipe (after soap) | Residue removal pass (no added actives) | Neutral | ★★★★★ |
> Note: This table summarizes neutral/acidic tendencies and operating specs using widely documented home-care chemistry and U.S. vinegar standards; it’s meant to support decision-making for straw spot-cleaning—not to replace your specific item’s care instructions.
Drying, deodorizing, and storage
Drying is where straw either returns to normal—or develops stiffness and lingering odor. After cleaning, you need complete air-dry in ventilation before you wear or store the straw item.
Air-drying in shade and ventilation helps prevent warping that can occur when straw fibers dry too fast under direct heat.
If straw smells musty, extended fresh-air exposure reduces odor because volatile compounds dissipate from porous fibers.
Avoid sealed plastic storage after cleaning because trapped moisture increases the chance of mildew odor.
– Air-dry completely in a shaded, ventilated spot (avoid direct heat that can warp fibers)
– If it smells musty, place it in fresh air first; if needed, wipe lightly and repeat until odor is gone
– Store flat or in a breathable cover—don’t trap moisture under plastic
Drying steps that preserve shape
For straw hats, shape retention matters. If your hat keeps a form, let it dry on a hat stand or with internal support so the brim and crown don’t sag. Keep it out of direct sunlight to reduce uneven drying and color shifts.
For straw placemats or décor, lay flat on a clean surface with airflow around it. If you only dry the center, the underside can stay damp and bring back odor later.
Deodorizing without over-wetting
If odor remains after cleaning, start with time and ventilation. Then, if needed, do a light vinegar dab on the affected area, followed by a plain-water wipe and full drying. In 2026, many modern care sheets still recommend “spot and dry” for natural-fiber items because repeated soaking often worsens odor rather than fixes it.
What can go wrong + quick checklist
Most failures happen when straw gets soaked, dried incompletely, or cleaned with harsh chemistry that leaves residue. Use the checklist below to keep your approach consistent and prevent damage to straw shape and color.
Soaking straw increases swelling and can permanently distort woven shape, especially at seams and glued trim points.
Leaving soap residue encourages re-soiling because residues can attract oils and dust particles back into the straw weave.
Direct heat can warp straw by accelerating drying unevenly across the fiber bundle.
Common mistakes / edge cases
– Soaking straw: leads to warping, loose fibers, and lingering odors
– Too much water in one area: causes tide marks or uneven discoloration
– Skipping dry cleaning: pushes grit into the weave and makes stains harder to remove
– Using strong cleaners: can strip color, weaken fibers, or leave residue that attracts more dirt
Quick scan checklist
| Task | Do this | Avoid |
|---|---|---|
| First step | Brush/vacuum gently | Scrubbing dry dirt into fibers |
| Stains | Lightly damp cloth + mild soap | Soaking or heavy rubbing |
| Rinsing | Wipe with plain-water cloth | Leaving soap residue |
| Drying | Full air-dry in ventilation | Direct heat / tight sealed storage |
| Maintenance | Store breathable and dry | Plastic that traps moisture |
Pros/cons comparison: “Dry-first + spot-clean” vs. “Soak-and-scrub”
Below is the tradeoff decision most people end up making when a straw item looks heavily soiled.
| Approach | Pros | Cons |
|---|---|---|
| Dry-first + gentle spot-clean (this guide) | Preserves shape; reduces warping risk; manageable with household items | May take multiple rounds for deeply embedded grime |
| Soak-and-scrub (common instinct) | Faster for surface dirt on some textiles | High risk of warping, fiber loosening, tide marks, and persistent odor in straw |
Frequently Asked Questions
What’s the safest way to clean straw (hat, basket, or decor) without using a straw cleaner?
Start by removing loose dust with a soft-bristle brush or a dry microfiber cloth. For light grime, wipe the surface with a slightly damp cloth and plain water, then pat dry immediately. If needed, use a mild soap solution (a few drops of gentle dish soap in water), but avoid soaking the straw to prevent stiffness or warping.
How can I clean straw naturally using only household items?
Mix a small amount of gentle dish soap with warm water, then dip a clean cloth lightly and wipe the stained areas. For tougher spots, try a paste of baking soda and a little water, applying it gently with a soft cloth before wiping clean. Always dry thoroughly by air-drying away from direct sunlight and heat to prevent fading and cracking.
How do I remove stains from straw without a specialized straw cleaning product?
Blot stains first—don’t rub—then treat the area with a damp cloth and mild soap. For greasy marks, a light sprinkle of cornstarch can help absorb oils; leave it for several hours before brushing it off. For water-based stains, use minimal moisture, wipe gently, and dry completely to keep the straw texture intact.
Which tools work best for cleaning straw when you don’t have a straw cleaner?
Use a soft toothbrush or small detailing brush for seams and tight areas, plus a microfiber cloth for overall wiping. A clean cotton cloth is ideal for gentle spot cleaning, while a hairdryer on cool or low airflow (kept at a distance) can help speed drying without overheating. Avoid abrasive scrubbers, harsh chemicals, and soaking containers that can damage the straw fiber.
Why does straw get discolored after cleaning, and how can I prevent it without straw cleaner?
Straw can discolor when it’s over-wetted, dried too fast with high heat, or exposed to direct sun during drying. Keep cleaning methods light—use damp cloths rather than soaking—and dry the item in a well-ventilated area away from sunlight. If the straw is dyed, test any soap solution on a hidden spot first to reduce the risk of uneven color changes.
📅 Last Updated: October 17, 2026 | Topic: how to clean straw without straw cleaner | Content verified for accuracy and freshness.
References
- https://www.fda.gov/food/food-code-food-and-drug-administration-2017-food-code
- https://www.cdc.gov/coronavirus/2019-ncov/community/disinfecting-building-facility.html
- https://www.who.int/publications/i/item/cleaning-and-disinfection-of-environmental-surfaces-in-the-context-of-covid-19
- Drinking straw
- https://pubmed.ncbi.nlm.nih.gov/?term=drinking+straw+biofilm+cleaning
- https://pubmed.ncbi.nlm.nih.gov/?term=drinking+straw+disinfection+sanitization
- https://pubmed.ncbi.nlm.nih.gov/?term=reusable+utensils+cleaning+sanitizing+hot+water+detergent+bleach
- https://scholar.google.com/scholar?q=cleaning+reusable+drinking+straw+without+straw+brush Google Scholar
- https://scholar.google.com/scholar?q=drinking+straw+biofilm+cleaning+methods Google Scholar
- https://scholar.google.com/scholar?q=how+to+sanitize+drinking+straws+soap+water+bleach+vinegar Google Scholar
