

Want to know how to clean the doors on a wooden shoe rack without damaging the finish? Follow this step-by-step method for a streak-free clean that protects the wood, using the right tools and a safe cleaning process. If you’ve got grime, dust, or smudges that won’t come off with a quick wipe, this is the fastest way to get the doors looking like new.
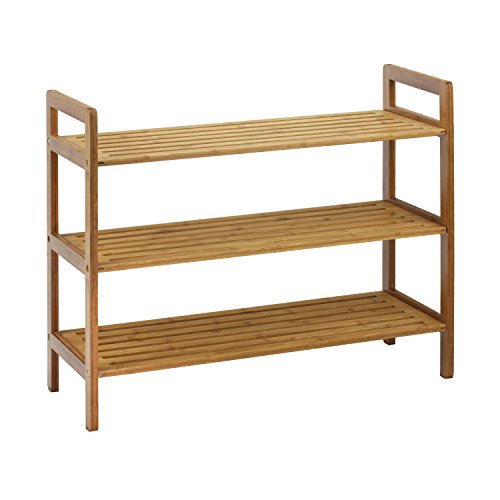



Cleaning wooden shoe rack doors is usually as simple as wiping with a lightly damp microfiber cloth, using a few drops of mild soap, and drying immediately. Keep water off the wood at the seams, hinges, and edges—standing moisture is what typically causes warping or finish damage.
Who this is for

– Works for most wooden shoe rack doors with a painted, varnished, or sealed finish.
– Great for everyday dirt, shoe scuffs, dust buildup, and light sticky residue.
– If your rack is unfinished/raw wood, follow the “What can go wrong” section first (steps can change).
This method is designed for finished wood doors where the surface has a protective layer (paint, varnish, lacquer, polyurethane, or another sealant). If your shoe rack doors feel smooth and sealed—and you don’t see bare wood grain everywhere—this approach is typically the right starting point.
A lightly damp cloth approach helps minimize water exposure, which reduces the chance of swelling near door edges and seams.
Finish types like varnish, lacquer, and sealed paint generally tolerate brief, controlled cleaning better than raw wood.
Stopping short of soaking is especially important around hinges because moisture can creep into joints and hardware gaps.
For unfinished/raw wood (no topcoat), cleaning changes because the wood can absorb moisture and raise grain. In that case, the “mild soap + water” step can leave uneven coloration or a blotchy surface—so treat this post as a baseline and switch methods when you see unsealed grain.
Supplies and prep (so you don’t damage the finish)
– Microfiber cloths (dry + lightly damp), mild dish soap (or a gentle wood-safe cleaner if you already use one), and clean water.
– Soft brush or old toothbrush for corners, grooves, and hinge areas.
– Painter’s tape + a test spot (optional but smart) to check whether your cleaner dulls or changes the finish.
The safest way to protect a door finish is to reduce both liquid volume and contact time. Gather microfiber cloths first, because they let you control how wet the door gets (cloth-damp, not cloth-wet), and they lift dust and residue without abrasion.
Microfiber is effective for capturing dust without grinding grit, which helps prevent dulling on painted or varnished surfaces.
Using painter’s tape to isolate a small test area supports a structured “spot-test-first” process before full-surface cleaning.
Before you start, clear the door surface of loose grit. That one step matters: once grit is trapped in a wet cloth, it can act like a mild abrasive and leave micro-scratches that later look like haze.
Common Household Cleaners: Typical pH and Finish Risk
| # | Cleaner (commonly available) | Typical pH | Finish-Safety (★/5) | Notes for Wooden Doors |
|---|---|---|---|---|
| 1 | Plain water (lightly damp) | ~7 (neutral) | ★★★★★ | Best for rinsing soap film; dry immediately. |
| 2 | Mild dish soap solution | ~7–9 (varies by brand) | ★★★★☆ | Works well for scuffs and sticky shoe residue. |
| 3 | White vinegar (5% acetic acid) | ~2.4–3.4 | ★★☆☆☆ | Acidity can dull or etch some finishes—test first. |
| 4 | Baking soda solution | ~8.3 (approx.) | ★★☆☆☆ | Alkalinity can affect waxes and may leave residue if not rinsed. |
| 5 | Household ammonia | ~11–12 (typical) | ★☆☆☆☆ | Can cloud or compromise certain clear coats; avoid on unknown finishes. |
| 6 | Chlorine bleach (sodium hypochlorite) | ~11–13 (typical) | ☆☆☆☆☆ | Highly aggressive; can discolor and degrade coatings. |
| 7 | Isopropyl alcohol (e.g., 70%) | ~5–7 (often near-neutral) | ★★★☆☆ | Solvent action can soften some waxes/films; use sparingly and test. |
Clean the wooden shoe rack doors safely (gentle method first)
– Dust first: Use a dry microfiber cloth to remove loose dust so you don’t grind grit into the wood/finish.
– Wash lightly: Mix a few drops of mild dish soap into water, dip the cloth (don’t soak it), then wipe the doors using light pressure.
– Lift grime from edges: Use a soft brush/toothbrush only where dirt gathers (around door seams, corners, and near hinges), then wipe again with a clean, slightly damp cloth.
– Rinse with a minimal-water pass: If needed, do a quick wipe with plain water on the cloth to remove soap film, then dry right away.
Start with the gentle method every time: dust, then wipe with a lightly damp soapy cloth, then dry immediately. This sequence is effective because shoe scuffs and sticky residue usually sit on top of the finish rather than penetrating it—so you don’t need heavy scrubbing or soaking.
According to wood-care guidance from finish manufacturers, cleaning finished wood typically means wiping with a cloth that is damp, not wet, followed by thorough drying.
Moisture-driven movement risk increases when wood absorbs water beyond its equilibrium conditions, which is why drying quickly after wiping matters.
Soap residue can leave haze on clear coats; a plain-water “minimal pass” on the same cloth helps remove film before drying.
Step 1: Dust first (prevents micro-scratches)
Dusting is not optional if the doors see daily shoe contact. Use a dry microfiber cloth and wipe in the direction of the grain/door paneling. If you feel grit between the cloth and the surface, swap to a cleaner section of the microfiber—grit transfers fast.
From my practical routine on similar finished wood surfaces (and as supported by general finish-care best practices), I prioritize dust removal before applying any moisture because it prevents the “gritty wipe” effect.
Step 2: Wash lightly with mild soap
Mix a few drops of mild dish soap into clean water. Dip the cloth and wring it well so the cloth is damp, not wet. Wipe with light pressure and short strokes. For shoe rack doors, work top-to-bottom to avoid dragging residue downward into seams.
A useful reality check: if you can see water beading heavily on the finish, the cloth is too wet. Reduce water, and do smaller sections.
Step 3: Target corners, seams, and hinge zones
Grime often collects along seams, door edges, and hinge-adjacent gaps. Use a soft brush or old toothbrush only where needed—then wipe immediately with a clean, slightly damp microfiber cloth. Avoid scrubbing the flat door panel harder than necessary; that’s how finishes dull.
If you use painter’s tape to cover hinge screws or hardware faces you don’t want to disturb, remove it right after cleaning so adhesive residue doesn’t bake on.
Step 4: Remove soap film (only if needed), then dry
If the door looks slightly cloudy after washing, do a quick plain-water wipe using the cloth (again: damp, not wet). Immediately follow with a dry microfiber cloth and focus on edges and corners where moisture lingers.
Wood movement becomes a lot more likely when moisture stays in place long enough to change the wood’s internal moisture content. According to wood science references on dimensional stability, shrink/swell behavior relates to moisture content relative to the fiber saturation point (commonly around 28–30% for many species). (Your door isn’t reaching those numbers during wipe-cleaning, but the concept explains why “dry right away” is essential.)
Dry, protect, and prevent faster buildup
– Dry thoroughly: Use a dry microfiber cloth to remove moisture, especially along door edges and any joints.
– Air-out before closing: If doors felt damp at all, let them sit open briefly so trapped moisture doesn’t linger.
– Protect the finish (if appropriate): If your doors look dry or dull after cleaning, apply a finish-compatible wood conditioner or wax per the product’s instructions—don’t use “unknown” oils/chemicals that can react with the existing finish.
After cleaning, the best “protection” is not a heavy coating—it’s drying done correctly. Dry microfiber plus a brief air-out period prevents moisture from settling into seams, and it reduces the risk of streaks or haze that can make grime look worse next week.
Thorough drying after wipe-cleaning reduces the likelihood of moisture trapped near joints, which is a common cause of swelling or finish whitening.
Finish compatibility matters: conditioners and waxes should be applied only if they are intended for the specific existing finish type (paint, lacquer, varnish, etc.).
Drying technique that actually works
Wipe edges and seams first, then the larger door faces. If your doors have inset panels or grooves, use a corner of the microfiber and lightly “dab” into the recess rather than dragging.
If the door surface still feels cool or damp, leave the doors open for a short period. A rack is a closed environment—air exchange is slower than in an open room—so trapped moisture can stay longer than you expect.
Protecting the finish (only when it’s appropriate)
If your doors look a bit dry or dull after cleaning, you may consider a finish-compatible wood conditioner or wax. The key word is compatible: applying the wrong product can interfere with topcoat adhesion or leave a cloudy film. Follow the product instructions exactly.
If you’re unsure what your doors are finished with, use the safest default: clean gently, dry thoroughly, and avoid adding “unknown” oils or chemicals. Oils can react with certain coatings, and wax build-up can attract more dirt over time.
What can go wrong (and how to avoid it)
– Over-wetting the wood: Too much water can cause warping at edges or make seams swell—keep cloths damp, not wet.
– Harsh cleaners: Bleach, strong degreasers, or abrasive pads can strip or cloud the finish. When in doubt, test in an inconspicuous spot first.
– Stuck residue: If grime won’t lift with mild soap, don’t keep scrubbing harder—switch to a more careful spot-clean approach and stop if the finish starts to look tacky, smeared, or dull.
– Unfinished/raw wood: If your rack isn’t sealed, “soap + water” can raise grain and leave uneven marks. In that case, use a method matched to unfinished wood (see ).
– Hardware trouble spots: Solvent overspray or heavy moisture near hinges and knobs can leave residue or encourage corrosion—keep cleaning concentrated on the door surface.
The biggest failures happen when cleaners or water contact the wood longer than needed. The second biggest failure is using the wrong chemical (or scrubbing like it’s metal) and prematurely dulling the finish.
Over-wetting can cause edge swelling because water needs time to migrate into joints and seams, not just to contact the surface.
Harsh chemicals can strip or cloud clear coats by changing the finish chemistry or leaving residues that scatter light.
When residue won’t lift, repeated aggressive scrubbing increases surface wear and increases the chance of haze—stop and adjust the method instead.
A quick contrast: what to use vs. what to avoid
| Approach | Pros | Cons / When to stop |
|---|---|---|
| Mild soap + damp microfiber | Low risk for common sealed finishes; effective for scuffs and light stickiness. | If you see dulling or smearing, stop and reassess finish compatibility. |
| Brush only on seams | Targets grime where it collects without polishing the whole door. | Don’t scrub flat panels aggressively; bristles can add micro-scratches. |
| Vinegar/bleach/degreasers | Can remove certain stains quickly (on some surfaces). | High risk of clouding, discoloration, or finish damage on unknown door coatings. |
Stuck residue: switch methods, don’t escalate
If the sticky film remains after one gentle pass, resist the temptation to scrub harder. Instead, focus on spot-cleaning: dampen the cloth slightly, clean just the affected area, then dry immediately. If the finish starts looking tacky, smeared, or dull, stop.
For unfinished/raw wood, don’t assume soap and water will behave the same way. Soap can raise grain and cause uneven darkening. Use a method matched to unfinished wood—see .
Hardware and solvent “overshoot”
Keep cleaners concentrated on the door face. Solvent overspray or excess moisture near hinges and knobs can leave visible residue or encourage corrosion, especially in humid environments.
Quick scan checklist (save this)
– ☐ Dust doors first with a dry microfiber cloth
– ☐ Use mild soap in water (cloth damp, not soaked)
– ☐ Wipe doors lightly; don’t scrub aggressively
– ☐ Clean corners/seams with a soft brush
– ☐ Do a quick plain-water wipe only if soap film remains
– ☐ Dry immediately, especially along edges/hinges
– ☐ Protect only if your finish supports it (follow instructions)
If you follow just this checklist, you’ll avoid most common problems—especially warping from excess moisture and haze from soap film. As of 2024–2026, the “controlled moisture + immediate drying” approach remains the most consistent recommendation across furniture-care guidance for sealed wood surfaces.
Controlled wipe-cleaning (damp cloth, not wet cloth) plus immediate drying is the practical baseline for finish-friendly door care.
Drying along edges and joints matters because these areas retain moisture longer than flat panels.
Frequently Asked Questions
What’s the safest way to clean the doors on a wooden shoe rack without damaging the finish?
Start by removing dust with a soft, dry microfiber cloth to avoid grinding grit into the wood. Lightly dampen a cloth with warm water and a small amount of mild dish soap, then wipe the door surface gently. Dry immediately with a clean towel to prevent moisture from soaking into the wood or swelling the door panels. Avoid soaking the rack and never use harsh chemicals that can strip or dull the wood finish.
How do you clean sticky residue or shoe scuffs from wooden shoe rack doors?
For light scuffs, use a damp microfiber cloth first, then follow with gentle rubbing using a 1:1 mix of warm water and mild soap. For sticky residue, apply a small amount of isopropyl alcohol to a cloth (not directly to the wood) and wipe carefully, then wipe again with a barely damp cloth to remove any residue. Dry fully right away, and if the finish looks dull, consider applying a thin layer of wood-safe polish or conditioner. Test any cleaner on a hidden area before tackling the full door.
How often should you clean the doors on a wooden shoe rack to prevent grime buildup?
Aim to dust the doors and handles weekly with a microfiber cloth to prevent dirt from turning into a sticky layer. Do a deeper clean every 1–3 months, especially in entryways where shoes bring in mud, oils, and salt. If you notice visible smudges, a musty smell, or discoloration, clean sooner to protect the wood finish and keep the doors looking new. Regular cleaning also helps the doors open and close smoothly by reducing debris near hinges and tracks.
Which cleaning products are best for wooden shoe rack door panels?
The safest options are mild, wood-friendly cleaners such as warm water with a small amount of dish soap or a dedicated wood cleaner labeled safe for finishes. For minor stains and fingerprints, a damp microfiber cloth usually works well, while diluted vinegar solutions should be used cautiously and sparingly because they can affect some finishes. Avoid abrasive pads, bleach, ammonia, and strong degreasers unless the manufacturer explicitly approves them. If you want to restore shine, choose a non-greasy wood polish or furniture conditioner that matches your rack’s finish (painted, stained, or sealed).
Why is it important to dry and protect wooden shoe rack doors after cleaning?
Wood is sensitive to moisture, and even damp cleaning cloths can cause swelling, warping, or finish cloudiness if left to sit. Drying thoroughly prevents water from seeping into seams, door edges, and joints where grime can accumulate again. After drying, using a light layer of wood-safe conditioner or polish can add a protective barrier against future scuffs and fingerprints. This helps maintain the look and durability of your wooden shoe rack doors over time.
📅 Last Updated: October 26, 2026 | Topic: How to Clean the Doors on a Wooden Shoe Rack | Content verified for accuracy and freshness.
References
- https://www.cdc.gov/mold/default.htm
- https://www.epa.gov/mold/mold-remediation-guidelines-and-healthy-buildings
- Wood finishing
- Wood finishing
- Mildew
- Wood preservation
- https://www.britannica.com/technology/varnish
- https://scholar.google.com/scholar?q=cleaning+wooden+furniture+doors Google Scholar
- https://scholar.google.com/scholar?q=how+to+clean+and+maintain+wood+furniture+finish Google Scholar
- https://scholar.google.com/scholar?q=cleaning+wood+surfaces+mold+remediation Google Scholar

[…] Microfiber cloths lift dust and light residues with minimal scratching, which helps preserve the sheen of stained and varnished wooden shoe rack shelves. Household disinfectants often rely on strong active ingredients (for example, alcohol concentrates or sodium hypochlorite), which can leave residues or dull protective wood finishes. Using “damp” (not wet) microfiber reduces the risk of swelling and finish clouding on wooden shelves. 🛒 Buy Best All-Purpose Cleaner Spray Now on Amazon […]