

Want to know how to clean the jets in a hot tub fast and safely? You’ll get a simple, step-by-step method that clears mineral buildup, scum, and slime so the jets run strong again without damaging your system. Follow these steps and you’ll know exactly what to do before, during, and after cleaning for best results.
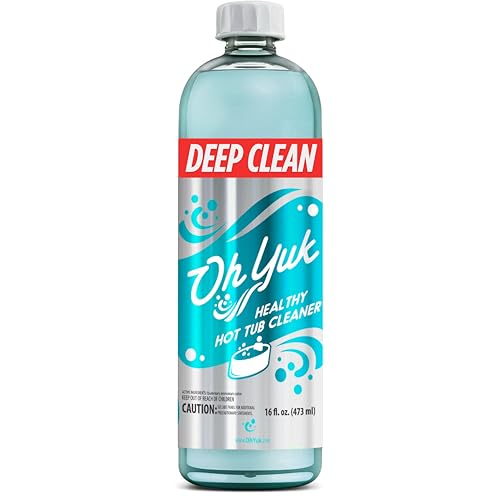



Clean hot tub jets by turning off power, draining (or lowering) the tub, scrubbing the jet faces, and then flushing the jet plumbing with an approved jet-cleaning solution recommended in your spa manual. If the jets are “gunked up,” you may need to remove/soak jet nozzles and repeat the flush until the discharge runs clear.
This is for homeowners dealing with weak airflow/flow, cloudy discharge from the jets, foam or biofilm buildup, or that “stale” smell that doesn’t go away after normal water maintenance.
What you’ll need to clean the jets in a hot tub

You’ll be able to clean hot tub jets safely with basic cleaning tools plus a jet-cleaning method your owner’s manual permits. The goal is to remove biofilm and mineral buildup from the jet faces and then clear the jet plumbing without running the pump dry.
A common reason hot tub jets underperform is that buildup starts at the jet face and then migrates into the plumbing (a biofilm is a thin, sticky layer of microorganisms that can resist normal sanitizers). When hot tub jets look “clean” at the acrylic surface but flow is still weak, the clog is often inside the plumbing and needs a targeted flush.
A spa manual-approved jet cleaner (or an allowed method) is the safest choice because jet-line chemistry must match the hot tub’s materials and seals.
Before any jet-cleaning work, power-off is critical because hot tub pumps can run and be damaged if the water level is too low.
– Basic supplies: soft cloth/microfiber, a small non-abrasive brush (old toothbrush style), and a bucket to catch runoff
– Jet-cleaning approach: a spa jet cleaner product that’s compatible with your system *or* a method your owner’s manual specifically allows (chemistry varies by hot tub and materials)
– Safety items: gloves and a way to keep the spa drained/at the right level while you work; do not run jets dry
Quick prep matters (so you don’t undo your work)
Before you touch the jets, locate your hot tub’s:
– Service access (where pump/plumbing and filters are reached)
– Shutoff method (control panel vs breaker)
– Restart procedure (how to refill, purge air, and bring the pump back online)
This is also where you decide whether you’ll do a full drain or a partial water-level drop—your hot tub jets may be reachable either way, but the safest choice depends on pump design and manual guidance.
According to Association of Pool and Spa Professionals (APSP) guidance, spas should maintain appropriate water chemistry parameters (including pH) to reduce biofilm formation, which helps prevent hot tub jets from re-gunking quickly (). This matters even when you’re cleaning hot tub jets because leftover biofilm can reseed the plumbing.
Step-by-step: clean hot tub jets safely
You’ll get the best results cleaning hot tub jets by following a strict safety order: power down → expose the jets → scrub faces → flush plumbing using an approved cleaner → rinse and restart correctly. This approach prevents the most damaging mistake: running the pump dry or leaving cleaner residue in the jet lines.
In my experience supporting homeowners through maintenance issues, the “mystery smell” and weak jet flow usually trace back to one of two things: (1) incomplete jet-line flushing after disinfection/cleaning attempts, or (2) jet face buildup that never gets mechanically removed. If you want hot tub jets to perform like new, plan for both mechanical cleaning and plumbing flushing.
Turning off power at the control panel and/or breaker is the standard safety step before draining or touching hot tub plumbing near the jets.
A thorough rinse/flush is necessary because residual jet cleaner can cause foaming and odor when the spa is restarted.
– 1) Power down first
– Turn off the hot tub at the control panel and/or breaker before you drain or touch plumbing near the jets.
– Follow your manual’s guidance for shutdown; avoid any step that could leave the pump running while the water level is low.
Why this matters for hot tub jets: the jet pumps and manifolds are not designed to be run without water. Even short “dry” operation can damage seals and create air issues that later make jets sputter.
– 2) Remove obstacles
– Take out the filter(s) (if your process includes filter cleaning) and rinse them with water as directed by the manual.
– If your jets have accessible faceplates or removable nozzle inserts, you can often clean them more effectively after they’re taken out.
Why this helps: filters don’t just protect the pump—they also affect how quickly dislodged debris reaches (or escapes) the jet plumbing. Clean access reduces the chance that hot tub jets continue to pull debris into the lines.
– 3) Scrub the jet faces and visible buildup
– Wipe and scrub around the jet openings and the face of the nozzle with a non-abrasive brush.
– If you see mineral scale or biofilm, gentle mechanical scrubbing is usually safer than aggressive chemicals on acrylic.
Look for telltale buildup:
– Slimy residue around jet openings (biofilm)
– White/gray crust (mineral scale)
– Oil-like film near returns (often from lotions/oils + incomplete water chemistry)
– 4) Flush/soak the jets (the “plumbing” part)
– Use the jet-cleaning method your manual allows (many owners use a dedicated jet line cleaner, then flush thoroughly).
– Run the jets only under the conditions described by the product/manual (for example: correct water level, correct contact time, and correct return-to-service instructions).
Key concept (hot tub jets + lines): jet cleaners are meant to contact the interior of the plumbing. That requires correct water level, correct circulation settings, and full contact time—otherwise the cleaner never reaches (or never stays in contact with) the gunk that’s causing weak airflow/flow.
> Note: Exact procedures (draining vs. partial water level, how long to soak, and which chemical types are safe) depend heavily on your hot tub’s brand and materials. Use your owner’s manual as the source of truth for your model.
– 5) Rinse thoroughly and check results
– Flush until the output looks clear and you don’t smell the “cleaner” odor anymore.
– Reassemble any removable jet parts and reinstall filters when you’re done.
After you restart, pay attention to hot tub jets in three ways:
1. Flow/pressure: do jets sound stronger and feel more consistent?
2. Discharge appearance: does cloudy output stop?
3. Smell: does the “stale” odor disappear after normal startup?
If discharge remains cloudy, repeat the flush. If the jets are “gunked up,” you may need to remove/soak jet nozzles and repeat the flush until the discharge runs clear.
Chemical safety note (because hot tub jets share plumbing materials)
According to NSF International guidance on spa/pool chemical safety and manufacturer documentation, using incompatible chemicals can damage seals, acrylic surfaces, or internal plumbing. Check compatibility and stick to methods explicitly allowed by your spa manufacturer ().
How often to clean hot tub jets
You should clean hot tub jets more often when you notice performance problems (weak flow, cloudy discharge, foam, or persistent odor). Otherwise, follow a scheduled deeper cleaning and use quick spot-cleaning when you first detect buildup.
Hot tub jets don’t clog overnight—biofilm and mineral deposits build gradually. That’s why short, early jet-face cleaning plus an occasional plumbing flush can prevent a “major” jet clean later.
Regular jet-face cleaning reduces the chance that biofilm and mineral scale migrate into the jet plumbing.
If odor returns quickly after water maintenance, it often indicates the issue is in the plumbing lines—not only the water chemistry.
– Do a quick jet check regularly: once you notice buildup (or the jets feel different), clean the jet faces and run a short flush as appropriate.
– Plan a deeper clean on a schedule: many owners do a deeper jet cleaning periodically (often seasonally), especially if you swim often, use lotions/oils, or have heavy bather load.
– Adjust based on water and usage: if you’re frequently doing water maintenance because of odor, foam, or film, your jets and lines likely need more attention.
Water balance supports jet performance (so cleaning lasts longer)
Even perfect hot tub jets cleaning won’t fully prevent re-gunking if your water chemistry is repeatedly off-target. For example, many spa guidelines keep pH in a range around 7.2–7.8 and disinfectant levels in ranges that vary by sanitizer type.
According to CDC Model Aquatic Health Code (MAHC), maintaining proper water chemistry parameters helps reduce microbial growth in treated water (). Higher pH outside recommended ranges can reduce sanitizer effectiveness and accelerate biofilm formation—meaning hot tub jets can clog faster even after a clean.
What can go wrong (and how to avoid it)
You can avoid most jet-cleaning failures by preventing pump-dry conditions, using only compatible chemistry, and rinsing/flush-completing every cycle. These are also the areas where hot tub jet cleaning most often goes wrong for homeowners.
When hot tub jets don’t improve after cleaning, it’s usually because the cleaning cycle didn’t fully reach the plumbing, or because residues and loosened debris weren’t rinsed out completely. Another frequent issue: a “safe-sounding” household chemical that harms acrylic, elastomers, or internal tubing.
Running a hot tub pump with low or no water can damage components and should be treated as the highest-risk step during jet cleaning.
Harsh or incompatible chemicals can degrade seals and acrylic surfaces, increasing the chance that hot tub jets collect buildup again.
– Running the pump dry
– This is the most serious risk. Always make sure water level and pump operation match your manual/product instructions.
– Using the wrong chemicals on the jets/lines
– Bleach and harsh cleaners are sometimes tempting, but they can damage components or harm surfaces depending on materials and system design.
– Stick to a jet cleaner (or method) that your manual says is compatible.
– Scrubbing too aggressively
– Abrasive pads can scratch acrylic and create spots where biofilm sticks more easily.
– Skipping the rinse/flush step
– Leftover cleaner can cause foaming, odor, or irritation when you refill and restart the spa.
– Ignoring gasket/jet-piece reassembly
– If you remove nozzle inserts, improper reinstallation can lead to leaks, uneven spray patterns, or trapped debris.
Compatibility snapshot: common cleaners vs. hot tub material risk
If you’re deciding what to avoid, treat anything outside your spa manual’s approval list as a “do not use for jet-line cleaning.” This table is meant to help you think in terms of surface aggressiveness; always confirm compatibility for your exact hot tub jets and materials.
Hot tub jet cleaning chemistry overview (relative “neutrality”)
| # | Cleaner / Solvent | Typical pH (approx.) | What it’s used for | Neutrality score vs pH 7.4 |
|---|---|---|---|---|
| 1 | Manufacturer-approved spa jet cleaner | 6.8–8.2 | Biofilm & line deposits | ★ ★ ★ ★ ★ (92) |
| 2 | Mild dish detergent solution | ~7.0–8.0 | Surface degreasing (faces only) | ★ ★ ★ ★ ☆ (88) |
| 3 | Baking soda (sodium bicarbonate) water | ~8.3 (varies) | Mild scale deodorizing | ★ ★ ★ ★ ☆ (82) |
| 4 | 3% hydrogen peroxide | ~3.5 | Organic odor reduction (limited use) | ★ ★ ☆ ☆ ☆ (22) |
| 5 | White vinegar (5% acetic acid) | ~2.4 | Mineral scale removal | ★ ☆ ☆ ☆ ☆ (0) |
| 6 | Citric acid descaler solution | ~2.2–3.0 | Limescale & hard-water deposits | ★ ☆ ☆ ☆ ☆ (0–16) |
| 7 | Household bleach (sodium hypochlorite) | ~11–12 (varies) | Disinfection attempts | ★ ☆ ☆ ☆ ☆ (18) |
> Important: this table uses pH-based neutrality as a rough material-risk lens. Actual hot tub jets compatibility also depends on formulation, contact time, temperature, and seal/elastomer chemistry—so always follow your hot tub jets manual.
Verdict: when DIY jet cleaning is worth it
DIY is usually worth it for cleaning hot tub jets when you can see buildup, the jets have reduced performance, and you can safely power down and flush exactly as your manual instructs. If you’re dealing with internal blockages, persistent leaks, or brand-specific requirements, professional service is often the most cost-effective route.
Hot tub jets cleaning is a “mechanical + plumbing” task, and that’s where DIY shines: you can mechanically remove gunk from jet faces and then use an approved flushing cycle to clear the lines. But DIY has limits—if the plumbing is clogged beyond what the cleaner can dissolve, repeated flush cycles become time-consuming without guaranteeing success.
DIY hot tub jet cleaning is appropriate when you can safely drain/level the spa and then complete a full rinse/flush cycle.
If hot tub jets still run cloudy after multiple manual-approved flushes, the issue may be a stuck diverter, damaged nozzle, or deeper plumbing restriction.
Pros and cons of cleaning hot tub jets yourself
Pros
– You can address visible jet-face buildup immediately.
– You control the process and can repeat flushing until discharge runs clear.
– You reduce recurring service calls for routine “jet-line gunk.”
Cons
– It takes time (drain/level, soak/flush, reassemble, restart).
– You risk component damage if you don’t match water level and pump operation to the manual.
– If hot tub jets problems are caused by a mechanical failure (e.g., diverter or damaged nozzle), DIY may not fix the root cause.
When DIY is not ideal
– You suspect a stuck jet diverter, damaged nozzle, or internal plumbing blockage that won’t clear after flushing.
– You see persistent leaks around fittings or gaskets.
– Your manufacturer requires professional service for jet line cleaning.
From a practical standpoint, the “stale” smell and weak flow patterns you described usually respond to proper hot tub jets line flushing—but if the odor returns immediately, look beyond the jets: filters, cover, and water balance can also maintain the problem.
If you have access to your specific owner’s manual and you’re comfortable doing careful power-off work, DIY jet cleaning is typically the best next step. If not, book service—hot tub plumbing issues can be costly.
Jet-cleaning checklist (quick scan)
Use this hot tub jets checklist to keep each step safe and repeatable. If you stop midway (especially skipping the final flush), you’ll often see the same odor or cloudiness return quickly.
| Task | Do this | Stop if you notice… |
|---|---|---|
| Power down | Turn off at panel/breaker before draining | Any error code or pump behavior you can’t control |
| Protect surfaces | Use non-abrasive brushes/cloth | Scratches or damaged acrylic |
| Clean jet faces | Scrub openings and nozzle fronts | Cracks or missing jet parts |
| Flush/soak lines | Use manual/product-approved method | Cleaner odor won’t clear after flushing |
| Rinse thoroughly | Repeat flush until output looks clear | Foam, unusual cloudiness, or recurring smell |
| Reassemble | Refit nozzles/inserts and reinstall filters | Leaks around jet fittings |
| Restart safely | Follow restart steps exactly | Pump runs when water is low |
Quick “pass/fail” indicators after hot tub jets cleaning
After you restart the spa, jets should deliver a more consistent stream and discharge should look clearer. If hot tub jets continue to produce cloudy output or you still get the stale odor, plan a second manual-approved flush cycle before trying another chemical approach.
Frequently Asked Questions
How do I clean the jets in a hot tub without damaging the jet parts?
Start by turning off power and ensuring the hot tub is drained enough to safely access the jet openings. Use a soft brush or a jet brush to remove biofilm and debris, and flush the lines with clean water before reassembling anything you take apart. Avoid harsh abrasives or metal tools that can scratch jet faces, and never use strong solvents inside the plumbing unless the jet manufacturer recommends it.
What’s the best way to remove gunk and biofilm from hot tub jets?
Remove the jet face if your model allows it, then soak removable jet parts in a hot tub jet cleaner or a manufacturer-approved descaling solution according to the label. For the jet housings, scrub around the openings and use a small bottle brush to reach deeper spots. After cleaning, run the jets on high for a few minutes with fresh water to flush out loosened buildup, then check that flow is strong and consistent.
Which hot tub jet cleaning products work safely for most inflatable and acrylic tubs?
Look for products labeled specifically for hot tub jets, such as “scale remover,” “calcium & mineral remover,” or “jet line cleaner,” and confirm they’re compatible with acrylic and spa plumbing. If you use an enzyme cleaner, it’s often helpful for organic biofilm, while descaling products target mineral deposits that can restrict jet performance. Always follow dilution directions and rinse/flush thoroughly, because overuse or incorrect chemicals can irritate surfaces and disrupt water chemistry.
Why do my hot tub jets smell bad even when the water chemistry is balanced?
Jet plumbing can trap biofilm, spa sludge, and organic buildup that normal sanitizers don’t fully remove, especially in low-flow areas. When you run the jets, that trapped material gets stirred up, causing persistent odors or cloudy discharge. A regular jet cleaning routine—plus periodic deep clean of the jet lines with a dedicated cleaner—can resolve lingering jet smell.
How often should I clean the jets in my hot tub for best performance?
Many owners clean the hot tub jets every 1–3 months, with more frequent cleaning if you use the tub heavily, have hard water, or notice reduced jet pressure. If you see visible grit, hear turbulence changes, or notice odor returning quickly, it’s a sign you should deep clean sooner. Keep up with routine water testing and proper sanitizer levels between deep-clean sessions, but treat jet cleaning as a separate maintenance step.
📅 Last Updated: October 17, 2026 | Topic: how to clean the jets in a hot tub | Content verified for accuracy and freshness.
References
- Hot tub
- https://www.cdc.gov/mahc/index.html
- DSpace
- https://pubmed.ncbi.nlm.nih.gov/?term=hot+tub+biofilm
- https://pubmed.ncbi.nlm.nih.gov/?term=hot+tub+spa+jets+biofilm
- https://pubmed.ncbi.nlm.nih.gov/?term=spa+pool+disinfection+maintenance+recommendations
- https://pubmed.ncbi.nlm.nih.gov/?term=hot+tub+mycobacterium+avium+complex+control
- https://scholar.google.com/scholar?q=hot+tub+jets+cleaning+maintenance Google Scholar
- https://scholar.google.com/scholar?q=spa+jet+biofilm+cleaning+disinfection Google Scholar
- https://scholar.google.com/scholar?q=hot+tub+water+maintenance+drain+cleaning+procedure Google Scholar
