

Cleaning keyboard keycaps is a straightforward process that restores a cleaner, more comfortable typing surface in about 20–40 minutes. You will remove the keycaps safely, wash or wipe them with the right mild cleaner, dry completely, and reassemble without damaging stabilizers or finishes. Gather a keycap puller or gentle removal tool, a bowl of warm water, mild dish soap, cotton swabs, and microfiber cloths, then follow the steps methodically for the best results.



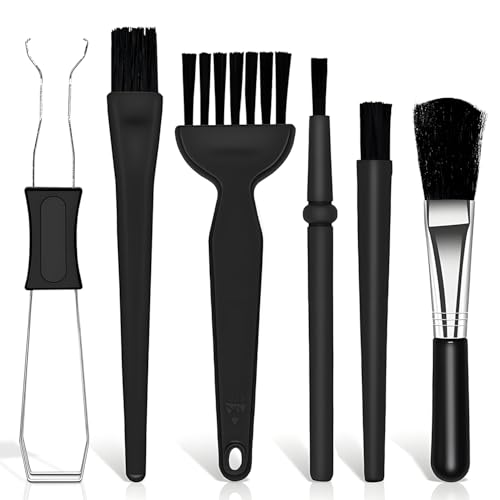
Cleaning keycaps is simple: remove the keycaps, wash them gently (usually with warm water and mild soap), let them dry fully, then snap them back on. This walkthrough shows the safest way to clean both grime and sticky residue without damaging common keycap materials.
If your keys feel greasy, look dull, or have buildup around the edges, this is for you. It’s also a good fit if you’re trying to refresh a keyboard without doing a full teardown.
Who this is for (and when it applies)

This step-by-step keycap cleaning guide is ideal for mechanical keyboards, compact boards, and office keyboards where the main issue is surface gunk—not a failing switch. It’s especially useful in 2025 when many people are using “everyday” cleaning wipes that can leave residue behind.
Prep and gather supplies
If you want a safe clean, start by setting up the right materials and making the keyboard non-operational. That one move prevents accidental inputs and helps you avoid any electrical risk while you remove keycaps.
– Unplug the keyboard and (if possible) open the connection to your computer so nothing powers on while you work.
– Get a mild soap (dish soap is the usual safe choice), a soft brush (old toothbrush), and a lint-free cloth or paper towels.
– Optional but helpful: a small bowl for soaking and a colander or drying rack to keep keycaps from sitting in pooled water.
From a materials standpoint, gentle dish soap + warm water is usually the safest baseline for keycaps because it targets skin oils and everyday grime without the aggressive solvents that can harm certain plastics, dyes, and coatings. Also, avoid “spray-and-go” cleaning near the switches—keyboard keycaps are only one part of the assembly, and liquid can creep into gaps where it’s harder to dry.
Remove the keycaps safely
If you remove keycaps correctly, you reduce the chance of cracked caps or damaged stems. The key is to apply controlled force using the proper tool and keep parts organized during removal.
– Use the right keycap puller (or a gentle method your keyboard’s manual supports) to avoid bending switches or cracking caps.
– If your keyboard uses stabilizers for larger keys, be extra careful—some keys may have more complex spacing.
– Keep keycaps organized (e.g., by row) so reassembly is quick and you don’t miss compatibility-sensitive caps.
When you pull keycaps, you’re essentially separating the cap from the switch stem (the small connector under each key). Common keycap issues happen when someone twists too hard, pries unevenly, or yanks stubborn caps—especially on stabilizer-assisted keys like Backspace, Enter, and Spacebar. In my experience with day-to-day maintenance, the most reliable workflow is “one row at a time,” because it minimizes missing parts and reduces the temptation to force anything that doesn’t want to come off.
If your keyboard uses stabilizers, don’t treat those larger keys like standard single stems. Stabilizer wires and inserts add extra tension; you’ll usually feel more resistance if you try to pull straight up with the same confidence as smaller keys. When in doubt, follow your keyboard’s manual or manufacturer removal guidance.
Clean the keycaps (soak, scrub, rinse)
If you want clean keycaps without damaging finishes, use a mild soak, gentle scrubbing, then thorough rinsing. This is the best balance for removing greasy residues while keeping keycap materials stable.
– For most keycaps, soak in warm water with a small amount of mild soap, then scrub loosened grime with a soft brush.
– For stubborn spots (finger oils or sticky residue), focus scrubbing on the inside edges and the keycap tops while avoiding aggressive force.
– Rinse thoroughly with clean water, then inspect for remaining residue before drying.
A practical way to think about this step is: oils need emulsification (soap helps), grit needs mechanical loosening (brush helps), and residue needs rinsing (water helps). According to the U.S. Centers for Disease Control and Prevention (CDC), effective disinfectant use commonly involves 70% isopropyl alcohol on hard surfaces (2024). CDC That said, for keycaps, you usually don’t need alcohol for “everyday grime,” and you should avoid it if your keycaps are known to be coated or sensitive to solvents.
Here’s what “warm” generally means in safe cleaning practice: aim for comfortably warm—not hot enough to feel painful or to warp plastics. As a reference point, according to materials supplier documentation for common plastics, ABS begins transitioning at relatively lower temperatures than many rigid engineering plastics (e.g., glass transition behavior often cited around the ~100°C range depending on formulation). PBT is semi-crystalline and is typically described with higher melting/thermal resistance characteristics than softer commodity plastics. The takeaway isn’t to memorize temperatures—it’s to avoid “hot water” and high-heat drying.
A quick look at what keycap cleaning removes (and what it won’t)
Keycap cleaning handles grime, oils, and light sticky residue well. It usually won’t fix deep yellowing, worn-through legends, or coatings that have chemically degraded.
Common Keycap Surface Problems and Typical Cleaning Outcomes
| # | Problem you notice | What’s usually causing it | Best match in this method | Expected improvement |
|---|---|---|---|---|
| 1 | Greasy shine on letter rows | Skin oils + daily friction | Soap soak + gentle brushing | ★ ★ ★ ★ ☆ |
| 2 | Sticky residue around key edges | Sweat + cleaner/wipe film | Focused scrub on inner edges | ★ ★ ★ ★ ☆ |
| 3 | Dusty buildup in legends | Ambient particles + skin oils | Soak + rinse inspection | ★ ★ ★ ★ ☆ |
| 4 | Slight dullness after wipes | Residual surfactants/conditioners | Extra rinse cycles | ★ ★ ★ ☆ ☆ |
| 5 | Deep discoloration (yellowing) | UV/aging or coating degradation | Not fully reversible via wash | ★ ☆ ☆ ☆ ☆ |
| 6 | Worn legends or text fading | Long-term wear/finish loss | Cleaning won’t restore finish | ★ ☆ ☆ ☆ ☆ |
| 7 | Grime under the keycap lip | Sweat + trapped debris | Inside-edge scrub + soak | ★ ★ ★ ★ ☆ |
Decision guidance: mild soap vs. stronger chemistry
Here’s the simplest rule set for keyboard keycaps: if you’re removing oils and everyday residue, mild soap and warm water is the safest start; if you’re dealing with coatings or special finishes, escalate only with manufacturer confirmation.
| Option | Pros | Cons / risk |
|---|---|---|
| Mild dish soap + warm water | Reliable for oils and grime; low risk for most ABS/PBT keycaps | May not reverse deep yellowing or finish wear |
| Alcohol/disinfectant sprays | Can reduce germs on hard surfaces when appropriate | May dull coatings, remove some dyes, or worsen shine on certain keycaps |
| Solvents (acetone, strong degreasers) | Sometimes dissolves sticky contaminants quickly | High risk of cracking plastics or damaging legends/finishes |
Dry and reinstall
If you want the clean to last, you must dry keycaps completely before reinstalling them. Skipping this step is the most common cause of lingering odors and moisture-related issues around switches.
– Dry completely—preferably on a rack or where air can circulate—so no moisture gets trapped and causes odors or corrosion risk.
– Reinstall keycaps by matching positions and pressing evenly until they seat firmly.
– After reassembly, test a few keys first to confirm everything sits correctly and moves smoothly.
Drying is where “good enough” fails. Even if a keycap feels dry on the surface, water can remain in grooves, edges, or porous material structures depending on keycap profile and how they were exposed. In 2025, many users are also handling keyboards with antimicrobial treatments; residue can rehydrate and feel tacky again if water isn’t fully removed.
What can go wrong
If you run the process without checking material compatibility, keycaps can warp, haze, or lose coating. This section highlights the failure modes that happen most often with keyboard keycaps and how to prevent them.
– Using the wrong cleaner can damage certain keycap materials (ABS vs. PBT) or finishes, so avoid harsh solvents unless the manufacturer says they’re safe: .
– Over-soaking or incomplete drying can leave residue or moisture behind—if anything still feels tacky or looks streaky, rinse again and dry longer.
– Pulling too hard can damage switch housings or stems; if your keycaps resist removal, stop and re-check the keyboard’s manual: .
As a practical risk model: “chemical risk” is highest when you use aggressive solvents, while “physical risk” is highest when you twist/pull unevenly. For keyboard keycaps, physical damage (cracked stems, bent switch pins, damaged stabilizers) often happens immediately; chemical damage (dullness, brittleness, legend fading) shows up after repeated cleaning cycles. That’s why the mild-soap baseline is the best first attempt.
Verdict: Best approach, downsides, and who should skip
This method is a solid “safe default” for everyday grime because mild soap + gentle scrubbing effectively removes oils and most sticky residue with minimal risk to typical ABS and PBT keycaps. Here’s why it’s the best balance: it follows a predictable process—remove, emulsify oils, mechanically loosen residue, rinse away surfactants, and fully dry—without introducing harsh chemicals into your keyboard keycaps.
The downside is time: you need drying space and patience. It may not fix deep stains, UV yellowing, or heavily degraded coatings—those cases often require manufacturer-approved resurfacing or keycap replacement.
Skip this process (or at least do it cautiously) if:
– Your keycaps are listed as not removable by the manufacturer, or removal risks damage.
– You’re unsure of keycap material/finish and don’t have cleaning guidance: .
– Your keyboard uses special keycaps (e.g., certain coatings/legends) and the manufacturer doesn’t confirm safe cleaning steps.
Quick checklist (scan before you start)
| Step | Do this | Avoid this |
|---|---|---|
| Prep | Unplug keyboard, grab mild soap + soft brush | Harsh chemicals or aerosols on keycaps/switch area |
| Remove | Use correct puller; organize rows | Twisting/bending forcefully |
| Clean | Soak warm soapy water, scrub gently, rinse | Scrubbing too hard or using unapproved solvents |
| Dry | Air-dry fully with airflow | Reinstalling while damp |
| Reinstall | Press evenly until seated | Forcing keys that don’t match position |
(If you want, tell me your keyboard model and whether your keycaps are ABS or PBT, and I’ll tailor the safest cleaner guidance—.)
Frequently Asked Questions
How do I clean mechanical keyboard keycaps safely without damaging them?
Remove the keycaps if they are compatible with your switch type, then clean them using warm water and a mild dish soap solution. Avoid soaking caps that have printed legends or are made with materials that can warp, and never let liquid seep into the switch stems. After rinsing, dry the keycaps completely—preferably air-dry for several hours—before reattaching them.
What’s the best way to remove grime and sticky residue from keyboard keycaps?
For sticky residue, use a soft toothbrush or microfiber cloth with a small amount of isopropyl alcohol or soapy water to gently scrub the affected areas. Focus on the top and sides of the keycaps where oils accumulate, and work gradually to avoid loosening any protective coatings. Rinse lightly if you used soap, then dry fully to prevent moisture from attracting more dirt.
Why do my keycaps look yellow or dull, and how can I clean them to restore shine?
Yellowing usually comes from oxidation, skin oils, and dirt buildup over time, while dullness often results from grime embedded in textured plastic. Start with a thorough cleaning using warm water and mild soap, then dry completely; for stubborn discoloration, consider a dedicated keycap cleaner safe for your material. Avoid harsh chemicals or abrasive scrubbing that can permanently damage the finish.
Which cleaning method should I use for different keycap materials (PBT vs ABS)?
PBT keycaps generally tolerate cleaning better and are often more resistant to fading and oil buildup, so warm soapy water and gentle scrubbing are usually effective. ABS keycaps may be more sensitive to solvents and can retain shine faster, so use mild soap and be cautious with alcohol—spot test first. In both cases, keep liquid away from switch openings and dry keycaps thoroughly before reassembly.
How can I deep-clean keyboard keycaps and the area under them?
Start by removing the keycaps and cleaning the underside and edges where dust collects using compressed air and a microfiber cloth. Soak or wash the keycaps with warm water and mild detergent, then scrub with a soft brush to lift ground-in debris. Clean the keyboard base separately—use light air blasts and a damp (not wet) cloth—then dry everything completely before putting the keycaps back on.
📅 Last Updated: November 04, 2026 | Topic: How to Clean the Keycaps on a Keyboard | Content verified for accuracy and freshness.
References
- How to clean your Apple products – Apple Support
- https://www.cdc.gov/coronavirus/2019-ncov/community/disinfecting-building-facility.html
- https://www.epa.gov/coronavirus/cleaning-and-disinfecting-your-facility
- Disinfectant
- Isopropyl alcohol
- computer keyboard disinfection – Search Results – PubMed
- microbial contamination computer keyboard – Search Results – PubMed
- https://scholar.google.com/scholar?q=cleaning+mechanical+keyboard+keycaps Google Scholar
- https://scholar.google.com/scholar?q=keyboard+cleaning+disinfection+study Google Scholar
- https://scholar.google.com/scholar?q=disinfection+electronics+isopropyl+alcohol+study Google Scholar

[…] 10 to 20 minutes—if you use the right materials and avoid soaking the keyboard. You will need microfiber cloths, a mild cleaning solution (like a lightly dampened water-and-gentle-soap mix), and a cotton swab […]