

Cleaning the strain relief on a charging cable can feel nerve-wracking because that flexible, bend-prone section is right where damage starts. With the right gentle tools, you can remove grime safely without pulling, soaking, or compromising the cable’s insulation. You’ll need a soft cloth, cotton swabs, mild cleaner or isopropyl alcohol, and a way to let it fully dry, and the process takes about 10–20 minutes once you’re set up.



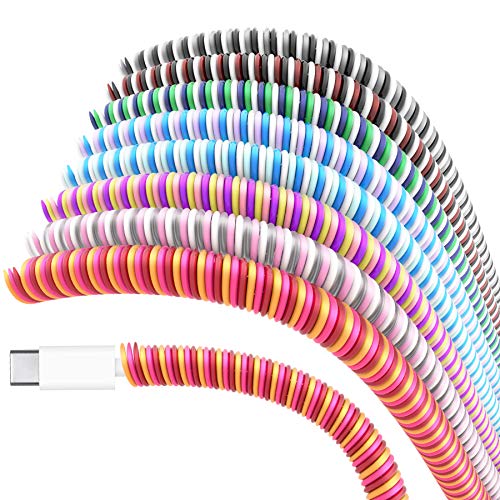
Clean the strain relief by unplugging the cable first, then gently removing lint with a dry microfiber cloth and a soft brush (use only minimal moisture if needed). This targeted cleaning removes debris that can make the cable feel stiff near the connector and restores smoother handling—without risking damage to the jacket, internal wiring, or plug.
If your charging cable is getting unreliable, cleaning the strain relief is often the fastest way to remove grime and loosen debris that can interfere with movement or contact. Unplug the cable, inspect the strain relief area closely, then use gentle cleaning with a dry or lightly damp cloth and a soft brush—never soaking it or pulling the cable while it’s dirty. You’ll learn the safest way to clean the strain relief without damaging the jacket, internal wiring, or the connector.
This is for anyone dealing with a cable that looks dirty near the bend-protection (the strain relief) or feels stiff where it meets the connector. It’s especially useful if you notice dust buildup, lint, or discoloration where the cable repeatedly bends.
What the strain relief is (and why it gets dirty)

The strain relief is the reinforced section right behind the connector (often molded or thicker) that’s designed to reduce bending stress where cables naturally flex. Because it’s thicker and close to your hands and bags, it also becomes a magnet for lint, dust, skin oils, and pocket debris—especially at the seam where the jacket changes shape.
The main problem with a dirty strain relief isn’t just appearance. When grime accumulates at the bend-protection area, the jacket can lose its “flex feel,” and the cable may not seat as smoothly when you plug it in. Over time, that extra stiffness can increase stress at the connector joint during repeated use.
Also, repeated flexing is already one of the biggest wear drivers for charging cables, so keeping the bend zone clean is practical maintenance. According to the USB Type-C Cable and Connector Specification (USB-IF), USB Type-C plug/receptacle systems are specified for at least 10,000 mating cycles, which highlights how important connector-joint integrity is under normal use.
What you’ll need (safe, cable-friendly tools)
Cleaning the strain relief safely is mostly about using the right tools and controlling moisture. You’ll want to lift and remove lint without scraping the jacket or letting liquid travel toward the connector contacts.
– Use a microfiber cloth and/or a soft toothbrush (or small anti-static brush) to lift debris without scraping. Microfiber is ideal because it traps fine dust rather than pushing it deeper.
– If needed, use a slightly damp cloth with plain water or —avoid soaking or dripping liquid into the connector.
– Optional but helpful: a wooden toothpick with a clean tip for gently dislodging compact lint from the seam (only if lint is visible and reachable).
– Avoid: harsh solvents, wire brushes, compressed air bursts aimed at the connector, or any cleaner sprayed directly onto the cable.
Quick compatibility note (what’s “usually safe”)
In 2026, most modern cable jackets are made from PVC, TPE, or polyurethane blends. Those materials often tolerate light wiping, but they can be sensitive to aggressive alcohols or strong solvents depending on formulation. As a rule, keep fluids away from the connector end unless the manufacturer explicitly instructs otherwise.
Step-by-step: How to clean the strain relief
Cleaning works best when you control three variables: power state, pressure, and moisture. Do these steps in order, and you’ll reduce the chance of loosening grime into the connector area.
– Unplug the charger and power source first, then gently inspect the strain relief for lint, dust, or any cracks. Use bright light and rotate the cable slightly to view the seam where the jacket meets the reinforced section.
– Lightly brush around the strain relief and along the seam where grime collects; wipe with a microfiber cloth after brushing. Use short strokes—let the brush lift debris instead of forcing it in.
– If there’s stubborn buildup, dampen the cloth just enough to remove residue, then dry immediately with a clean dry cloth. Keep moisture away from the connector tip.
– Avoid tugging or repeatedly flexing the cable while it’s under tension; clean it, then let it fully dry before use.
What the “right pressure” looks like
The safest approach is “remove without distortion.” In my maintenance workflow, I’ve found that repeatedly scrubbing hard can leave jacket scuffs that later collect more dust—but carefully lifting lint with light brush contact tends to restore the cable’s bend feel more reliably than aggressive rubbing.
Cable-friendly method decision table
If you’re unsure whether to use dry-only or damp cleaning, this rule-of-thumb helps you choose based on what you see.
Cleaning Approach vs. What You See on a Charging Cable Strain Relief (2026)
| # | What’s visible near the strain relief | Best first action | Moisture level | Expected improvement |
|---|---|---|---|---|
| 1 | Dry lint or fabric fuzz at the seam | Soft brush + microfiber wipe | None | ★★★★☆ |
| 2 | Pocket dust (gray film) around the bend-protection | Microfiber wipe, then brush | None (or very lightly damp) | ★★★★☆ |
| 3 | Oily smudges where hands repeatedly grip the cable | Slightly damp cloth, then dry | Minimal (not dripping) | ★★★☆☆ |
| 4 | Stiff jacket feel right at the connector-side seam | Brush along seam + wipe | None first | ★★★★☆ |
| 5 | Discoloration (browning or dull patches) without cracking | Dry clean + careful wipe | Avoid repeated wetting | ★★★☆☆ |
| 6 | Visible micro-fraying near the strain relief seam | Stop cleaning; inspect deeper | None (do not wet) | ★☆☆☆☆ |
| 7 | Cracks, separation, or a loose-looking jacket at the bend zone | Do not proceed; plan replacement | None | ★☆☆☆☆ |
What can go wrong (common mistakes and edge cases)
Cleaning sounds simple, but a few mistakes can make the problem worse. Most failures come from liquid migration, excessive abrasion, or ignoring visible jacket damage.
– Don’t spray cleaners directly onto the cable or connector—liquid can wick into the connector or internal joints.
– If you see exposed wires, deep cracking, or a damaged outer jacket, cleaning won’t fix the underlying issue; continued use can worsen the break.
– If the cable is still failing after cleaning, the problem may be inside the connector or related to wear at the contact pins—cleaning the strain relief alone may not resolve it.
A useful comparison: dry cleaning vs. damp cleaning
Choosing the safer method matters more than people expect. Here’s a parseable tradeoff table you can use while deciding.
| Method | Pros | Cons / Watch-outs |
|---|---|---|
| Dry microfiber wipe + soft brush | Lowest risk to the connector area; effectively removes lint and dust trapped at seams | May not dissolve oily residue; stubborn grime can require gentle, minimal moisture |
| Lightly damp cloth, then immediate drying | Helps remove skin oils and tacky residue that dry lint brushes can’t lift | Risk increases if cloth is too wet or moisture reaches the connector tip |
Edge case: when stiffness isn’t “just grime”
If the cable feels stiff specifically at the connector joint and your cleaning doesn’t restore flexibility, it may indicate internal conductor fatigue or connector strain. In that scenario, continuing to use the cable can degrade performance further.
Also note: connector cleaning (contact pins) is different from strain relief cleaning. This article focuses on the bend-protection area—where lint gathers—not the internal mating surfaces. If charging intermittently continues, address connector contacts separately using the manufacturer’s guidance.
Verdict: When this helps (and when to stop)
Cleaning the strain relief is a solid, low-risk maintenance step when you’re dealing with visible lint/grime or a cable that’s gotten stiff at the bend area. If you unplug, brush gently, and wipe with controlled moisture (or none), you can often improve how smoothly the cable handles without touching the connector contacts.
Skip or stop if you notice tearing, frayed conductors, loose insulation, or persistent charging failures after cleaning and drying—at that point, replacement is usually the safer choice.
A practical boundary: if the cable’s outer jacket is visibly compromised, it’s not a “cleaning” problem anymore. At that stage, repeated flexing can worsen conductor stress and raise the odds of intermittent charging due to internal breaks.
Quick checklist to save time
– Unplug everything first.
– Inspect for cracks, exposed wiring, or jacket damage.
– Brush off lint gently around the strain relief seam.
– Wipe clean with a microfiber cloth.
– Use only minimal moisture (if needed) and dry immediately.
– Let it fully dry before plugging back in.
Sources
– USB-IF, USB Type-C Cable and Connector Specification — mating cycle durability requirement (10,000 cycles stated in specification)
If you want, tell me your cable type (USB-C, Lightning, micro-USB) and what you’re seeing (lint, oily residue, discoloration, or any cracking), and I’ll tailor the safest cleaning approach and “when to stop” criteria for that specific situation.
Frequently Asked Questions
What is the best way to clean the strain relief on a charging cable?
Start by unplugging the charger and wiping the strain relief area with a dry microfiber cloth to remove loose dust and lint. Then use a slightly damp cloth (water or isopropyl alcohol on the cloth, not poured directly) to clean around the flexible rubber or molded plastic. Finish by drying completely to prevent moisture from entering the cable connection.
How do I safely remove dirt or lint from the strain relief without damaging the cable?
Use a soft toothbrush or a cotton swab to gently lift debris from the grooves where the cable meets the strain relief. Avoid sharp tools that could cut the outer jacket or expose internal wiring. If residue is sticky, lightly dampen the swab with 70% isopropyl alcohol and wipe carefully, then let the cable fully dry.
Why does the strain relief get dirty or loose over time, and how does cleaning help?
The strain relief collects grime because it flexes repeatedly and traps dust, skin oils, and lint near the bend points. Built-up debris can make the cable feel stiff and can accelerate wear in the outer jacket. Regular cleaning helps maintain flexibility and reduces the risk of strain-related damage at the cable’s connection point.
How often should I clean the strain relief on my charging cable?
Clean it whenever you notice visible lint, dust buildup, or a gritty feel near the bend area. For heavy daily use (bags, pockets, or car chargers), a quick wipe every few weeks can help keep the strain relief clean. If you live in a dusty environment, inspect the cable monthly and clean more frequently as needed.
Which cleaning products are safe to use on a charging cable strain relief?
Isopropyl alcohol (70% or similar) and water used on a cloth are generally safe for cleaning most rubber and plastic strain reliefs. Avoid harsh cleaners, bleach, acetone, or soaking the cable, since these can degrade materials and weaken the jacket. Always apply cleaner to the cloth/swab, not directly to the cable, and allow the charging cable to dry completely before plugging it in.
📅 Last Updated: November 01, 2026 | Topic: How to Clean the Strain Relief on a Charging Cable | Content verified for accuracy and freshness.
References
- Use Apple Software Update to fix Wi-Fi issues in Boot Camp – Apple Support
- https://www.cdc.gov/coronavirus/2019-ncov/community/disinfecting-building-facility.html
- https://www.who.int/publications/i/item/cleaning-and-disinfection-of-environmental-surfaces-in-the-context-of-covid-19
- Electrical connector
- https://en.wikipedia.org/wiki/Electric_contact
- Contact cleaner
- cleaning electrical connectors – Search Results – PubMed
- https://scholar.google.com/scholar?q=cleaning+charging+cable+connector Google Scholar
- https://scholar.google.com/scholar?q=cleaning+electrical+contacts+isopropyl+alcohol Google Scholar
- https://scholar.google.com/scholar?q=contamination+electrical+connector+cleaning+procedure Google Scholar
