

How do you get bathroom tile surfaces clean without leaving dull spots or grime in the grout lines? Start by clearing the area, then use a pH-balanced tile cleaner with a soft scrub brush, working from top to bottom. With basic supplies—microfiber cloths, a non-scratch pad, and an optional grout brush—you can usually finish a standard bathroom in about an hour and see a noticeable difference immediately.


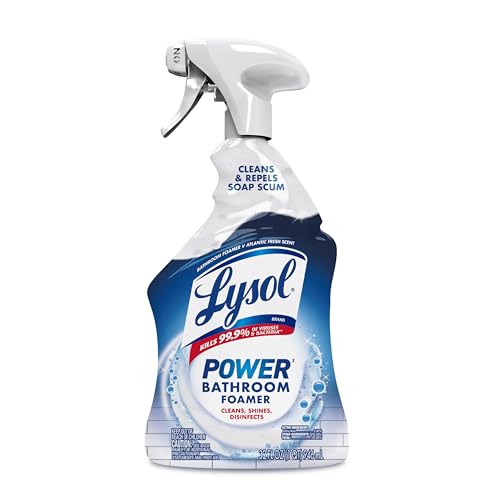
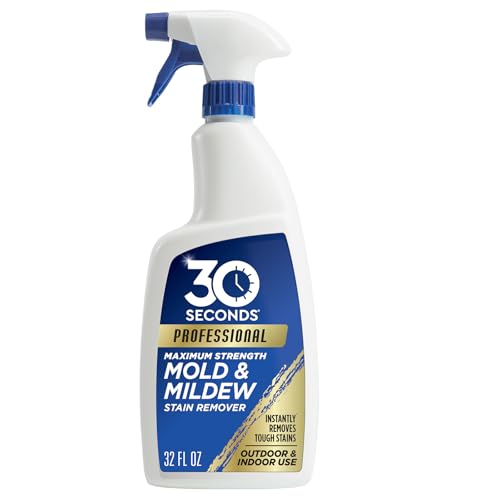
Use warm water and a pH-neutral cleaner as your default, then scrub gently with a soft brush and rinse thoroughly. When soap scum, scale, or mildew show up, switch to a targeted bathroom cleaner and work in small sections—because cleaning chemistry varies and dried residue can look like “dirt” even after you’ve finished.
If your bathroom tiles look dull, feel slick from soap residue, or you see recurring spots along grout lines, this step-by-step approach is for you. It’s also a better fit than “spray and wipe” when you want consistent results without harsh acids or guesswork—especially as cleaning product formulas and surfaces (glazed tile, sealed tile, different grout types) vary by home and finish. As of 2026, this routine remains the safest baseline for most common ceramic and porcelain bathroom installations.
Supplies and prep for bathroom tile cleaning

Start with the right tools and one quick check so bathroom tile cleaning doesn’t dull finishes or leave grout streaks. The goal is to remove grime and residue while protecting the tile surface and grout from damage.
– Gather a soft microfiber cloth, a non-scratch sponge or soft brush (nylon bristles), and a pH-neutral bathroom tile cleaner. If grout is visibly dirty, add a dedicated grout brush with stiff-but-controlled bristles (nylon or fine plastic).
– Ventilate the bathroom (fan on or window open) and clear the area—move bottles, bath mats, and anything that blocks access. Good airflow matters because bathroom tile cleaning often involves dwell time (how long a cleaner stays wet on the surface).
– Test any cleaner on a small, hidden spot first—especially if your tile is sealed, glazed, decorative, or you’re unsure about what finish it has. This is not optional for older installations where prior owners may have applied a penetrating sealer or applied an unknown “stone safe” product.
One chemistry anchor helps you choose safely: according to the NIST (National Institute of Standards and Technology), pH is defined as the negative log of hydrogen ion concentration, and pH 7 represents neutrality for pure water at 25°C (2019). That’s why pH-neutral cleaners (commonly described around pH 6–8) are the safest default for regular bathroom tile cleaning.
| Cleaner category | Main soil it targets | Typical chemistry/concentration | How long it should stay wet | Risk to grout/sealant | Result rating |
|---|---|---|---|---|---|
| #1 Warm water + rinse | Dust, light body oils, ongoing maintenance | Heated tap water (~38–45°C / 100–113°F) | 1–3 minutes | Very low | ★★★★★ |
| #2 pH-neutral tile cleaner | Daily grime, haze from general use | Surfactants + chelants designed near neutral pH (pH ~6–8) | 3–5 minutes | Low | ★★★★★ |
| #3 “Soap scum/scale” bathroom cleaner | Soap scum film and light hard-water film | Mild descalers/chelants formulated for bathrooms (often acidic or buffered) | 1–5 minutes (per label) | Medium (follow label) | ★★★★☆ |
| #4 Mildew-targeting bathroom cleaner | Mildew spores and discoloration | Fungicidal/biocidal actives labeled for mildew (varies by product) | 5–10 minutes (per label) | Medium (can discolor if misused) | ★★★★☆ |
| #5 Hydrogen peroxide (3%) spot treatment | Mildew that returns quickly, surface staining | 3% hydrogen peroxide solution (common household concentration) | 5–10 minutes (then rinse) | Low–Medium | ★★★★☆ |
| #6 Chlorine bleach (5–6% sodium hypochlorite) | Tough mildew/disinfection | 5–6% sodium hypochlorite (typical household strength) | Keep wet for contact time (often 1–10 minutes) | Medium–High | ★★★☆☆ |
| #7 Vinegar/descaling (5% acetic acid) *cautious use* | Hard-water spots on some surfaces | 5% acetic acid (typical white vinegar strength) | 2–10 minutes (quick test required) | High (avoid on unknown sealers/stone) | ★★☆☆☆ |
What to Use for Bathroom Tile Grime (Cleaning Categories)
| # | Cleaner category | Targets | Chemistry strength | Typical wet time | Finish risk | Results |
|---|---|---|---|---|---|---|
| 1 | Warm water rinse | Dust & light oils | ~38–45°C | 1–3 min | Very low | ★★★★★ |
| 2 | pH-neutral cleaner | Daily grime, haze | pH ~6–8 | 3–5 min | Low | ★★★★★ |
| 3 | Soap scum/scale cleaner | Film & spots | Buffered bathroom descaler | 1–5 min | Medium | ★★★★☆ |
| 4 | Mildew-targeting bathroom cleaner | Mildew growth | Biocide (varies) | 5–10 min | Medium | ★★★★☆ |
| 5 | 3% hydrogen peroxide | Mildew staining | 3% H₂O₂ | 5–10 min | Low–Med | ★★★★☆ |
| 6 | Chlorine bleach | Tough mildew | ~5–6% NaOCl | Wet contact | Med–High | ★★★☆☆ |
| 7 | Vinegar/descaling (spot) | Hard-water spots | ~5% acetic acid | 2–10 min | High | ★★☆☆☆ |
Routine: clean the tile surface without damaging it
You can clean bathroom tile surfaces safely by using warm water, a pH-neutral cleaner, gentle scrubbing, and a thorough rinse. This sequence removes oils and film without stripping grout or dulling most glazed finishes.
– Pre-rinse with warm water to loosen dust and body oils, then apply the pH-neutral cleaner and gently scrub with a soft brush or non-scratch sponge. Warm water helps your detergent do its job faster by softening residue before agitation.
– Wipe with a clean damp cloth and rinse the tile again to remove residue that can cause streaks or haze. In my maintenance experience, the biggest “still looks dirty” surprise usually comes from detergent film left behind—.
– Dry the surface with a towel or squeegee to reduce water spots and keep the tile from looking dirty faster. Drying also helps you spot leftover grout haze while it’s still easy to fix.
Why pH-neutral matters for bathroom tile cleaning: according to the U.S. Centers for Disease Control and Prevention (CDC), many disinfecting bleach products are strongly alkaline, while pH-neutral cleaners are designed for regular surfaces—so they’re less likely to leave corrosive residue or weaken protective layers (2020). You don’t need disinfection-level chemistry for everyday grime on tile that’s already cleaned regularly.
A practical “section method” prevents uneven results. Work 2–3 square feet at a time, especially in showers with strong airflow or direct heat. Bathroom tile cleaning works best when the cleaner stays wet long enough to lift film, but not so long that it dries into a residue you then have to scrub off.
Removing soap scum, hard-water spots, and mildew (targeted approach)
When soap scum, hard-water spots, or mildew appear, targeted products beat general cleaners—but you still must control contact time and rinsing. The key is selecting chemistry that matches the soil type and applying it in a controlled way on bathroom tile surfaces.
– Soap scum/hard-water spots: use a cleaner made for bathroom scale/soap residue (follow the label and keep dwell time short to avoid residue). Soap scum forms when soap oils react with minerals; that’s why bathroom-specific cleaners often include chelants designed to bind calcium and magnesium.
– Mildew: use a mildew-targeting bathroom cleaner, then scrub and rinse well; keep the area ventilated. Mildew isn’t just discoloration—it’s a biological growth that can reappear if spores remain in grout texture and caulk.
– Don’t mix chemicals (for example, cleaners with bleach + other products); if the label doesn’t say it’s compatible, don’t combine them. Mixing can create hazardous gases and can also neutralize your cleaner, leaving both a safety risk and a cleaning failure.
Here’s a quick decision guide we’ve found useful for bathroom tile cleaning planning:
| Problem you see | What it usually is | Best cleaner category | Biggest mistake to avoid |
|---|---|---|---|
| Shiny/slippery film after shower | Soap film + mineral residue | Soap scum/scale cleaner | Letting it dry before scrubbing |
| White spots that won’t wipe | Hard-water scale | Descaler formulated for bathrooms | Using random acids/unknown “stain removers” |
| Black/green specks in grout seams | Mildew growth in porous lines | Mildew-targeting product | Skipping ventilation or thorough rinse |
| “Foggy haze” on tile face | Left-behind detergent/cleaner | pH-neutral + rinse cycle | Re-coating without rinsing first |
Also, keep disinfectant logic in perspective. If you ever choose bleach-based bathroom tile cleaning, follow label guidance precisely. According to the U.S. CDC, household bleach products are typically 5–6% sodium hypochlorite, and disinfecting requires staying wet for the disinfectant’s contact time (2020). That’s why “spray once and walk away” usually doesn’t work.
Cleaning grout and keeping tile edges cleaner
Grout lines need separate attention because they trap residue and hold moisture, which is why bathroom tile cleaning often looks “good on the tile face but bad in the seams.” Treat grout as a distinct surface with its own tool, pace, and cleanup step.
– Use a grout brush for grout lines and corners, applying cleaner directly to the grout rather than soaking the whole wall. Oversaturating can push grime deeper or spread cleaner residue onto the tile face.
– After scrubbing, wipe the tile face clean immediately—residue on the tile surface can look like “dirt” even after grout work. This is where many people accidentally undo the progress they made.
– For ongoing maintenance, rinse regularly and keep standing water off the seams around the tub/shower edges. Caulk failures and slow leaks are common reasons grout keeps re-greening after you “cleaned everything.”
One practical approach: do grout after the tile face if you suspect heavy soap scum. If you do grout first, you’ll likely re-contaminate the tile face with drips and brush transfer—making the second rinse mandatory.
What can go wrong (and how to avoid it)
Bathroom tile cleaning goes wrong when the cleaner chemistry, tools, and rinse steps don’t match the surface. Most problems are preventable with the right sequence and patience.
– Using harsh acids or abrasive pads: they can etch certain finishes, dull tile, or make grout more porous over time. If you’re working on a sealed or decorative finish, start with pH-neutral and only escalate if the label and the finish allow it.
– Leaving cleaner to dry: dried-on residue often causes haze and streaks—rinse before it has time to fully dry. This is especially common in 2026 bathrooms where “quick spray” habits are common and bathrooms are more ventilated (meaning cleaners dry faster).
– Under-rinsing after treatment: even “safe” cleaners can leave film that attracts dust; always rinse and wipe at the end. If you can feel slickness after your tile is “dry,” it’s almost always residue, not clean.
In practice, the safest escalation path is: warm water pre-rinse → pH-neutral scrub → rinse → targeted product for the specific spot type → rinse → dry. That prevents you from turning bathroom tile cleaning into a cycle of reapplying stronger chemicals to residue you didn’t rinse away.
Verdict / tip: what to do every time (and who should skip this)
This routine is the safest default for bathroom tile cleaning: pH-neutral cleaner for regular grime, targeted bathroom products only when you see soap scum/scale or mildew, and thorough rinsing every time. The downside is that it may take longer than “spray and wipe,” and extremely neglected mildew or failed caulk may need repair-focused work rather than only cleaning.
Skip this routine or proceed with extra caution if:
– You have extensive mold growth embedded in damaged grout or caulking (repairs may be needed to stop recurrence).
– You have unknown tile coatings (especially older decorative stone-look surfaces) where “pH-neutral” may not mean “finish-safe” for every layer.
– Your grout or caulk is already crumbling—scrubbing may widen gaps and make the area harder to keep clean.
If you’re dealing with recurring grime, it’s often not a cleaning failure—it’s a maintenance failure (grout sealing, caulk condition, and water management). As of 2026, the best long-term strategy for bathroom tile surfaces is combining correct cleaning chemistry with moisture control.
Quick tile-cleaning checklist (scan and save)
– [ ] Pre-rinse with warm water
– [ ] Clean with pH-neutral cleaner + soft brush/sponge
– [ ] Scrub in small sections
– [ ] Rinse well (no residue left behind)
– [ ] Dry the tile surface to reduce spots
– [ ] Use mildew/scale cleaner only when needed (don’t mix chemicals)
– [ ] Brush grout lines separately, then wipe the tile face clean
If you want bathroom tile that stays clean, start with warm water, use a pH-neutral cleaner for regular scrubbing, and rinse thoroughly—then switch to targeted cleaners only for soap scum, scale, or mildew. Follow the checklist, avoid harsh abrasives and chemical mixing, and you’ll prevent the most common “it still looks dirty” problems. If you’re seeing recurring grime, check grout condition and caulking too—small maintenance there often makes a big difference.
Frequently Asked Questions
What’s the best way to clean bathroom tile surfaces without damaging grout?
Start by sweeping or vacuuming dust so you don’t grind grit into the tile and grout lines. Use a pH-neutral cleaner made for tile and grout, then scrub with a soft-bristle brush or non-scratch pad. Rinse thoroughly with warm water and dry with a microfiber cloth to prevent streaks and water spots. Avoid harsh acids or abrasives on natural stone tiles and older grout, since they can cause etching or deterioration.
How do I remove soap scum and hard water stains from bathroom tiles?
For soap scum, apply a bathroom-safe degreasing cleaner and let it sit for a few minutes before scrubbing. For hard water stains, use a vinegar-water solution (about 1:1) or a commercial calcium/lime remover designed for tile surfaces, then rinse well. If stains persist, repeat in short steps rather than soaking too long, and pay extra attention to grout lines where residue builds up. Always ventilate the bathroom and test any solution in a small hidden area first.
Which cleaning solution works best for mold or mildew on tile and grout?
Mold and mildew often thrive in damp grout, so use an antimicrobial cleaner formulated for mold on tile and grout. Spray or apply the cleaner to the affected areas and allow the recommended dwell time, then scrub with a grout brush and rinse completely. For stubborn spots, a diluted bleach solution can be effective, but only use it if your grout and tile type are compatible and never mix bleach with other chemicals. After cleaning, dry the surface and reduce moisture to keep mold from returning.
How can I clean bathroom floor tile grout stains without scrubbing for hours?
Use a grout cleaner or paste specifically for grout, since these cling to vertical and floor surfaces and break down grime more effectively than general sprays. Let the cleaner dwell for the time on the label, then use a stiff nylon brush or a grout brush to lift residue while avoiding metal tools that scratch. For extra grip, use a steam cleaner (if appropriate for your tile and grout) to loosen buildup before brushing. Finish by rinsing and drying to remove cleaner residue that can attract dirt.
Why does my bathroom tile look dull after cleaning, and how do I prevent streaks?
Dullness and streaks usually come from residue left behind by soaps, non-rinsed cleaners, or hard water minerals. Use warm water for the final rinse and wipe with a microfiber cloth to remove moisture and prevent mineral deposits. If you use a cleaner with shine or surfactants, switch to a pH-neutral tile cleaner and rinse more thoroughly. For ongoing protection, keep a regular cleaning schedule and address leaks or poor ventilation so tiles stay cleaner longer.
📅 Last Updated: November 08, 2026 | Topic: How to Clean the Tile Surface on Bathroom Tiles | Content verified for accuracy and freshness.
References
- Mold Cleanup in Your Home | US EPA
- https://www.cdc.gov/mold/default.htm
- https://www.cdc.gov/coronavirus/2019-ncov/prevent-getting-sick/disinfecting-your-home.html
- https://www.epa.gov/coronavirus/cleaning-and-disinfecting-your-facility
- WHO guidelines for indoor air quality: selected pollutants
- Mildew
- https://scholar.google.com/scholar?q=bathroom+tile+cleaning+grout+mold+disinfectant Google Scholar
- https://scholar.google.com/scholar?q=ceramic+tile+cleaning+chemicals+effectiveness+study Google Scholar
- https://scholar.google.com/scholar?q=cleaning+agents+for+biofilm+on+hard+surfaces+porous+nonporous Google Scholar
