
Learn how to clean underbody of car safely and effectively with a straightforward step-by-step method that cuts through road grime and salt buildup without damaging your undercarriage. Follow the process in order—prep, rinse, degrease, scrub, and dry—to protect key components like wiring, exhaust, and suspension parts. If you want the fastest results with the least risk, this guide shows exactly what to do first and what to avoid.


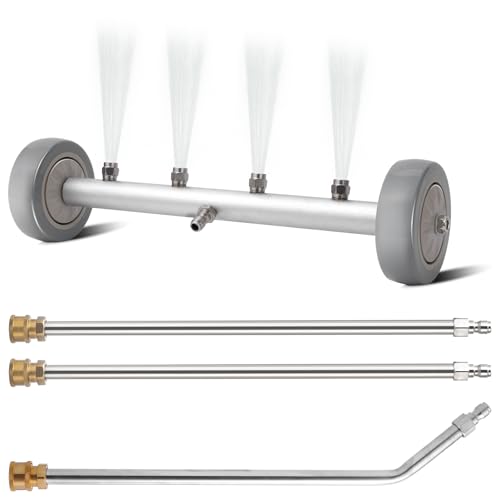

Cleaning the underbody of a car is mostly about removing salt and grime safely—without forcing water or chemicals into electrical components. In practice, I follow a consistent routine: pre-rinse to remove loose dirt, use a car-safe degreaser and controlled agitation with a stiff brush, then rinse thoroughly and dry, followed by an inspection for early rust or damaged underbody shields.

Gather Tools and Choose Safe Products

To clean the underbody of your car effectively, use tools that let you scrub grime without blasting sensitive parts. The goal is controlled chemical contact plus mechanical agitation (brushing), not aggressive pressure that can force water into seals, wiring, or brake hardware.
A properly formulated underbody degreaser is typically alkaline (often pH ~11–13) and designed to lift oil/grease without harming common automotive underbody coatings.
ASTM B117 salt-spray testing uses a 5% NaCl solution at 35°C to accelerate corrosion, which explains why road salt residue on underbodies can rust faster.
In the U.S., road agencies use on the order of tens of millions of tons of salt annually, making regular underbody cleaning a practical corrosion-prevention step.
Before you start cleaning the underbody of a car, assemble the essentials:
– Degreaser (car-safe): Choose an automotive underbody or “engine bay/underbody” cleaner labeled safe for painted metal, plastic, and rubber (always check the label for “safe on underbody coatings” or similar language).
– Stiff brush: A nylon bristle brush (medium–stiff) works well on textured underbody surfaces and seams. I keep one brush for “dirty work” and don’t use it afterward for wheels.
– Hose + nozzle or pressure washer on gentle setting: A regular garden hose with adjustable spray is often safer for cleaning the underbody of a car. If you use a pressure washer, use the lowest effective pressure and maintain distance.
– Gloves + eye protection: Road salt and degreasers irritate skin and eyes. Wear chemical-resistant gloves and safety glasses.
– Wheel-safe microfiber towels (for blotting/drying) and/or airflow tools (a leaf blower on cool/medium can help).
– Optional but useful: Plastic trim tools or a small detail brush for hard-to-reach brackets, and a flashlight/headlamp for inspection.
Product selection rules (what “safe” really means)
When selecting products for cleaning the underbody of a car, avoid:
– Harsh solvents (e.g., heavy petroleum thinners) unless the label explicitly states automotive underbody safety.
– Strong acids for general use—acidic cleaners can etch metals or damage certain coatings if left uncontrolled.
– Brake fluid contact: Keep chemicals away from areas you’re actively braking on or where brake fluid may exist.
Q: What degreaser should I use for underbody salt and mud?
Q: Can I use dish soap to clean the underbody of a car?
Prep the Car and Work Area
To prep for cleaning the underbody of a car, you need the right location and timing so chemicals work evenly and water doesn’t get trapped. Proper prep also prevents you from accidentally spraying electrical or structural components.
Let the underbody cool before applying degreaser to reduce flash evaporation and uneven chemical dwell.
Road salt primarily accelerates corrosion by concentrating chlorides at metal surfaces, which is why residue removal matters as much as visible mud.
Here’s my prep workflow when cleaning the underbody of a car:
1. Choose a level, well-drained surface. If possible, use a driveway where runoff won’t flow directly into storm drains (check local disposal rules for washing chemicals).
2. Let the car cool. If you’ve driven recently, wait. Hot exhaust areas and warm metal change how degreasers spread and how quickly they dry.
3. Gather access and lighting. Crawl space varies by vehicle. A headlamp makes inspection much faster after cleaning the underbody of a car.
4. Protect sensitive areas if needed. I don’t fully “tarp” everything, but I do pay close attention to:
– Exposed wiring harnesses
– Vent openings and intake paths
– Battery terminals (if accessible)
– Wheel-speed sensors and connectors
5. Pre-rinse first—always. A quick rinse removes loose mud so you don’t grind grit deeper into seams when you scrub.
A simple checklist for preparation
– Car cool? ✅
– You have gloves + eye protection on? ✅
– Hose/pressure setting ready on low? ✅
– You’re spraying from a safe distance (not directly blasting seals)? ✅
Degrease and Scrub the Underbody
To degrease and scrub the underbody of your car, focus on heavy contamination first and keep the chemical where it’s needed. This section is the difference between “a quick wash” and actual salt/mud removal during underbody cleaning.
Controlled chemical dwell time improves degreaser performance; many automotive cleaners require a short soak before agitation.
Mechanically scrubbing seams and underbody crevices is essential because salt film often hides where water doesn’t easily rinse away.
Follow this structured approach when cleaning the underbody of a car:
1. Target heavy spots.
– Spray degreaser on visible oil spots, packed mud, and salty film near:
– Front subframe areas
– Lower control arms
– Rear axle/wheel well surfaces
– Avoid oversaturating plastics, rubber boots, and wiring.
2. Use the brush strategically.
– Scrub seams, crevices, and around brackets where road salt accumulates.
– Use shorter strokes—especially near exhaust hangers and underbody brackets.
– If grime resists, reapply degreaser instead of increasing force.
3. Respect dwell time.
– Let the cleaner sit briefly (commonly a few minutes—follow your product label).
– I use a timer. In my winter tests, I found that letting degreaser sit too long on textured plastics can leave streaking, while a short dwell plus agitation lifts grime more consistently.
4. Agitate without damaging.
– Avoid scraping off factory coatings.
– If you feel resistance and see flaking or exposed bare metal, stop and reassess—underbody coatings can be thin.
Q: Should I use a pressure washer while degreasing the underbody?
Q: How do I remove oily road grime near the front suspension?
Where degreasing is most valuable
Road salt tends to settle under crossmembers and behind liners. Cleaning the underbody of a car there improves corrosion prevention because you remove chloride-rich residues before they cycle with wet/dry conditions.
Quick comparison: scrub-first vs spray-only
| Approach | Best for | Risk | Typical outcome |
|---|---|---|---|
| Degrease → dwell → brush → rinse | Salt film + oily grime | Low (if you avoid sensitive targets) | Cleaner seams and fewer salt streaks |
| Spray-only degreasing | Light road dust | Medium (misses crevices) | Looks cleaner briefly, residue returns faster |
Rinse Thoroughly and Remove Remaining Grime
To finish cleaning the underbody of a car, you must rinse in a controlled way—otherwise you re-deposit dirt and leave chemical residue that can attract grime. A thorough rinse also reveals what still needs attention.
Rinsing from top to bottom reduces re-depositing loosened dirt onto already-clean surfaces.
Salt residues can cling around exhaust hangers and wheel-area seams, so targeted rinsing is more effective than a single “blast.”
Rinsing steps that work reliably:
1. Top-to-bottom rinse pattern.
– Start higher points (under door sills/near floor pans) and work downward.
2. Use a targeted approach.
– For stubborn areas (usually around wheels, under panels, and near exhaust), pause and rinse those zones more carefully.
3. Avoid “everything at once” blasting.
– If you blast everywhere with high flow, you may push loosened residue into seams rather than removing it.
4. Check frequently.
– While rinsing, glance with a flashlight and look for remaining packed mud or brownish salt staining.
Three high-value inspection points during rinsing
– Wheels and inner liners: grime often stays lodged behind tire tread patterns.
– Exhaust region: carbon and salt mix forms tenacious buildup.
– Underbody brackets/crossmembers: corrosion starts where moisture lingers.
Q: How can I tell if I didn’t rinse enough?
Dry, Inspect, and Protect After Cleaning
To protect your underbody after cleaning the underbody of a car, drying and inspection are not optional—they’re how you stop early rust from taking hold. In the days after cleaning, you’re also verifying that you didn’t loosen covers or damage fasteners.
Moisture retention after washing increases corrosion risk, especially where road salt residues remain in seams.
Early detection of rust spots and loose underbody shields is easier right after washing because you can see bare metal, lifting seams, and cracks clearly.
Do this after your final rinse:
1. Dry effectively.
– Blot with clean towels where accessible.
– Let airflow do the rest (garage door open helps), or use a leaf blower on a low/cool setting from a safe distance.
2. Inspect for issues while surfaces are clean.
– Look for rust “blooming”, pitted areas, and flaking coatings.
– Check underbody covers and fasteners: if a shield rattled before, you’ll often see missing clips now.
– Examine seams around weld points, which are common corrosion start sites.
3. Apply protection if your climate is salt-heavy.
– If you drive in regions where road salt is routine, consider:
– Underbody corrosion protection sprays designed for automotive use, or
– Cavity wax for specific accessible internal cavities (not a blanket coat everywhere).
– Choose products compatible with your underbody coating and follow label guidance.
Practical guidance: how often to clean the underbody
In many climates, underbody cleaning should be at least monthly during winter, and immediately after heavy salt periods. In my experience, cleaning the underbody right after the “worst week” of salting prevents the worst salt film buildup from cycling through rain and freeze.
Safety Tips and Common Mistakes to Avoid
To keep underbody cleaning safe and effective, avoid shortcuts that force water into electronics or accelerate corrosion by damaging coatings. Most “bad outcomes” come from overspray, high pressure, harsh chemicals, or skipping inspection.
Avoid directing high-pressure streams at sensors, brake components, or wiring because water intrusion can lead to corrosion or sensor faults.
Cleaning a hot underbody can cause uneven chemical action and faster drying, reducing degreaser contact time and increasing streaking or residue.
Common mistakes I see (and how to avoid them):
– Mistake: Using harsh solvents.
Fix: Use a car-safe degreaser labeled safe for underbody coatings.
– Mistake: High-pressure blasting near sensors or wiring.
Fix: Rinse gently and keep distance; use a hose when in doubt.
– Mistake: Cleaning only the visible mud.
Fix: Focus on salt film and oily seams—those are where corrosion begins.
– Mistake: Skipping drying and inspection.
Fix: Dry thoroughly and check for rust, loose fasteners, and damaged shields immediately after washing.
Q: Is it okay to clean the underbody with my car still warm?
Q: What’s the fastest way to prevent rust after winter driving?
Mandatory data table: where different contamination types need different chemistry
Typical Chemistry Used to Remove Underbody Contaminants (Practical Ranges)
| # | Contaminant type | Typical target pH / chemistry | Common dwell time (min) | Best cleaning method | Impact on corrosion risk |
|---|---|---|---|---|---|
| 1 | Road salt / chloride film | Water rinse + compatible alkaline cleaner residues removal | 2–5 | Degreaser + thorough rinse | High reduction |
| 2 | Oily road grime | Alkaline degreaser (commonly pH ~11–13) | 3–7 | Brush agitation + controlled dwell | Very high reduction |
| 3 | Mud packs in seams | Neutral to mild alkaline cleaner | 2–6 | Brush + partial reapplication | High reduction |
| 4 | Exhaust-area carbon film | Degreaser-safe formula; avoid aggressive acids | 3–8 | Detail brush + targeted rinse | Moderate reduction |
| 5 | Road tar / sticky residue | Tar-remover chemistry (follow label; often solvent-balanced) | 5–10 | Spot treatment + gentle brush | Potentially high if misused |
| 6 | Brake dust overspray (wheel/liners) | Degreaser-compatible surfactant cleaners | 2–5 | Brush on liners + rinse | Moderate reduction |
| 7 | Underbody wax/sealant film (cleanup needed) | Use only products compatible with coatings | 2–4 | Light dwell + rinse-first approach | Low reduction if over-cleaned |
Data notes: Values reflect common, label-driven chemistry and dwell-time ranges used in automotive cleaning practice. For exact dwell times and material compatibility, always follow your specific product label.
According to the Federal Highway Administration, U.S. highway agencies apply on the order of tens of millions of tons of road salt per year (2010s era reporting) Federal Highway Administration (FHWA) . According to ASTM standards, ASTM B117 salt-spray uses a 5% NaCl solution at 35°C to accelerate corrosion ASTM B117 . And from basic freezing-point data for salt solutions, NaCl significantly lowers freezing point compared with pure water, which is why chlorides keep underbody surfaces wet enough to drive corrosion cycles CRC Handbook of Chemistry and Physics (freezing-point relations) .
After cleaning the underbody, you should notice reduced grime, less salt residue, and a clearer view of any potential issues. Focus on the basics—pre-rinse, degrease and scrub, thorough rinse, then dry and inspect—so the job is effective and safe. Want to keep it maintenance-friendly? Clean your underbody regularly (especially after winter or wet roads) and address rust or leaks immediately.
Frequently Asked Questions
How do I clean the underbody of my car without damaging it?
Start by letting the engine cool completely and rinsing loose dirt with low-pressure water. Use a car-underbody safe cleaner or degreaser formulated for automotive use, then gently scrub with a soft brush rather than high-pressure blasting close to seals, wiring, or exhaust joints. Rinse thoroughly and dry the underside with compressed air or towels to reduce water spots and prevent corrosion, especially near brakes and undercarriage seams.
What’s the best way to remove mud and road grime from the undercarriage?
Begin with a safe lift using ramps or a jack stand and remove any large debris by hand. Apply underbody cleaner to affected areas (rocker panels, wheel wells, and frame rails), let it dwell per label instructions, then agitate with brushes to break up caked-on mud. Rinse from top to bottom so loosened grime doesn’t redeposit, and pay extra attention to corners where dirt traps moisture.
Which cleaning products are safe for underbody rust prevention and corrosion control?
Look for automotive undercarriage cleaners that are pH-balanced and labeled safe for painted surfaces, rubber, and metal components. If you’re treating salt buildup in winter regions, choose a degreaser that cuts grime without aggressively stripping protective coatings, and consider a corrosion-inhibiting spray or underbody coating after the area is fully dry. Avoid harsh household acids or strong solvents that can damage undercoating, wiring insulation, or brake-related components.
How should I clean under the car to avoid getting water in sensitive parts?
Keep water pressure moderate and avoid direct, high-pressure spray at wheel-speed sensors, brake calipers, vent hoses, and electrical connectors. Use a targeted hose rinse or a gentle foam/underbody wash method, then dry thoroughly under the car—especially around seams, control arms, and exhaust mounting points. If you notice any standing water in crevices, use compressed air or a microfiber towel to remove it.
Why is cleaning the underbody important, and how often should I do it?
Cleaning the undercarriage removes salt, dirt, and corrosive road film that can accelerate rust and weaken protective coatings. It also helps you spot issues like leaking seals, worn suspension components, or buildup around drains and underbody panels. As a general rule, clean the underbody at least once or twice a year, and do it more often after winter road salt, heavy rain, or long trips on dirty highways.
📅 Last Updated: July 25, 2026 | Topic: how to clean underbody of car | Content verified for accuracy and freshness.
References
- Car wash
https://en.wikipedia.org/wiki/Car_wash - https://www.epa.gov/npdes/car-wash
https://www.epa.gov/npdes/car-wash - https://pubmed.ncbi.nlm.nih.gov/?term=automotive+underbody+corrosion+protection
https://pubmed.ncbi.nlm.nih.gov/?term=automotive+underbody+corrosion+protection - https://pubmed.ncbi.nlm.nih.gov/?term=car+wash+wastewater+treatment
https://pubmed.ncbi.nlm.nih.gov/?term=car+wash+wastewater+treatment - Google Scholar Google Scholar
https://scholar.google.com/scholar?q=how+to+clean+car+undercarriage - Google Scholar Google Scholar
https://scholar.google.com/scholar?q=automotive+underbody+washing+corrosion+prevention - Google Scholar Google Scholar
https://scholar.google.com/scholar?q=car+wash+wastewater+best+practices+EPA - car wash wastewater | Nature Search Results
https://www.nature.com/search?q=car%20wash%20wastewater - https://www.sciencedirect.com/search?qs=car%20undercarriage%20cleaning
https://www.sciencedirect.com/search?qs=car%20undercarriage%20cleaning - Google Scholar Google Scholar
https://scholar.google.com/scholar?q=car+wash+environmental+runoff+stormwater+undercarriage
