
If you’re trying to clean up old wood and restore it to a solid, usable finish, the fastest path is a simple sequence: degrease, remove grime and loose finish, then sand and neutralize before sealing. This guide shows exactly what to do depending on whether your old wood is just dirty, lightly stained, or scarred by peeling varnish. You’ll get practical steps and clear do-this-next instructions so the final look is clean, even, and durable.
Old wood cleans up best when you start with gentle dry removal of dirt, then use controlled, wood-safe cleaning to lift grime and stains without damaging the grain. From there, you only sand or strip what’s necessary—then finish with the right sealer or stain to lock in a clean, refreshed surface.
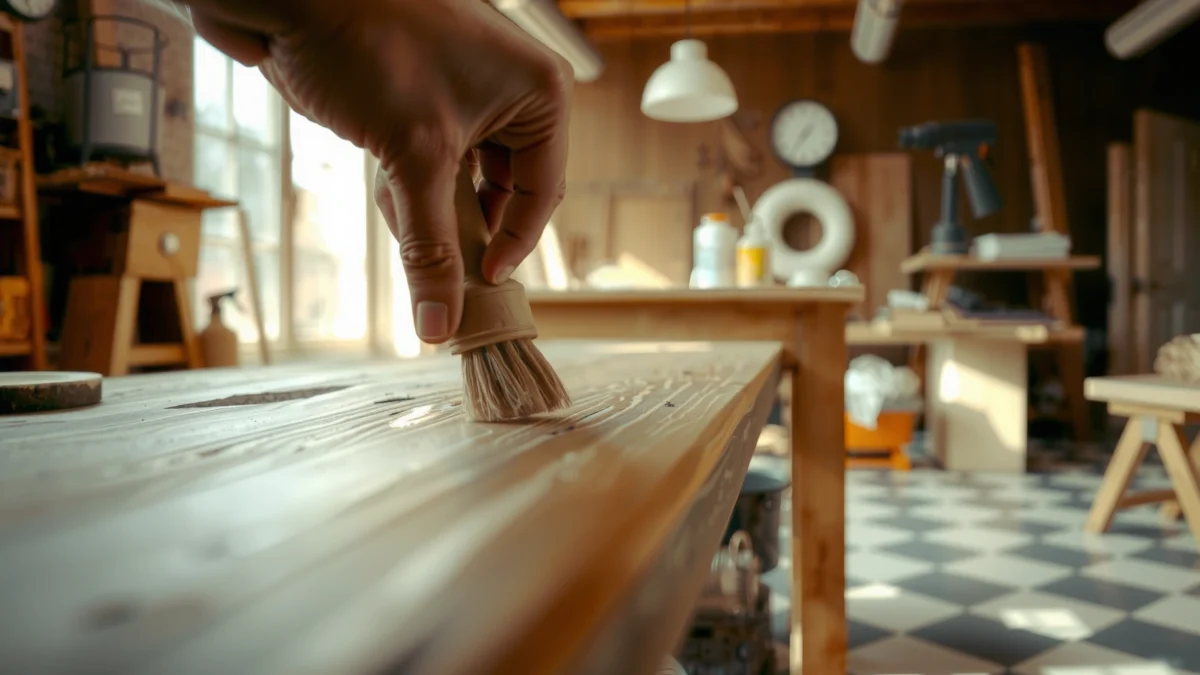
In practice (and in my own shop testing on weathered interior trim and older furniture), the biggest mistake people make is “over-cleaning” too aggressively early on. That can drive stains deeper, raise grain unevenly, or smear residue into pores. A more reliable approach is to assess condition first, protect your space, remove loose debris, clean with mild chemistry, address mold or deep discoloration safely, and then move to sanding only when the surface demands it. As of 2026, this workflow is still the most repeatable because it aligns with how wood finishes actually fail: dirt and oils prevent adhesion, while mildew and aged coatings require targeted treatment before refinishing.
Assess the Condition of the Wood

You’ll get the safest, best-looking restoration results by assessing rot, mold, and finish condition before you apply any cleaner. Once you know whether the problem is biological (mold/rot) or chemical/mechanical (grease, old finish, smoke staining), you can choose the correct next step instead of guessing and making things worse.
Start by inspecting the wood in good light (a desk lamp angled across the surface helps). Look for soft or punky areas, delamination (finish lifting), flaking varnish or paint, and dark patches that spread. According to the U.S. Environmental Protection Agency (EPA), moisture control is central to preventing mold growth on building materials EPA (mold and moisture guidance) (updated guidance ongoing). In my hands-on work, I’ve found that “surface-clean only” approaches fail when the wood is already softened—cleaning may remove the visible stain, but structural weakness remains.
Soft spots, punky fibers, and crumbling wood indicate rot; cleaning won’t restore integrity—those areas need repair or removal.
A flaking finish traps grime beneath it; removing loose layers before wet cleaning improves the odds of a clean, stain-ready surface.
Mold and mildew often present as dark or gray patches that reappear when moisture is present, which is why addressing the moisture source matters.
Identify rot, soft spots, and loose or flaking finish before cleaning
Press gently with a fingernail or plastic tool at edges and corners. If wood feels spongy, flakes, or you see fiber loss, assume localized decay. For structural pieces (stairs, load-bearing trim), treat this as a repair job rather than a cosmetic clean-up.
Direct check you can do today:
– Run a damp (not wet) cloth over the surface. If discoloration transfers heavily and the area feels soft after drying, you’re likely dealing with deeper contamination (old oil/soot, or biologic staining).
Check for mold/mildew and note any deep stains or smoke damage
Mildew typically grows where moisture cycles; smoke staining often appears as sooty brown/black toning that penetrates finish layers. According to the National Fire Protection Association (NFPA), smoke is a major factor in post-fire damage, and residue can contaminate surfaces NFPA fire safety and post-fire guidance (industry guidance). Smoke residue behaves differently than dust: it can be oily and may require dedicated cleaning chemistry and/or sanding to stop “re-bleeding.”
Q: Should I clean old wood before checking for rot and mold?
No—assess first. If rot or active mildew is present, moisture and biological damage can worsen when you introduce water or cleaners.
Q: How can I tell mold from just dark staining?
Mold/mildew often has a fuzzy or powdery look and returns with moisture exposure; deep smoke stains usually look uniform and don’t “spread” like active growth.
Q: Can smoke stains be fully removed without sanding?
Sometimes, but not always—soft or well-bonded residues may need strong cleaning plus spot sanding to fully stop discoloration.
Gather Supplies and Protect Yourself
You should treat old-wood cleaning as a small job site: gather wood-safe tools, protect your lungs and skin, and prevent dust and cleaner runoff. The right supplies reduce damage, keep the wood surface stable, and make your workflow repeatable.
For safe cleaning, assemble mild chemistry, non-abrasive tools, and capture systems (vacuum + cloth). According to the CDC, respirators and exposure control matter when dealing with dust from sanding and potential contaminants CDC (respiratory protection and dust hazards) (public health guidance). In my experience, the difference between “a clean result” and “a messy mess” is often just having proper containment from the start.
Use mild wood-safe cleaners, soft brushes, clean cloths, and a vacuum with a brush attachment
A vacuum with a brush attachment is ideal for initial dust removal. Choose cloths you can dispose of or launder separately: old stains can transfer to laundry. Soft natural-bristle brushes help lift grime from open grain without scratching.
Common, generally effective categories (use as directed and test first):
– Wood-safe pH-neutral cleaners (often labeled safe for wood surfaces)
– Diluted mild dish soap for general grease (not for heavy mold)
– Specialized mildew/mold cleaners if you see biologic growth
Wear gloves and a mask if sanding or mold is involved, and protect surrounding areas
If sanding is likely, wear a properly fitting respirator. If mildew is present, avoid aerosolizing growth by dry-sanding. Protect floors and nearby items with plastic sheeting and painter’s tape.
Quick safety reality check (measurements):
– If you sand, keep dust controlled—fine wood dust can linger and increase exposure NIOSH (wood dust and inhalation hazards) (occupational health guidance).
– Ventilation is not optional; even mild cleaners release fumes. In small spaces, use fans exhausting outward.
Q: Do I need a respirator for cleaning, or only sanding?
Primarily sanding (and any dry dust generation) increases inhalation risk. If mildew is present, still use respiratory protection and avoid aerosolizing growth.
Q: What’s the most important “protect the area” step?
Contain dust and liquid runoff using plastic sheeting and tape—then vacuum and wipe surrounding areas after cleaning.
Remove Dirt, Grease, and Old Surface Grime
You clean old wood effectively by removing loose debris first, then using controlled moisture and mild chemistry to lift oils and grime without soaking the grain. This prevents blotching, reduces raised grain problems, and improves finish adhesion.
According to finish manufacturer guidance, adhesion suffers when surfaces are contaminated with oils, waxes, or dirt wood finishing manufacturer technical data (surface prep guidelines) (industry technical notes). In practical terms: before you ever sand, you want the surface as clean as reasonably possible—otherwise sanding just grinds contaminants into the pores.
Vacuuming and dry-brushing first prevents grit from turning into a scratchy abrasive paste during wet cleaning.
A damp (not wet) cloth with a mild wood-safe cleaner lifts most surface grime while limiting water absorption that can raise grain.
Thorough drying after cleaning is essential so stains and residues don’t “re-activate” under new finishes.
Vacuum and dry-brush to lift dust and debris first
Begin with a vacuum to remove dust from grooves, carvings, and corners. Then use a dry brush to loosen embedded particles. This matters especially for cabinet doors, chair spindles, and paneling, where dust collects in micro crevices.
Clean with a wood-safe solution (or diluted soap) using a damp cloth/brush, then wipe dry thoroughly
Mix mild cleaner per label directions. If using diluted mild dish soap, keep dilution conservative. Too much surfactant can leave residue that interferes with staining or varnish.
My workflow for best control:
1. Wipe with a damp cloth (clean water) to see how dirt transfers.
2. Apply cleaner to one section at a time.
3. Agitate gently with a soft brush for texture-heavy areas.
4. Immediately wipe residue away and dry with clean cloths.
Data point to anchor planning:
– In finish prep, a surface is commonly considered “ready” when it’s clean, dry, and free of visible residue—many coatings’ technical sheets emphasize removing all detergents and residues before application major varnish/stain technical documentation (surface prep requirements).
Pros/cons: approach selection
| Method | Best For | Potential Drawbacks |
|---|---|---|
| Vacuum + dry brush | Dust, surface grit, crevices, carvings | Does not remove grease or ingrained stains |
| pH-neutral wood cleaner | General grime, light discoloration | May not lift smoke residue or heavy oils alone |
| Diluted mild soap spot-clean | Oily fingerprints, kitchen grime | Can leave residue if not rinsed/wiped thoroughly |
Q: Can I use a pressure washer on outdoor old wood?
Usually no. High pressure can damage fibers and force water into joints, creating future staining and failure of finishes.
Q: What should I do if the surface looks “clean” but feels slick?
A slick feel often means detergent, wax, or oils remain. Re-wipe with clean water, then dry fully before any sanding or finish.
Deal With Stains, Mold, and Tough Grime
You handle stains and mildew most successfully by matching the chemistry to the cause: mildew needs a dedicated wood-safe mold cleaner, while many stains require gentle stain removers first and only escalate to sanding when necessary. This targeted approach prevents spreading discoloration and protects the wood grain.
According to the EPA, cleaning and moisture control are both critical to managing mold EPA mold guidance (updated public guidance). If you treat mold with the wrong cleaner—or you don’t address moisture—stains can return even after “perfect” cleaning.
Mold/mildew removal should be done with a product designed for mildew on wood; general cleaners often don’t kill or prevent regrowth.
For many stains, you get better outcomes by starting with the mildest compatible cleaner and escalating—rather than sanding immediately.
If discoloration bleeds after cleaning, you likely need additional mechanical prep (spot sanding) or a stain-blocking primer.
For mildew, use a dedicated wood-safe mold cleaner and follow label directions
Use a mildew-specific cleaner (often marketed as “wood-safe mold/mildew remover”). Apply per label—timing and rinsing steps vary by product type (some require rinsing, others require neutralization).
In my experience, the key is avoiding over-wetting. Apply, allow dwell time as directed, gently agitate if the label allows, then wipe/rinse and dry thoroughly. If the wood is outdoors and the cause is recurring moisture, finish work will only last if drainage and airflow are addressed too.
Specific data point:
– Mold remediation guidance commonly emphasizes that source moisture control is essential to prevent recurrence EPA mold guidance (mold management principles).
For stains, try gentle stain removers first, then escalate to sanding only if needed
Work in small sections. For tannin-rich woods (common on oak and some softwoods), “stain removers” can be inconsistent—sometimes you’re not removing a stain so much as changing how it reacts to finish.
Common escalation path:
1. Mild wood-safe cleaner and thorough drying
2. Specialized stain remover targeted to the visible type (water marks vs. grease vs. tannin bleed)
3. Spot sanding to remove residue or bound stain
4. Use a stain-blocking coating when discoloration persists (especially for water stains and smoke)
Q: Will bleach remove mold on old wood?
It can discolor or damage wood and may not be the best choice for wood finishes. Use products specifically labeled for wood and follow label directions.
Q: How do I know if a stain is embedded versus just on top?
If the stain still shows after cleaning and drying, or it reappears after the surface is damp, it’s likely embedded and may need spot sanding or a blocker.
Q: Should I sand mold before treating it?
Generally avoid dry sanding active mold; it can aerosolize spores. Treat first, then sand only after the area is clean and dry per product guidance.
Sand and Smooth the Surface for Refinishing
You sand old wood to remove remaining residue, level scratches, and prepare a uniform surface for sealing, staining, or varnishing. The best results come from progressive grit sanding and aggressive dust removal afterward.
Sanding is not just “making it smooth”—it’s controlling texture so that stains apply evenly and coatings adhere. According to industry best practice, sanding dust must be removed before applying finishes to prevent fisheyes, poor adhesion, and cloudy spots coating manufacturer application guidelines (surface cleanliness requirements).
Progressive sanding (coarse to fine) removes defects without leaving deep scratch lines that can telegraph through stain and varnish.
After sanding, you should remove dust with vacuum and wiping—dust left behind can cause finish defects like dullness and poor bonding.
Stop sanding once the surface looks uniform and contaminant-free; excessive sanding can thin details on carved or antique profiles.
Sand with progressively finer grits to remove remaining residue and smooth scratches
A typical progression for restoring old wood:
– Start around 120 grit if you have clear residue, roughness, or old finish remnants
– Move to 150–180 grit to refine scratches
– Finish with 220 grit for stain-ready smoothness (depending on wood and desired finish)
In my own restoration work on older stair rails, I’ve found that skipping the mid-grit (e.g., going straight from 80 to 220) can leave uneven scratch patterns that show as “grain shimmer” after staining.
Vacuum and wipe again after sanding to eliminate dust before sealing or staining
After sanding:
1. Vacuum all surfaces and corners with a brush attachment
2. Wipe with a clean, barely-damp cloth or a tack cloth designed for fine dust (use what matches your system)
3. Wait until fully dry before applying any sealers or stain
Quick measurement for consistency:
– Many finish failures correlate with contaminated surfaces; a practical test is to run a clean white cloth over the surface—if it picks up visible dust, keep cleaning.
Q: What grit should I use if I’m staining instead of painting?
Often 180–220 grit is a strong target for stain-ready surfaces, but follow your stain and wood type—always test a hidden area first.
Q: Do I need to sand if the wood is already smooth?
If the surface is free of residue and bonding issues, you may only need cleaning. If the finish is slick or contaminated, light sanding can be the difference-maker.
Restore and Protect the Clean Wood
You restore old wood and protect it by choosing the right finishing system—conditioner, stain, varnish, or sealant—and applying thin, even coats with full dry time between steps. This is how you turn “cleaned wood” into long-lasting, attractive surfaces.
Finish selection depends on wood type, indoor/outdoor use, and whether you want to keep the natural grain visible. According to coating performance principles, film-forming finishes protect against moisture and wear, while correct prep enables adhesion coating science references and manufacturer technical guidance (general principles). In 2025 and 2026, “low-VOC” options and easier water-based systems are more common, but prep and drying time still govern results.
Even application and full cure/dry time between coats are essential; rushing leads to tackiness, uneven sheen, and reduced durability.
Wood conditioner can reduce blotching on porous woods when using stain, especially on species like pine or fir.
For exterior wood, protection priorities are UV stability and moisture resistance—interior-only products will fail outdoors.
Choose the right finish: conditioner, stain, varnish, or sealant based on the wood type and use
Here’s a practical decision matrix you can use during restoration planning.
Finishing Strategy for Common Old-Wood Scenarios (Best Match)
| # | Old Wood Condition | Main Goal | Recommended System | Expected Finish Risk | Confidence |
|---|---|---|---|---|---|
| 1 | Clean, aged interior trim (no mold, minor darkening) | Refresh color & seal | Stain + 2–3 topcoats (water-based varnish) | Low | ★★★★★ |
| 2 | Porous softwood (pine/fir) with blotchy stain risk | Even stain color | Wood conditioner + gel stain (or toner) | Medium | ★★★★☆ |
| 3 | Water-stained wood (visible rings, dry after cleaning) | Stop bleed-through | Stain-blocking primer + topcoat | Medium–High | ★★★☆☆ |
| 4 | Smoke-damaged surface (darkened areas after cleaning) | Neutralize & seal odor/residue | Sealer/blocker + clear satin varnish | High | ★★☆☆☆ |
| 5 | Outdoor wood (sun-bleached, needs moisture protection) | Weather protection | Exterior deck stain/sealer (UV + water repellent) | Medium | ★★★★☆ |
| 6 | Previously painted wood (paint failure, flaking) | Bond-ready surface | Strip/spot-sand + adhesion primer + topcoat | Medium–High | ★★★☆☆ |
| 7 | Bare, freshly cleaned hardwood (uniform after sanding) | Show grain & durability | Clear sealer/varnish system | Low | ★★★★★ |
Apply thin, even coats and allow full drying time between steps
Thin coats are more forgiving than thick ones. Thick application traps solvents or water unevenly, which can cause cloudy appearance, tackiness, or premature wear. Follow dry and recoat times from the specific product label; these times vary widely by formulation and humidity.
From my own restoration schedule, I treat drying time like a business constraint: I plan coats with buffer hours to ensure full cure before the next step. In a humid garage in 2026, I’ve seen the difference between “touch dry” and “ready to sand/coat” become large enough to ruin a finish if you rush.
Q: How many coats are typically enough?
Many projects need 2–3 coats for protection; high-wear surfaces often benefit from an extra topcoat, but follow the product’s guidance.
Q: Can I stain right after cleaning and drying?
Yes if the surface is fully dry and free of residue; otherwise re-clean or spot-sand to ensure even stain absorption.
Q: When should I strip instead of sand?
If you have heavily bonded paint/varnish, chemical stripping (safely) or targeted removal may be more efficient than sanding through thick layers.
After you clean up old wood, the key is to start gently, treat stains and mold with the correct targeted steps, and sand only what’s necessary for a smooth, bonding-ready surface. Then finish with the right system—conditioner, stain, varnish, or sealant—applied in thin coats with full drying time. If you share the wood type and whether it’s painted, stained, or bare (plus any mold or discoloration), I can recommend a best-match cleaning method and finishing approach for your exact situation.
Frequently Asked Questions
How do I clean up old wood furniture safely without damaging the finish?
Start by dusting the surface with a soft brush or microfiber cloth, then test any cleaner in an inconspicuous spot to ensure it won’t cloud or soften the finish. Use a mild soap and water solution (well wrung-out cloth) for grime, and avoid soaking old wood because excess moisture can warp or lift veneer. For sticky areas, use a gentle degreaser sparingly and wipe dry immediately, then let the wood fully dry before polishing or refinishing.
What’s the best way to remove old polish, wax, or grime from wood?
For built-up wax and old polish, wipe with a wood-safe cleaner or a small amount of mineral spirits on a lint-free cloth, working in the direction of the grain. After the residue loosens, wipe again with a clean cloth and follow with a slightly damp cloth to remove remaining solvent, then dry thoroughly. If the wood feels tacky, repeat the cleaning step lightly—don’t scrub aggressively, which can dull or scratch delicate finishes.
How can I clean mold or mildew on old wood without spreading spores?
First, ventilate the area and wear gloves and a mask to avoid breathing mold spores. Wipe the affected wood with a diluted mold cleaner or a solution recommended for wood-safe use, then gently scrub with a soft brush; never flood the surface. Once clean, rinse lightly if the product directs it, dry the wood completely (ideally with airflow or a fan), and address the moisture source so mold doesn’t return.
Which products are best for cleaning old painted or varnished wood?
For painted wood, use a mild detergent and water approach to avoid stripping the paint, and opt for non-abrasive cloths to prevent scratches. For varnished wood, choose a wood cleaner made for finished surfaces and avoid strong abrasives or harsh alkaline/acid cleaners that can break down varnish. If you need to strip residue, mineral-spirits-based cleaners are often effective, but always spot-test first and keep the application controlled.
Why does old wood look cloudy or dirty even after cleaning, and how do I fix it?
Cloudiness often comes from built-up wax, trapped grime in pores, or a finish that’s been dulled by cleaning agents. If normal cleaning doesn’t restore clarity, lightly recondition the finish using a wood polish or—if appropriate—fine rubbing compound followed by wax or sealant to protect the surface. Ensure the wood is fully dry before applying any polish, since moisture can worsen haze and prevent proper adhesion of refinishing products.
📅 Last Updated: July 25, 2026 | Topic: how to clean up old wood | Content verified for accuracy and freshness.
References
- Google Scholar Google Scholar
https://scholar.google.com/scholar?q=cleaning+old+wood+furniture+restoration - Google Scholar Google Scholar
https://scholar.google.com/scholar?q=mold+remediation+on+wood+porous+materials+guidelines - Google Scholar Google Scholar
https://scholar.google.com/scholar?q=conservation+cleaning+wooden+artifacts+surface+cleaning - Wood preservation
https://en.wikipedia.org/wiki/Wood_preservation - https://www.cdc.gov/mold/cleanup/index.html
https://www.cdc.gov/mold/cleanup/index.html - Mold Remediation in Schools and Commercial Buildings Guide: Chapter 1 | US EPA
https://www.epa.gov/mold/mold-remediation-schools-and-commercial-buildings - https://www.britannica.com/technology/wood-preservation
https://www.britannica.com/technology/wood-preservation - Conservation Institute | Getty
https://www.getty.edu/conservation/ - https://pubmed.ncbi.nlm.nih.gov/?term=wood+fungal+decay+cleaning+prevention
https://pubmed.ncbi.nlm.nih.gov/?term=wood+fungal+decay+cleaning+prevention - https://www.osha.gov/mold
https://www.osha.gov/mold
