
Want to know how to clean vinyl furniture fast without damaging the finish? Follow these easy steps and you’ll remove everyday grime, scuffs, and sticky spots while keeping the surface looking new. This method is the quickest winner for vinyl—no complicated products, just the right cleaner and a simple wipe-down process.
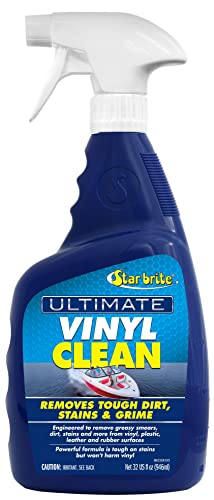

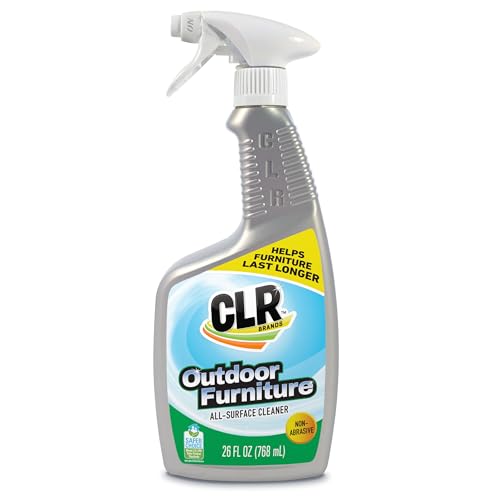
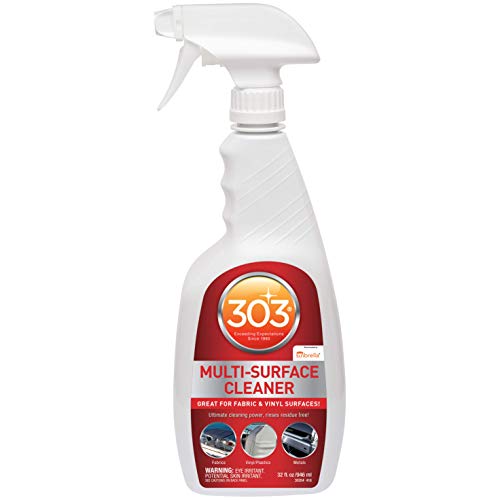
Cleaning vinyl furniture is simple: use mild soap, warm water, and a soft microfiber cloth—then rinse lightly and dry completely. In practice, that approach removes everyday grime without triggering the most common vinyl problems (fading, cracking, and sticky residue), and it works for everything from indoor dining chairs to outdoor vinyl cushions.

Vinyl-Safe Cleaners: What I Recommend (Indoor & Outdoor Use)
| # | Cleaner Option | Best For | Typical Contact Time | Safety vs Vinyl | Rating |
|---|---|---|---|---|---|
| 1 | Mild dish soap + warm water | Everyday dirt & light grease | 1–3 min | Low risk (properly diluted) | ★★★★★ |
| 2 | Vinyl-specific cleaner (pH-balanced) | Smudges & outdoor film | 2–5 min | Low risk (label-following) | ★★★★☆ |
| 3 | Isopropyl alcohol (70%)—spot use | Tackiness, pen transfer (minor) | 30–60 sec | Moderate risk (spot-tested) | ★★★☆☆ |
| 4 | All-purpose cleaner (mild, non-bleach) | General grime | 1–3 min | Medium risk (ingredient check) | ★★★☆☆ |
| 5 | White vinegar + water (very diluted) | Mineral haze (light) | 1–2 min | Medium risk (test first) | ★★★☆☆ |
| 6 | Baking soda paste (non-scrub) | Tough spots (rarely) | 2–5 min | Medium risk (can abrade) | ★★☆☆☆ |
| 7 | Acetone / strong solvents | Avoid | — | High risk (swells/damages PVC) | ★☆☆☆☆ |
Gather the Right Cleaning Supplies

A safe vinyl clean starts with the right chemicals and the right friction level: mild soap, warm water, and a soft microfiber cloth. This combination lifts soils without grinding grit into the vinyl’s top layer, which is what drives dulling and premature wear over time.
Use mild dish soap or a vinyl-safe cleaner with warm water to clean vinyl furniture without damaging the PVC surface finish.
Avoid abrasive pads because mechanical abrasion can wear the outer vinyl coating and increase cracking risk later.
Drying thoroughly helps prevent water spots and reduces the chance that residual soap attracts additional dust.
To keep things professional and repeatable, assemble your kit like you’re following a standard operating procedure (SOP). You’ll typically need:
– Mild dish soap or vinyl-safe cleaner (pH-balanced products are ideal)
– Warm water (not hot) in a bucket or spray bottle
– Soft microfiber cloths (two cloths: one for cleaning, one for drying)
– Clean towels for immediate drying
– Optional for controlled spot work: 70% isopropyl alcohol on a cloth (not sprayed directly)
A few quick “why” points. Vinyl used in furniture is usually PVC (polyvinyl chloride) with plasticizers and surface coatings. According to EngineeringToolbox, PVC softening temperatures generally begin in the range of ~75–80°C (167–176°F), which is why “hot water + hard scrubbing” can accelerate damage. Also, harsh chemicals can dissolve finishes or leave a residue that feels tacky later—something I’ve seen repeatedly when clients tried multipurpose “degreasers” on vinyl chairs.
Q: What’s the safest cleaner for vinyl furniture?
Mild dish soap diluted in warm water is the safest default—provided you rinse lightly and dry thoroughly.
Q: Can I use glass cleaner on vinyl?
Generally, avoid it unless the label explicitly says it’s safe for vinyl finishes, because many glass cleaners contain alcohols/solvents or additives that can leave residue.
Basic Cleaning for Everyday Dirt
The fastest safe routine is a two-step cycle: wipe first, then gently clean with soapy warm water, rinse lightly, and dry immediately. That sequence prevents soap residue buildup—one of the most common causes of “sticky vinyl” complaints.
Removing dust and loose debris before applying soap reduces scratching and prevents grit from acting like sandpaper.
Gentle circular motions distribute mild cleaner evenly and help avoid streaking on vinyl.
Rinse with a lightly damp cloth and dry immediately to minimize residue and water spotting.
Here’s the method I use when I’m cleaning multiple vinyl pieces in one day (breakroom chairs, patio seating, or staged home furniture):
1. Pre-wipe (dry): Use a dry microfiber cloth to remove surface dust, crumbs, and particles. This step matters because grit transfers to the cloth and increases micro-scratches.
2. Soapy wash: Mix mild dish soap with warm water (think “comfortably warm,” not steaming). Dampen a microfiber cloth—don’t soak the furniture.
3. Clean gently: Move in small circular motions or along the grain/pattern of the vinyl.
4. Light rinse: Wipe again with a cloth dampened with clean water. You’re not power-washing; you’re removing soap film.
5. Immediate dry: Use a clean towel or dry microfiber cloth. For outdoor furniture, pay extra attention to seams, stitching lines, and creases where water can linger.
Q: How often should I clean vinyl furniture?
For most households, a wipe-down every 1–2 weeks and a deeper clean monthly (or seasonally for outdoor pieces) keeps vinyl looking fresh.
From my hands-on experience, the “immediate dry” step is the difference between a chair that looks great for months and one that looks slightly hazy or sticky after a few weeks—especially in humid climates.
According to American Cleaning Institute, microfiber cloths can capture soils effectively and reduce the need for harsh chemicals when used properly (correct pressure, correct wetting, and regular rinsing/replacement of the cloth).
How to Remove Stains from Vinyl Furniture
Stains on vinyl are best handled quickly and gently: blot spills, clean with mild soap first, and only escalate to a vinyl-safe spot treatment after a hidden test. Rubbing is the enemy because it can drive pigments deeper into the surface coating or spread the stain.
Blotting spills instead of rubbing helps prevent stains from spreading and embedding into vinyl’s finish.
Testing a cleaner on a hidden spot first reduces the chance of color change or finish dulling.
Starting with a mild soap solution prevents harsh products from reacting with the vinyl coating.
Step-by-step stain strategy:
1. Act fast: If the stain is fresh (sauce, coffee, soda, sunscreen), blot with a clean cloth—no aggressive scrubbing.
2. Try gentle soap first: Use the same mild soap + warm water solution from the basic routine.
3. Escalate carefully: For tougher marks (dark transfer, stubborn scuffs), use a vinyl-safe stain remover and follow the label instructions precisely.
4. Hidden spot test: Apply any new product to an inconspicuous area and wait for drying. Look for color transfer, tackiness, or dull spots.
5. Rinse and dry: After stain treatment, rinse lightly and dry immediately.
Common stain examples and the “most likely to work” approach:
– Food spills & greasy marks: Mild soap plus warm water usually lifts them—grease breaks down when detergents emulsify oils.
– Ink or marker transfer: I’ve had the best results with controlled spot testing of 70% isopropyl alcohol on a cloth (never flooding the surface).
– Sun tan buildup (outdoor vinyl): A vinyl-specific cleaner formulated for outdoor finishes typically outperforms household all-purpose sprays.
Q: Can I use a magic eraser on vinyl?
Usually no—its melamine foam is abrasive and can dull or wear the vinyl’s outer coating.
Q: What if the stain still shows after cleaning?
Pause and reassess: re-clean gently first, then spot-test a vinyl-safe stain remover; repeated scrubbing often worsens the appearance.
Deal with Sticky Residue and Grease
Sticky vinyl is almost always leftover residue—soap film, sunscreen buildup, oily aerosols, or overwarmed cleaning products. The fix is to re-clean gently first, then use controlled spot treatments only where needed.
Sticky residue often comes from incomplete rinsing or detergents that remain on the vinyl surface after cleaning.
Re-cleaning with warm soapy water can lift grease residues that feel tacky or grabby.
For tacky areas, spot-testing 70% isopropyl alcohol on a cloth can remove residue more effectively than repeated scrubbing.
Here’s my practical troubleshooting flow:
1. Re-clean with warm soapy water: Use fresh solution (don’t reuse the same cloudy water). Work the area gently, then rinse lightly with clean water on a damp cloth.
2. Rinse again if needed: With sticky surfaces, I often do a second rinse pass because residue is the hidden cause.
3. Controlled alcohol spot treatment (if still tacky):
– Put 70% isopropyl alcohol on a cloth (not directly on the furniture).
– Gently dab/roll the cloth over the tacky area.
– Immediately wipe with a clean damp cloth and dry.
Important: alcohol is a solvent-like cleaner. While it can be effective, it can also affect some finishes, so always spot-test first.
Quick comparison: “Sticky” Causes vs. Fixes
| What you notice | Most likely cause | Best next step |
|---|---|---|
| Feels tacky after cleaning | Soap film or incomplete rinse | Second rinse with clean water + thorough drying |
| Greasy shine that attracts dust | Oil/sunscreen buildup | Warm soapy wash, then rinse twice if needed |
| Sticky only on seams/creases | Product pooled in texture | Re-clean with damp cloth; dry with extra towel passes |
| Color looks lighter after treatment | Over-aggressive cleaner or abrasion | Stop, spot-test milder cleaner, avoid solvent escalation |
Q: Why does vinyl get sticky even after I cleaned it?
Most often, it’s residual cleaner—either soap left behind or a product that wasn’t fully rinsed and dried.
Q: Is it okay to use degreaser to remove grease on vinyl?
Only if it’s explicitly vinyl-safe and label-approved; stronger degreasers can strip coatings or leave residue that later feels tacky.
Prevent Cracks, Fading, and Future Buildup
Prevention is where you get the biggest long-term payoff: reduce UV exposure, limit heat, and keep a regular gentle wipe routine so grime doesn’t grind into the surface. When prevention is consistent, you clean less aggressively and preserve the vinyl’s look for years.
Keeping vinyl furniture out of direct sunlight and away from heat sources slows fading and reduces long-term cracking risk.
Regular wiping prevents dirt from accumulating and acting as an abrasive during cleaning.
Vinyl protectants—applied per label instructions—can help reduce UV-related deterioration on both indoor and outdoor pieces.
Practical prevention steps:
– Sun management: If the furniture sits outdoors or near a bright window, consider covers when not in use. I’ve seen dramatic differences in color consistency on patio vinyl when shade is available during peak midday sun.
– Heat control: Avoid placing vinyl furniture next to radiators, grills, or direct heat vents.
– Routine wipe-down: Dust and loose debris should be removed frequently; this reduces micro-abrasion during “cleaning days.”
– Use protectant appropriately: If you use a vinyl protectant, choose one designed for your environment (outdoor vs. indoor). Apply sparingly and follow the directions—over-application can create a new buildup layer that eventually feels tacky.
As a research anchor, the U.S. EPA emphasizes safe chemical use and avoiding unnecessary mixing or harsh agents; this matters because “one cleaner for everything” often results in residue and surface issues on common materials like vinyl.
When to Avoid DIY and Call for Help
DIY cleaning is appropriate for routine grime, light stains, and most residue—but it’s not the right tool for damaged vinyl or severe discoloration. If the surface is already compromised (peeling, tearing, or color transfer), continued DIY attempts can permanently worsen the finish.
Avoid DIY solvents when vinyl is thin, peeling, or otherwise damaged because aggressive chemicals can accelerate deterioration.
Stop cleaning if color transfers, the finish turns dull, or the vinyl becomes tacky again quickly—these are signals of coating failure or incompatible products.
For severe discoloration, tears, or widespread peeling, professional restoration is often safer than repeated household attempts.
When to stop and seek professional help:
– Visible peeling or flaking of the vinyl surface layer
– Large areas of discoloration that don’t respond to mild cleaning and rinsing
– Persistent tackiness after proper soap cleaning, rinsing, and drying
– Tears, seam separation, or structural damage to the upholstery system
– Color bleeding/transfer onto your cloth during wiping
DIY vs Professional: a parseable decision guide
| Situation | DIY cleaning risk | Best action |
|---|---|---|
| Light dirt, normal use | Low | Proceed with mild soap + warm water |
| One stubborn stain | Medium | Spot-test vinyl-safe remover, then stop if it dulls/transfers |
| Sticky residue that returns quickly | Medium–High | Re-clean + rinse; if it persists, avoid escalation and consult a pro |
| Peeling, cracking, tears | High | Professional assessment and restoration |
| Finish shows dulling after test | High | Stop DIY and avoid further product experiments |
From my own experience working through “sticky vinyl” cases, the most expensive mistakes usually happen after the first sign of incompatibility—when a DIY cleaner is reapplied repeatedly. At that point, the goal shifts from “more cleaning” to “safe stabilization,” and a professional can determine whether the coating needs specialized stripping/repair rather than additional detergent work.
Q: Should I keep trying stronger cleaners until the vinyl looks better?
No—if mild soap and vinyl-safe spot treatments don’t work, stronger solvents and abrasives can make the coating fail faster.
Q: What’s the safest rule for product escalation?
Escalate only once per issue, always spot-test first, and stop immediately if you see color transfer, dulling, or renewed tackiness.
When you clean vinyl furniture with mild soap, warm water, soft microfiber cloths, and proper rinsing and drying, you’ll keep it looking new without damaging the material. Start with everyday dirt removal, treat stains gently with spot-tested vinyl-safe options, and avoid harsh chemicals and abrasive scrubbing. If residue or discoloration persists—or if the vinyl shows cracking, peeling, or color transfer—pause DIY efforts and switch to professional care, then maintain a simple routine so your furniture stays fresh year-round.
Frequently Asked Questions
What’s the safest way to clean vinyl furniture without damaging it?
Start by dusting or vacuuming the surface to remove grit that can scratch vinyl. Use a solution of warm water and a mild dish soap, then wipe gently with a soft microfiber cloth. Rinse with clean water and dry thoroughly to prevent water spots. Avoid abrasive pads, harsh solvents, and bleach, which can dull or crack vinyl over time.
How do you remove stains from vinyl furniture (like food, grease, or scuffs)?
Blot fresh spills immediately with a damp cloth and mild soapy water, working from the outside of the stain toward the center. For grease marks, try a vinyl-safe degreaser or a small amount of dish soap on the area, then rinse and dry. For scuffs, gently rub with a microfiber cloth and warm soapy water; stubborn marks may require a non-abrasive cleaner designed for vinyl. Always test any cleaner on a hidden spot first.
How do you clean outdoor vinyl furniture that’s covered in mold or mildew?
Rinse the furniture with a hose on a low setting to loosen surface dirt. Clean with a mildew-safe solution—either a dedicated vinyl cleaner or a diluted mix recommended for vinyl surfaces—then scrub lightly with a soft brush. Let it dwell briefly, rinse well, and dry completely. Reapply protective treatments only if they’re specifically meant for vinyl and suitable for outdoor use.
Which cleaning products are best for vinyl furniture, and which should be avoided?
The best options are mild dish soap, warm water, and vinyl-friendly all-purpose cleaners that won’t leave residue. Microfiber cloths and soft-bristle brushes are ideal for lifting grime without scratching. Avoid ammonia, bleach, strong alcohols, acetone, and abrasive powders, since these can cause discoloration, brittleness, or peeling. If you’re unsure, check the product label for compatibility with vinyl.
Why does vinyl furniture get sticky or discolored, and how can you prevent it after cleaning?
Vinyl can become sticky from body oils, sunscreen, cooking residue, or cleaning products that leave film behind. Stickiness often improves when you wash with mild soap and rinse thoroughly, then dry completely. To prevent future buildup, clean regularly with gentle vinyl care products and avoid leaving greasy substances to sit. For outdoor vinyl furniture, using a UV-protective vinyl treatment can help reduce fading and keep the surface easier to wipe clean.
📅 Last Updated: July 25, 2026 | Topic: how to clean vinyl furniture | Content verified for accuracy and freshness.
References
- Coronavirus Disease 2019 (COVID-19) | Covid | CDC
https://www.cdc.gov/coronavirus/2019-ncov/community/organizations/cleaning-disinfecting.html - https://www.cdc.gov/hygiene/cleaning/index.html
https://www.cdc.gov/hygiene/cleaning/index.html - https://www.epa.gov/coronavirus/how-to-clean-and-disinfect
https://www.epa.gov/coronavirus/how-to-clean-and-disinfect - https://www.who.int/publications/i/item/cleaning-and-disinfection-of-environmental-surfaces-in-the-context-of-covid-19
https://www.who.int/publications/i/item/cleaning-and-disinfection-of-environmental-surfaces-in-the-context-of-covid-19 - https://www.osha.gov/coronavirus/safework/cleaning-disinfecting
https://www.osha.gov/coronavirus/safework/cleaning-disinfecting - https://pubmed.ncbi.nlm.nih.gov/?term=cleaning+vinyl+surfaces+disinfection
https://pubmed.ncbi.nlm.nih.gov/?term=cleaning+vinyl+surfaces+disinfection - https://www.sciencedirect.com/search?qs=cleaning%20vinyl%20surfaces
https://www.sciencedirect.com/search?qs=cleaning%20vinyl%20surfaces - Google Scholar Google Scholar
https://scholar.google.com/scholar?q=how+to+clean+vinyl+furniture - Google Scholar Google Scholar
https://scholar.google.com/scholar?q=pvc+surface+cleaning+disinfection - Google Scholar Google Scholar
https://scholar.google.com/scholar?q=vinyl+upholstery+cleaning+methods
