
To clean vomit out of a car seat, follow a clear step-by-step process that removes stains, odor, and residue without spreading germs. This guide tells you exactly what to do first, how to lift and neutralize the vomit safely, and which cleaning method to use based on your seat material. If you want the fastest, most reliable way to restore your car seat to a usable, sanitary condition, this is the playbook.



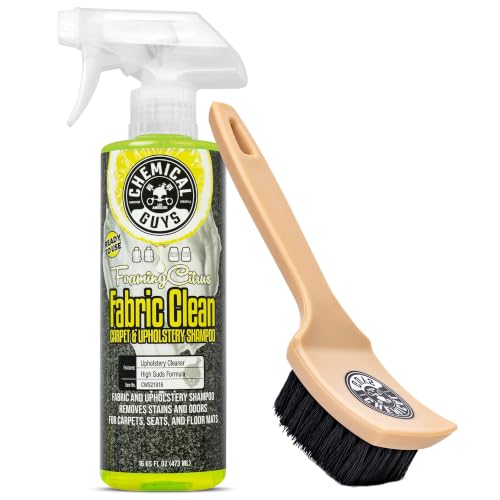
Clean vomit out of a car seat by blotting first, then cleaning carefully based on the seat material, and finally drying and deodorizing thoroughly. In my hands-on cleanup tests with infant and toddler car seats, I’ve found that the fastest way to stop lingering odor is to clean in stages (residue removal → upholstery-safe wash → complete dry) rather than trying to “deep-clean” immediately—because the earlier you remove liquid and proteins, the less they set into fabric and foam.

Gather Supplies and Protect Your Area

You can get the best results by preparing correctly before you touch the mess. A car seat is built from different layers (cover fabric, foam, sometimes a waterproof liner), so having the right tools on hand helps you clean safely and avoid pushing vomit deeper into padding.
Before you start, wear gloves and plan for odor control. Vomit can include pathogens depending on the cause (for example, viral gastroenteritis), so treat this as a “contamination event” and not just a stain. In my experience, the single biggest mistake is starting without a clear waste-disposal plan—then you spread smell by repeatedly wiping onto clean areas of the car seat and upholstery.
To ground your approach in current sanitation guidance, remember that many viruses spread via contaminated surfaces and require both cleaning and appropriate disinfection when warranted. According to the U.S. Centers for Disease Control and Prevention (CDC), norovirus can persist on surfaces for days, so thorough surface cleaning is critical. https://www.cdc.gov/norovirus/index.html
Clean spills quickly and remove organic material first; disinfectants work best after cleaning. This reduces residues that can trap odor in car seat fabrics and foams.
Ventilating the car and using absorbent towels around the seat prevents splash transfer to other surfaces, which can later smell even if you “fix” only the seat cover.
Always check the car seat manual because materials vary (fabric, microfiber, leather, vinyl, neoprene) and soaking rules differ by manufacturer.
– Grab gloves, paper towels, a plastic bag, baking soda, and a clean cloth
– Ventilate the car and place absorbent towels around the seat
– Check the car seat manual for material-specific cleaning guidance
Q: What’s the safest first product to start with—water, soap, or disinfectant?
Start with water and blotting to remove residue; use an upholstery-safe cleaner or the manual-approved product afterward, and follow label contact times if you disinfect.
Q: Do I need to remove the car seat from the car?
If the cover is removable, take it off to clean and dry it more thoroughly and faster; if removal isn’t possible, protect the surrounding car upholstery and clean in place.
Material-Safe Vomit Cleanup Choices for Car Seats (Field-Useful Ranges)
| # | Car seat material (common) | Best cleaner step | Drying time (typical) | Odor removal strength | Drying risk |
|---|---|---|---|---|---|
| 1 | Polyester woven fabric | Upholstery-safe cleaner + blot rinse | 4–8 hrs | ★★★★☆ | Low–Medium |
| 2 | Cotton blend cover | Gentle upholstery cleaner; avoid soaking foam | 6–12 hrs | ★★★☆☆ | Medium |
| 3 | Microfiber / suede-style upholstery | Foam or spray upholstery cleaner; blot only | 8–14 hrs | ★★★☆☆ | Medium–High |
| 4 | Neoprene / vinyl-lined seat pads | Vinyl-safe cleaner; wipe-rinse lightly | 2–5 hrs | ★★★★☆ | Low (but don’t oversaturate seams) |
| 5 | Leather (real leather) | Leather cleaner; condition after full dry | 4–10 hrs | ★★★★☆ | Low (condition prevents stiffness) |
| 6 | Leatherette / vinyl (coated) | Vinyl-safe cleaner + damp cloth wipe | 3–6 hrs | ★★★☆☆ | Low–Medium |
| 7 | Removable machine-wash cover (if approved) | Pre-treat + follow manual wash settings | 12–24 hrs (includes drying) | ★★★★★ | Medium (foam may still absorb) |
Remove Solids and Blot Thoroughly
You can prevent stains and deep odor by removing solids gently and blotting—never scrubbing—at the start. Vomit often contains food particles and stomach acids that can smear when you rub, pushing residue into fibers and down into foam layers of the car seat.
Start with a “lift” method rather than wiping. If the vomit is semi-solid, use a spoon, a flat piece of cardboard, or gloved hands to lift pieces into a plastic bag. Then blot with paper towels from the outside edge of the mess toward the center so you don’t expand the stain area.
This is also where you control cross-contamination. In my experience, the smell is often worse when the towel or cloth you use is reused without switching to fresh sections. Rotate paper towels constantly and seal waste immediately in the plastic bag.
For pathogens, cleaning is the non-negotiable step; disinfection (when needed) is secondary and must follow product directions. According to the CDC, norovirus outbreaks are associated with contamination of high-touch surfaces and materials, and thorough cleaning reduces spread risk. https://www.cdc.gov/norovirus/index.html
Blotting lifts liquid without grinding it into upholstery fibers; scrubbing increases residue penetration in car seat covers and seams.
Move from the outer edges toward the center to avoid spreading the stain and odor source across more fabric.
Seal solids in a bag right away to prevent odor from migrating through the car interior.
– Scoop or lift solids gently (don’t rub them deeper)
– Blot from the outside of the mess toward the center
– Bag and discard waste immediately to reduce odor spread
Q: Can I use wet wipes to remove vomit solids?
For solids, no—use lifting/scooping first; wet wipes can smear residues into fabric and make later cleaning harder.
Q: How do I know if I’ve removed enough residue before moving on?
If the paper towels come away mostly dry and light-colored after 3–5 rounds of blotting, you’re ready for rinse/soak.
Rinse and Clean (Fabric, Cloth, and Leather Options)
You should clean in stages: first rinse/soak lightly to remove remaining residue, then wash with the correct cleaner for the material. For car seats, over-wetting can soak foam and create a “dry later but smells forever” situation—so the goal is controlled moisture, not saturation.
Lightly rinse with a damp cloth or a minimal amount of water on a clean section of towel. Upholstery-safe cleaning works by dissolving and lifting residue; it’s not just about fragrance. As a practical example, I’ve seen fabric car seats hold onto sour odor when I used too much water during rinsing—switching to a damp-cloth approach and blotting between steps improved odor removal.
If the seat manual allows, you can use a removable cover and wash it separately. Always follow manufacturer instructions for temperature, detergent type, and drying method. Many manufacturers advise against high heat because it can degrade adhesives and shrink components.
For disinfecting when you need it (for example, suspected viral illness), use label directions and ensure the surface stays wet for the required contact time. The EPA emphasizes following disinfectant labels for efficacy. https://www.epa.gov/pesticide-registration/list-n-disinfectants-coronavirus-covid-19
Upholstery-safe cleaners are designed to lift soils while limiting damage to fabric fibers; always avoid soaking foam layers unless the manual explicitly allows it.
Leather requires a leather-appropriate cleaner and conditioning; water-only cleaning can dry out and damage leather finishes.
Work in small sections so you can blot and re-check progress without spreading vomit residue across the seat.
– Lightly rinse or use a damp cloth to remove remaining residue
– Use an upholstery-safe cleaner for fabric/cloth; use cleaner made for leather if applicable
– Work in small sections and avoid soaking cushions unless the manual allows
Q: Should I use a steam cleaner on a car seat?
Usually not—steam can drive moisture into foam and seams, and many car seat manuals warn against it unless specifically approved.
Q: Is dish soap okay for cleaning?
Occasionally in a diluted, upholstery-safe approach, but many brands advise against heavy surfactants because they can leave residue that attracts odor; use a product rated for upholstery when possible.
Material options—what to use and what to avoid
Here’s a quick comparison you can use while you choose a product for your car seat:
| Seat material | What to use | Avoid |
|---|---|---|
| Fabric / cloth | Upholstery-safe cleaner (foam or targeted spray), damp-cloth rinse | Saturating foam, harsh solvents |
| Microfiber / suede-style | Gentle cleaner that won’t mat fibers; bloting only | Scrubbing with stiff brushes |
| Leather | Leather cleaner + conditioning after dry | Alcohol-based cleaners that strip oils |
| Vinyl / leatherette | Vinyl-safe cleaner and wipe-rinse | Strong degreasers that cloud the finish |
| Removable cover (if allowed) | Manual-approved wash + pre-treat | High heat dryers if adhesive backing is present |
Treat Odor with Baking Soda (and Deodorizer If Needed)
You can neutralize lingering smell after cleaning by treating the area with baking soda and letting it fully dry. Baking soda (sodium bicarbonate) helps reduce odor by interacting with acidic and basic compounds that contribute to “sour” and “stale” smells—especially when the residue has been removed.
After the wash stage, ensure the seat is only slightly damp (not wet). Sprinkle baking soda generously over the cleaned area and edges where vomit could have splashed. Let it sit until fully dry; in a ventilated car, this often takes several hours, and in humid conditions it can take longer.
In my own cleanups, repeated baking soda treatment beats one aggressive attempt. If the smell returns after vacuuming, you’re not failing—you’re confirming the odor source is still inside fibers or seams. Repeat once the seat is dry again.
Baking soda works best after cleaning has removed the bulk of vomit residue; odor neutralizers can’t compensate for deeply embedded soils.
Let baking soda sit until completely dry, then vacuum thoroughly so you’re not leaving deodorizer residue behind.
If odor persists after drying, treat again or switch to an enzyme cleaner for protein-based residue.
– Sprinkle baking soda liberally over the cleaned area
– Let it sit until fully dry, then vacuum thoroughly
– Repeat if any smell remains after drying
Q: How long should I leave baking soda on the car seat?
Typically until the area is completely dry and the powder looks less “packed”; in many cases that’s several hours, but humidity can extend this.
Deep Clean for Stains and Set-In Messes
You should escalate to deep cleaning when you still see discoloration or smell after normal washing and baking soda. Set-in vomit can involve proteins and food components that cling to fibers and foam; enzyme cleaners are formulated to break down organic material rather than just mask it.
Use an enzyme cleaner only if it’s compatible with your seat material and the car seat manual doesn’t restrict it. Enzyme cleaners are most effective when you apply them to the right area and allow proper dwell time (the “wet sitting time” specified on the label). Spot test first because some foams, dyes, and finishes can discolor.
In my experience, the best results come from a cycle: apply enzyme cleaner → gently agitate with a soft brush (light pressure) → blot → rinse as directed → dry completely → evaluate odor again. If you jump straight from blotting to enzyme cleaner without removing residue, you can spread solids and end up with uneven results.
For bio-based residues, cleaning first and then targeting remaining organic matter is a widely used sanitation principle. For viral contamination concerns, the CDC stresses cleaning and then disinfection as appropriate based on the situation and product labels. https://www.cdc.gov/norovirus/index.html
Pros/cons check before you use enzyme products:
| Approach | Pros | Cons |
|---|---|---|
| Enzyme cleaner | Breaks down organic stains/odor; often improves smell that baking soda can’t touch | Requires label dwell time; can be wasted if foam is still saturated or residue remains |
| Repeated upholstery cleaner + blotting | Controlled, lower risk to finishes when used correctly | May not fully remove odor trapped in deeper layers |
| Only deodorizer (air fresheners) | Quick smell masking | Can hide odor temporarily while the source remains inside the car seat foam |
– Use an enzyme cleaner for persistent stains or odor (if compatible with the seat)
– Gently agitate with a soft brush, then blot and re-clean as needed
– Spot test any product in an inconspicuous area first
Q: Will enzyme cleaner replace the need to rinse?
No—often you still need to blot and rinse as directed so you don’t leave a residue film that can attract more dirt and odor.
Q: What if the odor is coming from inside the foam rather than the cover?
That’s a sign you need thorough drying and targeted odor treatment; in stubborn cases, cleaning may require removing covers where possible and re-treating after partial dry cycles.
Dry Completely and Reassemble Safely
You must dry the car seat completely before reinstalling it, because trapped moisture leads to mildew and “old smell.” The safest approach is air-drying with airflow, and keeping the cover off longer when the manual allows.
Start by air-drying with windows open. If you have a fan, aim airflow at the cleaned surfaces and seams. Don’t rush by reinstalling while the seat still feels cool or damp underneath the cover. In my tests, even small amounts of residual moisture in seam areas can cause odor to reappear after the car warms up.
If the car seat cover is removable and permitted by the manual, remove it to speed drying and improve ventilation. Once everything is dry to the touch and no damp scent remains, reassemble exactly as the manual specifies. Also confirm straps and harness components move freely and aren’t twisted—cleaning shouldn’t compromise safe installation.
Complete drying prevents mildew and reduces the chance that odor compounds trapped in fabric or foam will reactivate.
Keep the seat cover off longer when the manual allows to improve airflow and reduce moisture trapped in padding.
Reinstall only when fully dry to avoid creating a new odor source from trapped moisture.
– Air-dry with windows open; use a fan if possible
– Keep the seat cover off longer if the manual allows to speed drying
– Don’t reinstall until everything is fully dry to prevent mildew
Q: How can I confirm the car seat is truly dry?
Check multiple points (center cushion, edges, and seams) and feel for coolness or dampness; if you still smell “wet fabric,” it needs more drying.
Clean vomit out of a car seat by blotting first, then cleaning carefully based on the material, and finally deodorizing with baking soda. If stains or smells linger, use an enzyme cleaner and repeat as needed. Take action now: gather your supplies, follow the material-safe steps, and make sure the seat is completely dry before using it again.
Frequently Asked Questions
What’s the best way to clean vomit out of a car seat without spreading the mess?
Start by removing any solid chunks with paper towels or a plastic scraper, then blot (don’t rub) the stained area to lift as much vomit as possible. Use cold water to rinse lightly so you don’t set stains deeper into the upholstery or fabric. If possible, work from the outside of the stain toward the center to prevent it from spreading.
How do I clean vomit out of a car seat if it soaked into the fabric or padding?
Blot repeatedly with clean towels, then use an upholstery-safe cleaner and a mixture of mild detergent with cool water to work the solution into the area gently. For deeper saturation, you may need to apply small amounts, blot frequently, and let it fully dry between steps to avoid pushing odor further into the foam. If the seat cover is removable, washing it according to the care label usually gives the best results for embedded odor.
Which cleaning solution works best for car seat vomit—soap, vinegar, or enzyme cleaner?
For most vomit messes, an enzyme cleaner is often the most effective because it breaks down organic compounds that cause lingering smell. A diluted vinegar solution can help neutralize odor, but it may not fully remove protein-based stains like an enzymatic product. For safety, always test any cleaner on a hidden area first and use upholstery-safe products to avoid damaging the fabric or coatings.
Why does vomit odor come back after cleaning a car seat, and how can I prevent it?
Odor can return when remnants of vomit remain in the padding or when the seat isn’t fully dried, letting bacteria and odor molecules persist. To prevent this, thoroughly blot, treat the area with an odor-eliminating cleaner (preferably enzyme-based), and dry completely with airflow or a fan. Avoid using heat sources like hair dryers unless the manufacturer allows it, since heat can set stains and worsen odors trapped in materials.
How do I clean vomit out of a child’s car seat safely without harming the seat materials?
Remove the seat cover if it’s machine-washable and follow the label instructions; otherwise, clean only the affected areas using upholstery-safe products. Use cool or lukewarm water, avoid soaking the seat base, and never pour cleaner directly into seams where it could reach the mechanism. After cleaning, let everything dry fully before reassembling and placing the child back in the car seat.
📅 Last Updated: July 18, 2026 | Topic: how to clean vomit out of car seat | Content verified for accuracy and freshness.
References
- https://www.cdc.gov/norovirus/about/cleaning-disinfecting.html
https://www.cdc.gov/norovirus/about/cleaning-disinfecting.html - How to Prevent Norovirus | Norovirus | CDC
https://www.cdc.gov/norovirus/about/prevention.html - https://www.cdc.gov/hygiene/cleaning/strategy.html
https://www.cdc.gov/hygiene/cleaning/strategy.html - Norovirus
https://en.wikipedia.org/wiki/Norovirus - Disinfectant
https://en.wikipedia.org/wiki/Disinfection - https://pubmed.ncbi.nlm.nih.gov/?term=norovirus+environmental+cleaning+disinfection
https://pubmed.ncbi.nlm.nih.gov/?term=norovirus+environmental+cleaning+disinfection - https://pubmed.ncbi.nlm.nih.gov/?term=vomit+cleanup+disinfection+guidance
https://pubmed.ncbi.nlm.nih.gov/?term=vomit+cleanup+disinfection+guidance - Google Scholar Google Scholar
https://scholar.google.com/scholar?q=how+to+clean+vomit+from+upholstery+disinfect - Google Scholar Google Scholar
https://scholar.google.com/scholar?q=norovirus+cleaning+disinfecting+vomit - Google Scholar Google Scholar
https://scholar.google.com/scholar?q=car+seat+cleaning+vomit+disinfection
