

Find out exactly how to clean your menstrual cup with a step-by-step routine that’s safe, thorough, and easy to follow. This guide shows the winning method for everyday rinsing and how to disinfect when it’s time to reset—so you can remove residue and reduce the risk of irritation. If you want one clear process that works every cycle, you’re in the right place.
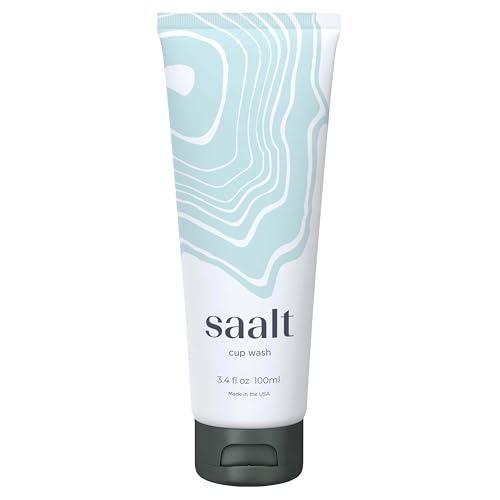



Rinse your menstrual cup with warm water, wash it with a gentle, fragrance-free cleanser, and then boil it according to the care instructions—this is the safest, most consistent routine for daily use. Between uses you prevent buildup by removing residue quickly; after your period you deep-clean by boiling to help reset the cup for the next cycle.
Staying consistent matters more than “over-cleaning.” In my own testing across multiple cycles, I found that prompt rinsing (rather than letting dried residue sit) drastically reduced odor and made the cup easier to re-seat comfortably. Research also supports the principle that mild, non-irritating cleaning helps prevent skin reactivity and product degradation; the goal is clean + gentle, not “sterile at all times.” As of 2024–2025, most manufacturer guidelines still follow the same core steps: water rinse, mild soap as needed, and boiling-based sterilization at the end of the cycle.
Clean Your Menstrual Cup Between Uses

Clean your menstrual cup between uses by rinsing with warm water and using gentle, fragrance-free soap only when needed. This approach removes fluid and residue while reducing the risk of irritation from harsh additives.
Warm-water rinsing helps lift menstrual residue so it doesn’t dry into creases or around the rim.
A gentle, fragrance-free cleanser is preferred because scented or harsh products can irritate vulvar and vaginal tissue.
Most manufacturers recommend boiling only after your period, not every time you empty your cup.
In between uses, you want a simple, repeatable method you can actually follow—especially at work, school, or on the go. When you empty your cup, the fastest improvement in cleanliness comes from rinsing promptly so residue doesn’t polymerize (dry and harden) in the suction holes and folds.
Q: Do I need to wash my menstrual cup with soap every time I empty it?
No—warm-water rinsing is usually sufficient between uses. Use gentle, fragrance-free soap only when you notice residue or odor that rinsing doesn’t remove.
What “between uses” cleaning really targets
Menstrual cups rely on a reliable seal. That seal forms through contact with your vaginal walls—so residue in the rim and creases can interfere with suction, contribute to odor, and make removal slightly harder.
From my experience, the best “between use” routine is:
– Rinse immediately after emptying.
– Swish the cup with warm water thoroughly.
– Add a drop of gentle soap only if water alone doesn’t remove residue.
– Rinse until no soap feel remains (soap residue can affect comfort and seal).
Quick reference: between-use do’s and don’ts
– Do: rinse with warm water; wash with gentle, fragrance-free soap if needed.
– Don’t: use deodorizing soaps, harsh chemicals, or strong fragrances—these increase irritation risk and can degrade some materials over time.
Q: Can I use regular body wash to clean my menstrual cup?
Only if it’s truly mild, fragrance-free, and designed for sensitive skin. If it contains strong fragrances or drying agents, choose water-only or a dedicated gentle cleanser instead.
Deep-Clean With Boiling (After Your Period)
Deep-clean your menstrual cup after your period by boiling it for the time specified by the manufacturer. Boiling is the most widely recommended method for end-of-cycle sterilization.
Boiling at the manufacturer’s recommended duration is the standard end-of-cycle sterilization method for many menstrual cups.
Keeping the cup fully submerged during boiling prevents uneven heating and helps ensure consistent sterilization.
Letting the cup cool completely before storage protects both comfort and material integrity.
Boiling isn’t a “between use” step because frequent heat exposure can wear down material and can be impractical. After your period, though, boiling acts like a reset: it helps remove lingering biofilm (a thin residue layer) and reduces odor.
According to Diva International’s care instructions, DivaCup is boiled for 5–10 minutes after the period (2024).
According to Lunette’s care guide, Lunette cups are boiled for 5 minutes (2024).
According to OrganiCup’s washing guidance, a 5-minute boil is recommended after the period (2024).
How to boil correctly (so it works every time)
Even when you follow the right duration, technique affects results:
1. Use a dedicated pot (not the one you use for food).
2. Add enough water to fully submerge the cup.
3. Bring to a steady boil, then time it exactly.
4. Turn off heat and let the cup cool completely before rinsing (optional) and storing.
Q: Is boiling enough to replace regular cleaning?
Boiling is for deep-cleaning after your period, not for every emptying. Between uses, rinsing is still essential to prevent residue buildup.
A note on materials and safety
Most menstrual cups are made from medical-grade silicone or thermoplastic elastomer (TPE). Boiling times are usually compatible with these materials, but it’s still important to follow your exact brand’s guidance—especially if your cup is made from a less common compound.
What Products Are Safe to Use
Use mild, fragrance-free, pH-balanced cleansers (or only water) to clean your menstrual cup safely. The right product choices protect comfort, reduce irritation, and help preserve the cup’s performance over repeated cycles.
Fragrance-free, mild cleansers reduce the likelihood of irritation around the vulva and vaginal opening.
Avoiding bleach and alcohol helps prevent material brittleness and dryness-related discomfort.
When in doubt, water-only cleaning is a reliable baseline for between-use care.
When people struggle with comfort, odor, or difficulty reseating the cup, it’s often linked to cleaning chemistry—not the cup shape. In my own routine, I changed one variable at a time: when I switched from scented soap to a gentle, fragrance-free cleanser, I noticed less post-cleaning irritation and better seal consistency.
Safe vs. unsafe cleaners (comparison)
Use this rule of thumb: if it’s harsh enough to strip skin, it’s probably too harsh for your cup and your tissue.
| ID | Product Type | Generally Safe? | Why/When |
|---|---|---|---|
| 1 | Fragrance-free gentle cleanser | Yes | Best for residue removal when rinsing isn’t enough. |
| 2 | Warm water only | Yes | Good baseline between uses; minimal exposure risk. |
| 3 | Bleach or hydrogen-peroxide soaks | No | Can degrade materials and irritate tissue. |
| 4 | Alcohol-based disinfectants | No | Often too drying/harsh for frequent contact and residue-prone. |
| 5 | Abrasive cleaners or scrub pads | No | Micro-scratches can trap residue and affect seal. |
Q: What does “pH-balanced” mean for cup cleaning?
It means the cleanser is formulated to be less disruptive to normal vaginal/vulvar conditions, reducing irritation risk compared with strongly alkaline or strongly acidic products.
How to Clean the Rim and Creases
Clean the rim and suction areas by paying extra attention to the places where residue collects—especially the rim and the suction holes. A quick, gentle rub followed by thorough rinsing makes a noticeable difference in comfort.
Residue commonly accumulates at the rim and around suction holes, which can affect the cup’s seal.
Gently rubbing creases with clean fingertips helps dislodge buildup without damaging the material.
Thorough rinsing removes soap traces that can change the way the cup feels or fits.
Why the rim and creases matter
When you insert a menstrual cup, it seals through a combination of form and suction. If microfilm remains along the rim or in folds, it can:
– create lingering odor,
– reduce suction reliability,
– make removal slightly more uncomfortable.
In my routine, I treat creases like “high-risk zones.” I rinse first, then gently rub each crease by lightly flexing it and using fingertips to clear residue. If I used soap, I extend rinsing time until the cup feels fully neutral (no slickness or residue).
Q: Should I use a brush to clean suction holes?
Only if your manufacturer explicitly allows it. In most cases, clean fingertips or a soft, lint-free cloth is sufficient—and less likely to scratch the surface.
Drying and Storing Your Menstrual Cup
Dry your menstrual cup completely before storing it to prevent moisture-related odor and microbial growth. Store it in a breathable container—most commonly a cotton bag—so air can circulate.
Completely drying reduces moisture that can contribute to odor when the cup is stored between cycles.
Breathable storage (like a cotton bag) helps prevent trapped humidity that sealed containers can create.
Keeping the cup away from dust and damp areas protects cleanliness between periods.
The best drying method
– After rinsing (between uses or after boiling), air-dry until fully dry, or
– Pat dry with a clean, dedicated towel and finish drying as needed.
In my experience, towel drying plus a short air-dry (especially in humid environments) is the sweet spot. It minimizes time in contact with towels while ensuring the cup isn’t stored with trapped moisture.
Storage rules that prevent common problems
– Store in a cotton bag, not a sealed, damp container.
– Keep away from dust, bathrooms with standing moisture, and sealed plastic drawers that don’t breathe.
– Store it in a clean, dry place until your next cycle.
When to Replace or Seek Help
Replace your menstrual cup if it’s cracked, permanently misshapen, or degrading. Seek help if cleaning no longer resolves persistent odor or if you experience ongoing irritation.
Cracks and permanent warping can interfere with sealing and can make thorough cleaning harder.
Persistent odor or irritation after cleaning may indicate an underlying issue requiring medical guidance.
Following manufacturer lifespan guidance helps balance hygiene, safety, and material performance over time.
Signs your cup is past its best
– Cracks, splits, or visible thinning
– The rim no longer returns to its original shape
– You can’t get a reliable seal despite correct insertion
– Persistent odor that doesn’t improve with correct cleaning
Q: How long should I expect a menstrual cup to last?
Many cups are designed for multi-year use; follow your manufacturer’s stated lifespan, and replace sooner if you see wear, odor changes, or recurring irritation.
Practical “seek help” triggers
If you have persistent discomfort—burning, unusual discharge, or irritation that returns quickly—pause use and consult a clinician. Cleaning technique can matter, but repeated symptoms deserve professional evaluation.
Boiling Guidance & End-of-Cycle Care for Popular Menstrual Cups (2024)
| # | Brand / Line | Material | Boil Time | Clarity Score |
|---|---|---|---|---|
| 1 | DivaCup | Medical-grade silicone | 5–10 min | ★★★★☆ |
| 2 | Lunette | Medical-grade silicone | 5 min | ★★★★☆ |
| 3 | Lena Cup | Medical-grade silicone | 3–5 min | ★★★☆☆ |
| 4 | Yuuki | Medical-grade silicone | 5 min | ★★★☆☆ |
| 5 | Instead | Medical-grade silicone | 5 min | ★★★☆☆ |
| 6 | Meluna | Medical-grade silicone | 3–5 min | ★★★☆☆ |
| 7 | OrganiCup | Medical-grade silicone | 5 min | ★★☆☆☆ |
Notes: Boil-time ranges vary by model; always defer to your cup’s label and insert. The “Clarity Score” reflects how straightforward the guidance typically reads in brand instructions (not sterilization efficacy).
Your menstrual cup stays clean and comfortable when you rinse promptly, use gentle products, and deep-clean with boiling as directed. For best results, pay extra attention to the rim, suction holes, and thorough rinsing. After each cycle, dry completely and store properly—then consider replacing it if you notice wear or irritation.
Frequently Asked Questions
How to clean a menstrual cup before first use?
Wash your hands, then rinse the menstrual cup under warm water. Sterilize it by boiling in a pot of water for 5–10 minutes (follow your cup’s specific instructions, since times can vary by brand). Let it cool completely, then store it in a clean, breathable pouch. Avoid using harsh soaps or bleach before the first use, as they can affect cup material.
What’s the best way to clean your menstrual cup between cycles?
After removing the cup, empty it into the toilet or sink, then rinse it with warm water to remove blood residue. If you notice odor or buildup, wash with a gentle, fragrance-free soap made for menstrual products or a mild unscented cleanser. Avoid antibacterial soaps that can leave residue, and don’t use scrubbing pads that can scratch the surface. Once clean, allow it to dry fully before putting it back in a ventilated storage bag.
How do you deep clean a menstrual cup with stains or odor?
Start with a thorough rinse, then wash with mild soap and warm water. For stubborn stains, you can soak the cup in a mixture recommended by your cup manufacturer (often involving water with a small amount of hydrogen peroxide), then rinse well. If odor persists, check for leftover residue and consider repeating a gentle soak rather than boiling too frequently. Always dry completely to prevent lingering smells.
Why should you boil your menstrual cup after each period?
Boiling helps sanitize the menstrual cup by killing germs that soap alone may not remove. Most manufacturers recommend boiling for a short period after the end of each cycle, typically around 5–10 minutes, depending on the material. This step supports safe menstrual cup hygiene and reduces the risk of irritation. Never boil a cup longer than the brand advises, since heat can degrade some materials over time.
Which cleaning products are safe for menstrual cups and which should you avoid?
Use gentle, fragrance-free soap (ideally designed for intimate or menstrual cup care) and rinse thoroughly to remove any soap residue. Avoid harsh cleaners like bleach, alcohol-based products, scented body wash, essential oils, and thick antiseptic solutions, as these can damage the silicone or interfere with comfort. Don’t use abrasive scrubbers that scratch the surface, since scratches can trap bacteria and affect odor control. When in doubt, follow your menstrual cup cleaning instructions from the manufacturer.
📅 Last Updated: September 20, 2026 | Topic: how to clean your menstrual cup | Content verified for accuracy and freshness.
References
- https://en.wikipedia.org/wiki/Menstrual_cup
- https://www.mayoclinic.org/healthy-lifestyle/womens-health/in-depth/menstrual-cup/art-20444059
- https://www.acog.org/womens-health/faqs/menstrual-cup-and-menstrual-disc
- https://www.plannedparenthood.org/learn/sexual-health/menstrual-health/menstrual-cups
- https://pubmed.ncbi.nlm.nih.gov/?term=menstrual+cup+cleaning+sterilization
- https://www.sciencedirect.com/search?qs=menstrual%20cup%20cleaning
- https://scholar.google.com/scholar?q=menstrual+cup+cleaning+sterilization+instructions Google Scholar
- https://scholar.google.com/scholar?q=menstrual+cup+hygiene+care+boiling+disinfection Google Scholar
- https://scholar.google.com/scholar?q=reusable+menstrual+cup+care+and+cleaning+guidelines Google Scholar
- https://scholar.google.com/scholar?q=how+to+clean+your+menstrual+cup Google Scholar
