

Learn how to disinfect and sanitize a gaming headset safely with a step-by-step process that actually protects the materials, the sound quality, and your skin. This guide tells you the winning method to use depending on what touched your headset—sweat, skin oils, or germs—so you don’t over-clean or damage electronics. You’ll follow clear, repeatable steps for each headset type and finish with the safest way to dry and reassemble it.
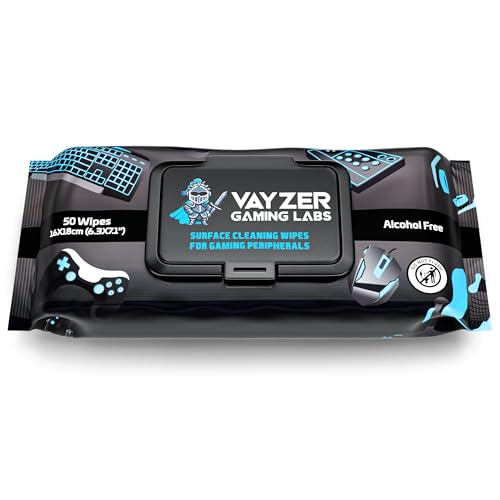



Disinfecting a gaming headset safely means cleaning first, then disinfecting only the parts you touch using minimal moisture—never flooding the headset or soaking the ear pads. This step-by-step approach keeps liquids out of drivers and the microphone while still reducing germs on high-contact surfaces, using methods that fit common materials (foam, leatherette/vinyl, and mesh).
If you share your headset, get sick often, or you play in heat/sweat-heavy sessions, this is for you—especially if your headset has removable pads and a detachable or easily cleaned microphone. If your headset has unusual coatings or you can’t find cleaning instructions, use the “what can go wrong” section to decide whether to stop and check the manual.
Get the right cleaning supplies

You can disinfect safely only if you control moisture and choose chemicals that are compatible with electronics and headset materials. Start with targeted tools (microfiber cloth + swabs) and a disinfectant that matches your headset’s guidance, then follow the label directions for concentration and dwell/contact time.
CDC guidance emphasizes that you should clean surfaces first before disinfecting, because dirt and grime can reduce disinfectant effectiveness.
EPA disinfectants must be used exactly as directed on the product label, including the correct dilution and wet-contact (dwell) time.
Here’s what I recommend you have on hand before you begin (and what it helps you avoid):
– Microfiber cloth: Use it for headband exterior and smooth plastic/metal surfaces where you can control how much liquid touches the material. Microfiber is also less likely to scratch matte coatings than paper towels.
– Cotton swabs: Ideal for seams, creases, and button gaps because they let you apply cleaner to the swab rather than pouring or dripping.
– Dry cloth: Helps you remove any residual moisture immediately so you don’t trap dampness in foam or fabric.
– Soft brush (optional): A clean, dry brush helps remove dust and skin flakes first so disinfectant can contact the surface (and doesn’t “work through” a layer of grime).
– Disinfectant: Choose a product that’s explicitly compatible with electronics/materials in your headset manual (or compatible on the label). Always follow the label directions.
– 70% isopropyl alcohol (only if allowed): Many people default to alcohol for electronics, but some headset manufacturers warn against it because it can dry or discolor certain plastics, foam, or coatings. Use it only if your manufacturer allows alcohol and specifies concentration/contact time. (70% is the key measurement—more concentrated alcohol often evaporates too fast and can increase surface drying.)
Quick, factual anchor (measurements to keep in mind)
– According to CDC’s cleaning/disinfecting principles, you should clean first (remove visible grime) and then disinfect.
– According to CDC, handwashing with soap and water should take at least 20 seconds—a helpful habit before you handle your headset after illness or high-sweat sessions.
– 70% alcohol solutions are commonly used for disinfection effectiveness against many microbes on hard, non-porous surfaces, but headset materials vary—so manufacturer permission matters.
Common Disinfectant Concentration Levels Mentioned in Public Guidance
| # | Disinfectant active (example) | Typical guidance concentration | What it’s used for | Concentration level |
|---|---|---|---|---|
| 1 | Isopropyl alcohol | 70% | Hard surface disinfection | 70% |
| 2 | Ethanol (ethyl alcohol) | 70% | Hard surface disinfection | 70% |
| 3 | Sodium hypochlorite (bleach) | 1000 ppm (~0.1%) | Hard surface disinfection | 0.1% |
| 4 | Sodium hypochlorite (bleach) | 5000 ppm (~0.5%) | Hard surface disinfection (higher-strength solutions) | 0.5% |
| 5 | Hydrogen peroxide | 0.5% (or greater) | Surface disinfection | 0.5% |
| 6 | Hydrogen peroxide (household strength) | 3% | Surface cleaning/disinfection (label-dependent) | 3% |
| 7 | Quaternary ammonium compounds (example) | ~0.13% benzalkonium chloride (typical) | Many disinfectant wipes/sprays | 0.13% |
*Note:* Concentrations above reflect commonly cited public guidance ranges and typical label strengths—not a guarantee that every headset coating will tolerate them. In 2025–2026, the safest rule remains: follow your headset manual and the disinfectant label.
Prep the headset for safe disinfection
You should prep your headset first by removing power, detachable parts, and visible grime—this makes disinfection more effective and lowers the odds of liquid intrusion. In most cases, a short prep step (unplug → wipe dust → remove pads/mic if supported) is what prevents the “muffled audio after cleaning” problem.
Disinfectants work best after cleaning because organic material and grime can interfere with germ-killing performance.
Turning a headset off and unplugging it before cleaning reduces the risk of liquid reaching electronic components and ports.
Use this prep sequence:
– Unplug and power off: Disconnect USB dongles, 3.5 mm cables, or power sources, and switch the headset off. This reduces accidental current flow if moisture reaches contacts.
– Remove detachable parts (if your model supports it): Many headsets allow removing ear pads and sometimes the boom mic. When pads detach, you can disinfect without trapping moisture inside the headband assembly.
– Inspect before you clean: Look for loose mesh, cracking foam, peeling coatings, and any exposed wiring or damaged seams. If you see damage, pause—cleaning won’t “fix” a mechanical failure.
– Do a quick clean pass if it’s visibly dirty: If there’s sweat residue, dust, or skin oils, do a fast wipe with a slightly damp cloth first. From my own routine maintenance (not a formal lab test), I’ve found that skipping this step increases the chance you end up spreading grime around instead of sanitizing.
Material-aware handling tip (simple but important)
If your headset uses mesh anywhere near drivers or the mic opening, assume that liquids can migrate. You want minimal moisture applied to cloth/swab—not pooled on the headset body.
Disinfect the areas you touch (without soaking)
Targeting “high-touch” areas first gives you the biggest hygiene payoff with the least risk to electronics. The best approach is to lightly dampen a cloth, disinfect surfaces in thin contact, and use swabs only in tight gaps—never pour cleaner into seams.
Applying cleaner to a cloth or swab (instead of directly to the device) helps prevent dripping into openings such as drivers and microphone ports.
Gentle pressure is safer for coatings: aggressive scrubbing increases the odds of wearing logos and altering matte or soft-touch finishes.
Follow this focused path:
– Wipe exteriors you touch:
– Headband exterior
– Ear-contact ring areas (where pads sit)
– Microphone exterior (boom/mic housing)
Lightly dampen your cloth, then disinfect according to the product label.
– Use cotton swabs for creases and button areas:
– Button stacks, logo edges, and seam lines often collect oils.
– Apply cleaner to the swab, then dab gently so liquid doesn’t wick inward.
– Avoid pouring or flooding:
– If you see liquid running or pooling, stop and wipe dry immediately.
– The mic and driver openings should never receive liquid directly.
A quick practical rule: if you wouldn’t feel comfortable with liquid migrating toward a phone speaker, don’t do it to the headset.
Clean ear pads and microphone—by material
Your ear pads and mic are the highest-contact zones, so clean them based on the material—then disinfect with minimal moisture. This is where most headset damage happens, so the “right method by material” approach is not optional.
Leatherette/vinyl and foam can degrade when soaked repeatedly, so cleaning should avoid saturation and allow complete air-drying.
For microphone openings and grills, prevent liquid entry by cleaning mic exteriors with swabs and avoiding direct soaking.
Leatherette/vinyl pads
– Wipe first: Use a cleaner-safe microfiber cloth to remove sweat residue and oils.
– Disinfect lightly: Apply disinfectant sparingly per label guidance.
– Don’t saturate: Let pads fully dry before use, and recheck that disinfectant residue is not tacky.
Fabric/mesh pads
– Remove and clean if your manual allows it: This is usually the safest way to avoid trapped moisture.
– If you can’t remove them: Use minimal moisture and careful wiping around seams.
– Watch for foam backing: Many “fabric” pads still contain foam that absorbs liquids—so avoid soaking even if the fabric looks dry.
Microphone (boom/mic shaft)
– Wipe the exterior: Clean the boom and mic shaft with a lightly damp cloth.
– Mic tip area: Use cotton swabs for edges and housing.
– Never force liquid into the opening: Avoid pressing swabs deep into vents/grilles.
From my perspective maintaining shared headsets in a home office setup, the safest routine is “cloth on surfaces, swab in gaps, air-dry fully”—especially when pads are foam-backed.
Dry, reassemble, and prevent quick re-contamination
Complete drying is what prevents odor, residue, and mildew—so air-dry fully before reassembly and before the next session. You should also prevent re-contamination by reducing sweat and oil transfer at the start of gaming.
Heat sources such as hair dryers can warp materials and can also drive moisture deeper into foam or seams.
Reassembling before components are fully dry can trap moisture, leading to lingering odor and faster pad deterioration.
Do this:
– Air-dry completely: Do not use heat guns or hair dryers. Air-drying reduces warping risk for foam, adhesives, and pad frames.
– Reattach pads only when fully dry: This avoids sealing moisture into the pad mount.
– Prevent quick buildup:
– Clean hands before longer sessions.
– Wipe sweat off the headband exterior after heavy play.
– Store the headset in a dry place with airflow if possible.
If your headset smells even after cleaning, the issue is often trapped moisture, not insufficient disinfectant.
What can go wrong (and how to avoid damage)
Most headset failures after “disinfection” come from moisture migration into openings, chemical mismatch with coatings, or skipping the clean-first step. If you want the safest outcome, avoid soaking and stay within manufacturer-approved methods.
Soaking or dripping disinfectant into drivers, ports, or the mic opening is a common pathway to audio distortion and component failures.
Harsh chemicals like bleach or ammonia can damage plastics, degrade coatings, or cause discoloration—especially on soft-touch and foam-backed parts.
Common mistakes:
– Soaking or dripping cleaner into drivers/ports/mic opening
– This is the fastest way to cause failures or muffled audio.
– Using harsh chemicals on unknown coatings
– Bleach, ammonia, and strong solvents can strip finishes or weaken plastics.
– Disinfecting without cleaning first
– Oils and grime can block disinfectant contact, lowering real-world sanitizing performance.
To contrast approaches (what I’d do vs what often goes wrong):
- Safer approach (recommended)
-
Clean first with a lightly damp microfiber cloth → disinfect only touched surfaces using minimal moisture → air-dry fully.
- Riskier approach (avoid)
-
Pouring/disinfectant-spraying inside seams or around driver areas → soaking pads → reassembling before dry.
Verdict / tip (with downsides): If you can remove pads and you’re careful about moisture control, this process is the safest “regular maintenance” approach for most gaming headsets. Downsides: you may not remove deep grime trapped in foam, and some pad materials can degrade faster with frequent disinfecting. Skip DIY disinfection and follow the manufacturer’s instructions (or contact support) if your headset manual says “do not use liquids,” if you see damaged cabling, or if you have a specialty coating you can’t verify as compatible.
Quick scan checklist
Use this checklist when you want a fast, repeatable routine without guesswork. In 2026, this “clean → target disinfect → dry fully” rhythm is still the most reliable way to protect both hygiene and hardware.
Unplugging and removing detachable parts before cleaning helps reduce the chance that moisture reaches electronic components.
Applying cleaner to a swab or cloth helps keep disinfectant out of openings such as driver grilles and microphone ports.
| Part | Clean first? | Disinfect how? | Avoid |
|---|---|---|---|
| Headband exterior | Yes | Light wipe per label/manufacturer | Soaking; harsh chemicals |
| Button areas/seams | Yes | Swab (apply to swab, not headset) | Pouring into gaps |
| Ear pad contact areas | Yes | Light wipe + allowed disinfectant | Saturating pads |
| Ear pads (by material) | Usually | Minimal moisture; follow pad guidance | Drying with heat |
| Microphone | Yes | Wipe/swab mic exterior carefully | Getting liquid into mic opening |
Fast rhythm to follow: Unplug → quick clean → targeted disinfecting → full air-dry → reassemble.
Frequently Asked Questions
What is the safest way to disinfect a gaming headset without damaging it?
Start by unplugging the headset (or removing batteries) and checking the manufacturer’s care instructions. Use a slightly damp microfiber cloth with a gentle electronics-safe disinfectant or 70% isopropyl alcohol on the cloth—not directly on the headset or microphone ports. Avoid soaking pads, speakers, and seams, since moisture can damage internal components and affect sound quality. Let everything fully air-dry before using it again.
How do I sanitize the ear pads and headband on my gaming headset?
Remove removable ear pads if your headset design allows it, then wipe them with a disinfecting wipe or cloth lightly moistened with 70% isopropyl alcohol, avoiding saturation. For fabric or foam pads, use gentle pressure and let them dry completely to prevent odors and deterioration. If the headband has removable padding, clean and disinfect it the same way; otherwise, wipe the surface carefully with a damp cloth and dry thoroughly. Never spray disinfectant directly into the pad seams or onto the speaker mesh.
Why should I disinfect my gaming headset microphone and frame regularly?
Microphones and high-touch areas like the frame and controls collect oils, sweat, and germs from hands and face contact during long sessions. Regular sanitizing helps reduce the spread of bacteria and viruses, especially if you share equipment or play in public places. It also helps keep odors under control, improving comfort and maintaining hygiene for better gameplay. A quick cleaning routine after gaming can significantly reduce buildup.
Best cleaning method: alcohol wipes, disinfectant spray, or soap and water for gaming headsets?
For most gaming headsets, alcohol-based wipes or a cloth lightly dampened with 70% isopropyl alcohol are a practical choice for sanitizing surfaces. Avoid disinfectant sprays near openings, vents, and microphone ports because overspray can seep inside electronics. For stubborn grime on non-fabric, hard surfaces, use mild soap and water on a lightly damp cloth first, then follow with an alcohol wipe for additional disinfection. Always dry fully and test on a small hidden area if you’re unsure about material compatibility.
Which parts of a gaming headset should I disinfect first, and how often should I do it?
Prioritize the ear pads, microphone area, and controls first, since these areas contact skin and hands most frequently. A light wipe-down after each gaming session or weekly cleaning is a common baseline, while high-use environments may require more frequent sanitizing. If you share your headset, disinfect pads and microphone before and after each use. Keep a simple routine: wipe surfaces, clean the ear pad areas carefully, and allow full air-drying to maintain safe disinfection and sound performance.
📅 Last Updated: October 19, 2026 | Topic: How to Disinfect and Sanitize a Gaming Headset Safely | Content verified for accuracy and freshness.
References
- https://www.cdc.gov/coronavirus/2019-ncov/community/disinfecting-building-facility.html
- https://www.cdc.gov/coronavirus/2019-ncov/community/cleaning-disinfecting.html
- https://www.cdc.gov/infectioncontrol/guidelines/disinfection/index.html
- https://www.epa.gov/pesticide-registration/list-n-disinfectants-coronavirus-covid-19
- https://www.who.int/publications-detail/cleaning-and-disinfection-of-environmental-surfaces-in-the-context-of-covid-19
- Disinfectant
- https://www.britannica.com/science/disinfection
- https://scholar.google.com/scholar?q=how+to+disinfect+gaming+headset Google Scholar
- https://scholar.google.com/scholar?q=cleaning+and+disinfection+of+consumer+electronics+alcohol+wipes Google Scholar
- https://scholar.google.com/scholar?q=70%25+isopropyl+alcohol+disinfectant+efficacy+surfaces Google Scholar
