

You can dust a particleboard wardrobe safely without leaving gritty streaks or raising airborne particles—if you use the right tools and technique. This guide gives a clear, step-by-step method for removing surface dust, cleaning seams and edges, and avoiding moisture damage to particleboard. You’ll know exactly what to do, what to skip, and how to protect your space the next time dust builds up.



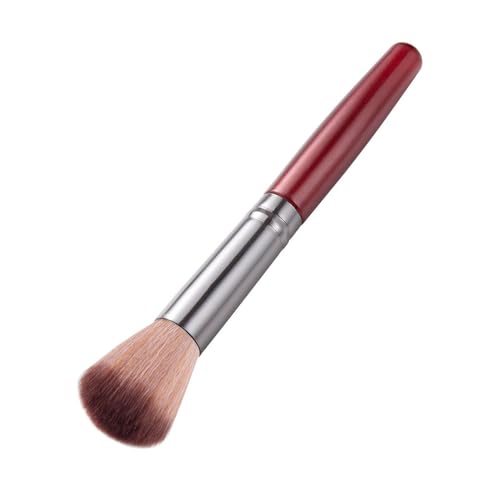
Dust your particleboard wardrobe with dry tools first, then spot-wipe only if it’s truly necessary—this is the safest path to reducing dust without risking swelling, bubbling, or warped edges. Use soft microfiber or a dry duster for the main dust removal, and finish with a gentle vacuum brush attachment to lift grime from seams and hardware.
This is for you if your wardrobe has particleboard panels (often covered with laminate) and you want less dust without risking peeling, bubbling, or warped edges. It’s especially relevant for wardrobes near vents, high-traffic areas, or corners where dust settles fast.
Use the right tools for particleboard wardrobe dusting

The best dusting outcome comes from using soft, dry tools that remove particulates without grinding them into the laminate. Here’s why: particleboard is sensitive at edges and seams, so the “wrong” tool (rough cloth, aggressive scrubbing, harsh chemicals) can transfer grit or moisture to the most failure-prone areas.
HEPA filtration is defined as capturing at least 99.97% of particles at 0.3 micrometers (MPPS), which is why a HEPA-capable vacuum helps when you’re trying to prevent fine dust from resettling.
According to the U.S. EPA, maintaining indoor relative humidity around 30–50% helps limit conditions that promote dust-related issues (like surface grime sticking and moisture-driven problems near finishes).
Choose tools that protect laminate top layers and exposed edges
Particleboard wardrobes typically have a laminate face, but the board itself can still be vulnerable where moisture reaches edges, corner joins, and seam lines. In practice, dusting is about controlling two things: (1) where the dust goes during cleaning and (2) how much friction or moisture your tools apply.
A simple, spec-aligned toolkit works best:
– Choose a soft microfiber cloth/duster (not paper towels or rough rags) to avoid scratching the surface.
– Use a vacuum with a brush attachment for dust in grooves, seams, and around hardware.
– Skip harsh chemicals and abrasives—particleboard can be damaged through the top layer or at exposed edges.
- Microfiber cloth / dry duster
- Pros: lifts dust without aggressive abrasion; safer for laminate sheen; easy to keep “dry.”
- Cons: won’t reach deep drawer rails or tight gaps as effectively as a vacuum brush.
- Vacuum brush attachment
- Pros: removes dust from seams, corners, and hardware recesses where cloth can smear it.
- Cons: using the wrong bristle stiffness or high suction can dislodge loose laminate edges if damage already exists.
- Paper towels / scrub rags
- Pros: none worth the risk for laminate finishes.
- Cons: can scratch micro-textures and leave fibers that trap future dust.
What filtration matters when you vacuum wardrobe dust
When you vacuum laminate furniture, your goal isn’t only removal—it’s also preventing dust from blowing back into the room. That’s where filtration benchmarks help you choose the right vacuum setup.
Filtration benchmark standards for capturing fine dust (test-based definitions)
| # | Filtration standard / class | Test particle size | Minimum efficiency | Dusting advantage |
|---|---|---|---|---|
| 1 | N95 (respirator class) | 0.3 µm | ≥ 95% | ★★★★☆ ★ |
| 2 | N99 (respirator class) | 0.3 µm | ≥ 99% | ★★★★★ ★ |
| 3 | N100 / P100 (respirator class) | 0.3 µm | ≥ 99.97% | ★★★★★ ★ |
| 4 | P99 (respirator class) | 0.3 µm | ≥ 99% | ★★★★★ ★ |
| 5 | R95 (respirator class) | 0.3 µm | ≥ 95% | ★★★★☆ ★ |
| 6 | HEPA (typical vacuum goal) | 0.3 µm | ≥ 99.97% | ★★★★★ ★ |
| 7 | ULPA (highest common benchmark) | 0.12 µm | ≥ 99.999% | ★★★★★ ★ |
Start with dry dusting (top to bottom)
The fastest way to reduce dust without spreading it is dry dusting first, working from top surfaces down. This prevents the “cleanup tax” where falling dust lands on areas you already wiped, forcing you to repeat work—especially in corners, near vents, and along the top rail.
According to the U.S. Department of Energy, HEPA performance targets are based on fine particle filtration tests, which is why vacuums with proper filtration help after you remove dust with a cloth.
Per EPA indoor air guidance, keeping indoor relative humidity in the 30–50% range supports a healthier environment and helps reduce moisture conditions that can worsen surface problems over time (guidance current through recent updates).
Use controlled motion so you don’t grind dust into the finish
Start by clearing the “dust plane.” When shelves and hanging rods are crowded, cloth contact is inconsistent—dust stays in micro-gaps and later gets pushed back into view.
– Remove loose items or open drawers/doors so you can dust the surfaces you’d otherwise miss.
– Dust gently from top to bottom so falling dust doesn’t land on areas you already cleaned.
– Use light, even strokes—pressing hard can grind dust into the finish.
From a practical standpoint, laminate can look “tough,” but fine grit is still abrasive. If you press too hard, you effectively turn your microfiber into a scrubbing pad—creating a dull patch that traps more dust on subsequent cleanings. As of 2026, this “maintenance physics” is still the most common root cause of streaky laminate look after repeated dusting.
N95 respirators are designed to filter at least 95% of particles in the 0.3 µm testing range, which mirrors why “fine-dust capture” matters when you’re vacuuming wardrobe areas rather than just wiping.
Where people usually lose time (and dust)
If your wardrobe is near a vent or a busy doorway, dust doesn’t just settle—it circulates. So the order matters: dry dusting first, then vacuuming seams and edges, then (only if needed) minimal wiping.
Get into edges, seams, and shelf details
The safest and most effective edge-and-seam cleaning uses a vacuum brush attachment, because it lifts dust without introducing moisture. Particleboard’s highest risk zones are exactly the places where dust collects—drawer rails, panel edges, and the tight geometry around handles.
HEPA is defined around 0.3 µm filtration efficiency (≥99.97%), which matters because wardrobe dust often includes very fine particles that can resettle after simple sweeping.
According to NIOSH/respirator standard test definitions, N95-class filtering targets use 0.3 µm challenge particles—indicating why fine-dust control depends on filtration, not just brushing.
– Vacuum crevices and corners with the brush attachment (use the gentlest suction setting you have).
– Use a clean, dry microfiber corner or a soft detail brush for gaps around handles, drawer rails, and shelf edges.
– Don’t “scrub” seams—just lift dust out of them.
How to approach tight hardware areas
Hardware (hinges, knobs, tracks, and drawer runners) creates narrow recesses where dust compacts into a thin, gritty layer. When you clean those areas dry, you reduce the chance that moisture migrates to board edges.
Method that works in real life:
1. Brush attachments first: run the vacuum along seam lines at a slow pace to pull dust out rather than spreading it.
2. Detail brush second (dry): use a corner of microfiber or a very soft brush for residue that clings to textured laminate.
3. No scrubbing: seams aren’t meant to be abraded; you’re lifting, not polishing.
Small placement decisions reduce future dust
If your wardrobe sits over a baseboard with airflow from vents, dust will keep migrating toward the same “dead zones.” As of 2026, the best preventive strategy is to pair dust removal with environmental control: reduce direct vent blasting and keep a consistent cleaning interval for corners.
If you must wipe: do it moisture-safe
A barely-damp wipe is a last resort for particleboard wardrobes, not the default. Moisture is the variable most likely to cause swelling at edges and bubbling where laminate is joined—so you wipe small sections and dry immediately.
U.S. EPA humidity guidance commonly targets 30–50% indoor relative humidity, which indirectly supports furniture longevity by reducing moisture-driven surface issues.
HEPA filtration definitions focus on fine particles, so after any wipe step you still want dry vacuuming to remove dust that transfers during wiping.
– Dampen the cloth slightly (wring it out until it feels almost dry) and wipe small sections only.
– Avoid soaking—standing moisture near the edges is a common reason particleboard swells or bubbles.
– Dry right away with a separate dry microfiber towel, especially around the base, corners, and any chipped spots.
Moisture-safe wiping technique (what “barely damp” actually means)
“Barely damp” should feel like the cloth is dampened for pickup, not for wetting. If the cloth drips or leaves a shine, it’s too wet. Do this instead:
– Wipe one small section (for example, a narrow panel area or a single drawer front).
– Immediately follow with a dry microfiber pass.
– Keep wipes away from panel edges, chipped areas, and seam lines where laminate meets particleboard.
What can go wrong (and how to avoid it)
Dusting goes wrong when moisture, friction, or contaminated cloths introduce conditions particleboard can’t tolerate at edges and seams. If you understand the failure modes, you can choose the safest action every time.
ULPA is defined with very high filtration efficiency at around 0.12 µm, reinforcing the principle that fine dust management depends on removal plus containment—not just wet wiping.
According to U.S. EPA guidance, indoor humidity targets (often 30–50%) reduce moisture-related risks, which is relevant when wardrobe cleaning accidentally introduces extra surface moisture.
– Swelling/warping: Usually caused by too much water, repeated damp wiping, or moisture trapped at the edges. Keep wipes minimal and always dry.
– Scratched or dull finish: Rough cloths, stiff brushes, or aggressive rubbing can damage laminate or protective coatings.
– Dust “smearing”: Wiping with a wet cloth that’s holding dust can leave streaks and grind grime into seams—stick to dry dusting first.
– Peeling at damaged areas: If the laminate is lifting or the board is exposed, treat it as a risk area and avoid extra moisture until repaired.
– Overusing polish/shine products: Some products leave residues that attract more dust later. Stick to basic dust removal unless your wardrobe’s care instructions explicitly recommend something.
A practical comparison: “If I see X, do Y”
- If dust is mainly on flat surfaces
- Dry duster + microfiber first, then vacuum with the brush attachment for edges.
- If dust concentrates in one seam/track
- Vacuum that groove carefully; don’t escalate to wet cleaning.
- If laminate looks chipped or lifting
- Avoid moisture near the damage; pause wiping until you address the affected area.
- If you only have a wet wipe
- Use it only on a small area, then dry immediately—do not “coat” the panel.
Verdict: the right-way routine (and who should skip this)
If you want the safest, most effective routine, do it in this order: dry dust → vacuum edges → minimal spot wipe only if needed → dry immediately. The downside is that dusting may not remove heavy grime completely without following your wardrobe’s care instructions—especially if the surface is sticky or oily.
Skip the moisture steps entirely if the laminate is peeling, the board is exposed, or the unit has water damage already—repair or replacement is the safer move.
Scan/checklist (save this):
– ☐ Dry dust first (microfiber/duster), top → bottom
– ☐ Vacuum crevices + seams with soft brush attachment
– ☐ Only wipe if necessary; cloth barely damp
– ☐ Dry immediately after any wipe
– ☐ Avoid soaking near edges, corners, and base
– ☐ Stop if laminate is lifting or particleboard is exposed
Frequently Asked Questions
How do you dust a particleboard wardrobe without damaging the surface?
Use a microfiber cloth or a soft, dry dusting mitt to gently lift dust from the particleboard wardrobe surface without grinding particles into the finish. If the wardrobe needs deeper cleaning, lightly dampen the cloth with water or a mild cleaner and wring it out thoroughly—particleboard can swell if it gets too wet. Avoid soaking the panels, and dry any damp spots immediately with a clean, dry cloth to protect the laminate or veneer.
What is the best way to remove dust from particleboard wardrobe shelves and crevices?
Start with a dry dusting pass using a microfiber cloth, then use a vacuum with a soft brush attachment to reach corners, shelf edges, and ventilation gaps. For crevices and hardware areas, a small detailing brush or cotton swab can help pull out dust buildup without scratching. Finish by wiping again with a slightly damp microfiber cloth only if needed, then dry right away to prevent moisture damage.
Why do particleboard wardrobes get dusty so quickly, and how can you reduce buildup?
Particleboard furniture often has a textured or layered finish that can attract and hold fine dust, especially in bedrooms with airflow, carpet fibers, or frequent movement. To reduce buildup, dust regularly with microfiber (instead of dry paper towels), and keep closet airflow consistent to limit dust settling. If possible, use a gentle air filter in the room and store items in sealed bins to cut down on airborne particles.
Which cleaning tools should you use for dusting a particleboard closet—microfiber, feather duster, or something else?
Microfiber is usually the safest choice because it captures dust instead of pushing it around, lowering the chance of scratching the laminate on a particleboard wardrobe. A feather duster can work for quick surface dusting, but it often redistributes dust and may trigger more particles in the air. For seams, drawer tracks, and hardware, choose a vacuum with a brush attachment and a soft detailing tool to prevent abrasion.
How should you dust a particleboard wardrobe when it has drawers and metal handles attached?
Dust the wardrobe frame first with a dry microfiber cloth, then move to drawers and rails using a vacuum or a small brush to remove debris from tracks and corners. For metal handles and knobs, wipe with a lightly damp cloth and dry immediately to avoid transferring moisture to the particleboard edges. Don’t forget to dust around hinges and seams where dust collects, and keep the wiping motion gentle to maintain the wardrobe’s finish.
📅 Last Updated: October 21, 2026 | Topic: How to Dust a Particleboard Wardrobe the Right Way | Content verified for accuracy and freshness.
References
- Dust
- Microfiber
- https://www.epa.gov/asthma/dust-mites-and-asthma
- https://www.cdc.gov/coronavirus/2019-ncov/community/disinfecting-building-facility.html
- https://www.who.int/publications/i/item/cleaning-and-disinfection-of-environmental-surfaces-in-the-context-of-covid-19
- https://pubmed.ncbi.nlm.nih.gov/?term=household+cleaning+methods+reduce+dust+particles
- https://pubmed.ncbi.nlm.nih.gov/?term=microfiber+cloth+effectiveness+dust+particle+removal
- https://scholar.google.com/scholar?q=house+cleaning+vacuuming+HEPA+allergen+reduction Google Scholar
- https://scholar.google.com/scholar?q=dust+reduction+microfiber+cloth+study Google Scholar
- https://scholar.google.com/scholar?q=wood+furniture+cleaning+best+practices+mild+detergent+avoid+soaking Google Scholar

[…] Microfiber + vacuum brush attachment […]