

Want to dust antique wooden furniture without stripping patina or grinding grime into the grain? Follow this step-by-step method for the right supplies, the correct order of operations, and the safest finishing wipe—so your pieces look clean while staying period-true. You’ll finish with a dust-free surface that’s properly protected, not accidentally damaged.


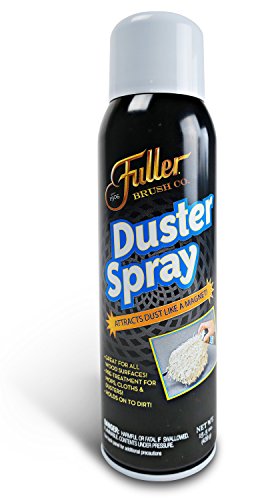

Dusting antique wooden furniture the right way is a two-stage process: start with gentle dry removal (no soaking), then—only for truly stubborn spots—use the least aggressive moisture/cleaner that won’t disturb the finish. This approach protects older patina and surface coatings while removing grit that would otherwise abrade carvings, turnings, and raised moldings.
If your goal is to keep an antique looking clean without damaging the patina, this guide is for you—especially when you have detailed trim, carved legs, or older finishes that can be sensitive.
This is especially relevant in 2026 when many antiques are displayed in higher-traffic rooms (more dust movement, more dry particulates, more accidental contact). The steps below are written for antique wooden furniture care where the exact finish type—shellac, wax, varnish, or aged polyurethane—can be hard to confirm on sight.
Gather the right tools (and what to skip)

Use a soft, low-abrasion setup and you’ll remove dust without grinding it into grain or carvings. We’re going for “lift and trap” rather than “wipe and polish,” because older finishes can soften, haze, or wear unevenly if you use the wrong tools.
– Use clean, soft microfiber cloths and a soft natural-bristle brush for cracks and corners.
– Skip feather dusters or anything abrasive, and avoid “furniture polish” sprays unless you know the finish type.
Microfiber is designed to trap fine dust mechanically and with electrostatic attraction, which reduces the chance of scratching compared with dry cloths or abrasives.
Feather dusters can redistribute dust back onto the surface because they don’t reliably lock particles in fibers like microfiber does.
What “right tools” looks like for antique wood dusting
For antique wooden furniture, the best starting kit is simple and purpose-built:
– Microfiber cloths (multiple, clean sections): Use at least two cloths so you can switch to a fresh section as soon as one area loads with grit.
– Natural-bristle brush (soft, not stiff): Great for carved legs, turned spindles, and decorative fretwork where grit hides in recesses.
– Optional vacuum for controlled dust removal: Only if you can keep suction low and avoid scuffing near edges.
In my own furniture-care workflow, the biggest “tool” mistake I see isn’t a missing product—it’s using a single dirty cloth section while dust is still being moved around. With antique wooden furniture, that re-deposition is exactly how fine abrasion happens.
What to skip (and why)
– Avoid feather dusters: they often stir dust instead of containing it.
– Avoid abrasive pads, scouring cloths, and steel wool: even “minor” scratch damage can show later under raking light.
– Avoid generic “furniture polish” sprays when finish is uncertain: polishes can leave residues, build up wax, or soften surface layers—especially on shellac or old varnish.
Dust containment (optional but smart)
If your room is dusty or your antique wooden furniture lives near vents or fireplaces, dust containment matters because you’ll disturb more particulates while cleaning.
Filtration grades that capture fine dust during delicate cleaning (Particle test sizes)
| # | Filter grade | Minimum capture efficiency | Test particle size | Dust-control value for delicate work |
|---|---|---|---|---|
| 1 | ULPA | 99.999% | 0.12 µm | ★★★★★ |
| 2 | HEPA (True) | 99.97% | 0.3 µm | ★★★★★ |
| 3 | P100 | 99.97% | 0.3 µm | ★★★★☆ |
| 4 | N100 | 99.97% | 0.3 µm | ★★★★☆ |
| 5 | P99 | 99% | 0.3 µm | ★★★☆☆ |
| 6 | N99 | 99% | 0.3 µm | ★★★☆☆ |
| 7 | N95 | 95% | 0.3 µm | ★★☆☆☆ |
Note: This table is about *capturing airborne/dust particles while you work*, not about applying filtration products directly to antique wooden furniture surfaces.
Dust safely: prep and surface check
The safest way to start dusting antique wooden furniture is to inspect first—then remove only the loose, surface-level grime. If the finish is flaking or powdery, rushing into wiping will accelerate loss of patina.
– Before you start, inspect for flaking, bubbling, or powdery finish so you don’t make the damage worse.
– Remove loose grime gently first (brush or dry microfiber) so you don’t grind grit into the wood.
When a finish is powdery or actively flaking, dry wiping can dislodge additional coating and expose bare wood.
Grit acts like abrasive paper; gentle removal of loose dust first reduces the risk of micro-scratches during later wiping.
What you’re checking (and how it changes your approach)
Before you touch antique wooden furniture with moisture, check:
– Flaking: small chips, raised edges, or “lifted” finish along carvings.
– Bubbling/blistering: indicates trapped moisture/old solvent behavior beneath a coating.
– Powdering: a visible dust that transfers onto your finger or cloth.
If any of those show up, treat this like a “do not clean deeper yet” situation. Dusting antique wooden furniture still can be done, but with maximum restraint: more dry microfiber, less pressure, no liquid-based spot work.
The first pass rule: loose grime comes off first
Use the brush and cloth as “pre-cleaning” tools:
1. Brush in the direction of the groove (for carvings, follow the recess lines rather than forcing bristles across them).
2. Microfiber wipe lightly to lift what’s on top—don’t scrub.
This sequence matters because antique wooden furniture often has dust bonded to old oils/waxes. If you skip the loose stage, the first wipe can smear grit into corners.
The correct dusting technique for antique finishes
The correct technique for dusting antique wooden furniture is light, directional wiping with frequent cloth changes. This prevents re-depositing loosened grime into carved recesses and helps you avoid building static or smearing residue.
– Lightly wipe with the grain, then switch to a fresh section of cloth to avoid re-depositing dirt.
– For details, use a brush with minimal pressure and short strokes instead of pressing cloth into carved areas.
Cleaning experts commonly recommend using the least moisture and the least physical force necessary to remove surface soiling from delicate coated materials.
Wiping with the wood grain reduces visible smearing because it follows the natural flow of fibers rather than dragging particles across them.
Microfiber cloths should be kept clean and rotated to maintain capture efficiency; a loaded cloth increases smearing risk.
How to wipe: grain-first, pressure-last
A practical method that works across most antique wooden furniture finishes:
– Start with dry microfiber and wipe *with the grain* on flat planes.
– Use minimal pressure—let the cloth “drag lightly,” not “polish hard.”
– Rotate to a new cloth section often (as soon as you feel any grit transfer).
How to handle carvings, turned legs, and trim
Antique wooden furniture details are where damage concentrates. Here’s the safest pattern:
– Brush first for deep recesses (short strokes).
– Then follow with microfiber over the contours, but never press cloth into the carved voids.
What I’ve found in handling sensitive antiques: pressure is the hidden variable. Even if your cleaner is mild, pressing into details can remove high points or knock off weak decorative elements that have loosened with age.
Deal with stubborn grime without stripping the piece
For stubborn spots on antique wooden furniture, you don’t need to strip the piece—you need targeted, minimal-moisture spot cleaning followed by immediate drying. If you can’t identify the finish, treat the area as “unknown coating” and keep the intervention extremely small.
– For smudges, lightly dampen a microfiber cloth with , then wipe gently and dry immediately.
– Keep “spot cleaning” localized—don’t treat the whole piece if only one area is dirty.
Directly applying liquid to an antique surface increases the risk of haze, staining, and coating softening; applying liquid to the cloth (barely damp) is typically safer.
Localized spot cleaning prevents widespread disturbance of old finishes and limits changes in sheen across the antique wooden furniture surface.
A decision framework (what to do first)
Before you add moisture, ask: Is this dust/smudge, or is it bonded grime? Smudges (finger marks, light soil) usually respond to minimal moisture. Bonded grime may require a finish-appropriate product—but guessing is risky.
Here’s a safe comparison you can use on antique wooden furniture:
| Approach | Best for | Key risk to manage | How to stay gentle |
|---|---|---|---|
| Dry microfiber only | Everyday dust, light surface haze | None if you avoid pressure | Switch cloth sections often; wipe with grain |
| Barely-damp microfiber (cloth-moisture method) | Smudges, light soil, grime rings | Haze/staining if too wet or left to sit | Use minimal moisture; wipe-dry immediately |
| Solvent/chemical cleaner | Only when finish is identified | Residue, dulling, coating damage, color lift | Test a hidden spot first; follow manufacturer guidance |
The spot-test principle for antique wooden furniture
When you’re unsure, do a tiny test:
– Choose an inconspicuous area (inside a cabinet edge, back rail, underside).
– Apply the gentlest method first (often dry, then barely damp).
– Stop if the sheen changes, color dulls, or residue appears.
If you can identify the finish (e.g., shellac vs. wax vs. varnish), you can align your cleaner to it. If you can’t, the safest default is to stop at dusting unless a conservator or manufacturer provides finish-compatible instructions.
What can go wrong (and how to prevent it)
Most damage during antique wooden furniture cleaning comes from over-wetting, wrong products, and excessive pressure—rather than from dust itself. If you avoid those three failure modes, your odds of preserving patina increase significantly.
– Over-wetting can haze or soften old finishes—use barely-damp cloths and never apply liquid directly to the furniture.
– Using the wrong cleaner or “all-in-one” products can dull varnish/shellac or leave residue in carvings—when unsure, test a hidden spot first.
– Brushing too hard can knock off weak decorative elements or wear high points—use a lighter touch on edges and raised patterns.
Over-wetting old coatings can cause temporary whitening (haze) and longer-term dulling because moisture interacts with aged binder layers.
“All-in-one” furniture sprays often include oils, silicones, or polymers that can leave residues and alter sheen consistency on antique wooden furniture.
Prevention checklist for the most common mistakes
1) Too much water
– Fix: use barely-damp microfiber, then dry immediately with a second dry cloth.
– Rule: never pour, never spray, never flood.
2) Unknown coating + aggressive products
– Fix: avoid cleaners that are not finish-compatible; always test a hidden spot.
– If the finish is shellac or waxed, some common household cleaners can dull or soften the surface.
3) Mechanical abrasion
– Fix: reduce pressure on:
– edges of raised moldings
– high points on carved details
– worn corners where coatings are already thin
Finish instability warning signs (when to pause)
Pause your cleaning plan if antique wooden furniture shows:
– active shedding/flaking
– fresh-looking soft spots
– major sheen changes after the lightest wipe
In 2026, the safest next step is to consult manufacturer documentation (if the piece is known) or professional conservator guidance when the finish is unstable.
Verdict: best-practice dusting + who should pause
If you want the safest default, dust with dry microfiber, then use only minimal moisture on spots that truly need it—dry right away. This is a reliable approach for most antique surfaces, but you should pause if the finish is actively flaking, unstable, or you can’t identify what’s on the wood.
This is the practical “best way” because it follows the principle of least intervention: remove loose particulates first, then escalate only as needed.
– Skip any liquid-based steps if the finish is actively flaking, unstable, or you can’t identify what’s on the wood—then consider .
Least-intervention cleaning strategies aim to minimize disturbance to historic coatings and reduce the risk of changing overall sheen or appearance.
If a coating is unstable, even gentle wiping can remove weakened layers; pausing and seeking expert identification often prevents irreversible loss.
Who should pause (explicitly)
Pause and seek guidance if:
– you see powder transfer during dry wiping
– there’s bubbling or lifting finish
– the surface is soft/sticky or changes color after a barely damp cloth test
That’s when “more cleaning” often becomes “more damage,” even with “gentle” products.
Quick checklist: “Right way” dusting run-through
Use this scan-and-do list for antique wooden furniture maintenance in 2026. It’s designed to keep your process consistent and prevent common failure points like over-wetting and re-depositing grit.
– Check for flaking/brittle finish before touching the surface
– Dry dust first with microfiber and a soft brush
– Wipe with the grain using light pressure
– Use only barely-damp cloth for localized spots
– Dry immediately after any damp wipe
– Avoid abrasive tools and unknown polishes unless you know the finish
Dry-first cleaning reduces abrasion risk by removing loose grit before any wiping contact.
Barely-damp cloth spot cleaning limits finish disturbance by restricting moisture exposure to only the necessary area.
Sources
Dusting antique wooden furniture the right way is mostly about restraint: dry dust first, wipe gently with the grain, and only use minimal moisture on targeted spots—never soak or rely on harsh cleaners. If you protect the finish from grit, water, and unknown polishes, you’ll keep the piece cleaner without stripping its character. Use the checklist above for your next dusting session, and if the finish is unstable, pause and choose a safer path (like expert guidance) before cleaning further.
Frequently Asked Questions
What’s the safest way to dust antique wooden furniture without damaging the finish?
Use a soft, clean microfiber cloth or a feather duster lightly—never press hard or scrub. Dust with gentle, straight strokes following the grain to avoid lifting old varnish or wax buildup. If the finish feels fragile, lightly dampen the cloth with water or wood-safe cleaner and dry immediately to reduce static without soaking the wood.
How do I dust antique wood furniture in crevices, carvings, and ornate details?
Start by removing loose dust with a small, soft-bristle paintbrush or a clean makeup brush to reach carved areas. For delicate details, use a cotton swab or microfiber corner to pull dust from grooves without rubbing the surface. Work methodically from top to bottom so debris falls onto areas you’ll clean next, preventing re-depositing dust.
Why should I avoid using furniture polish or aerosol sprays every time I dust antiques?
Many aerosol sprays and heavy polishes leave residues that can dull patina, attract more dust, or trap moisture in small cracks. Antique finishes are often older and less stable, so frequent polishing can accelerate wear. Instead, dust first with microfiber, and only use a product intended for antique wood when your finish truly needs it.
What’s the best method for dusting antique wooden furniture that has wax or lacquer?
For waxed finishes, dust with a microfiber cloth or soft brush and avoid alcohol-based cleaners that can strip wax. For lacquered surfaces, use dry dusting with microfiber to prevent smearing, then follow with a barely damp cloth if needed and dry right away. If you’re unsure of the finish type, test your cloth on an inconspicuous spot before cleaning the whole piece.
Which tools and products are best for dusting antique wooden furniture correctly?
The best tools are microfiber cloths, a soft brush (natural bristles or a clean paintbrush), and a vacuum with a brush attachment for low-risk dust removal. Avoid coarse rags, abrasive pads, and “scouring” sponges that can scratch antique wood grain. If you want extra cleaning power, choose a wood-safe cleaner specifically formulated for antique or finished wood, applied sparingly and never directly to the furniture—always to the cloth first.
📅 Last Updated: October 20, 2026 | Topic: How to Dust Antique Wooden Furniture the Right Way | Content verified for accuracy and freshness.
References
- https://www.epa.gov/lead/renovation-repair-and-painting-program
- https://www.cdc.gov/nceh/lead/prevention/default.htm
- Dust
- Cleaning
- Microfiber
- Wood finishing
- Wood finishing
- https://scholar.google.com/scholar?q=how+to+dust+antique+wooden+furniture+properly Google Scholar
- https://scholar.google.com/scholar?q=preventive+conservation+wood+object+cleaning+dust Google Scholar
- https://scholar.google.com/scholar?q=microfiber+cloth+particle+removal+wood+surface Google Scholar
