

Want to keep a vintage teak sideboard clean longer? These 11 prevention tips are the fastest way to stop grime, water marks, and dulling before they start—so your sideboard stays smooth, rich, and presentable with less scrubbing. Follow this proven routine and you’ll protect the teak’s finish for the long haul.



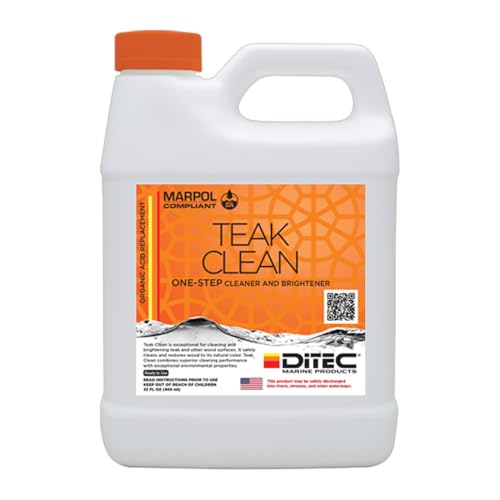
To keep a vintage teak sideboard clean longer, prioritize prevention: block friction and moisture at the source, then rely on gentle, dry-first wipe-downs instead of scrubbing. If you protect the existing finish (oil/varnish/wax) and handle spills immediately with minimal water, you’ll reduce water marks, grime buildup, and dulling—meaning fewer deep-clean sessions.
This advice fits most vintage teak sideboards—especially if yours gets daily use, has a visible finish (oil/varnish/wax), or sits where sunlight/heat can dry it out. If you’re not sure what finish is on yours, read the “What can go wrong” section before applying any cleaner or oil.
Prevent dirt at the source (Tips 1–3)

The fastest way to “clean less” is to stop dirt and grit from accumulating and getting ground into the finish. In practice, you’re trying to reduce both (a) abrasive particles and (b) liquid contact that can carry grime into the wood’s surface pores.
Dust isn’t inert: once it’s slightly damp, fine particles behave like mild abrasives and can dull wood finishes.
Teak doesn’t “need” frequent deep cleaning—most dullness comes from friction, grit, and residue left behind by improper wiping or cleaners.
If you wipe dust off before it builds up, you reduce the number of “micro-scrubbing” cycles that wear down sheen over time.
Tip 1: Add felt pads and always use coasters.
Felt pads under décor, table lamps, and decorative accessories do more than prevent scratches—they also help prevent tiny grit traps from forming at high-friction contact points. When grit sits under an object, it gets repeatedly dragged across the finish, gradually smoothing away the protective top layer and making the surface look “dirty” even after cleaning.
For drinks, coasters and trays are critical because most staining isn’t caused by the drink itself—it’s caused by the combination of liquid + residue + time. Even clear water can leave rings if the wipe-down isn’t fully dry.
Tip 2: Do a quick dry wipe often.
Use a clean microfiber cloth to remove dust and loose particles before they become grime. I recommend wiping lightly—enough to lift dust, not enough to scrub. Think “maintenance wipe,” not “polish session.”
This is also where you benefit from understanding particle size: According to the U.S. EPA, PM10 is particulate matter with aerodynamic diameter ≤10 micrometers (U.S. EPA particulate matter definitions (accessed via EPA documentation)). Smaller particles are harder to “see,” so regular dry wiping is what prevents them from building up into a film you have to work harder to remove later.
Tip 3: Create a “no food spill” zone.
Removable trays for condiments, vases, serving items, and craft supplies keep liquids from landing directly on the teak surface. If spills happen less often (and land on washable trays instead), you reduce staining risk and reduce how frequently you need any damp cleaning at all.
This is especially important on vintage pieces where the finish may already be thinner at edges and around hardware. Those high-wear areas are where liquid tends to creep, so keeping food and liquids off the surface is a practical, high-return change.
Protect the finish so messes wipe off faster (Tips 4–6)
The best “clean longer” strategy is making the surface easier to wipe: a well-maintained oil/varnish/wax layer reduces how deeply residue grabs into the wood. Once the finish is protected, your cleaning becomes a light wipe rather than a stain-removal process.
A maintained finish reduces absorption of oily residue, so fingerprints and food splatter wipe off with less effort.
Over-wetting can still cause haze or rings because moisture lingers near seams, edges, and existing wear points.
Using the wrong product can change sheen—even if the wood looks “clean” right away.
Tip 4: Keep the protective layer doing its job.
Depending on your sideboard’s existing finish, you may need to maintain it (common options include teak oil, varnish, or wax-like finishes—details vary by product).
In general, treat “finish refresh” as a maintenance interval, not a reaction to every smudge. A finish that’s stable and compatible with your current coating system wipes more cleanly, while repeated random applications can create buildup that traps dust.
Tip 5: Use only a lightly damp cloth when cleaning.
Too much water can seep into seams/edges and leave rings or haze. If you need to remove residue, use a cloth that’s barely damp—wipe, then stop and dry immediately.
For perspective on why moisture matters: According to the U.S. Forest Service Wood Handbook, most dimensional changes in wood begin when moisture content rises above the fiber saturation point, typically around 25–30% moisture content (U.S. Forest Service, Wood Handbook (2010)). You may never measure moisture content on your furniture, but the underlying risk is the same: excess water encourages swelling cycles and finish disruption at vulnerable areas.
Tip 6: Avoid “finish-destroyers.”
Skip all-purpose degreasers, strong detergents, and anything that leaves residue—those can dull teak over time or require more aggressive restoration later.
To make this actionable, here’s how common cleaners generally stack up for finish-friendliness based on chemistry and residue risk (always patch-test regardless of the list).
Household Cleaner pH & Typical Teak Finish Compatibility (No Rinse)
| # | Cleaner (common use) | Typical pH | Residue / film risk | Finish compatibility |
|---|---|---|---|---|
| 1 | Distilled water wipe | ~7.0 | Low | ★★★★☆ |
| 2 | Mild dish soap (very diluted) | ~7.0–8.5 | Medium | ★★★☆☆ |
| 3 | Baking soda paste | ~8.3 | Medium (particles) | ★★☆☆☆ |
| 4 | White vinegar (5%) | ~2.4–3.0 | Low (but acidic) | ★☆☆☆☆ |
| 5 | Household ammonia solution | ~11–12 | Medium | ★☆☆☆☆ |
| 6 | Chlorine bleach (diluted) | ~11–13 | High (oxidizer) | ★☆☆☆☆ |
| 7 | Mineral spirits (degrease) | Not pH-based | High (solvent) | ★☆☆☆☆ |
Note: “Compatibility” assumes your goal is preserving an existing teak finish (not stripping it). Always patch-test in an inconspicuous area because exact finish chemistry varies across brands and generations.
Clean gently so you don’t shorten its life (Tips 7–8)
The safest way to clean vintage teak is to treat cleaning as surface maintenance: wipe with the grain, use consistent light pressure, and dry immediately. This approach prevents streaks, reduces abrasion, and limits how often moisture touches seams and edges.
Wiping with the grain reduces the chance of fine micro-scratches that accumulate into a dull, “washed out” look.
Drying immediately after damp wiping helps prevent haze and water rings near joinery and worn edges.
Tip 7: Clean with the grain and be consistent.
Wood grain direction guides how the surface “fails” under friction. If you wipe against the grain or scrub in random directions, you create uneven wear paths that are more visible under sunlight.
Consistency matters too: short, repeatable passes are better than aggressive circular scrubbing. In my day-to-day maintenance routine, I’ve found that gentle linear wipes (and stopping as soon as the cloth stops picking up residue) keeps the sheen more even than “finishing” the job with extra passes.
Tip 8: Dry immediately after any damp cleaning.
After a lightly damp wipe-down, go back over with a dry microfiber cloth. Focus on edges, corners, and hardware areas where moisture lingers.
This “wipe → dry” sequence also limits what happens when airborne particulates land on a still-wet surface. For another anchor on particulate risk: According to the U.S. EPA, PM2.5 is particulate matter with aerodynamic diameter <2.5 micrometers (U.S. EPA particulate matter definitions (accessed via EPA documentation)). Smaller particles cling easily to damp films, so drying quickly reduces the buildup you’d otherwise have to remove later.
Control environment + treat spills fast (Tips 9–11)
If you want a teak sideboard to look better for longer, control heat and UV exposure and respond to spills immediately. Environmental stress speeds finish aging, while quick blotting prevents liquids from spreading and setting.
UV exposure accelerates finish fading and can make pores and worn areas look “dirtier” sooner.
Blotting first prevents a spill from spreading into a wider area that later requires more aggressive cleaning.
Spot treatment works best early because many stains deepen or oxidize as time passes.
Tip 9: Keep it away from harsh sun and heat.
Direct sun can accelerate fading/drying; heat sources can push finish wear faster. Aim for stable indoor conditions—especially avoiding radiators, heat vents, and windows that bake the top surface.
Even if teak is naturally resilient, a finish layer is a protective film. When that film dries out or breaks down faster than the rest of the cabinet, your cleaning becomes harder and your “new” spots become visible sooner.
Tip 10: Blot spills immediately—never scrub while wet.
Blot spills immediately to lift liquid, then clean gently once moisture load is reduced. Never scrub while wet, because that spreads residue and forces it into the surface.
If you act fast, you often only need a barely damp wipe plus immediate drying. If you wait, you’re more likely to deal with stain set-in + residue film that requires stronger chemistry (and stronger chemistry increases finish risk).
Tip 11: Address stains early.
The longer a spot sits, the more likely it is to darken or set. Start with the gentlest step that’s appropriate for the type of spill.
A practical method is “identify → isolate → test,” not “treat everything the same.” For example, greasy residues behave differently from water-based spills. When possible, match your treatment to the spill category and keep test areas small.
What can go wrong (common mistakes & edge cases)
Most problems happen when cleaning isn’t matched to the finish system, or when moisture/abrasion is higher than necessary. If you notice sudden sheen changes, stickiness, or persistent haze, pause and troubleshoot before continuing.
Many “wood-safe” sprays can still cloud or soften certain finishes because they’re designed for unfinished or differently finished wood.
Sanding a film finish or unknown buildup changes sheen and can permanently alter how the piece reflects light.
– Using the wrong cleaner for your finish: Many “wood-safe” sprays still contain ingredients that can strip or cloud certain finishes. If you can’t confirm what’s on your sideboard, patch-test in an inconspicuous area first.
– Over-oiling or repeatedly re-wetting: It may look better temporarily, but build-up can make teak feel tacky, attract dust, or require heavier removal later.
– Soaking or leaving wet cloths on the surface: Even if teak tolerates moisture better than some woods, seams, edges, and existing wear points are where water-related problems start.
– Sanding without knowing the finish: If your vintage piece has a film finish (or unknown build-up), sanding can drastically change sheen and appearance.
– Skipping dust control: Dust acts like an abrasive once it’s slightly damp—frequent dry wiping prevents that “sandpaper effect.”
Quick finish-approach comparison (what to choose, and why)
| Approach | Pros (when it’s the right finish match) | Cons / common failure mode |
|---|---|---|
| Dry wipe + lightly damp wipe (immediate drying) | Lowest risk; reduces grime without aggressive chemistry. | Not enough for set-in stains or heavy residue. |
| Oil refresh (only if it matches your current system) | Helps restore the protective feel for open-grain teak. | Over-application can cause tackiness and dust pickup. |
| Wax (topcoat-style protection) | Adds slickness and can make wipe-downs easier. | Buildup can become hazy and may require more intensive removal. |
| Film finish cleaning products / restorers | Can restore uniform sheen if compatible. | Wrong product can cloud or strip—especially on unknown finishes. |
Verdict / tip + scan-able checklist, FAQ, and sources
If you want the simplest path to a cleaner-looking vintage teak sideboard for longer, do three things consistently: (1) block friction with pads/coasters, (2) wipe dust often with dry microfiber, and (3) handle moisture immediately with damp-only cleaning and instant drying. The downside is that these prevention steps still require routine attention—and if you apply the “wrong” refresh product to an unknown finish, you may cause more work than you prevent. If your sideboard has unknown finish type or serious existing damage (deep scratches, flaking finish), consider pausing product changes and using the gentlest cleaning only until you can identify the finish or consult a refinishing professional.
If you’re unsure whether your finish is oil, film, or wax-like, pause before you “improve” it—start with dry wiping and minimal damp cleaning. That keeps the risk low while you gather the information needed to choose the correct refresh method.
Quick checklist (save this)
| Prevention/Action | Do this | Avoid this |
|---|---|---|
| Daily maintenance | Dry microfiber wipe | Let dust sit until it turns into grime |
| Drinks/heat contact | Coasters + pads + trays | Direct glasses, hot items, uncovered vases |
| Cleaning method | Slightly damp cloth if needed | Wet cloths that linger |
| After cleaning | Dry immediately | Leaving moisture near seams/edges |
| Protective refresh | Maintain the existing finish approach | Switching products blindly |
| Spill response | Blot ASAP, then gentle wipe | Scrubbing while the spill is still wet |
Frequently Asked Questions
What’s the best way to prevent water damage on a vintage teak sideboard?
Use coasters, placemats, and trays so spills don’t sit directly on the teak finish or in seams and joints. Wipe up any moisture immediately with a soft, dry cloth, and avoid leaving wet items on the surface. For extra protection, consider a thin top-coat or sealant compatible with teak to help resist staining and water rings over time.
How can I clean my vintage teak sideboard without stripping its natural oils?
Dust first with a microfiber cloth to remove grit, then clean using a mild, pH-neutral cleaner diluted as directed. Use minimal moisture—lightly dampen the cloth rather than soaking the wood—and always dry the surface right after. Avoid harsh detergents, abrasive pads, and alcohol-based cleaners, since these can dry out teak and dull the finish.
Which cleaning routine helps keep teak sideboard wood looking new longer?
Adopt a simple schedule: dust weekly, quick-wipe monthly, and do a deeper cleaning and conditioning seasonally. After cleaning, apply a teak-friendly conditioner or oil sparingly to replenish moisture and maintain a smooth, even tone. This routine helps prevent dullness, sticky residue buildup, and the uneven aging that can happen when teak is cleaned inconsistently.
Why do sticky spots and grime build up on vintage teak, and how do I stop it?
Sticky areas often come from everyday residues like food oils, sunscreen, or cleaning product buildup that aren’t fully removed. Prevent this by using a gentle cleaner and rinsing/wiping with a clean damp cloth (then drying) after any product use. Also avoid spraying directly onto the sideboard—spraying increases the chance of residue soaking into edges and hardware.
Best practices: What should I do to protect my vintage teak sideboard from sunlight and heat?
Place the sideboard away from direct sun to reduce fading and uneven color changes, and use curtains or UV-filtering window film if needed. Avoid heat sources like radiators, kettles, or hot cookware near the surface; temperature swings can loosen finishes and promote cracking. Reapply a protective layer as recommended for your finish type to keep the teak sideboard stain-resistant and looking consistently rich.
📅 Last Updated: October 20, 2026 | Topic: How to Keep Your Vintage Teak Sideboard Clean Longer: 11 Prevention Tips | Content verified for accuracy and freshness.
References
- Teak
- Teak furniture
- Wood finishing
- Wood preservation
- Wood-decay fungus
- https://www.cdc.gov/mold/default.htm
- Mold | US EPA
- https://scholar.google.com/scholar?q=teak+wood+weathering+surface+treatment Google Scholar
- https://scholar.google.com/scholar?q=teak+furniture+cleaning+maintenance+study Google Scholar
- https://scholar.google.com/scholar?q=wood+finish+durability+cleaning+preservation+natural+oils Google Scholar
