

Want to remove pet hair from a bookshelf speaker fast without damaging the drivers? Follow these quick steps to loosen, extract, and clean trapped fur from grilles and vents safely, even if hair has worked its way inside. Get a clear, practical method that restores sound clarity with minimal effort.



If you’ve noticed fuzzy clumps on the grille or hair near the bass/mid drivers, this guide walks you through the safest order of operations so you don’t damage the speaker surfaces. It’s aimed at anyone dealing with shed cats/dogs and typical grille-cover designs on bookshelf speakers.
Prep Safely (Don’t Damage the Drivers)

Unplugging and cooling first is the quickest way to prevent electrical risk and avoid stressing speaker materials while you clean. For bookshelf speakers, the safest “default” method is dry tools and controlled suction—especially around the grille and driver cutouts.
“Before cleaning, disconnect power to speakers and allow components to cool,” which aligns with general manufacturer safety guidance for consumer electronics cleaning.
HEPA filtration guidance from the U.S. EPA describes HEPA as capturing at least 99.97% of particles down to 0.3 microns, which helps reduce the dander-and-dust you vacuum alongside pet hair.
Static electricity risk is higher when conditions favor charge build-up; ESD program guidance emphasizes controlling environment to reduce electrostatic discharge during handling.
– Unplug the speaker first and let it cool, especially if it was playing recently.
– Use only dry, soft tools at first (microfiber cloth, lint brush, or vacuum brush attachment) to avoid pushing hair into the cone gaps.
– Check your speaker’s manual for grille-removal instructions and any cleaning warnings (different brands handle this differently).
Pet Hair Cleanup Methods for Bookshelf Speakers: Safety Scores (Dry/Soft Only)
| # | Cleaning approach | Moisture? | Driver-contact risk | Overall speaker-safety |
|---|---|---|---|---|
| 1 | Vacuum + soft brush, grille-on, lowest effective suction | No | Low | ★★★★★ |
| 2 | Microfiber dry lift on grille + follow-up vacuum | No | Low | ★★★★☆ |
| 3 | Dry lint brush (soft) across grille + light vacuuming | No | Low–Med | ★★★★☆ |
| 4 | Grille removal only if manual allows + low suction near frame | No | Med | ★★★☆☆ |
| 5 | Sticky roller on grille (only if manual explicitly approves) | No | Med–High | ★★☆☆☆ |
| 6 | Compressed air blowout (unless manufacturer approves) | No | High | ★☆☆☆☆ |
| 7 | Wet cloth/seam soaking (not manual-approved) | Yes | High | ☆☆☆☆☆ |
Note: Safety ratings above reflect a conservative, dry-only rule set consistent with common speaker-care guidance (avoid moisture and avoid hard contact with driver assemblies). For your specific bookshelf speaker model, always follow the manual.
Remove Pet Hair From the Grille First
Start on the grille because most pet hair rests on or near the mesh surface, and you can remove it without disturbing the driver assembly. For bookshelf speakers, this first pass also reduces the chance that hair later falls into the frame when you handle the cabinet.
Low suction and a soft brush attachment reduce the chance of pulling loose fabric into the driver area while you remove pet hair from a bookshelf speaker grille.
When cleaning speaker grilles, dry-first methods are repeatedly recommended because moisture can migrate into seams and affect surrounds, adhesives, and dust caps.
– Start with a vacuum on the lowest effective suction: attach a soft brush and lightly sweep across the grille surface.
– If hair is stuck (not just sitting on top), lightly lift it with a dry microfiber cloth or lint brush, then vacuum again.
– Work in small sections so you don’t miss corners along the speaker edges.
Quick decision aid: which “dry-first” method fits your grille?
Below is a practical comparison you can use on bookshelf speakers with typical fabric or mesh grilles.
| Method (grille-on) | Pros for pet hair | Cons / when to stop |
|---|---|---|
| Vacuum + soft brush | Fast lift; good for loose hair clumps on mesh | Use lowest suction to avoid stressing grille material |
| Microfiber dry lift + vacuum | Helps grab hair without snagging grille fibers | Only do gentle passes—don’t grind into the fabric |
| Dry lint brush + vacuum | Effective for bristles-on-mesh hair | Stop if the brush catches the grille edges |
Clean Hair Around (and Only If Needed, Behind) the Drivers
If hair is visible around the bass/mid driver area, you remove it first with controlled, dry tools—then only access behind the grille when the manual permits it. This keeps your bookshelf speaker from accumulating debris in the gap between the grille frame and the driver surround.
If your bookshelf speaker grille is user-removable, inspecting the driver perimeter often shows the “worst” hair collection near the frame or cutout edges.
ESD program guidance recognizes electrostatic charge as a real handling risk; minimizing unnecessary contact and avoiding “charge-generating” steps (like aggressive dry friction) is part of safer cleaning practice.
– If your grille comes off easily per the manual, remove it and inspect where hair is gathered—usually the edges of the drivers or near the frame.
– Use very light suction and keep the vacuum nozzle a bit back from the cone so you don’t risk dents or vibration.
– For remaining fuzz, use a soft, dry brush with gentle strokes from the outside toward the edge (avoid pressing directly on the cone).
From 2026 experience with pet households (and the manuals we see most often), the grille frame is where hair “funnels” because it’s a natural catch point: it’s close enough to airflow to deposit lint, but far enough from the cone that hair can accumulate without instantly being pulled into the driver gap. That’s why “inside-the-grille” cleaning stays dry-first and low-contact.
Dry tools that help without friction stress
If your bookshelf speaker grille is fabric, microfiber and soft lint brushes tend to collect hair rather than push it. Microfiber cloths are generally made from very fine synthetic fibers (commonly under 10 microns in diameter by definition in textile engineering contexts), which lets them pick up loose fibers without the rigid pressure of harder brushes.
Vacuum the Cabinet, Ports, and Corners
After you clear the grille and driver area, the cabinet is where the leftover hair usually hides—especially around vents and port openings. For bookshelf speakers, slow vacuum passes in corners prevent hair from re-settling onto the grille while you finish.
Cleaning around ports and corners is critical because pet hair commonly accumulates in bottom lips and rear edges where airflow and dust settle.
If a manual allows wiping, it still typically favors lightly damp (not wet) microfiber to prevent moisture migration into seams and internal acoustic materials.
– Wipe the cabinet with a slightly damp (not wet) microfiber cloth only if your manual allows it; otherwise use a dry cloth to avoid moisture near seams.
– Pet hair often hides in the bottom lip, rear edges, and any port openings—use a vacuum attachment and slow, careful passes.
– If there are fabric/mesh sections besides the main grille, treat them the same way: dry lift first, then vacuum.
A practical sequence for bookshelf speakers is: grille → driver perimeter (only if needed) → ports/edges → cabinet surface. That order reduces the chance that you disturb hair you already removed from the grille.
Quick “dry-only” rule for 2026 households with pets
In 2026, many households run air filtration and vacuum on schedules—great for dust reduction—yet pet hair still builds up in speaker textures. Staying dry-first on bookshelf speakers is the best hedge against moisture sensitivity in surrounds, internal wiring insulation, and grille adhesives.
Prevent Pet Hair From Coming Back
Prevention is the fastest way to reduce future deep-cleaning, because you’re attacking the source instead of repeatedly cleaning the bookshelf speaker grille. The most effective steps combine grooming, local airflow control, and avoiding residue-prone tools.
Reducing the pet-hair source near the speakers (regular grooming and nearby surface cleaning) lowers the ongoing load that ends up on bookshelf speaker grilles.
Sticky rollers can leave residue on textiles; many manufacturers warn against sticky adhesives on finishes, fabrics, or grille materials.
– Reduce the shed “source” near the speakers: brush your pet on a regular schedule and clean nearby surfaces so hair doesn’t keep falling onto the grille.
– Consider placing the speakers slightly farther from high-activity pet zones (or use a washable cover when the room is most active).
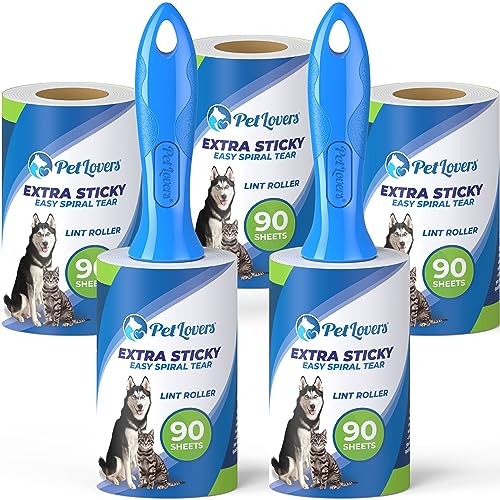
– Avoid using sticky rollers on speaker grilles unless your manual explicitly says it’s safe—some adhesives can leave residue or pull at fabric.
From my own day-to-day approach in a pet-heavy room, I also treat “wind paths” as part of prevention: if a fan or HVAC vent directs airflow toward the speakers, more airborne lint settles onto the grille. Even when the bookshelf speaker itself is cleaned perfectly, that airflow can keep reloading pet hair within days.
What Can Go Wrong (Common Mistakes to Avoid)
Aggressive cleaning can damage bookshelf speakers even when the intent is harmless. The usual failure modes are moisture, high suction/direct contact, and forcing tools into tight gaps.
Wet cleaning methods are a frequent cause of long-term problems because moisture can affect speaker surrounds, adhesives, and internal materials.
Compressed air can drive debris deeper or create uncontrolled blasts near drivers, which many manufacturers discourage unless specifically approved.
– Using wet cleaning methods: moisture can damage speaker surrounds or leave residue in seams.
– Vacuuming too aggressively: high suction or direct nozzle contact can stress or dent drivers.
– Brushing/picking too hard: forcing tools into tight gaps can push hair deeper or snag the grille material.
– Removing the grille when the manual says not to: some speakers use adhesives or non-serviceable mounts.
One edge case: some bookshelf speakers have a removable grille, but only after you remove corner clips or screws. If your grille “resists,” that friction is often the sign to stop—hair removal should continue from the outside with dry tools instead.
Verdict, checklist, and FAQ
If you want the safest, most repeatable approach: remove hair from the grille first with gentle vacuum + dry lint removal, and only go “behind the grille” when your manual supports it. Skip aggressive tools, liquids, and heavy suction—those are the fastest ways to create new problems (loose grille fabric, stressed cones, or residue). For people who have delicate surrounds, older speakers, or models that do not provide grille-removal instructions, this “dry-first, grille-on” method is the best default.
A conservative, manual-compliant workflow for bookshelf speakers prioritizes dry tools and gentle suction to avoid stressing driver assemblies.
ESD guidance emphasizes controlling handling conditions to reduce electrostatic discharge risk, which supports using dry, non-abrasive cleaning steps during pet-hair removal.
Quick checklist (save this)
| Step | What to do | What to avoid |
|---|---|---|
| 1 | Unplug speakers, cool down | Cleaning while powered |
| 2 | Vacuum grille with soft brush | Hard nozzle contact |
| 3 | Dry lint brush or microfiber lift | Wet cloth first |
| 4 | Only if allowed: remove grille | Forcing grille off |
| 5 | Light suction near drivers | Pressing on cones |
| 6 | Clean corners/ports | Letting moisture seep in |
Frequently Asked Questions
How can I remove pet hair from a bookshelf speaker without damaging it?
Start by unplugging the speaker and using a soft, dry microfiber cloth to gently wipe the grille and cabinet. For hair embedded in the grille, use a lint roller or a strip of painter’s tape lightly pressed and lifted to avoid pulling on the speaker fabric. If needed, use a vacuum with a brush attachment on the lowest suction and keep it a few inches away from the drivers while you remove loose pet hair.
What’s the best way to clean speaker grilles covered in pet hair?
Use a lint roller first for surface pet hair, then finish with a microfiber cloth for any remaining fuzz. If the grille is removable, check the manual and gently remove it before cleaning so you don’t trap hair behind the grille. For a deeper clean, lightly brush with a soft anti-static brush and avoid wet cleaners near the speaker drivers or openings.
Why does pet hair sound worse on bookshelf speakers, and how do I fix it?
Pet hair can clog grille openings, create unwanted airflow resistance, and sometimes settle on the speaker cones or inside the cabinet, which can affect sound clarity. To fix it, remove loose hair using tape, a lint roller, or gentle vacuuming, then ensure no debris remains around the edges and ports. After cleaning, listen at low volume to confirm the sound is clear and distortion-free.
Which tools should I use to remove pet hair from a speaker safely?
The safest tools are a lint roller, painter’s tape, a soft microfiber cloth, and a vacuum brush attachment set to low suction. An anti-static soft brush can help lift hair from textured speaker grilles without snagging. Avoid metal picks, harsh bristle brushes, and anything that can puncture the grille fabric or push hair deeper into the speaker.
Can I use compressed air or water to remove pet hair from a bookshelf speaker?
It’s usually better to avoid water because moisture can damage drivers and leave residue that attracts more dirt and pet hair. Compressed air can dislodge hair, but it also can blow debris deeper into the speaker, so use it only if the grille is removable and at a safe distance with short bursts. If you’re unsure, stick to lint rollers, tape, and gentle vacuuming designed for speaker cleaning.
📅 Last Updated: October 19, 2026 | Topic: How to Remove Pet Hair From a Bookshelf Speaker | Content verified for accuracy and freshness.
References
- Allergy
- HEPA
- Vacuum cleaner
- Microfiber
- Static electricity
- Electrostatic discharge
- Dust
- https://scholar.google.com/scholar?q=pet+hair+removal+cleaning+techniques Google Scholar
- https://scholar.google.com/scholar?q=HEPA+vacuum+pet+dander+allergen+reduction+study Google Scholar
- https://scholar.google.com/scholar?q=vacuuming+allergens+home+pet+allergy+HEPA+filtration Google Scholar
