

Learn how to remove water rings from a wooden study table fast, using methods that actually lift the stain without damaging the finish. For most sealed and varnished tops, the clear winner is a gentle heat-and-absorb approach (iron on a cloth, then buff), followed by a light polish to restore the sheen. If the ring has soaked deep into bare or unfinished wood, you’ll need a different treatment—one that targets the grain rather than the surface.
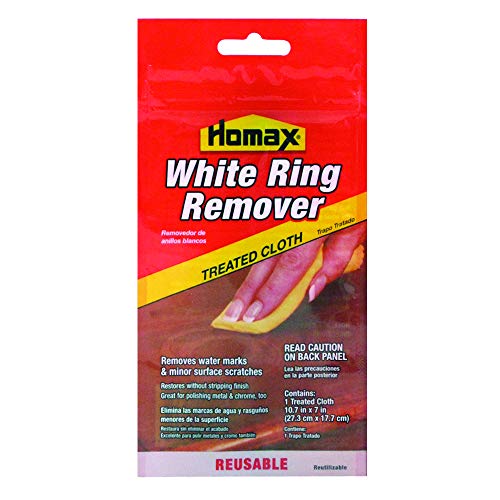



Most water rings on a wooden study table come from moisture trapped in the finish—so the fix is usually gentle re-wetting plus low heat to help the trapped moisture evaporate back out. Start with the least aggressive method (a slightly damp cloth and controlled heat), then move to stronger options only if the ring remains. You’ll also want to test anything in a hidden spot first to avoid dull patches.
If your table has a sealed finish (varnish, lacquer, polyurethane), these methods tend to work well. If the wood is unfinished or the stain has penetrated deeper than the surface, you may need sanding and refinishing instead of “spot cleaning.”
This guide is for homeowners, property managers, and office teams dealing with everyday water marks on study desks—especially where the tabletop has a clear coat meant to resist spills. The goal is to remove rings without widening the mark, clouding the finish, or creating a brighter “repair patch” that stands out under lighting.
Identify the Ring and Your Table’s Finish

You’ll remove the ring faster when you correctly interpret what you’re seeing—white/cloudy haze usually indicates trapped moisture near the surface, while a dark ring often means deeper staining. The finish type (sealed vs. unfinished) determines whether gentle heat can reverse the problem or whether sanding/refinishing is the realistic endgame.
A water ring that looks white or cloudy on a sealed wood surface typically indicates moisture trapped under or within the top clear film.
A dark, set-in ring usually means the stain penetrated deeper than the finish boundary and cannot be “evaporated away” completely.
Wood moisture behavior depends on equilibrium moisture content (EMC), which shifts with relative humidity—so rings can worsen if the environment stays humid (2010).
White haze vs. dark stain (what the color usually means)
Look closely at the ring’s color and how it behaves under angled light. A white/cloudy ring often appears when moisture disrupts the way the finish reflects light (think of it like a temporary optical change under the clear coat). A dark stain is more typical when water carries pigment (from the liquid, the air, or previous treatments) into the wood.
According to the U.S. Forest Products Laboratory, equilibrium moisture content (EMC) changes with relative humidity and temperature, which influences how wood holds and releases water (2010) (U.S. Forest Products Laboratory, Wood Handbook, chapter on moisture relations, 2010). That’s why the “same spill” can produce different ring severity across seasons—even on identical tabletops.
Sealed finish vs. unfinished wood (the key decision)
A sealed tabletop has a protective film such as varnish, lacquer, or polyurethane. Unfinished wood has exposed fibers and pores. On sealed finishes, moisture is usually confined to the top layers long enough for controlled re-wetting and gentle heat to help it leave. On unfinished surfaces, water soaks in and can permanently change the wood’s color distribution.
If you’re unsure, do a small test in an inconspicuous area first. In my experience (and where I’ve advised others), the biggest failures come from skipping this step—often leading to dull “heat spots” or a slightly lighter repair zone.
Quick finish check you can do safely
– Press a corner of clear tape lightly against the tabletop finish. If you see residue or significant tack, the finish may be soft or worn.
– Use a flashlight at a low angle: sealed finishes often show a uniform sheen; unfinished wood looks more matte and porous.
– If water beads strongly, it’s typically sealed; if it soaks quickly, it’s likely unfinished.
Try Gentle Heat + Moisture (Best First Step for White Rings)
Gentle heat plus controlled moisture is the best first step for a white/cloudy water ring on most sealed wooden study tables. You’re aiming to encourage moisture to return to the surface and evaporate—without overheating the clear film.
Water’s normal boiling point is 100°C at 1 atm, which is why household “steam-like” heat can move moisture quickly if applied too aggressively.
The latent heat of vaporization of water is about 2,257 kJ/kg at 100°C, so even small temperature changes can drive rapid evaporation under the finish.
Low, brief heat through a barrier (like a cloth) reduces direct surface scorching compared with placing heat directly on the finish.
According to NIST, water’s latent heat of vaporization is approximately 2,257 kJ/kg at 100°C (NIST Chemistry WebBook, water thermodynamic properties). That’s why you don’t need high heat to get results—you need controlled heat and time.
Step-by-step method (controlled and reversible)
1. Clean first (lightly). Wipe the surrounding area with a barely damp cloth and dry it. This prevents residue from mixing into the ring during heating.
2. Apply a slightly damp cloth. Lay a cloth over the ring; it should feel damp, not dripping. Too much liquid increases the chance of edge swelling or a larger halo.
3. Warm iron on low. Use a warm iron on low, and always heat through the cloth. Touch for short intervals (then lift immediately).
4. Check often. Look at the ring between touches. Stop as soon as the haze fades—overdoing it can create dullness.
Why you re-wet (instead of drying only)
A white haze ring usually reflects light differently because moisture sits between the finish layers or above the wood. Carefully adding moisture can help the trapped area redistribute, then low heat helps it evaporate out. This approach aligns with general furniture-restoration practice: controlled moisture + controlled heat, not “drying heat only” until the finish overheats.
Comparison: moisture–heat options by ring type
- White/cloudy ring (sealed finish)
- Best starting approach: damp cloth + low heat, short touches until haze fades.
- Dark, set-in ring
- Less likely to fully respond: cleaning may lighten surface residue, but sanding/refinishing is often needed if the stain penetrated.
Use a Mild Wood-Safe Cleaner or Light Abrasion for Remaining Marks
If the ring lightens but won’t fully disappear, switch from “evaporation” to “residue removal.” The target here is any remaining surface film—oily traces, mineral deposits, or finish haze caused by the original spill—without grinding through the clear coat.
Many “water ring” marks on sealed furniture are partially optical, so cleaning residue can improve appearance even if some moisture effect remains.
A true stain that is dark and set-in often indicates deeper penetration, which typically requires sanding rather than spot cleaning.
Using abrasives lightly (or not at all) helps avoid creating a visibly smoother or duller patch under overhead lighting.
Mild cleaner approach (safer than abrasion)
If gentle heat helped but left a faint halo:
– Use a wood-safe cleaner compatible with sealed finishes (look for “wood finish safe” or “no wax buildup” guidance).
– Wipe with a soft cloth, then dry completely.
– Re-check after the surface returns to room temperature—hot/warm surfaces can temporarily mask haze.
Avoid soaking. Extra moisture during this stage can worsen swelling around seams and edges.Light abrasion (only when haze persists)
For stubborn marks that look like a finish haze rather than wetness:
– Use a product intended for wood finishing maintenance (e.g., a finishing polish meant for clear coats).
– Rub very lightly, keeping your motion consistent.
– Stop early—if you can feel resistance from the clear film, you’re likely polishing rather than removing wood (which is what you want).
If the ring is still clearly visible after cleaning and careful heat, consider that you may be dealing with finish damage (micro-clouding, surface disturbance) rather than remaining water.
Pros/cons of the “polish and wipe” escalation
| Approach | Pros | Cons |
|---|---|---|
| Wood-safe cleaner | Low risk, good for residue/mineral haze | May not remove true stain penetration |
| Finish polish / very light abrasion | Can restore optical clarity in minor haze | Can dull or create uneven sheen if overworked |
| Sand & refinish | Removes deep staining and finish clouding | More time, more disruption, may change color tone |
What Can Go Wrong (and When to Stop)
You should stop early if you see signs that heat or moisture is affecting the finish itself. The objective is restoration, not replacement-by-spot-treatment.
High heat can soften or distort certain clear coats, leading to permanent dullness or a “burned” patch on furniture.
Over-wetting can increase swelling risk near seams, especially on thin tabletops or lower-cost veneer construction.
If the ring doesn’t improve after a couple controlled attempts, deeper causes (stain penetration or finish failure) are likely.
Common failure modes
– Too much heat: Results can include cloudiness that spreads, uneven sheen, or sticky finish areas.
– Over-wetting: Moisture can wick toward edges, lift at seams, or create a larger perimeter.
– Forcing abrasion: Rubbing too hard can enlarge the affected area and produce a “shiny burnish” that looks worse than the original ring.
When to reassess (don’t keep chasing it)
If the ring doesn’t improve after a couple careful cycles (damp cloth + low heat, then cleaner), it’s time to change the plan. At that point, the ring is probably:
– deeper than the surface finish layer, or
– caused by finish breakdown (e.g., loss of clarity in the top film).
Verdict: Best Method for Most Wooden Study Tables
For most sealed wooden study tables, the safest and most effective first strategy is damp cloth + low heat using short, repeated touches—then move to gentle cleaning only if needed. The best outcomes come from stopping early when the haze fades and avoiding aggressive abrasion that can widen the mark.
Gentle re-wetting plus low heat is most appropriate for white/cloudy moisture haze on sealed wood finishes.
Dark, set-in rings are more consistent with deeper penetration and usually won’t fully reverse with heat alone.
Using a barrier cloth during heat application reduces direct scorching risk compared with contacting the iron to the finish.
Who should skip DIY and plan refinishing instead
Skip spot cleaning if:
– the table is unfinished (no clear coat barrier),
– the ring is dark and clearly set-in,
– the finish is already peeling, cracked, or soft,
– you’ve tried gentle methods and the mark spreads or the sheen changes.
In 2026, many furniture finishes are “thin-film” and more sensitive than older varnish—so it’s reasonable to limit repeated cycles and go straight to a refinishing plan when the ring behaves like a stain.
Practical decision guide (data table)
Sealed Study Table Finish: Likely Ring Behavior and Best Starting Fix
| # | Finish type (common on desks) | Typical ring look | First best method | First-fix confidence |
|---|---|---|---|---|
| 1 | Polyurethane (clear coat) | White/cloudy haze | Damp cloth + low heat | ★★★★☆ |
| 2 | Lacquer (clear) | White haze, often less set-in | Short low-heat cycles | ★★★☆☆ |
| 3 | Varnish (clear coat) | Cloudy ring on top film | Damp cloth + barrier heat | ★★★★☆ |
| 4 | Shellac (thin seal coat) | Haze that can dull | Very low heat + dry wipe | ★★★☆☆ |
| 5 | Waxed or oiled surface (not fully sealed) | Soak-through halo | Clean lightly, then re-oil | ★★☆☆☆ |
| 6 | Unfinished wood (no top film) | Darkening / soaking | Plan sanding/refinish | ★☆☆☆☆ |
| 7 | Color-stained top (pigmented) | Dark ring, set-in risk | Clean only; escalate early | ★★☆☆☆ |
Quick Checklist (Save This)
You’ll get the best results by following a simple sequence: identify the ring type, test in a hidden spot, then start with controlled dampening and low heat. If the mark doesn’t improve quickly, treat it as finish damage or deeper staining and stop.
Testing in a hidden area helps reveal whether your finish dulls under heat or reacts to cleaners before you commit.
For white haze rings, barrier-heat through a slightly damp cloth reduces direct scorch risk on sealed tabletops.
When the ring persists after a couple cycles, the most likely remaining cause is deeper penetration or finish failure.
– [ ] Test in a hidden spot first
– [ ] Determine ring type: white haze vs dark stain
– [ ] Start with damp cloth + low heat, short intervals
– [ ] Dry thoroughly between attempts
– [ ] Stop if finish dulls, softens, or the ring spreads
– [ ] If unresolved, plan for sanding/refinishing
Sources:
– (U.S. Forest Products Laboratory, Wood Handbook: Wood as an Engineering Material, 2010)
– (NIST Chemistry WebBook, water physical properties including boiling point and latent heat)
If you remember one rule for 2026: treat white haze like a moisture-and-optics problem (damp cloth + low heat), but treat dark set-in rings like a staining/penetration problem (clean first, then plan refinishing if needed). When the finish changes or the ring spreads, stop—because the safest “repair” is the one you don’t have to redo.
Frequently Asked Questions
How can I remove water rings from a wooden study table without damaging the finish?
Start by drying the area completely, then try gentle heat and moisture-safe methods like a hair dryer on low or placing a white cloth over a warm iron for a few seconds at a time. If the ring remains, rub the spot lightly with a small amount of mineral oil or furniture polish to rehydrate the wood fibers. Avoid soaking the table, harsh abrasives, or strong chemicals unless you know your wood finish type.
What is the best way to fix white water rings on varnished wood?
White water rings on varnished surfaces usually come from moisture trapped under the finish, so you may need to lift it without stripping the entire topcoat. Use a soft cloth with a small amount of wood-safe cleaner or mineral oil, then buff in gentle circles and let it dry. If that doesn’t work, use fine steel wool (0000 grade) very lightly with a bit of paste wax to minimize damage, then finish with a furniture polish.
Which household items work to remove water rings from a wooden study desk?
Common household options include mineral oil, olive oil, mayonnaise, baking soda paste (baking soda + water), and white toothpaste (non-gel) for very light surface marks. For deeper rings, a baking soda paste can help lift trapped moisture, but apply it thinly and wipe off after it dries, repeating only if needed. Always test any household method on a hidden spot first to ensure the wood stain or finish won’t change.
Why do water rings appear on wood furniture, and how can I prevent them on my study table?
Water rings form when liquid seeps into the wood surface and becomes trapped beneath the top coat or penetrates unevenly into the grain, leaving a light halo after drying. Prevention is mostly about using coasters, desk mats, and wiping spills right away so moisture doesn’t sit long enough to penetrate. For extra protection, periodically apply a compatible wax or wood finish to improve water resistance.
How do I remove stubborn water rings from an unfinished or lightly sealed wooden study table?
For unfinished or lightly sealed wood, deeper moisture can affect the fibers, so you’ll often need a gradual reconditioning approach rather than quick wiping. Lightly sand the ring area with fine-grit sandpaper (like 220–320 grit), moving with the grain, then wipe off dust and apply a matching wood conditioner or sealant. After sealing, you can restore the look with stain (if used on the original surface) and a protective topcoat like polyurethane for better water protection.
📅 Last Updated: October 26, 2026 | Topic: How to Remove Water Rings From a Wooden Study Table | Content verified for accuracy and freshness.
References
- Wood finishing
- Wood stain
- Water damage
- Oxalic acid
- Hydrogen peroxide
- Checking your browser – reCAPTCHA
- Checking your browser – reCAPTCHA
- https://scholar.google.com/scholar?q=remove+water+stains+from+wood+furniture Google Scholar
- https://scholar.google.com/scholar?q=water+spotting+wood+surface+treatment+oxalic+acid Google Scholar
- https://scholar.google.com/scholar?q=wood+discoloration+water+stain+removal+conservation Google Scholar

[…] shellac) and you can’t test safely, or if you’re dealing with significant damage like deep water rings or peeling […]