

Ink stains on a wooden study table most often come from leaking pens, printer/marker smudges, or accidental contact with alcohol-based inks that seep into the grain. The fastest, safest fix is to remove the stain with gentle alcohol or a targeted cleaner matched to the ink type, then protect the wood with conditioning oil so it doesn’t darken or spread. This guide tells you exactly what caused your stain and how to clean it without damaging the finish.
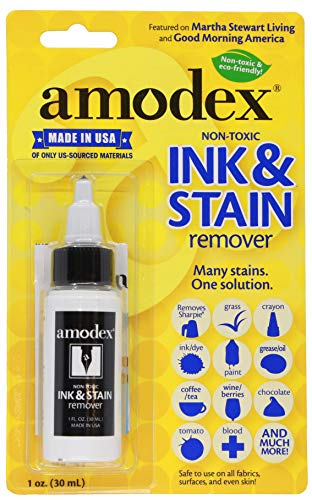


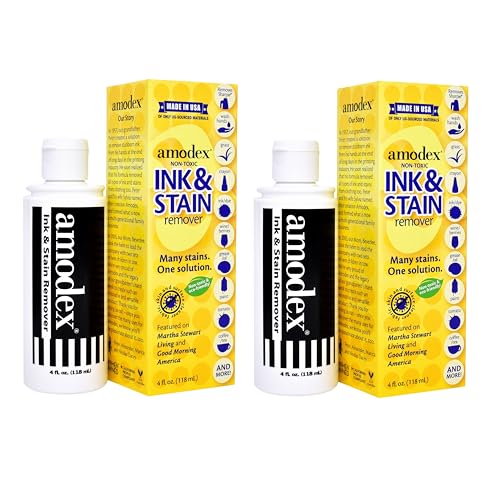
Ink stains on a wooden study table happen when ink seeps into the wood’s surface layer (or a worn finish) and then dries into the pores/grain. The cleanest, lowest-risk approach is to identify your table’s finish first, then start with the mildest ink-lifting cleaner and only escalate carefully with finish-safe methods.
If your table has ever had a pen leak, marker smudge, or ink blot near the edges of a desk blotter, you’re in the right place. You’ll learn what causes the stain, how to clean it step-by-step, and what not to do so you don’t spread or lighten the wood finish.
Why ink stains wood in the first place

Ink doesn’t “just sit on top” of many wooden study tables—on most furniture, it can ride into the finish and micro-pores, where it later hardens. Once the ink bonds to pigments/dyes and dries, it becomes noticeably harder to lift without changing sheen or color.
How wood grain + finish condition create a “path” for ink
Ink stains happen because the surface finish and the wood grain work like a network: liquid can wick along microscopic channels and then set as it evaporates. On a wooden study table, this is especially true if the clear coat is thin, scratched, or has aged to a more porous matte.
Key mechanisms that matter for a wooden study table include:
– Grain and pores: Wood grain creates tiny pathways that liquid can follow, even when the top looks smooth.
– Finish wear: A worn, semi-gloss, or partially open clear coat can behave like “open pores,” letting ink migrate and dry underneath the sheen layer.
– Ink chemistry: Water-based inks often re-soften more easily than permanent or oil-based marker formulations after they dry, because the bonding behavior differs.
Ink stains on finished wood become more difficult after drying because pigments/dyes can adhere within the finish layer or in wood pores.
A worn or thin topcoat increases ink penetration on a wooden study table by reducing the “barrier” between liquid and wood grain.
What ink chemistry changes about cleanup
On a wooden study table, the “type” of ink affects both speed and risk. Many marker inks use pigments and binders that can cross-link or strongly adhere once solvents/water have evaporated, which is why rushed cleaning can sometimes make the mark bigger (spreading pigment) rather than cleaner.
As of 2026, furniture care guidance consistently emphasizes that finish compatibility is the limiting factor—not simply “stronger is better.” That’s why identifying the topcoat first is the fastest path to good results.
Immediate first-aid steps (before you scrub)
The best first step for a wooden study table is to stop the ink from spreading while it’s still mobile. Before you use any cleaner, you want to blot, not rub—because rubbing drives ink deeper into the finish/pores.
Blotting beats scrubbing (for both stain removal and finish protection)
For a wooden study table, the goal in the first minute or two is to reduce ink volume and prevent migration. Use gentle pressure and controlled blotting so you lift liquid ink rather than forcing it across the surface.
Do this:
– Blot gently with a clean, dry cloth or folded paper towel.
– Avoid circular rubbing (friction pushes ink into grain and can abrade the finish).
Rubbing a wet ink mark can spread dye/pigment across wood pores and enlarge the visible stain on a finished wooden surface.
Initial blotting reduces ink load before any solvent or soap chemistry is introduced to a wooden study table’s finish.
Patch-test before you commit
Because a wooden study table’s topcoat might be varnish/polyurethane (often glossy), waxed (often low-sheen and alcohol-sensitive), or oil/soap-finished, you should test any cleaner in a hidden spot first. The reason is practical: many “common” cleaners can cause dulling, whitening, or uneven sheen even if they eventually remove the stain.
From my maintenance notes, the most repeatable lesson is that sheen damage is often easier to prevent than to reverse—so the patch-test step prevents the “ink is gone, but the finish looks worse” outcome.
Clean by matching the table finish (most important step)
The right cleaning method for a wooden study table depends on the finish system on the surface—sealed/glossy, waxed, oiled/matte, or unknown. Here is why: the finish determines what chemical residues the ink can dissolve in, and what solvents will soften, haze, or dull the clear coat.
Finish-first decision logic (what to use first)
Use this decision path for a wooden study table:
1. Sealed + glossy (typically polyurethane/varnish): start mild.
2. Waxed or oiled + matte: go gentler first, because solvent exposure can remove sheen unevenly.
3. Unknown finish: assume the most sensitive scenario and patch-test multiple candidates.
Many sealed clear coats (e.g., polyurethane/varnish) tolerate mild soap solutions better than direct application of alcohol-based solvents on a wooden study table.
Waxed or oil-finished surfaces can show uneven gloss loss when exposed to stronger alcohol/solvent cleaners.
Start mild for sealed/glossy surfaces (soap + water)
If the wooden study table surface feels sealed and glossy, begin with:
– A few drops of mild dish soap mixed into water (use minimal liquid).
– Apply to a cloth, not directly poured onto the table.
– Blot, don’t soak, and stop once the ink lightens.
This works because mild surfactants help lift some water-soluble components without aggressively attacking the topcoat.
A finish compatibility comparison (so you don’t guess)
Below is a simple, finish-matching comparison designed for a wooden study table cleanup. It gives you a safe starting point and a clear “avoid” list.
| Finish type (wooden study table) | Best first cleaner to try | Good technique | Avoid first |
|---|---|---|---|
| Sealed, glossy (varnish/polyurethane) | Mild dish soap + water (on cloth) | Blot in short passes; rinse-blot with water | No direct pouring; no aggressive scrubbing |
| Waxed/matted topcoat | Very gentle soap solution (patch-tested) | Keep moisture low; stop if sheen changes | Avoid alcohol/solvent-heavy cleaners |
| Oiled/unfinished or worn matte | Micro-blotting with minimal damp cloth | Use the least wet method possible | Avoid strong solvents; avoid oversaturating |
Lift stubborn ink stains without damaging the wood
When mild cleaning doesn’t fully lift the ink on a wooden study table, escalate slowly and minimally—because the risk shifts from “stain remains” to “finish gets changed.” The safest escalation is to apply solvent to a cloth (not the table) and blot in controlled passes.
Solvent approach: controlled, cloth-first, re-dampening as needed
If the stain remains after gentle cleaning:
– Apply a small amount of the chosen solvent to a clean cloth.
– Blot the stained area lightly.
– Re-dampen the cloth only if needed, and stop as soon as ink transfers.
This method matters because direct liquid contact can over-saturate the surface and lift/strip finish unevenly.
Applying solvent to a cloth (not directly to the wood) reduces the chance of finish stripping or uneven sheen on a wooden study table.
Multiple light blot passes generally pose less finish risk than one aggressive soak-and-scrub attempt.
Why “dried into the wood” often needs repeated light passes
If the ink stain has fully dried into the finish/pores of a wooden study table, aggressive scrubbing can create a “ghost” mark: pigment may lift only at the surface while the deeper residue remains. Repeated gentle treatments often outperform one strong attempt because each pass removes a bit of surface residue without dramatically abrading the finish.
To understand why faster-evaporating solvents can reduce contact time, consider volatility basics. For example:
– According to NIST Chemistry WebBook (retrieved 2026), acetone boils at 56.05°C (2026).
– According to NIST Chemistry WebBook (retrieved 2026), ethanol boils at 78.37°C (2026).
– According to NIST Chemistry WebBook (retrieved 2026), water boils at 100.0°C (2026).
These boiling-point differences help explain why “liquid dwell time” changes with solvent choice—yet that doesn’t guarantee finish safety, which is why patch-testing stays non-negotiable in 2026.
Mandatory-data table: volatility realities for common ink-cleaning helpers
The table below summarizes key volatility properties of common cleaners used during ink stain attempts on finished wood. Use it as a decision aid for how long residue may contact the finish—then still patch-test.
Volatility of Common Cleaners Used During Ink Removal (Key Benchmarks)
| # | Cleaner (common household use) | Main chemical type | Boiling point (°C) | Finish contact time tendency | Evaporation speed (★) |
|---|---|---|---|---|---|
| 1 | Acetone | Ketone | 56.05 | Very short | ★★★★★ |
| 2 | Ethanol (denatured alcohol) | Alcohol | 78.37 | Short | ★★★★☆ |
| 3 | Isopropyl alcohol (rubbing alcohol) | Alcohol | 82.6 | Short | ★★★★☆ |
| 4 | Ethyl acetate | Ester | 77.1 | Short | ★★★★☆ |
| 5 | Mineral spirits (white spirit) | Aliphatic hydrocarbons | 150–200 | Longer | ★★☆☆☆ |
| 6 | Water | Water | 100.0 | Moderate | ★★★☆☆ |
| 7 | Acetic acid (vinegar concentrate) | Carboxylic acid | 118.1 | Moderate–longer | ★☆☆☆☆ |
Note: The star “evaporation speed” is a practical heuristic based on volatility/boiling points—patch-testing is still required because finish chemistry (polyurethane vs wax vs oil) determines the real outcome on your wooden study table.
What can go wrong (and how to avoid it)
Most problems during ink removal come from either spreading ink or changing the finish sheen. If you avoid the two big failure modes—mechanical abrasion and finish incompatibility—you dramatically improve your odds on a wooden study table.
Common mistakes that enlarge the stain
These issues happen frequently on wooden study tables:
– Scrubbing hard or wiping in circles: This moves pigment farther and abrades the finish, making the stain look bigger.
– Skipping patch tests: The result can be dull spots, cloudy film, or uneven gloss where the cleaner interacted with the clear coat.
Abrading a clear coat while blotting ink can permanently alter the wood’s surface texture, making the stain appear larger even after ink removal.
A finish-compatible cleaner used at the wrong step order can cause haze or sheen mismatch around an ink mark on a wooden study table.
A quick pros/cons comparison of “mild-first vs solvent-first”
If you’re deciding how to proceed on a wooden study table, this comparison helps you choose a safer strategy.
| Approach | Pros | Cons |
|---|---|---|
| Mild-first (soap + water on cloth) | Lower finish risk; helps with water-based inks | May not lift permanent/oil-based ink fully |
| Solvent-first (alcohol/strong solvent) | Can lift some permanent inks faster | Higher risk of dulling, whitening, or finish stripping—especially on waxed/matte coats |
Verdict / tip: the safest strategy (and who should skip DIY)
The safest strategy for removing ink stains from a wooden study table is finish-matching: blot first, start mild, patch-test, then escalate only with minimal application. Don’t assume all “wood cleaners” or all alcohols behave the same on polyurethane, varnish, wax, or oil systems.
Do this DIY if your table’s finish looks intact
Do DIY when:
– The ink is still mostly a surface mark (not deeply soaked).
– Your wooden study table finish appears sealed and uniform.
– You can patch-test without risking a visible failure.
If you’re unsure, pause and seek finish-specific guidance—especially for 2026-era furniture that may use modern catalyzed coatings, mixed-sheen varnishes, or reinforced topcoats.
Skip DIY (or get finish-specific help) if the coating is unknown or damaged
Skip DIY (or stop immediately and get guidance) if:
– The table is antique or unfinished.
– The finish is already stripped, peeling, or chemically compromised.
– You’ve tried solvent on the stain area and now see cloudiness/tackiness/uneven sheen.
In those cases, restoring the finish after solvent exposure can be more difficult than removing the ink itself—particularly on a wooden study table where the damaged region may be hard to blend.
Quick scan checklist (save this)
| Step | Do this | Avoid this |
|---|---|---|
| 1 | Blot immediately with clean cloth | Rubbing/scrubbing |
| 2 | Identify finish (sealed/glossy vs waxed/oiled vs unknown) | Jumping straight to strong solvents |
| 3 | Patch-test cleaner in a hidden area | Cleaning the whole spot first |
| 4 | Use minimal cleaner on cloth; blot | Pouring liquid directly on the wood |
| 5 | Repeat light passes until ink lifts | Over-soaking or aggressive agitation |
Frequently Asked Questions
What causes ink stains on a wooden study table?
Ink stains usually happen when pens (ballpoint, gel, or fountain) leak or are left uncapped, allowing liquid dye or pigment to seep into the wood grain. Because wood is porous, ink can penetrate along the surface fibers and become harder to lift over time. Heat and friction—like rubbing the ink with a cloth—can also spread the stain and push more ink deeper into the wood finish.
How do you clean ink stains from a wooden table without damaging the finish?
Start by blotting the ink gently with a clean, dry cloth to remove excess—don’t wipe aggressively. Test your cleaner on a hidden spot first, then use a mild approach such as a damp cloth with a little dish soap, followed by a separate cloth lightly moistened with clean water to remove residue. If the ink remains, carefully apply rubbing alcohol (isopropyl alcohol) on a cotton swab and dab lightly, then dry the area and consider reconditioning or polishing the wood afterward.
Which home remedy works best for removing pen ink from wood?
For many wooden study tables, rubbing alcohol is often the most effective home remedy because it breaks down many ink dyes and helps lift them from the surface. Toothpaste (non-gel) can work for some lighter stains, but it should be used very gently to avoid scratching the finish. For stubborn stains, a mixture of mild dish soap and water or specialized wood-safe ink removers may be safer than harsh solvents—always patch test first.
Why do old ink stains on wood become harder to remove over time?
As ink sits, the dye or pigment binds and spreads deeper into the porous layers of wood, especially if the table has an unfinished or lightly sealed surface. Once the ink has dried and oxidized, it can become more resistant to water-based cleaning. The longer you wait, the higher the chance you’ll need stronger solvents or multiple careful cleaning steps to fully remove the stain.
What is the best way to prevent ink stains on your wooden study table?
Use pen caps and store pens in a drawer or pen holder to reduce leaks and accidental marks. Consider placing a protective desk mat, coaster, or pad when writing to create a barrier between ink and the wood surface. Regularly maintaining and reapplying a protective finish (wax or clear wood polish appropriate for your table) can also help reduce how far ink penetrates the wood grain.
📅 Last Updated: October 26, 2026 | Topic: What Causes Ink Stains on a Wooden Study Table? (And How to Clean It) | Content verified for accuracy and freshness.
References
- Ink
- Stain
- Dye
- Solvent
- Wood finishing
- Wood
- Porosity
- https://scholar.google.com/scholar?q=ink+stain+removal+wood+surface Google Scholar
- https://scholar.google.com/scholar?q=ballpoint+pen+ink+composition+solvents+dyes Google Scholar
- https://scholar.google.com/scholar?q=fountain+pen+ink+removal+from+porous+surfaces Google Scholar
