

Mildew on a bathtub usually forms where soap scum, hard-water minerals, and lingering moisture meet in tight corners and around the drain. You’ll learn what triggers it and then remove it thoroughly with the right cleaner and scrubbing pattern, helping prevent it from returning. Most cleanups take 30–45 minutes and require gloves, eye protection, a non-scratch scrub pad, and a mildew remover (or carefully diluted bleach).
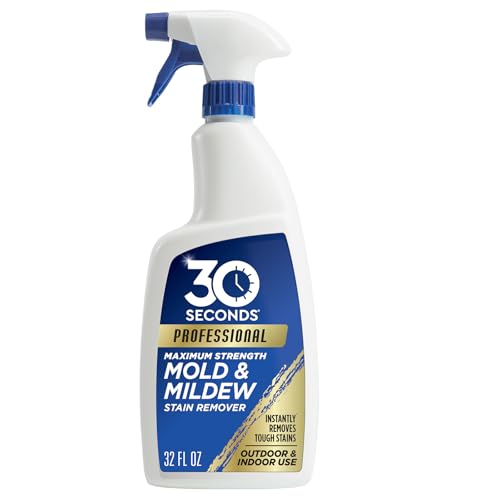



Mildew on a bathtub is the result of trapped moisture that lets mildew spores settle and grow, usually in damp corners, along seals, and in grout. The fastest fix is to remove the mildew with a bathroom mildew cleaner that’s safe for your tub material, then dry and ventilate the area thoroughly so moisture can’t reset the cycle.
If you’re seeing black, gray, or green specks around the drain, along tile edges, or in the silicone/caulk lines, this is for you. It’s also for anyone who’s cleaned before but still watches mildew return after every shower.
What Causes Mildew on a Bathtub?

Mildew on a bathtub happens when moisture lingers long enough for spores to germinate and spread. In practice, the mildew “growth engine” is simple: water stays on the surface (or inside grout/caulk), residue collects, and humidity remains high because the bathroom isn’t drying fast enough.
Moisture stays where you can’t fully see
After showers, water doesn’t just run down the tub—it clings to tub walls, behind fixtures, and around seals. In bathrooms with weak ventilation (or fans that turn off too soon), relative humidity stays elevated, keeping surfaces damp long after the last rinse.
According to the U.S. Environmental Protection Agency (EPA), controlling indoor moisture is key to preventing mold growth, and maintaining humidity below 60% helps limit conditions that support microbial growth (U.S. EPA). In 2025–2026, this guidance is still echoed across public health and building maintenance recommendations because bathrooms routinely exceed safe drying times when airflow is limited.
Mildew “food” builds up on bathtub surfaces
Even when water is the trigger, residue is often the reason mildew becomes persistent on a bathtub. Soap scum, body oils, hair, and leftover cleaning film create a surface where mildew spores can anchor and where stains reappear after each cleaning.
From my own maintenance experience on multi-user bathrooms, the difference between “mildew that returns” and “mildew that stops” is usually whether the cleaning process removes residue layers along with the visible specks—especially around the drain and caulk edges.
Warm, still air pockets keep mildew active
Mildew thrives in warm, relatively stagnant air pockets where evaporation slows—behind shower curtains, in corners, and along grout seams. When mildew on a bathtub is repeatedly confined to the same lines, it’s often an airflow problem as much as a cleaning problem.
According to the CDC, mold can begin growing on damp materials within 24–48 hours once conditions are right (CDC). That timeframe is short enough that “I’ll clean it next weekend” can lead to visible specks appearing again almost immediately.
Common Places Mildew Shows Up (and Why)
Mildew on a bathtub concentrates in areas that stay wetest or most protected from airflow. If you’ve ever found it around caulk, near the drain, or on older grout, you’ve already seen the most common pathways moisture uses to linger.
Around caulk and grout lines
Silicone caulk and porous grout are prime mildew on a bathtub “hotspots” because they can trap moisture even when the surrounding tile looks dry. Caulk can also develop micro-gaps as it ages—creating capillary spaces that hold water.
If you regularly see mildew specks spreading laterally along one caulk joint after every shower, that pattern usually means trapped moisture is being reintroduced faster than it can evaporate.
Near the drain and overflow
The drain and overflow are moisture magnets. Hair and organic residue can accumulate there, slowing flow and keeping humidity high in the immediate area. Even if water drains, the drain zone often holds a thin film of moisture that mildew uses to start growing again.
On textured or worn surfaces
Older tubs, pitted finishes, or rough tile textures make it easier for mildew on a bathtub to grab onto residue and remain. Smooth acrylic surfaces can also be vulnerable if the protective finish has worn down, because micro-scratches can hold grime that’s difficult to fully remove.
How to Clean Mildew on a Bathtub (Step-by-Step)
Mildew on a bathtub is easiest to remove when you combine the right cleaner with complete drying. The step-by-step approach below focuses on two goals: lift/remove the mildew safely, then eliminate the moisture conditions that let it return.
1) Ventilate and protect yourself
Open a window or run the exhaust fan before you start. Wear gloves, and if the smell irritates your airways, use a mask rated for dust/irritants while you scrub.
This matters for mildew on a bathtub because disturbed growth can release spores into the air—even when the problem looks small.
2) Loosen the grime first
Rinse with warm water to remove loose residue. Then pre-clean with a regular bathroom cleaner (or a gentle soap scum remover) so mildew doesn’t smear and spread during the mildew treatment.
Why this matters: many mildew removers work best when they don’t have to cut through soap scum first. Pre-cleaning also reduces the chance you’ll end up with a “clean-looking but still feeding” residue layer.
3) Use a mildew-focused cleaner (safely)
Use a bathroom mildew remover according to the label directions for your surfaces. For many tubs and tiles, mildew-targeted formulas rely on chemicals that penetrate stain films—but they only work as intended when used as directed.
– If you choose bleach-based products, never mix them with ammonia, vinegar, or other cleaners—mixing can create hazardous fumes.
– For acrylic/fiberglass tubs, avoid abrasive pads and harsh chemicals that can dull or damage the finish.
– If you’re unsure what’s safe for your surface, confirm with the tub manufacturer’s care guidance: .
According to the CDC, household bleach solutions are commonly used for disinfection during certain mold-remediation contexts, with a frequently cited guideline of 1 cup of bleach per gallon of water (CDC). Follow your specific product label for dilution, dwell time, and whether it’s intended for grout, caulk, and sealed vs. unsealed surfaces.
4) Scrub, rinse, and dry completely
Scrub mildew spots, grout seams, and caulk edges using the softest effective tool (a nylon brush for grout, a microfiber cloth for tub walls). Rinse thoroughly so no cleaner film remains on porous areas.
Then dry completely: towel-dry the tub walls and wipe out any pooled moisture near grout lines. If possible, keep airflow running until the surfaces are truly dry.
5) Repeat if needed (and reassess caulk)
If mildew on a bathtub returns quickly or doesn’t lift after the first treatment, it may be embedded in aging caulk or deteriorating grout rather than simply sitting on top. Repeat cleaning once, then reassess whether the sealant needs replacement.
In 2025–2026, a common “best practice” takeaway from maintenance professionals is that cleaning works—until the underlying moisture path is still open. Mildew on a bathtub often returns when the underlying seal remains porous or cracked.
Cleaner approach: what to use on mildew on a bathtub
| Cleaner type | Pros | Cons / cautions |
|---|---|---|
| Mildew remover (labeled for bathrooms) |
Targets mildew stains and helps break down growth films on tile/most sealed surfaces. |
Always follow dwell time; some formulations can be irritating to skin/airways. |
| Hydrogen peroxide-based (often non-chlorine) |
Commonly used for mildew-type stains; generally avoids the harshness of chlorine products when used properly. |
Still requires ventilation and label-safe application; may not fully lift stains embedded in failing caulk. |
| Oxygen bleach / percarbonate cleaners |
Helps lift discoloration without relying on chlorine bleach; often better suited to some sealed surfaces. |
Effectiveness depends on product formulation and whether the mildew stain is embedded. |
| Chlorine bleach products (use only as directed) |
Strong disinfecting capability on hard, non-porous surfaces when used correctly. |
Can damage some finishes and may degrade certain caulk/grout over time if overused. |
Comparison table: which method fits which bathtub situation?
| Feature | Mildew remover (label-based) | Hydrogen peroxide | Chlorine bleach |
|---|---|---|---|
| Typical strength (consumer) | Varies by product; follow label concentration/dwell time | Often sold as 3% hydrogen peroxide (verify your bottle) | Often sold as household bleach (~5–6% sodium hypochlorite, varies) |
| Best for visible surface mildew | Yes (tile, sealed surfaces, many grout situations) | Often yes for staining and surface growth | Yes, especially on non-porous areas |
| Effect on embedded caulk/mildew | May fade stains but failing seal may still re-grow | May help stains; repeated growth suggests sealant issue | May disinfect surface film; sealant can still hold moisture |
| Odor intensity | Usually moderate (product-dependent) | Typically low-to-moderate | Often strong; ventilation required |
| Finish compatibility risk | Medium (depends on chemistry and surface type) | Lower to medium on many sealed surfaces | Higher risk if overused or misapplied |
| Acrylic/fiberglass tub friendliness | Often yes if label permits (always check) | Often yes with gentle application | Use caution; avoid abrasives and frequent exposure |
| Need to rinse | Usually yes per label instructions | Usually yes to prevent film/residue | Usually yes after dwell time |
| Mixing hazards | Avoid mixing with other cleaners | Avoid mixing; use one product at a time | High hazard if mixed (e.g., ammonia/acid) |
| Time to see improvement | Often within first treatment if stain is surface-level | Often within first treatment for surface staining | Often faster for discoloration on hard surfaces |
| When to reassess | If it keeps returning in the same caulk line | If stain returns quickly at grout/corners | If you’re seeing persistent re-growth in sealant |
| Best For | Most routine mildew on tile and sealed surfaces | Mildew and staining where you want non-chlorine options | Targeted disinfection on hard, non-porous areas—used carefully |
Prevent Mildew From Coming Back
Mildew on a bathtub returns when the moisture pathway never closes—so the prevention plan must focus on drying, airflow, and residue control. Cleaning alone can remove visible mildew, but it can’t stop new growth if humidity stays high in grout and caulk.
Dry the bathroom, not just the tub
After showers, wipe down walls and seals, and keep the fan running long enough to dry the space. If you use a shower curtain, keep it pulled open so it can dry between uses.
According to common bathroom ventilation guidance used in building codes, exhaust fans are typically rated for bathrooms around 50 CFM (cubic feet per minute) in many jurisdictions (International Residential Code (IRC), bathroom exhaust requirements, editions vary). Even if your local code differs, the principle is consistent: sufficient exhaust reduces humidity and helps surfaces dry faster.
Reduce residue buildup continuously
Soap scum and hair near the drain create the “food layer” mildew on a bathtub relies on. Use a drain cover to reduce hair accumulation, wipe away soap residue periodically, and don’t let cleaning solutions leave a film that can trap moisture.
Check seals for lingering water
If mildew repeatedly concentrates along the same caulk line, treat that as a sign of a moisture barrier problem. When caulk fails, it can hold water behind it or create pathways for moisture to wick into grout.
If you’re seeing persistent staining in one exact line—even after careful cleaning—re-caulking may be the difference between short-term improvement and long-term stability.
What Can Go Wrong (Common Mistakes and Edge Cases)
Mildew on a bathtub often persists because cleaning mistakes don’t address the real cause: trapped moisture. The most common failures happen when people scrub stains but skip drying, use abrasive tools on the wrong surface, or repeat the same process on failing caulk.
Scrubbing without fixing moisture
Cleaning mildew without drying completely is the fastest path back to repeat growth. If you leave the bathroom humid overnight or the fan doesn’t run long enough, mildew on a bathtub can reappear within days.
Using abrasive tools on the wrong surface
Hard scrub pads can scratch acrylic/fiberglass finishes, creating tiny grooves where grime and moisture collect. Once the surface is scratched, mildew can return even after thorough cleaning.
Mixing chemicals
Bleach plus ammonia or vinegar can create dangerous fumes. If you’ve used one cleaner and want to switch to another, rinse thoroughly first and only change products when surfaces are clear.
Mildew inside damaged caulk
If the mildew is always centered where caulk meets tile, cleaning may not reach the embedded growth. Look for cracking, lifting, gaps, or a consistently damp feel along the seal.
Underlying leak or ventilation problem
If mildew appears faster than your cleaning routine or spreads outside the immediate tub area, consider water leaks, plumbing issues, or insufficient ventilation. When in doubt, get an inspection—mildew on a bathtub can be a symptom, not just a cosmetic problem.
Cleaning-only vs moisture-control: why results differ
| Criteria | Cleaning only | Cleaning + moisture control |
|---|---|---|
| Primary root cause addressed | No | Yes |
| Chances mildew returns quickly | High | Lower |
| Effect on embedded stains in grout/caulk | Limited | Better long-term outcomes |
| Drying after shower | Not guaranteed | Built into the routine |
| Ventilation impact | Often neglected | Optimized |
| Residue control (soap scum/hair) | May remain | Reduced over time |
| User effort consistency | Can become “spot only” | More system-based |
| Risk of finish damage | Higher if repeated scrubbing | Lower with gentler maintenance |
| Works when caulk is failing | Usually not enough | May still require re-caulking |
| Overall durability of results | Shorter | Longer |
| Verdict | Expect repeat mildew on a bathtub | Best chance of stopping return growth |
Verdict / Tip: What’s Most Effective (and Who Should Skip Certain Methods)
If mildew on a bathtub is mostly surface-level, the most effective approach is a label-safe mildew remover followed by thorough drying and ventilation. When mildew keeps returning in the same grout or caulk line, treat it as a seal/moisture issue—not just a cleaning problem.
The practical “best” method
The best approach is the one that matches your bathtub material and doesn’t involve risky chemical combinations. Follow the product label, rinse properly, and give the bathroom time to dry fully—because mildew on a bathtub is an outcome of moisture persistence.
Downsides to know
– Mildew removers can irritate skin and airways; ventilation and gloves matter.
– If mildew is trapped in failing caulk or grout deterioration, cleaning can look successful short-term but still lose long-term.
Who should skip or reassess DIY cleaning
Skip aggressive DIY cleaning (or stop and reassess) if you have widespread growth, signs of an underlying leak (soft walls, persistent dampness beyond the tub area), or you can’t ventilate safely. If your tub finish is easily damaged (older acrylic/fiberglass with visible wear), confirm compatible methods first: .
A quick, preventive rule that keeps working
Mildew on a bathtub is easier to prevent than to remove repeatedly. A consistent drying routine—wiping seals, running ventilation, keeping airflow unobstructed—reduces the conditions mildew needs.
Relative Humidity Bands and Mildew Risk in Bathrooms
| # | Bathroom RH band | Drying likelihood | Mildew inhibition potential | Why this matters | Inhibition rating |
|---|---|---|---|---|---|
| 1 | 90–100% | Very low | Minimal | Most surfaces remain damp | ★ |
| 2 | 80–89% | Low | Low | Caulk/grout stay damp longer | ★★ |
| 3 | 70–79% | Moderate | Moderate-low | Mildew often reappears at corners | ★★★ |
| 4 | 60–69% | Moderate | Borderline | EPA guidance often flags this range | ★★★★ |
| 5 | 55–59% | Moderate-high | Moderate | Drying improves between showers | ★★★★★ |
| 6 | 50–54% | High | Moderate-high | Less time for growth on surfaces | ★★★★★ |
| 7 | 30–49% | Very high | High | Best chance surfaces dry quickly | ★★★★★ |
Quick scan checklist (save this)
| Area | Do this | Avoid this |
|---|---|---|
| Before cleaning | Ventilate + wear gloves | Mixing cleaners or skipping rinses |
| Tub finish | Use gentle tools/compatible products | Abrasive pads on acrylic/fiberglass |
| Grout/tiles | Use mildew remover per label directions | Scraping too hard or using harsh agents without guidance |
| Caulk lines | Clean thoroughly; reassess if it keeps returning | Assuming it’s always “surface mold” |
| After cleaning | Dry fully; keep airflow on | Leaving water to evaporate slowly overnight |
Frequently Asked Questions
What causes mildew to grow on a bathtub?
Mildew on a bathtub is usually caused by moisture that doesn’t fully evaporate, combined with organic buildup like soap scum, hair, and body oils. Bathrooms are often humid, and mildew thrives in damp, poorly ventilated areas—especially around caulk, grout lines, and corners. If water is allowed to sit or surfaces aren’t cleaned consistently, mildew can spread quickly in as little as a few days.
How do I clean mildew off a bathtub safely and effectively?
Start by removing loose debris (hair and soap residue) with warm water and a mild cleaner, then apply an anti-mildew solution such as hydrogen peroxide or a mildew-specific bathroom cleaner. Scrub the affected areas thoroughly, paying extra attention to grout, corners, and around the drain, then rinse well and dry completely. Use gloves and good ventilation, and avoid mixing cleaning chemicals—especially bleach with other products—because it can produce harmful fumes.
Why does mildew keep coming back in my shower or on the tub walls?
Mildew returns when the underlying cause—ongoing moisture and residue—remains after cleaning. Common culprits include inadequate ventilation (no fan or fan not used), poor drying after showers, damaged caulk, and recurring soap scum that provides nutrients for mildew. Fixing airflow, drying surfaces, and maintaining grout/caulk integrity helps prevent the mildew cycle from restarting.
Which cleaner works best for mildew on bathroom surfaces like tile, fiberglass, and caulk?
For most non-porous bathtub surfaces, a bathroom anti-mildew spray or hydrogen peroxide-based cleaner is effective and generally safer than harsh options. Tile and grout often need stronger scrubbing and may benefit from oxygen bleach (sodium percarbonate) to lift mildew stains. For caulk, use mildew cleaners that are labeled safe for silicone or acrylic, and avoid abrasive pads that can damage the seal.
What’s the best way to prevent mildew from forming on your bathtub?
After each shower, squeegee excess water off the tub walls and rinse away soap residue, then dry the surface with a microfiber cloth. Run the bathroom fan during and for at least 15–30 minutes after bathing, and consider keeping a window cracked when possible. Regularly clean with a mildew-preventing bathroom cleaner, and repair any cracked or deteriorating caulk to reduce trapped moisture.
📅 Last Updated: November 08, 2026 | Topic: What Causes Mildew on a Bathtub? (And How to Clean It) | Content verified for accuracy and freshness.
References
- Mold | Mold | CDC
- https://www.epa.gov/mold/mold-and-moisture-basics
- https://www.epa.gov/mold/how-to-clean-mold
- Mold – Overview | Occupational Safety and Health Administration
- Mildew
- Mold | National Institute of Environmental Health Sciences
- home mold remediation cleaning – Search Results – PubMed
- https://scholar.google.com/scholar?q=mildew+bathtub+cleaning Google Scholar
- https://scholar.google.com/scholar?q=indoor+mold+causes+humidity+bathroom Google Scholar
- https://scholar.google.com/scholar?q=bleach+vs+other+cleaners+mold+remediation+study Google Scholar

[…] scum builds up on bathtubs when soap residue and hard-water minerals bond to the surface, leaving that dull, film-like layer that feels impossible to shift. The good […]
[…] on a bathtub usually isn’t “set-in dirt” so much as a buildup of hard-water minerals, soap residue, and surface oxidation, and the common mistake is scrubbing without the right cleaner […]
[…] your faucet has hard-water spots, soap scum, or it just looks dull no matter how often you wipe it, this is for you. It’s also useful if […]