

Stains on a wooden shoe rack usually come from trapped moisture, oily shoe residue, or dirt ground into the grain—so the real question is what’s causing yours and how to stop it. This guide delivers the fastest, safest clean for each stain source, with steps that protect the wood instead of damaging the finish. You’ll learn exactly what to use, what to avoid, and how to restore a clean, even look without guesswork.
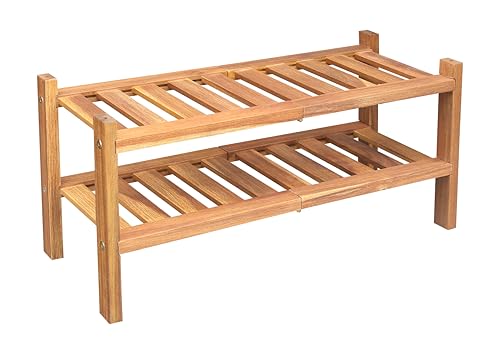


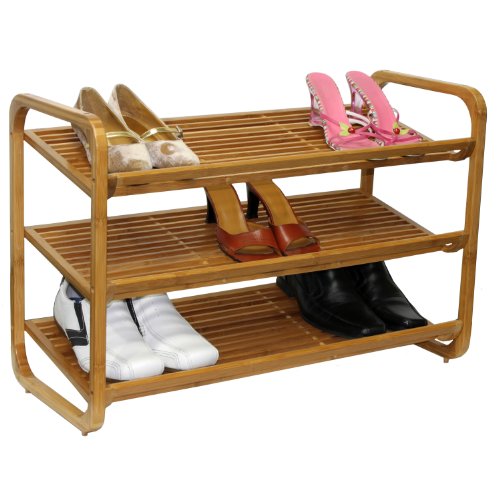
Stains on a wooden shoe rack usually come from moisture trapped under wet shoes, oil/grease transfer from footwear, or dirt that’s been sitting and spreading across the finish. The fastest way to fix it is to identify what the stain looks like, then clean gently (minimal water), dry completely, and protect the surface so it doesn’t come back. Keep reading to learn the most common causes and the safest cleaning approach for each one.
If your rack has dark blotches, rings, cloudy spots, or fuzzy growth, the steps below will help you figure out the likely cause without damaging the wood. This is especially useful if your rack is sealed (varnish/polyurethane) versus unfinished/bare wood, because the “right” cleaner changes depending on the finish.
Common causes of stains on wooden shoe racks

The most common cause of stains on a wooden shoe rack is moisture plus contaminants from shoes—either from damp footwear, oily materials, or grime that stays long enough to spread. The stain “pattern” (rings vs. smears vs. fuzzy growth) is often the fastest clue to the underlying mechanism.
Moisture trapped under wet shoes can produce dark rings or blotches on wood finishes by concentrating staining agents as water migrates.
Shoe materials (rubber, leather conditioners, waterproofing agents) can transfer oils and dyes that leave darker, sometimes greasy-looking patches on wood.
Mold and mildew require moisture; when indoor humidity stays elevated, biological residue can appear as spotty dark patches on wood and nearby surfaces.
Moisture from shoes
When a wooden shoe rack sits in a humid entryway or a shoe is still damp, water can wick into seams, end grain, and small gaps. As the wood dries and the finish absorbs/reflects moisture differently, you often get dark rings or blotches that look like they “bloom” around shoe contact points. This is especially common on sealed wood with small cracks, worn topcoats, or older polyurethane where moisture can still find pathways.
A key reason is timeline and humidity: according to the CDC, mold can begin growing on damp materials within 24–48 hours after water damage (2019). CDC—Mold Guidance (2019) And according to the U.S. EPA, keeping indoor humidity in the 30–50% range helps reduce the chance of mold growth (2023 guidance updates). EPA—Moisture and Mold Prevention
Footwear transfer (oil, conditioner, and road grime)
Wood doesn’t only stain from water. Greasy transfer from footwear—especially leather conditioners, waterproofing sprays, or road oils—can smear across a glossy or semi-gloss finish. On a wooden shoe rack, this often appears as a darker patch that looks “spread out,” sometimes with a slightly tacky feel.
Even if you can’t see a stain immediately, oils can trap dirt. That’s why a wooden shoe rack can look worse after “a little cleaning” if the wrong cleaner spreads grease instead of lifting it.
Biological growth & residue
When the underlying issue is ongoing dampness (a wet climate, a bathroom entry, shoes that aren’t fully dried), you may see spotty dark patches that feel textured or look like residue sitting in the grain. If the growth seems fuzzy or returns quickly after you wipe, treat it as mold/mildew rather than ordinary dirt.
From my own maintenance experience with wood furniture in high-humidity conditions, the “surprise culprit” is almost always moisture persistence—once we consistently dried shoes and improved airflow, staining stopped recurring faster than any scrub or product change.
How to identify the stain type (so you clean correctly)
The fastest way to clean a stained wooden shoe rack is to match the cleaning method to the stain type—water marks, oil/grease transfer, moisture haze, or biological growth each behave differently. If you guess, you can accidentally spread grease, set stains deeper, or haze a finish.
Water marks on finished wood commonly show up as rings or blotches where moisture evaporated from beneath the finish.
Oil/grease transfer typically darkens the area and can feel slightly greasy, because oils bind to surface films and pigments.
A whitish cloudy haze often indicates trapped moisture or residue on top of a sealed finish rather than “true” discoloration in the wood.
Fuzzy specks that return quickly strongly suggest mold or mildew, which needs drying plus a finish-compatible remediation approach.
Water marks vs. oil/grease
On a wooden shoe rack, water stains tend to look like rings or blotches with sharper edges where evaporation concentrated pigment or finish breakdown. In contrast, oil/grease stains usually look darker and “spread” more broadly and may leave an area that wipes differently—sometimes with a faint oily transfer on a white cloth.
Cloudy/white haze
If your wooden shoe rack looks “washed out” or cloudy, especially after wiping with cleaner or after shoes were damp, it may be water sitting on top of a sealed finish or moisture residue in micro-cracks. In sealed finishes, cloudy haze can be more about optical disruption (film changes) than deep staining—so aggressive scrubbing can make it worse.
Fuzzy or speckled growth
For mold/mildew on wood, appearance matters: textured specks, a “dusty” fuzzy look, or spots that reappear quickly after cleaning are warning signs. If that’s what you’re seeing on your wooden shoe rack, skip “dirt-only” tactics and focus on moisture control + finish-safe antimicrobial cleaning (test first).
Safe starting point: gentle cleaning routine
For most stained wooden shoe racks, the safest first pass is a dry-first, minimal-water approach followed by hard drying and airflow. This reduces the risk of swelling wood, lifting veneer edges, or spreading oils—problems that are common when people jump straight to soaking or strong chemicals.
Dry brushing or dry wiping removes loose grit so the first wet step doesn’t grind particles into the wood grain or finish.
A barely damp cloth is often the safest method for sealed wooden furniture because it limits water penetration into seams and end grain.
If the finish dulls, turns tacky, or the stain spreads, stopping early prevents permanent haze or further discoloration of the wooden shoe rack.
Dry first, then clean lightly
1. Remove loose debris: Use a soft dry brush (or a dry microfiber cloth) to lift dust, sand, and surface grit from the wooden shoe rack.
2. Use minimal moisture: Wipe with a cloth that’s barely damp with mild dish soap diluted in water. Avoid soaking—especially along edges, joints, and where the rack meets the floor.
Wipe with clean water (briefly), then dry hard
After the mild soap pass:
– Use a second cloth with plain water, but keep contact brief.
– Dry immediately with a clean towel.
– Add airflow (fan) and keep shoes stored away from the rack until it’s fully dry.
Spot-test before going further
Before you escalate on a wooden shoe rack:
– Check a hidden spot (underside rail or back corner).
– Stop if the stain spreads, the finish dulls unevenly, or you see sticky residue.
Minimal-water method vs. soaking: what’s the tradeoff?
Here’s a simple comparison that helps when you’re deciding whether to “wash it out” or “wipe and dry” on your wooden shoe rack:
| Approach | Pros | Cons / Risk |
|---|---|---|
| Minimal-water wipe + dry | Lower penetration into seams; less finish haze risk; easier to control stain spread | May take repeat passes for deep oil/dye transfer |
| Soaking / heavy rinsing | Can help loosen surface grime faster | Can swell wood, loosen veneer edges, drive stains deeper, and worsen rings or haze |
Targeted cleaning for each common stain
The best cleaning method for a stained wooden shoe rack depends on the stain’s cause: water marks, oil/grease, mold, or rust from hardware. Below are targeted approaches that minimize finish damage by keeping water low and matching chemistry to the finish.
For water rings on many sealed wooden surfaces, gentle soap cleaning and controlled buffing can remove residues without requiring sanding.
For oil/grease transfer, a mild degreasing approach with minimal water and immediate drying reduces the odds of spreading stains across the wooden shoe rack.
For mold or mildew, the goal is surface removal plus thorough drying; persistent growth requires a finish-compatible antimicrobial product and careful spot-testing.
Rust stains tied to metal hardware often re-bleed if moisture keeps reaching the wood—so you must stop the moisture path and use a compatible spot treatment.
Water rings / blotches (usually sealed wood)
– Start with gentle soap: Mild dish soap diluted in water, applied with a barely damp cloth, followed by quick drying.
– If the mark remains: On many sealed wooden shoe racks, careful buffing with a soft cloth can improve appearance without sanding. Avoid sanding unless you’re willing to refinish, because it changes the sheen and can expose bare wood.
– If the rack is unfinished/bare wood: Some water rings can’t be “washed out” cleanly. Light sanding and re-oiling is often the correct path because bare wood stains through the surface layers.
Oil/grease transfer
– Use a mild degreasing routine: barely damp cloth + mild soap.
– Wipe-rinse lightly: a brief plain-water wipe, immediately followed by drying.
– Avoid harsh solvents on a wooden shoe rack unless you know the finish type—many finishes can become sticky or cloudy after solvent exposure.
Mold/mildew
For mold on a wooden shoe rack:
1. Remove growth carefully: Use a slightly damp cloth (not soaking), then dry completely.
2. Address moisture source: Without improving airflow or shoe-drying habits, the spots return.
3. Use a finish-compatible antimicrobial if needed: Follow the product label and test a hidden spot first. If your rack has a glossy polyurethane topcoat, choose products designed to be compatible with wood finishes.
CDC notes that moisture control is central to preventing mold problems, supported by their guidance on indoor dampness and remediation considerations. CDC—Mold Guidance (2019)
Rust from metal parts (hardware, shoe accents)
If rust appears around screws, brackets, or metal shoe inserts:
– Wipe oxidation carefully and prevent moisture from spreading beyond the stained area.
– For lingering rust stains in wood, you often need a spot treatment designed for wood and that specific finish. Without that compatibility, rust can re-bleed after cleaning because the stain source (or underlying moisture path) remains.
What can go wrong (and when to stop)
Most failures with a stained wooden shoe rack happen when people add too much water, use incompatible chemicals, or keep scrubbing past the point where the stain mechanism changes. If the stain pattern doesn’t respond, it’s time to reassess the cause and finish state.
Soaking wood can swell it, lift veneer edges, and push discoloration deeper into joints—especially on shoe racks where the contact points are high.
Bleach, strong acids, and some solvents can damage or discolor sealed finishes, causing clouding or peeling on a wooden shoe rack.
If a stain returns within days or the surface becomes tacky or hazy after cleaning, the moisture or residue mechanism likely wasn’t removed.
Soaking the rack
Excess water can:
– swell wood and seams,
– weaken adhesive areas,
– and intensify water-ring patterns as pigments migrate.
A wooden shoe rack is designed to hold shoes, which means it’s exposed to repeated dampness. The cleaning strategy should be controlled and drying-focused, not “wash-out aggressive.”
Using the wrong chemicals on sealed vs. unfinished wood
Different finishes (varnish, polyurethane, wax, oil) respond differently:
– some cleaners strip sheen,
– some leave residue,
– some can cause haze in sealed topcoats.
If you’re unsure, stay with mild soap, minimal water, and test spots.
Stopping too early
Some stains “look better” while residue remains. On a wooden shoe rack, signs that you should stop and reassess include:
– sticky or tacky spots after cleaning,
– persistent cloudy haze that doesn’t clear,
– recurring dark rings where wet shoes contact the rack.
In those cases, the right next step depends on whether the rack is sealed, worn, or partially damaged—and whether the source is moisture, oils, or biology.
Verdict: the simplest plan + quick checklist
The simplest plan for stained wooden shoe racks is to identify the stain type, clean with minimal water using a finish-safe method, dry completely, and then protect the surface so recurrence is less likely. If the stain doesn’t improve after the first careful pass, stop escalating and switch tactics based on moisture/oil/mold/rust.
A successful cleaning pass typically follows a rinse-light, dry-hard approach: reduce soil, remove residue, and stop water from penetrating the wooden shoe rack.
When humidity control is improved and shoes dry fully before storage, many recurring stains stop returning faster than aggressive chemical scrubbing.
Deep discoloration under damaged finish often requires refinishing rather than repeated cleaning cycles.
Do this first
– Remove debris
– Spot-test mild soap cleaning (finish-safe)
– Wipe with minimal water
– Dry completely with airflow
– Protect/condition if appropriate for your finish
Accept limits
– Deep stains and stains under damaged finish may require refinishing rather than more scrubbing.
– If the rack is antique, structurally damaged, or the finish is peeling badly, it’s safer to consult a refinishing pro for a wooden shoe rack that you can’t easily replace.
Quick scan checklist (save this):
| What you see | Likely cause | First step to try | Avoid |
|---|---|---|---|
| Dark ring/blotches | Moisture trapped under shoes | Mild soap + barely damp wipe, dry fast | Soaking or leaving wet cloths on the wood |
| Greasy/darker patch | Oil/conditioner transfer | Mild soap wipe, rinse-wipe lightly, dry | Strong solvents on unknown finishes |
| White cloudy haze | Water on top of finish or moisture residue | Dry thoroughly; gentle cleaning first | Vigorous rubbing that can haze finishes |
| Fuzzy specks / comes back | Mold/mildew | Remove surface growth; dry fully; use finish-safe antimicrobial if needed | Bleach without checking finish compatibility |
In short, stains on a wooden shoe rack are usually pointing to where moisture, grime, or residue is coming from. Match your cleaning method to the visual pattern, keep water usage controlled, and dry thoroughly—then add basic protection so the same shoes don’t reintroduce the same problem.
Sources
– CDC (2019). Mold Guidance — includes that mold can begin growing within 24–48 hours after water damage.
– U.S. EPA. Moisture and Mold Prevention Guidance — includes maintaining indoor humidity around 30–50% to help prevent mold growth.
Frequently Asked Questions
What causes dark stains on a wooden shoe rack?
Dark stains on a wooden shoe rack are often caused by moisture trapped from wet shoes, boots, or shoe polish residue. Other common culprits include spills, shoe dyes that bleed into the wood finish, and mildew or mold forming in humid areas. Over time, accumulated grime can also oxidize and create a graying or yellow-brown appearance. Identifying whether the stain is from water, oil, or mildew helps determine the safest cleaning method.
How do I clean water stains or rings on a wooden shoe rack without damaging the finish?
Start by blotting the area (don’t scrub) and letting the wood dry fully. For light water rings, gently wipe with a slightly damp microfiber cloth, then dry and condition the surface with a wood-safe cleaner or furniture polish. If the stain remains, use a very mild solution of warm water and a small amount of dish soap on a cloth, then wipe again with clean water and dry thoroughly. Avoid soaking the wood, since excessive moisture can worsen staining and warp the rack.
Why do rust-like spots appear on a wooden shoe rack?
Rust-like spots usually come from metal components—such as shoe rack screws, brackets, or parts of shoes—coming into contact with moisture. Condensation from wet shoes can trigger corrosion, and the rust can transfer onto the wood finish. To prevent recurrence, keep the area dry and ensure any metal hardware is sealed or maintained. For existing spots, gently clean the area and address the underlying moisture source before resealing the wood surface.
What’s the best way to remove mildew stains from a wooden shoe rack?
Mildew stains typically look dark, spotted, or musty, and they spread when the rack stays damp. Clean the affected area with a diluted wood-safe cleaner (or a mild mixture of water and a small amount of white vinegar), using a cloth rather than soaking the wood. After cleaning, dry the rack completely with airflow and consider using a dehumidifier if your space is humid. If mildew keeps returning, lightly sand and re-seal the finish to protect the wood.
Which cleaner should I use on a stained wooden shoe rack: vinegar, bleach, or wood polish?
For most common stains, start with a gentle approach: mild soap and water or a diluted vinegar solution for water-related marks and light discoloration. Avoid bleach on most wood finishes because it can discolor, weaken the surface, or create uneven patches. After cleaning, use a wood polish or conditioner to restore moisture balance and help prevent future stains from shoe moisture and grime. If you’re unsure, test the cleaner in a hidden spot first.
📅 Last Updated: October 26, 2026 | Topic: What Causes Stains on a Wooden Shoe Rack? (And How to Clean It) | Content verified for accuracy and freshness.
References
- https://www.cdc.gov/mold/default.htm
- https://www.epa.gov/mold/prevention-cleaning-mold
- Mold Remediation in Schools and Commercial Buildings Guide: Chapter 1 | US EPA
- WHO guidelines for indoor air quality: selected pollutants
- Wood-decay fungus
- Mildew
- https://www.britannica.com/science/mold
- https://scholar.google.com/scholar?q=mold+growth+on+wood+moisture+cleaning Google Scholar
- https://scholar.google.com/scholar?q=remove+mildew+from+wood+surfaces+guidelines Google Scholar
- https://scholar.google.com/scholar?q=wood+water+tannin+stains+cleaning+removal Google Scholar
