

Wondering how to clean a wooden shoe rack without warping or ruining the finish? This Wood Shoe Rack Cleaning FAQ gives straight answers to the most common questions, including what to use, what to avoid, and how often to clean. Use the right method for your rack’s surface—then get it back to looking clean and staying dry for everyday wear.
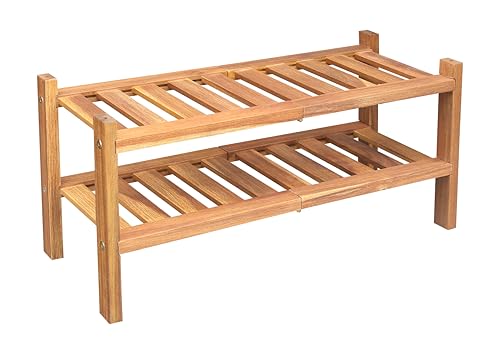


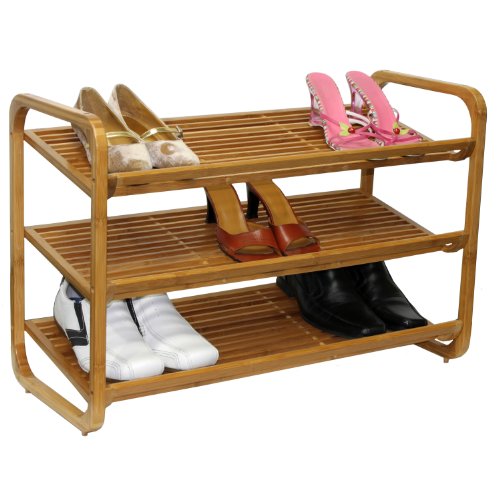
Use a barely-damp cloth with a mild, pH-neutral cleaner for everyday cleaning, then dry the wood immediately to prevent swelling or finish dulling. For deeper work, spot-clean stains gently—avoid soaking, harsh chemicals, and abrasive scrubbing, especially on clear coats and oils that can be damaged without you noticing right away.
If you’re cleaning a wooden shoe rack, the “safe” method depends on the rack’s finish (clear coat/varnish, wax/oil, or bare/unfinished wood). This FAQ is for homeowners who want to clean their rack effectively in 2026 while reducing the risk of warping, discoloration, or finish damage.
How to clean a wooden shoe rack (the safe default)

For most wooden shoe racks, the safest default is dusting first, then a barely-damp wipe with pH-neutral soap, followed by immediate drying. This approach removes daily grime without letting moisture linger long enough to affect wood fibers or soften the finish.
The step-by-step safe routine
A barely damp wipe reduces the risk of swelling because wood movement is driven by moisture absorption, not by dry dust removal.
Drying immediately after wiping helps prevent excess moisture from staying at the surface long enough to dull clear coats or raise grain.
Using pH-neutral cleaners limits finish stress compared with acidic or alkaline products that can attack binders in some coatings.
Dusting first prevents grit from scratching the wood during the wiping step.
– Dust first with a soft microfiber cloth or dry brush to prevent grit from scratching the surface.
Shoe racks collect dry debris—sand, dust, and tiny grit from soles—that can act like sandpaper once you add moisture. For the rack’s back panel, corners, and shelf edges, use a soft detailing brush or a microfiber cloth that you keep dedicated to “dry wood only.”
– Wipe with a barely damp cloth using mild, pH-neutral soap; don’t soak the rack or flood shelves.
“Barely damp” should feel like the cloth still leaves almost no visible water transfer. In practice, you can apply cleaner to the cloth (not the rack), wipe one section at a time, and keep shelves from pooling liquid.
– Dry immediately with a clean, dry towel, then let it air-dry fully before using.
After wiping, do a quick towel pass across all horizontal surfaces first (shelf tops and the bottoms of rails). Then allow the rack to finish drying in normal room airflow—especially important if shoes will be placed back into the rack soon.
To put the moisture risk in context for your wooden shoe rack: according to the Forest Products Laboratory, Wood Handbook (wood science overview), many woods begin to lose dimensional stability when moisture rises above the fiber saturation region (commonly cited around ~25–30% moisture content). Additionally, Wood Handbook notes that shrinkage from “fiber saturation to oven-dry” can be substantial—often on the order of several percent, depending on direction (tangential shrinkage is typically larger than radial). And at typical indoor conditions, wood does better when it can reach a steady “equilibrium moisture content”; according to Wood Handbook, equilibrium moisture content depends strongly on temperature and relative humidity (RH), which is why leaving a wooden shoe rack damp is such a common cause of warping.
Hardness vs. Scratch Risk on Wooden Shoe Racks (Common Woods)
| # | Wood species (common in furniture) | Janka hardness (lbf) | Typical wear behavior | Scratch resistance |
|---|---|---|---|---|
| 1 | Hard maple | 1450 | Resists dents and surface wear | ★★★★☆ |
| 2 | White oak | 1360 | Good durability for racks | ★★★★☆ |
| 3 | Yellow birch | 1260 | Handles routine cleaning well | ★★★☆☆ |
| 4 | Walnut | 1010 | Moderate wear resistance | ★★★☆☆ |
| 5 | Black cherry | 950 | Can mark with grit if wiped aggressively | ★★☆☆☆ |
| 6 | Douglas-fir | 660 | More prone to dents and surface scuffs | ★★☆☆☆ |
| 7 | Eastern white pine | 380 | Highest risk of scuffing if grit remains | ★☆☆☆☆ |
Note: hardness doesn’t replace finish care—your wooden shoe rack’s clear coat or oil film may do most of the work against water—but higher hardness generally makes scratches less likely when you dust and wipe correctly. For the numbers above, see The Wood Database (Janka hardness by species) and compare against your specific wood type if you know it.
Cleaning by finish: sealed, waxed, or unfinished wood
Yes—you can clean safely, but the “best” method changes with your shoe rack’s finish. The key is matching the cleaner and moisture level to whether the wood surface is sealed (reduces absorption), film-finished with wax/oil (can soften with improper cleaners), or unfinished (can absorb liquids).
Finish-specific rules that prevent damage
Sealed finishes (varnish/clear coat) typically tolerate gentle, damp wiping better than bare wood because they reduce liquid penetration.
Waxed or oiled surfaces can be affected by stronger cleaners, since oils and wax films can be partially dissolved or re-emulsified.
Unfinished wood is more absorbent, so “spot clean” is safer than wiping repeatedly with liquid.
– Sealed/varnished finishes: use mild soap and water on a damp cloth, then dry—avoid abrasive pads.
If your rack has a glossy or semi-gloss top layer, treat it like a coating system: damp cloth, mild cleaner, immediate drying. Avoid scouring sponges and “magic erasers” unless the finish manufacturer explicitly approves them.
– Waxed or oiled surfaces: use the gentlest cleaner you can, then let the finish fully dry; .
Wax and oil finishes are not always “waterproof.” In many cases, they rely on a protective film that can be thinned by repeated wet cleaning. Follow the manufacturer’s re-application guidance so your wooden shoe rack maintains its protective layer rather than slowly accumulating dull residue.
– Unfinished/bare wood: treat like “spot-clean only” because liquids can penetrate; .
Unfinished wood is the highest-risk category for warping and darkening. Keep liquid use minimal and targeted: blot stains, then allow full drying.
Here’s a practical comparison structure you can use while deciding how to clean your wooden shoe rack based on finish type:
| Finish type on your wooden shoe rack | Best cleaning approach | Main risk to avoid | Quick “stop” signal |
|---|---|---|---|
| Clear coat / varnish | Mild pH-neutral cleaner on a barely damp cloth | Dulling from leftover residue or over-wetting | Cloudy patches after drying |
| Wax | Gentle cleaner sparingly; dry fully | Film thinning and sticky residue | Smearing or tackiness |
| Oil (hardwax/oil finish) | Very gentle cleaner; dry fully | Spot darkening and uneven sheen | Light/dark blotches |
| Unfinished / bare wood | Spot-clean; blot; minimal liquid | Penetration leading to stain + raised grain | Dark rings around stains |
Personal note: . Even without lab equipment, your wooden shoe rack will “tell” you what’s too wet or too strong after drying.
Stains, odors, and built-up grime FAQ-style
For stains and smells, the fastest path is targeted cleaning plus drying and airflow—not soaking. Your wooden shoe rack usually needs spot-cleaning of spots that look or smell “active,” while the rest gets the gentle dust-and-wipe treatment.
What to do when the problem isn’t just dust
Spot cleaning is safer than full soaking because localized moisture reduces the chance of uneven swelling and finish changes.
Musty odors on wood storage usually improve when airflow and drying are addressed, because odors often come from trapped moisture.
Grease and residue require wiping with a second lightly damp cloth to remove leftover cleaner film.
If you notice residue after cleaning, the remedy is usually less liquid, fewer repeats, and immediate drying—not stronger chemicals.
– Sticky spots or shoe scuffs: clean lightly with damp cloth first; if needed, step up to a targeted spot clean instead of a full soak.
Start at the lowest-moisture method. For scuffs, lightly wipe with a damp cloth first, then dry. If the mark persists, you can increase effort only on that spot using the same mild, pH-neutral approach—then dry right away.
– Musty smells from damp shoes: focus on airflow and drying; wipe the rack, then .
Odor control is often moisture control. A wooden shoe rack placed in a cool, stagnant area can keep smells even if you clean the visible dirt. Improve airflow around the rack, dry shoes thoroughly before placing them inside, and avoid adding wet shoe items that can transfer dampness to the shelves.
– Grease or residue: use a mild cleaner sparingly and remove residue with a second lightly damp cloth, then dry thoroughly.
If you use too much soap, you can create tacky or dull areas that attract more dirt later. Your wooden shoe rack benefits from “clean then rinse-wipe” using a second barely damp cloth, followed by quick towel drying.
To anchor the moisture risk with science you can trust: according to Forest Products Laboratory, Wood Handbook, wood dimensional change is strongly tied to moisture content above the fiber saturation region. In other words, your wooden shoe rack doesn’t need to be “soaked” to be affected—enough residual moisture and time is often the real issue.
Also, as of 2026, many household cleaning practices still overuse wet wipes and multipurpose sprays. If you’re trying to clean built-up grime from a wooden shoe rack, keep product contact time short and dry promptly.
What can go wrong (and how to avoid it)
The most common problems—warping, raised grain, finish dulling, and sticky residue—come from excess moisture, aggressive chemicals, or leftover cleaner. The prevention strategy for a wooden shoe rack is simple: less liquid, gentle chemistry, and faster drying.
Common failure modes and practical safeguards
Soaking or leaving wet cleaner on wood increases moisture absorption, which is a leading driver of warping and raised grain.
Bleach, ammonia, and strong solvents can strip or cloud many wood finishes because they can attack coating binders.
Using too much soap can leave residue that dries tacky or dull, especially on glossy clear coats and wax films.
– Warping and raised grain: usually comes from soaking, heavy moisture, or long drying times—always dry quickly.
If your wooden shoe rack has thin shelves or exposed edges, extra moisture can travel into seams and joints. Use damp wipes (not wet cloths), work one area at a time, and towel dry immediately. Then let it fully air-dry before shoes return.
– Finish damage: bleach, ammonia, and strong solvents can strip or cloud many wood finishes; test cleaners in a hidden spot first.
Even if a cleaner “seems mild,” you can’t assume it’s finish-safe. Do a spot test on an underside shelf or a hidden corner. If the finish changes color or sheen, stop and switch to a finish-manufacturer-recommended cleaner.
– Residue buildup: using too much soap or leaving wet cleaner on the wood can create tacky or dull areas—wipe again with a lightly damp cloth and dry.
This is common when homeowners clean first and “deal with drying later.” For your wooden shoe rack, the order matters: clean → wipe any excess → dry.
If you want a quick “decision rule” for your wooden shoe rack in 2026: if you wouldn’t want the same cleaner to sit on a finished tabletop surface for several minutes, don’t let it sit on the rack—especially on corners and shelf edges.
Verdict: the best approach (and who should skip DIY)
For most wooden shoe racks, the best overall approach is dust → mild damp wipe → quick dry, with spot cleaning only when needed. Skip DIY if the rack is already water-damaged, flaking heavily, or has an unknown finish that you can’t confidently identify.
The safest routine reduces moisture exposure, which lowers the odds of swelling, warping, and finish clouding.
When the finish is unknown or failing, the risk of dulling or penetration increases—professional refinishing or manufacturer guidance becomes the safer path.
Matching the cleaning method to the finish type (sealed vs. wax/oil vs. unfinished) is more reliable than using one universal cleaner.
For your wooden shoe rack, here’s the honest “works most of the time” workflow:
1) Dust thoroughly, 2) wipe with a barely damp microfiber cloth using pH-neutral cleaner, 3) dry immediately, 4) spot-clean stains only if the mild wipe doesn’t resolve them.
Skip or pause DIY if the rack is water-damaged, flaking heavily, has an unknown/unsafe finish, or you notice ongoing blotching after drying—then . In those cases, aggressive cleaning can make refinishing harder by spreading compromised finish over a larger area.
Sources (use to match your exact finish):
– Forest Products Laboratory, Wood Handbook (wood moisture, dimensional stability, and shrinkage concepts).
Quick scan checklist (save this)
| Do | Don’t |
|---|---|
| Dust first with a soft cloth/brush | Scrub with abrasive pads |
| Use a damp (not wet) microfiber cloth | Soak shelves or let liquid pool |
| Use mild, pH-neutral cleaner | Use bleach/ammonia/strong solvents |
| Dry immediately after wiping | Leave it damp “to dry later” |
| Spot clean stains instead of full soaking | Over-apply soap that leaves residue |
| Test any new cleaner in a hidden area | Assume all wood finishes react the same |
Frequently Asked Questions
How do I clean a wooden shoe rack without damaging the finish?
Start by removing shoes and loose dirt, then wipe the rack with a slightly damp microfiber cloth. Use a wood-safe cleaner or a mild soap solution (lightly dampened cloth only) to avoid soaking the wood. Dry immediately with a clean towel and let it air-dry fully before placing shoes back. Avoid harsh chemicals, steam, and soaking, since they can warp wood and damage the protective finish.
What’s the best way to remove dirt, dust, and grime from a wooden shoe rack?
Use a soft brush or vacuum with a brush attachment to get dust out of corners, slats, and crevices. For built-up grime, wipe with a damp cloth using mild detergent, then follow with a clean water-only wipe to remove residue. Dry thoroughly to prevent moisture from settling into the wood. Regular dusting helps keep your wooden shoe rack looking clean and reduces buildup that’s harder to remove later.
Which cleaning solution is safest for wooden shoe racks—soap and water, vinegar, or commercial wood cleaner?
For most finishes, a diluted mild soap-and-water solution is the safest and most controllable option for routine cleaning. White vinegar can be too strong for some finishes, so use it sparingly only if your rack’s manufacturer recommends it and test a small hidden area first. A commercial wood cleaner labeled safe for your rack’s finish is a good choice, but always follow the label and avoid oversaturating the surface. When in doubt, stick to gentle, wood-safe methods and spot test before full cleaning.
Why does my wooden shoe rack get stained or develops a musty smell after cleaning?
Stains and odors often come from trapped moisture inside slats, the bottom of the rack, or residue from cleaning products. Shoes can also transfer sweat and bacteria that linger if the rack isn’t dried completely between cleanings. To prevent this, dry with towels and allow full air-drying before use, and consider wiping the rack regularly to keep it free of buildup. For persistent odors, use odor-neutralizing steps that don’t soak the wood and re-check drying time.
How often should I clean my wooden shoe rack, and what’s the best routine for ongoing maintenance?
Aim for a quick wipe and dust removal once a week, especially if shoes are worn indoors or in humid areas. Do a deeper cleaning every 1–3 months by brushing/vacuuming, wiping with a wood-safe cleaner, and drying thoroughly. If your wooden shoe rack looks dull or feels dry over time, lightly apply a compatible wood conditioner or polish as recommended by the manufacturer. Consistent cleaning reduces grime buildup, helps prevent moisture-related damage, and keeps your wooden shoe rack fresh and presentable.
📅 Last Updated: October 26, 2026 | Topic: Wooden Shoe Rack Cleaning FAQ: Answers to the Most Common Questions | Content verified for accuracy and freshness.
References
- https://www.cdc.gov/mold/default.htm
- Mold Cleanup in Your Home | US EPA
- https://www.hud.gov/program_offices/healthy_homes/mold
- Mold | National Institute of Environmental Health Sciences
- https://www.cdc.gov/hygiene/cleaning/index.html
- dampness mould indoor environments health – Search Results – PubMed
- Wood preservation
- https://scholar.google.com/scholar?q=wood+shoe+rack+cleaning Google Scholar
- https://scholar.google.com/scholar?q=wood+furniture+cleaning+how+to+clean+wooden+surfaces Google Scholar
- https://scholar.google.com/scholar?q=indoor+mold+cleanup+guidelines+hard+surfaces Google Scholar
