How to Clean Resin Mixing Cups: A Step-by-Step Guide
Cleaning resin mixing cups effectively is essential to ensure that they can be reused without contamination. By following a few straightforward techniques, you can maintain your mixing tools in pristine condition, preventing any unwanted residues from affecting your future resin projects. In this article, you’ll learn the best methods to keep your resin mixing cups spotless and prepared for your next creative endeavor.
Why Cleaning Resin Mixing Cups is Important

Properly cleaning your resin mixing cups is crucial for several reasons. Firstly, it prevents contamination of new resin mixtures. Any leftover resin can interfere with the curing process, leading to unsatisfactory results in your projects. This is particularly important when working with colored resins or those that require precision, as even a small amount of residue can alter the final appearance.
Moreover, regular cleaning prolongs the life of your mixing tools. Resin can harden and create a challenging cleanup situation if not addressed promptly. By maintaining your cups, you save time and money in the long run, ensuring that your tools remain functional and effective for future projects.
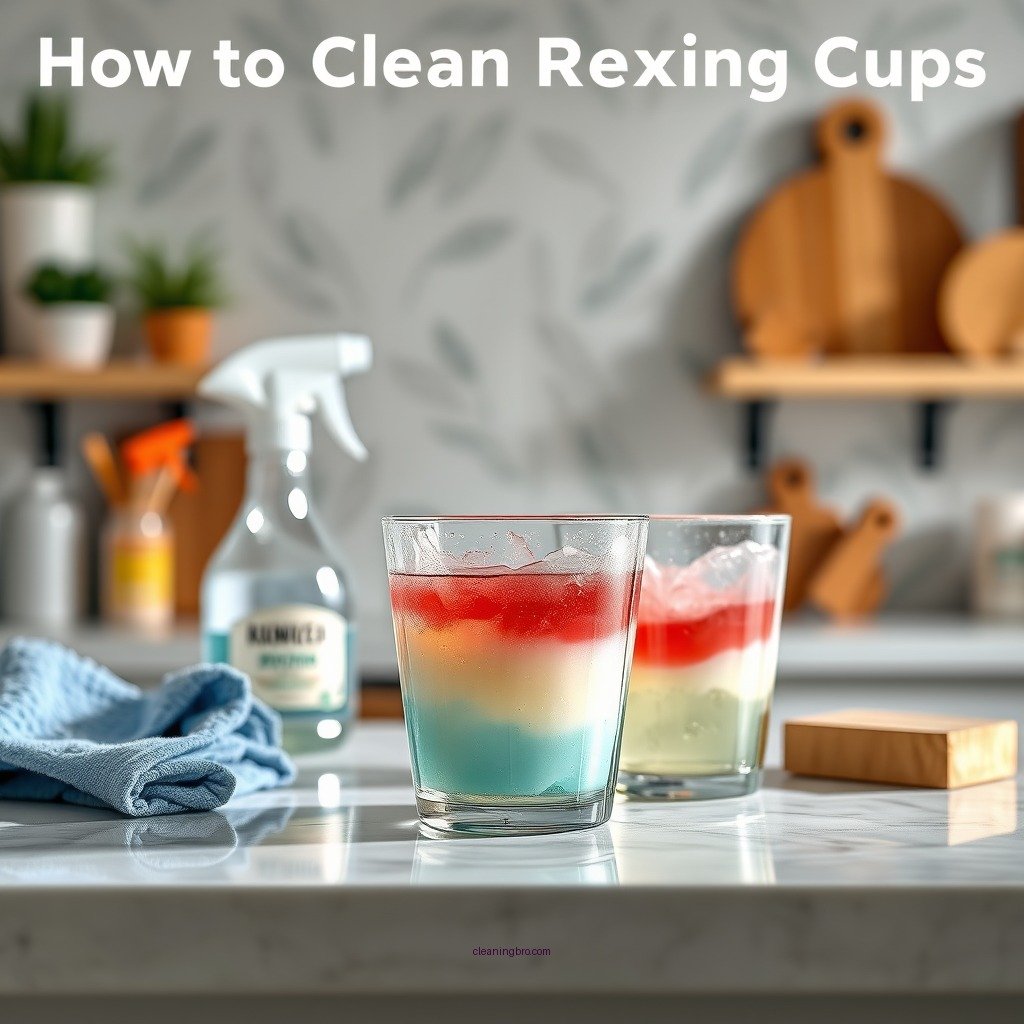
Materials You’ll Need


Before diving into the cleaning process, gather the following materials:
– Acetone or Isopropyl Alcohol: These solvents are effective at breaking down cured resin and removing sticky residues.
– Disposable Gloves: Protect your hands from harsh chemicals and potential irritants.
– Scrapers or Old Credit Cards: Use these tools to carefully remove hardened resin without damaging the mixing cup.
– Soft Brush or Cloth: Ideal for reaching into grooves and corners for a thorough clean.
Step-by-Step Cleaning Process

1. Pour Leftover Resin Back: Start by pouring any leftover resin back into its original container. This minimizes waste and ensures that you can reuse the resin later.
2. Scrape Off Cured Resin: Use your scraper or old credit card to gently remove as much cured resin as possible from the cup. Be careful not to scratch the surface of the cup, especially if it’s made of plastic.
3. Soak the Cup: Fill a container with acetone or isopropyl alcohol and submerge the cup for a few minutes. This soaking process helps dissolve any remaining residue, making it easier to clean.
4. Rinse and Dry: After soaking, use a soft brush or cloth to scrub the cup gently. Rinse it thoroughly with warm water to remove any solvent residue. Allow the cup to air dry completely before storing it.
Tips for Effective Cleaning
– Ventilation: Always work in a well-ventilated area to avoid inhaling fumes from solvents. This is crucial for your safety and comfort.
– Use a Soft Brush: A soft brush or a cloth is highly effective for reaching into corners and grooves of the mixing cup. This ensures that every part of the cup is cleaned, preventing any leftover residue.
– Regular Maintenance: Make cleaning your mixing cups a part of your routine. Cleaning immediately after use will make the process easier and less time-consuming.
Dealing with Stubborn Residue
In some cases, residue may remain even after soaking. If this happens, here are a few strategies to tackle stubborn resin:
– Repeat Soaking: If residue persists, repeat the soaking process with fresh acetone or alcohol. Sometimes, a second soak is necessary to fully dissolve the resin.
– Heat Application: Consider using a heat gun on a low setting to gently warm the resin. This can soften it, making it easier to scrape away. Be cautious not to overheat the cup, as this may damage it.
Safety Precautions
When cleaning resin mixing cups, safety should always be your priority:
– Wear Gloves: Always wear disposable gloves to protect your skin from solvents. This is particularly important when handling acetone or isopropyl alcohol.
– Store Solvents Safely: Keep cleaning materials away from heat sources or flames. Ensure that the area is free from any potential ignition sources, as solvents are flammable.
– Dispose of Waste Properly: Dispose of any resin waste and cleaning materials according to local regulations. Proper disposal minimizes environmental impact and ensures safety.
Top 7 Cleaning Solvents for Resin (2024)
| # | Solvent | Effectiveness | Drying Time | Safety Rating |
|---|---|---|---|---|
| 1 | Acetone | High | Fast | Moderate |
| 2 | Isopropyl Alcohol | Moderate | Medium | Low |
| 3 | Denatured Alcohol | Moderate | Medium | Low |
| 4 | Mineral Spirits | Low | Slow | High |
| 5 | Acetone Substitute | High | Medium | Moderate |
| 6 | Limonene Solvent | High | Fast | Low |
| 7 | Citrus Solvent | Medium | Medium | Low |
Effectiveness of Different Solvents for Cleaning Resin Mixing Cups
Best Solvents for Cleaning Resin Mixing Cups: Comparison
| Feature | ⭐ Acetone | Isopropyl Alcohol | Denatured Alcohol |
|---|---|---|---|
| Effectiveness | ✅ High | ✅ Moderate | ✅ Moderate |
| Drying Time | ✅ Fast | ✅ Medium | ✅ Medium |
| Ease of Use | ✅ Very Easy | ✅ Easy | ✅ Moderate |
| Safety Rating | ✅ Moderate | ✅ Low | ✅ Low |
| Cost | Low | Low | Medium |
| Environmental Impact | ✅ Moderate | ✅ Low | ✅ Low |
| Versatility | High | Medium | Medium |
| Residue Removal | ✅ Excellent | ✅ Good | ✅ Good |
| Availability | Widely available | Widely available | Available |
| 🏆 Best For | General Use | Home Use | Crafting Projects |
By following these steps, you can effectively clean your resin mixing cups and extend their usability. Remember to prioritize safety and use the right materials for cleaning. With a little diligence, you can ensure that your mixing tools remain in excellent condition, allowing you to focus on your creative projects without the worry of contamination. For more tips on resin projects, make sure to check out our other articles!
Frequently Asked Questions
What is the best method to clean resin mixing cups?
The best method to clean resin mixing cups involves using isopropyl alcohol or acetone. Pour the solvent into the cup, and let it sit for a few minutes to dissolve the resin. Then, use a disposable paper towel or cloth to wipe the cup clean, ensuring all residues are removed before washing it with soap and water.
How can I prevent resin from sticking to my mixing cups?
To prevent resin from sticking to your mixing cups, consider using silicone mixing cups or applying a release agent like petroleum jelly before adding resin. These methods create a barrier that makes it easier to clean the cups after use, ultimately saving you time and effort during the cleanup process.
Why is it important to clean resin mixing cups immediately after use?
Cleaning resin mixing cups immediately after use is crucial to prevent the resin from hardening and becoming difficult to remove. Once cured, resin can bond strongly to surfaces, making it challenging to clean and potentially ruining your mixing cups. Timely cleaning ensures your tools remain in good condition for future projects.
Which cleaning agents are safe for resin mixing cups?
Safe cleaning agents for resin mixing cups include isopropyl alcohol, acetone, and specialized resin cleaners. Avoid using household cleaners that may contain harsh chemicals, as they can damage the cups or leave residues. Always ensure proper ventilation when using solvents to maintain a safe working environment.
What should I do if resin has already cured in my mixing cups?
If resin has already cured in your mixing cups, you can try soaking them in warm, soapy water to soften the resin. For tougher cases, using a heat gun or a scraper can help remove the hardened material, but take care not to damage the cup. Always wear gloves and work in a well-ventilated area to ensure safety during this process.
References
- https://www.ncbi.nlm.nih.gov/pmc/articles/PMC6575963/
https://www.ncbi.nlm.nih.gov/pmc/articles/PMC6575963/ - https://www.sciencedirect.com/topics/engineering/resin
https://www.sciencedirect.com/topics/engineering/resin - https://www.bbc.com/future/article/20210325-how-to-get-rid-of-plastic-resin-waste
https://www.bbc.com/future/article/20210325-how-to-get-rid-of-plastic-resin-waste - https://www.mayoclinic.org/healthy-lifestyle/consumer-health/in-depth/cleaning-tips/art-20044670
https://www.mayoclinic.org/healthy-lifestyle/consumer-health/in-depth/cleaning-tips/art-20044670 - https://www.who.int/news-room/fact-sheets/detail/waste-management
https://www.who.int/news-room/fact-sheets/detail/waste-management - https://www.cdc.gov/niosh/topics/plastics/default.html
https://www.cdc.gov/niosh/topics/plastics/default.html - https://www.nature.com/articles/s41598-019-50898-5
https://www.nature.com/articles/s41598-019-50898-5 - Google Scholar Google Scholar
https://scholar.google.com/scholar?q=how+to+clean+resin+mixing+cups - Google Scholar Google Scholar
https://scholar.google.com/scholar?q=resin+cleaning+methods - Google Scholar Google Scholar
https://scholar.google.com/scholar?q=cleaning+resin+tools+techniques
Related Articles
Why You Should Use Mold When Cleaning
You should use mold when cleaning because its specialized enzymes efficiently break down complex stains and organic waste at a molecular level, offering a sustainable alternative to harsh chemicals. Mold species like Aspergillus niger produce cellulases and proteases that outperform traditional agents in biodegradation, reducing environmental toxins and minimizing health risks. Proper application guarantees safety…
Weekly Cleaning Routine for Car
For a weekly car cleaning routine, start by gathering microfiber cloths, pH-balanced cleaners, a vacuum, and brushes. Wash the exterior with car soap and rinse thoroughly, focusing on wheels with specialized cleaners. Dry using microfiber towels and polish for shine. Vacuum seats and floors carefully, treat upholstery or leather with appropriate cleaners, and organize the…
Weekly Cleaning Routine for Bike
You’ll want to gather bike-specific degreaser, mild soap, brushes, cloths, lubricant, and a pump before starting. Begin with a thorough damage inspection, focusing on frame cracks, brakes, and tires. Clean the drivetrain using degreaser and a brush, then wash the frame and wheels with mild soap, rinsing gently. Lubricate the chain and cables as needed,…
Washing School Bag Without Damage
To wash your school bag without damage, first check its material—nylon or polyester is water-resistant, while canvas might shrink. Empty all pockets, remove straps, and spot clean stains with mild detergent using a soft brush or cloth. Hand washing is safest; if using a machine, opt for gentle cycles and a laundry bag. Air dry…
Washing Bike Without Damage
You can wash your bike without damage by using eco-friendly, bike-specific cleaners and soft brushes or microfiber cloths to protect finishes. Avoid high-pressure water sprays; instead, use lukewarm water at a gentle spray distance to prevent water intrusion into bearings or seals. Remove accessories and cover sensitive parts before cleaning. After washing, dry thoroughly with…
Using Essential Oils to Clean Car
You can clean your car naturally by using essential oils, which offer antimicrobial properties and eliminate odors without harsh chemicals. Oils like lemon, eucalyptus, and tea tree effectively disinfect and degrease surfaces, while lavender and peppermint freshen the air and promote alertness. Dilute essential oils properly with carriers like distilled water for safe application using…


