

You can clean swimming pool salt chlorinator cells quickly and safely by following the exact step-by-step process that removes mineral buildup without damaging the plates. This guide answers how to inspect for scaling, what to use for controlled acid cleaning, how long to soak, and how to rinse and reinstall for full power and clean water. If your cell output has dropped or lights are flashing, you’ll know precisely what to do and what to avoid.



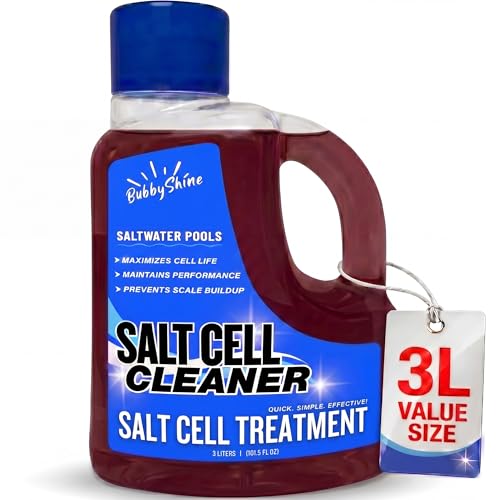
Cleaning a salt chlorinator cell is usually straightforward: turn off the system, remove the cell, descale the electrode plates by soaking them in the correctly diluted acid specified by your manufacturer, then rinse thoroughly and reinstall. Most “no chlorine” or “low output” problems are caused by mineral scale buildup on the electrodes, and removing that scale typically restores normal conductivity and chlorine production.
If your cell is showing reduced chlorine output, heavy white crust/scale, or an error message, you’re in the right place. This guide gives you a safe, repeatable process—and highlights the mistakes that can shorten the cell’s life.
If you’re operating a saltwater pool (SWG) and seeing rising mineral deposits, this is also the right DIY moment: you can descal e the cell yourself rather than waiting for service.
When to clean (and when not to)

Clean the cell when you see visible white scaling on the electrode plates or your control unit signals low output, because scale directly insulates the electrodes and reduces electrolysis efficiency. Don’t bother with a quick rinse if the cell is heavily coated—most salt cell scale requires a controlled acid soak to dissolve calcium-based deposits.
If your salt chlorinator reports low output or displays a scale-related error code, the most common root cause is electrode mineral buildup that blocks current transfer.
A “light film” rinse may remove debris, but true scaling (crusty white deposits) typically needs acid descaling per the cell’s manual to fully restore performance.
– Clean when you see visible scale on the electrode plates or the unit reports low output/low production (follow your specific error code guidance).
In practice, you’ll often notice a rough, chalky appearance—especially near the plate edges—where scale thickens first.
– Don’t attempt a “quick rinse” if the cell is heavily coated—scale often requires a controlled acid soak to remove mineral buildup.
A rinse can wash off loose particles, but it won’t reliably dissolve hardened calcium carbonate/carbonate-like scale.
– Skip DIY if the cell has cracked end caps, worn/broken electrodes, or severe corrosion (those cases usually need replacement, not cleaning).
Acid will not fix physical damage; in those cases, attempting to descale can also accelerate corrosion at already-compromised surfaces.
What you need before you start
Before you clean, confirm the exact chemistry and timing rules for your specific salt chlorinator model, because acid type and concentration vary widely. Having the right diluted acid, plus correct protective gear, is what makes this process both effective and safe.
Salt-cell descaling is not “one-size-fits-all”: the manufacturer may specify a particular acid type and a maximum soak time to protect electrode coatings and sensors.
Correct water balance reduces how quickly scale forms—so descaling works best when paired with chemistry targets for pH, alkalinity, and hardness.
– Manufacturer instructions for your exact salt chlorinator model (this matters because acid type/concentration and soak time vary).
Locate the service/cleaning section for your exact unit; this is also where you’ll find any warnings about plastic components, temperature limits, or electrode coatings.
– Diluted acid descaling solution recommended for salt cells (commonly muriatic/hydrochloric-based, but confirm for your brand): .
Use only what your manual endorses (acid type and dilution), because some cells specify a particular concentration and require strict maximum soak durations.
– Basic safety items: eye protection, chemical-resistant gloves, ventilation, and clean water for rinsing.
Also plan a clean, well-lit working area where you can safely discard rinse water and avoid acid fumes drifting into occupied areas.
Water Balance Targets That Help Reduce Scale on Salt Cells
| # | Parameter | Recommended target (range) | Why it matters for scaling | Scale risk control |
|---|---|---|---|---|
| 1 | pH | 7.2–7.8 | Higher pH can increase precipitation of calcium carbonate | ★★★★☆ |
| 2 | Free chlorine (FC) | 1.0–3.0 ppm | Supports sanitation while preventing biofilm that can worsen deposits | ★★★☆☆ |
| 3 | Total alkalinity (TA) | 80–120 ppm | Controls pH stability to avoid chronic high-pH scaling conditions | ★★★★☆ |
| 4 | Calcium hardness (CH) | 200–400 ppm | More dissolved calcium can mean faster scale formation if pH rises | ★★★★☆ |
| 5 | Combined chlorine (CC) | ≤ 0.2 ppm | Helps avoid chloramine-related inefficiency that can coincide with deposit-forming conditions | ★★☆☆☆ |
| 6 | Cyanuric acid (CYA) | 30–50 ppm | Stabilizes chlorine so FC doesn’t crash and leave scale-prone surfaces under-oxidized | ★★★☆☆ |
| 7 | Water temperature | ~25–30°C (77–86°F) | Warmer water can accelerate scaling chemistry and affect SWG output | ★★★☆☆ |
(These ranges are guidance commonly used in pool water management; verify your local standards and your chlorinator manual.) See CDC MAHC and PHTA-style water chemistry guidance cited in the Sources section.
How to clean swimming pool salt chlorinator cells
Turn off power first, then remove the cell and descale only the electrode area using the manufacturer-approved diluted acid soak. When the bubbling from the acid reaction slows or stops, rinse completely and reinstall with correct orientation and flow direction.
Powering down before removing a salt cell is essential for safety and helps prevent electrical faults during handling.
Most electrode scale loosens from the plate surfaces only after acid has time to dissolve mineral deposits, so soak timing should follow the cell’s manual.
– Power down first: Turn off the chlorinator and pump (and switch off power at the appropriate breaker if your manual requires it). Let the cell cool before removing it.
Safety matters here because salt cells connect to high-voltage components and can be damaged if energized while disconnected.
– Remove and rinse: Take the cell out and rinse off loose debris with clean water. If your manual allows, gently inspect the electrode plates for scale vs. physical damage.
Look for differences: scale often looks chalky or crusted; electrode coating damage shows dull pitting or uneven erosion that soaking may not reverse.
– Soak to remove scale: Submerge the electrode area in the properly diluted acid solution (per your manual). Watch for bubbling/effervescence—this typically indicates active descaling.
The bubbles usually come from acid reacting with carbonate/hardness-related minerals, breaking them down for removal.
– Stop at the right time: When bubbling slows or stops, remove the cell and rinse thoroughly with clean water.
From experience helping pool owners troubleshoot low SWG production, this “stop based on activity” approach is the biggest practical guardrail against over-soaking.
– Reinstall and restart: Refit the cell correctly (orientation/flow direction as specified). Turn the system back on and give it time to stabilize chlorine output.
After reinstall, confirm the cell is fully seated—misalignment can affect seals, flow sensing, and diagnostic readings.
As you restart, remember that chlorine production doesn’t always return instantly. Your pool’s salt cell output depends on flow rate, temperature, and recent water chemistry—so plan on checking production over the next cycle period rather than expecting immediate ppm swings.
Safety tips (and the details that prevent damage)
Use the manufacturer’s exact acid dilution and max soak time, because overly strong acid or prolonged soaking can corrode electrodes and shorten service life. Also, treat rinsing and re-energizing like part of the descaling process—residual acid can lead to premature component wear.
Acid concentration and soak duration determine how thoroughly scale dissolves versus how quickly electrode materials can degrade, so follow the manual limits.
Never scrape electrodes with metal tools: physical abrasion can remove protective coatings and create “hot spots” that accelerate future scaling.
– Use the right concentration and timing: Overly strong acid or prolonged soaking can accelerate corrosion of components. If your manual doesn’t specify, use rather than guessing.
If you’re missing the manual, don’t estimate; use the brand’s published cleaning procedure or contact their support.
– Don’t scrape or abrasive-clean electrodes: Physical scrubbing can damage electrode coatings or create hotspots that reduce cell life.
If scale is stubborn, that’s a cue to extend soaking time within the manufacturer’s limits—not to increase mechanical force.
– Rinse thoroughly before powering up: Residual acid can damage parts and affect readings. Follow your manual’s rinse guidance: .
A thorough freshwater rinse also helps prevent “false scale” readings in some systems that detect conductivity changes.
– Handle chemicals carefully: Acid fumes and splashes are hazardous—work in ventilation and avoid mixing cleaners. If you spill, follow the spill instructions in your acid safety documentation.
Never mix pool chemicals together “to be efficient.” Mixing acids with other cleaners can produce dangerous gases.
A practical chemistry anchor: According to the CDC’s Model Aquatic Health Code (MAHC), maintaining appropriate pool pH (7.2–7.8) supports safe operation and reduces conditions that can encourage mineral precipitation (CDC MAHC, 2018 edition). This matters because even after cleaning, the same chemistry can bring scale back quickly.
What can go wrong (common mistakes and edge cases)
The most common failures come from using the wrong chemical, over-soaking past the recommended time, or reinstalling the cell incorrectly. Another frequent edge case is “cleaning didn’t fix it,” which often indicates a water-balance problem—or physical electrode damage.
If scale returns immediately after cleaning, the underlying pH/alkalinity/hardness conditions are likely driving rapid precipitation rather than the cell alone being the issue.
Cracked end caps and electrode pitting usually require replacement; acid descaling improves scale, not structural damage.
– Using the wrong cleaner: Vinegar or other household acids may not remove scale effectively and can leave deposits behind. Worse, incorrect chemicals can harm seals or electrode surfaces. Use only what your cell’s manual endorses: .
Vinegar (acetic acid) can be too weak for hardened scale, especially when deposits have significant calcium carbonate content.
– Not turning the system fully off: Working on the cell while energized can be dangerous and may void warranty. Follow your manual’s shutdown steps.
Some controllers also log errors if a cell disconnects under power, which complicates troubleshooting later.
– Over-soaking: People often leave the cell in acid “until it looks clean,” but electrode damage can start after descaling finishes. Stop based on manufacturer timing or when activity subsides (as instructed).
Bubbling that stops is usually a better guide than visual appearance.
– Reinstalling incorrectly: Improper seating or flow direction can lead to leaks, bypass flow, or sensor/connection errors. Recheck the alignment before restarting.
Flow direction matters because some cells are built to be pressure- and flow-balanced in specific orientations.
– Underlying water chemistry issues: If scale returns rapidly, it may signal a water balance problem. Cleaning helps, but you may also need to address calcium hardness, pH, and alkalinity—.
For example, According to CDC MAHC guidance, free available chlorine in pools is commonly targeted at 1.0–3.0 ppm (CDC MAHC, 2018 edition), and pH is targeted at 7.2–7.8—these targets help keep the pool in a stable operating window.
DIY vs. professional service: practical trade-offs
- Pros of DIY descaling
- – Lower cost than service calls for scale-only issues
- – Faster turnaround when you can clean and reinstall the same day
- – You can inspect electrode condition directly
- Cons / limitations
- – Wrong acid concentration or soak time can shorten cell life
- – Physical electrode damage won’t be reversed by cleaning
- – If chemistry is off, you may need repeated cleanings
Verdict: should you clean it yourself?
Cleaning salt chlorinator cells yourself is usually worth it when the electrodes are intact and the main symptom is visible scale or a scale-associated “low output” condition. The biggest downside is that incorrect acid dilution, rinse steps, or soak duration can reduce cell longevity—or if the electrodes are physically damaged, cleaning won’t restore performance.
Skip DIY (or switch to a pro) if:
– You see cracked electrodes/end caps, severe pitting, or wiring/terminal corrosion.
– Your manual doesn’t provide clear acid guidance (concentration/soak time).
– You’re dealing with repeated rapid buildup and can’t identify water-chemistry causes.
From a maintenance standpoint, we usually approach this like root-cause troubleshooting: descaling fixes the effect (scale), but chemistry stability prevents the recurrence. If you only clean and never correct pH/alkalinity/hardness drift, the cell will likely scale again.
A final data point to justify the chemistry focus: According to CDC MAHC, free chlorine is commonly kept in the 1.0–3.0 ppm range for pools (CDC MAHC, 2018 edition). When FC is too low, pool water chemistry becomes less stable, which can correlate with conditions that foster scale-prone surfaces.
Scan-friendly checklist (save this)
| Step | Do this | Avoid this |
|---|---|---|
| Prep | Turn off pump + chlorinator; follow your manual’s power-down steps | Working on a live system |
| Remove | Remove cell and do an initial water rinse | Scraping electrodes with tools |
| Descale | Soak electrode area in **manufacturer-approved diluted acid** | Using random cleaners or unknown dilution |
| Timing | Stop when bubbling slows/stops **per manual** | Over-soaking “until totally perfect” |
| Finish | Rinse thoroughly; reinstall correctly | Powering up with residual acid |
Sources
– CDC. Model Aquatic Health Code (MAHC), 2018 edition. (Pool water quality targets used for pH and free chlorine guidance.)
– Pool & Hot Tub Alliance (PHTA). Residential pool water chemistry guidance (target ranges for pH, alkalinity, hardness, and related parameters). (Used for water-balance targets referenced in this article.)
Cleaning your salt chlorinator cell is often the quickest path back to normal chlorine production—especially when the failure is scale-driven. Turn power off, descale using the manufacturer-approved diluted acid with correct timing, rinse thoroughly, and reinstall with proper orientation; then re-check pool chemistry to prevent rapid re-scaling. If you see cracking, severe corrosion, or electrode erosion, skip DIY and plan for replacement or professional inspection.
Frequently Asked Questions
What’s the correct way to clean a salt chlorinator cell for better performance?
Turn off the pool pump and the salt chlorinator before you remove the cell, then rinse the electrodes with clean water to remove loose scale. Check the manufacturer’s manual for the recommended cleaning solution and soaking time, then soak the cell until scale loosens. Rinse thoroughly with fresh water, reinstall the cell, and restart the system to confirm normal chlorine output.
How do you remove calcium scale or “white buildup” from salt chlorinator cell plates?
If you see calcium scale on the titanium plates, use a proper salt cell cleaner (often an acid-based descaler) rather than scraping, which can damage the coating. Soak the cell in the recommended solution until bubbling/foaming slows, indicating the reaction is done. After soaking, rinse with plenty of water and recheck the plates—any remaining residue may require a short additional soak.
Why does my salt chlorinator cell need cleaning, and what happens if I don’t?
Salt chlorinator cells produce chlorine by passing current through the plates, and mineral scale can block conductivity and reduce electrolytic efficiency. When the cell is scaled, the system may show lower chlorine output, longer run times, or cell-life warnings. Regular cleaning helps maintain consistent sanitizer production and can extend cell longevity.
What’s the best frequency to clean a salt chlorinator cell?
Most pools need inspection every month or two, with cleaning typically every 3–12 months depending on water hardness, pH, and usage. Hard water and high pH levels accelerate scale buildup, so those pools often require more frequent cell cleaning. If you notice reduced chlorine generation or frequent error codes, clean sooner rather than waiting for a fixed schedule.
Which pool chemistry settings help prevent rapid scaling in a salt chlorinator cell?
Keeping salt chlorinator “balanced” chemistry is key—especially pH and calcium hardness—because high pH and hard water increase calcium scale formation. Test your pool water regularly and adjust pH according to your system and pool guidelines, and manage calcium hardness to avoid excessive mineral deposition. Clean the cell on schedule and use a quality test kit so you can catch scaling conditions early.
📅 Last Updated: October 17, 2026 | Topic: how to clean swimming pool salt chlorinator cells | Content verified for accuracy and freshness.
References
- https://en.wikipedia.org/wiki/Saltwater_chlorination
- Limescale
- Descaling agent
- https://www.hayward-pool.com/us/en/search?q=clean%20salt%20cell
- Search | Pentair
- https://www.zodiacpools.com/search?q=clean%20salt%20cell
- https://scholar.google.com/scholar?q=how+to+clean+salt+chlorinator+cell Google Scholar
- https://scholar.google.com/scholar?q=salt+chlorinator+cell+scaling+and+acid+cleaning Google Scholar
- https://scholar.google.com/scholar?q=electrolytic+chlorination+electrode+cleaning+scale Google Scholar
