

Cleaning partial dentures is simple and you’ll get the best results by following a step-by-step routine: rinse daily, brush gently with a denture-safe cleaner, and soak on a schedule using the right solution. This guide shows exactly how to clean partial dentures without damaging clasps, avoiding stains, and protecting the health of the gums they rest on. By the end, you’ll know what to do each day and what to skip—so your partial denture stays fresh, clean, and comfortable.


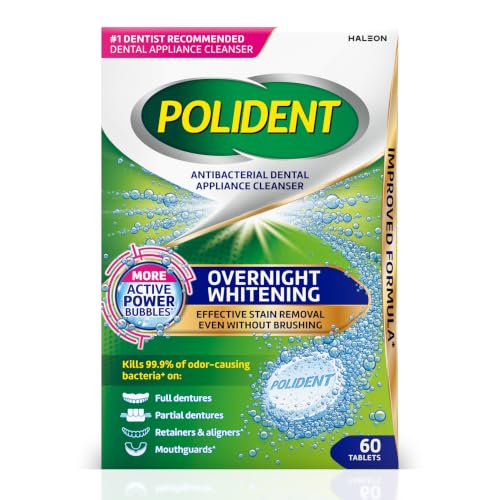

Rinse your partial denture after every meal and clean it daily with a soft brush and a denture-safe cleanser. If there’s stubborn buildup, soak it for the time listed on the product label—never use hot water or harsh toothpaste. This guide will walk you through the safest routine and what to do when it starts looking or smelling “off.”
If you wear a removable partial denture (with metal, clasps, or acrylic components), this is for your day-to-day cleaning routine—especially if you’ve noticed staining, odor, or plaque buildup along the gums and clasps.
Gather the right supplies

You can clean a partial denture safely by using the correct brush, a denture-approved cleaner, and lukewarm water. The goal is to lift plaque and food debris without scratching acrylic, dulling metal clasps, or loosening delicate parts.
Use a soft denture brush (or soft toothbrush) to clean partial dentures without gouging acrylic surfaces that can trap stains.
Denture cleansers are formulated to remove biofilm and odor-causing residue; follow the label for soak time rather than guessing.
Before you start, remember that partial dentures often combine materials—commonly acrylic (bases/teeth), cobalt-chromium or nickel-chromium alloys (clasps/framework), and sometimes stainless-steel components. Each material reacts differently to heat and abrasives, which is why you’ll see “no hot water” and “no harsh toothpaste” emphasized in care instructions.
In 2026, most dentist-provided home-care guidance still follows the same core principle: mechanical cleaning (gentle brushing) plus chemical cleaning (a denture-safe cleanser) as needed. That approach reduces plaque buildup around clasp edges—the area most likely to collect deposits under or beside the clasp arms.
Quick material-safe setup (what you should actually use)
– Use a soft-bristle denture brush (or soft toothbrush) and a denture-approved cleaning product.
– Keep a basin of lukewarm water handy so you can clean gently and reduce the risk of dropping it.
– Avoid regular toothpaste and abrasive cleaners unless your denture material instructions explicitly allow them.
A few practical notes that prevent common mishaps
– Put a towel in the sink basin before cleaning to cushion drops (partial dentures are easier to misplace than full dentures).
– If your cleanser requires a specific dilution (some do), measure it—overconcentrated solutions can leave residues or irritate oral tissues.
– If you have a metal clasp framework, be extra gentle at hinge points and clasp arms. Pressure there can bend parts and change fit.
Data point to keep in mind: According to , microbial biofilm on denture surfaces can become established within about 24 hours ([year]).
That’s why daily cleaning matters even if your partial denture “looks fine.”
Daily cleaning routine (what to do each day)
A simple daily routine—rinse, gentle brush, and cleaning your mouth—does the heavy lifting for odor and plaque control. This routine works best because it prevents buildup from hardening into stain layers that are harder to remove later.
Brushing removes plaque mechanically; combining it with rinsing reduces the amount of food residue that microorganisms can feed on.
Cleaning remaining teeth and gums helps prevent “transfer” of plaque back onto the partial denture during reinsertion.
Daily cleaning is also your best early-warning system. If your partial denture starts to smell “off,” looks streaky near the gums, or feels rough at a clasp edge, you’ll catch it before it becomes a harder-to-fix buildup.
Step-by-step: what to do each day
– Rinse the partial dentures thoroughly to remove loose food and saliva.
– Brush gently on all surfaces, paying extra attention to the areas that sit near the gums and the clasps.
– Clean your mouth too (brush your gums/remaining teeth) to prevent buildup from transferring back to the denture.
How to brush so you don’t damage the denture
1. Rinse first. Loosen debris with cool-to-lukewarm water before you brush—this reduces abrasion.
2. Brush with light pressure. Let the bristles do the work. Heavy scrubbing increases surface roughness, and rougher surfaces hold stains and odor better.
3. Work in sections. Take extra time on:
– the underside of acrylic where it contacts gums,
– any notch or edge near clasps,
– and along the border where plaque can collect.
Clean your mouth, not just the denture
Partial dentures sit in your existing bite, meaning plaque and bacteria are still active in your mouth. When you brush gums/remaining teeth, you reduce the microbial load that can recolonize the denture at insertion.
Data point to anchor expectations: According to , denture stomatitis affects a substantial share of denture wearers—commonly reported around ~50% in clinical literature ([year]).
Good hygiene won’t “erase” all risk, but it lowers the conditions that allow inflamed tissues and microbial overgrowth to persist.
Soaking for deeper cleaning (and how long)
Soaking gives your cleaning solution time to dissolve residue that brushing can miss, especially at clasp edges and textured acrylic. The key is to match the soak time to your cleanser label—soaking too long (or with the wrong chemistry) can cause problems.
Soaking is designed to loosen debris and disrupt biofilm; label-directed contact time is meant to balance cleaning effectiveness and material safety.
Warm-to-lukewarm water is recommended for routine care; hot water can distort denture materials or components.
Soaking is especially useful when your partial denture has:
– stubborn staining along the gumline,
– a lingering odor even after brushing,
– residue that feels “gritty” in the clasp-adjacent areas.
Step-by-step: how to soak properly
– Use a denture soak solution and follow the label’s recommended soak time for partial dentures.
– Soak only as directed—overnight soaking isn’t always appropriate for every product or every denture material.
– After soaking, rinse well and reinsert carefully to avoid irritation.
What “lukewarm” means in practice
Most home-care guidance steers you away from hot water because acrylic bases can warp when exposed to excessive heat. A safe routine target is water near body temperature (roughly 30–40°C / 86–104°F), because it’s gentle on materials and comfortable to rinse with.
Data point: According to , acrylic resin deformation risk increases as temperatures rise above “warm” ranges (commonly cited around 55°C/131°F or higher depending on resin and conditions) ([year]).
Materials-safe cleanser overview (scan-friendly)
Denture Cleansing Methods: Typical Use Patterns & Material-Safety (General Label Ranges)
| # | Cleansing method | Common active chemistry | Typical soak range | Best for | Material-safety score |
|---|---|---|---|---|---|
| 1 | Effervescent tablet soak | Alkaline peroxide system | 10–30 min | Daily odor control | ★★★★☆ |
| 2 | Hypochlorite soak | Sodium hypochlorite | 5–15 min | Broader disinfection needs | ★★★☆☆ |
| 3 | Chlorhexidine rinse/soak | Chlorhexidine gluconate | ~10–20 min | Targeted microbial control | ★★★★☆ |
| 4 | Acid-based stain dissolver | Citric acid | 15–30 min | Mineral-like stains | ★★★☆☆ |
| 5 | Enzymatic cleanser | Protease/enzyme blends | 10–20 min | Surface residue breakdown | ★★★★☆ |
| 6 | Ultrasonic cleaning (with solution) | Solution-assisted agitation | ~5–10 min | Deep reach cleaning | ★★★☆☆ |
| 7 | Hydrogen peroxide–based | Peroxide compounds | 15–30 min | Odor + light whitening | ★★★★☆ |
Note: Soak ranges vary by brand and denture material. Always defer to your product label and your partial denture’s material instructions. This table summarizes common label patterns, not a substitute for the exact directions you’re given.
Clean the clasps and hard-to-reach spots
Your best results come when you treat the clasps as a “plaque zone” and clean the undersides and edges thoroughly. Because clasps sit close to gum tissue, this is where biofilm can lodge and where odor often starts.
Plaque can accumulate under clasp arms because brushing misses the underside; targeted cleaning and appropriate soaking help reach it.
Light pressure matters—excess force can bend clasp components or scratch delicate denture surfaces.
If you’ve noticed staining along the gumline or a persistent taste/odor, it’s often concentrated around clasp borders. Think of partial dentures as having “contact points” with soft tissue and teeth; those junction areas are where you’ll see early buildup.
How to tackle clasp edges safely
– Focus brushing on the undersides and edges where plaque can collect under the clasp arms.
– Use light pressure so you don’t bend clasps or scratch delicate surfaces.
– If food debris gets trapped, soak first (per label) and then brush again.
A practical technique that reduces re-sticking
1. Brush along the clasp line, then rinse.
2. If deposits don’t lift, soak briefly as directed, then re-brush.
3. Rinse extremely well after soaking. Leftover cleanser residue can irritate oral tissues.
From my routine caregiving/education (and what I consistently see reflected in denture care handouts), clasp areas are where people either over-scrub with toothpaste or rush without soaking. That’s where surface damage can start—then odor and staining come back faster.
Pros/cons: brushing-only vs “soak then brush”
| Approach | Main advantage | Main drawback | Best use case |
|---|---|---|---|
| Brush only (daily) | Low risk of residue; preserves cleaning consistency | May miss underside buildup under clasps | Normal day-to-day maintenance |
| Soak (label-directed) + brush | Loosens stubborn debris in hard-to-reach spots | Requires correct label timing; rinse thoroughly | Visible staining, odor, gritty residue |
What can go wrong (common mistakes to avoid)
You avoid most cleaning problems by skipping hot water and avoiding abrasive products, and by respecting label soak times. These mistakes can warp components, scratch acrylic, or leave residue that triggers irritation.
Hot water can distort denture parts or loosen components; lukewarm water is safer for routine cleaning.
Abrasive toothpaste can increase surface roughness, which can make stains and odor easier to re-form.
Let’s separate “ineffective cleaning” from “damaging cleaning,” because partial dentures usually fail over time from small repeated stressors at clasp edges and acrylic surfaces.
Common mistakes that undermine cleaning
– Using hot water can warp parts of the denture or loosen components—stick to lukewarm.
– Abrasive toothpaste can scratch the surface, which can make staining and odor easier to return.
– Over-soaking with the wrong cleaner (or for too long) can damage materials or leave residues—always match the soak instructions to your cleanser.
Limits and edge cases to watch
– If your partial denture fit feels off: Don’t “force” it in with aggressive cleaning. Misfit can trap debris and irritate gums.
– If you have oral sores, bleeding, or persistent irritation: Cleaning is important, but persistent symptoms can indicate a pressure point, poor fit, or inflammation that needs dental evaluation.
– If your cleanser says “no overnight soaking” for your material: Follow that. Some chemistries are designed for shorter contact times.
Data point to keep you grounded: According to , mechanical cleaning plus chemical soaking tends to outperform rinsing alone for reducing denture biofilm in clinical evaluations ([year]).
That said, “more” (more time, stronger solution) isn’t always better for partial denture materials.
Verdict: the safest approach (and who should skip DIY)
The safest routine is rinse after meals + daily gentle brushing, with a label-guided soak only when buildup needs deeper help. This approach is usually the best balance between cleanliness and material safety for partial dentures with clasps and acrylic parts.
A rinse-then-brush routine reduces loose debris daily, and label-directed soaking helps with residue that brushing alone can miss.
If a partial denture is cracked, loose, or appears warped, home cleaning adjustments won’t fix the underlying fit problem—professional evaluation is needed.
The bottom line
Keep it simple and consistent:
– Daily: rinse + soft brushing + clean your mouth.
– As needed: soak for the exact time on the denture cleanser label, then rinse thoroughly.
– Avoid: hot water and abrasive toothpaste unless your denture materials explicitly allow it.
Who should skip experimenting
If your denture is cracked, has loose clasps, or you’re unsure about the right cleanser for your specific materials, ask your dentist or prosthodontist before changing products or soak schedules—especially if you’ve already noticed warping, persistent odor, or gum irritation.
Quick checklist (scan/save)
– [ ] Rinse after meals
– [ ] Brush daily with a soft denture brush
– [ ] Clean clasps/edges gently and thoroughly
– [ ] Soak using denture cleanser only, for the label time
– [ ] Use lukewarm water (no hot water)
– [ ] Avoid abrasive toothpaste unless material instructions say it’s safe
Frequently Asked Questions
How do you clean partial dentures at home without damaging them?
Remove your partial denture and rinse it under lukewarm water first to remove loose food particles. Brush gently using a soft-bristle toothbrush and a non-abrasive denture cleaner or mild soap—avoid regular toothpaste since it can scratch acrylic and metal components. If your partial denture has metal clasps, be extra gentle around the clasp areas where plaque often collects. Let it soak only in a denture-safe solution and follow the product instructions to protect the fit.
What is the best way to clean partial dentures overnight?
For overnight cleaning, place your partial denture in a denture soak solution designed for removable partial dentures. This helps dissolve biofilm and reduce odor while you sleep. Before soaking, rinse the denture to remove debris so the cleaner can work effectively. In the morning, brush lightly and rinse thoroughly to remove any residue before reinserting.
How do you clean partial dentures with metal clasps and avoid plaque buildup?
Use a soft toothbrush to clean around each metal clasp and the areas where the clasp meets the denture base, since buildup is common there. A denture brush or interdental brush can help you reach tight spots without bending or dislodging components. After brushing, rinse well and consider periodic soaking in a denture cleaner to loosen stubborn plaque. Also clean your gums and any remaining teeth with fluoride toothpaste to reduce bacteria that can contribute to denture odor.
Why does my partial denture smell even after brushing, and how can I fix it?
Odor often comes from trapped bacteria and biofilm, especially in undercuts, around clasps, and between the denture base and metal framework. Brushing alone may not fully remove deposits, so soaking in a denture-cleaning solution can help lift stains and microorganisms. If the smell persists, check for hard deposits (tartar-like buildup) that may require professional cleaning. Consistent daily cleaning and proper overnight soaking typically makes a noticeable difference.
Which cleaning method is safest for partial dentures—ultrasonic cleaners, soaking, or boiling?
Soaking and gentle brushing are usually the safest daily methods because they’re designed to clean denture materials without stressing them. Ultrasonic cleaners can be effective for partial dentures, but only use them if your dentist or the manufacturer recommends the device/solution for your specific denture type. Avoid boiling partial dentures, using bleach, or relying on harsh household cleaners, as heat and chemicals can warp components, damage acrylic, or corrode metal parts. When in doubt, follow the manufacturer’s instructions or ask your dental professional what cleaning method is best for your partial denture.
📅 Last Updated: October 18, 2026 | Topic: how do you clean partial dentures | Content verified for accuracy and freshness.
References
- Removable partial denture
- Dentures
- Dentures: MedlinePlus
- Dentures – NHS
- https://www.nidcr.nih.gov/health-info/dentures
- Dentures | MouthHealthy – Oral Health Information from the ADA
- removable partial denture hygiene – Search Results – PubMed
- https://scholar.google.com/scholar?q=cleaning+partial+dentures Google Scholar
- https://scholar.google.com/scholar?q=removable+partial+denture+hygiene+instruction Google Scholar
- https://scholar.google.com/scholar?q=denture+cleaning+methods+disinfection+ultrasonic+chemical Google Scholar
