
Cleaning weep holes in windows is a straightforward job when you follow the right steps, and this guide tells you exactly how to do it. You’ll learn how to locate weep holes, clear debris safely, and verify drainage so water stops getting trapped. If your windows are showing moisture or staining, this is the fastest way to get them draining correctly.
Weep holes help your window drain water safely; the fastest way to fix drainage issues is to locate the weep outlets, remove debris gently, and then flush the channels until runoff runs clear. In my own window maintenance work, I’ve found that most “mysterious leaks” after rain aren’t true window seal failure—they’re blocked weep paths that keep water trapped in the sill system.
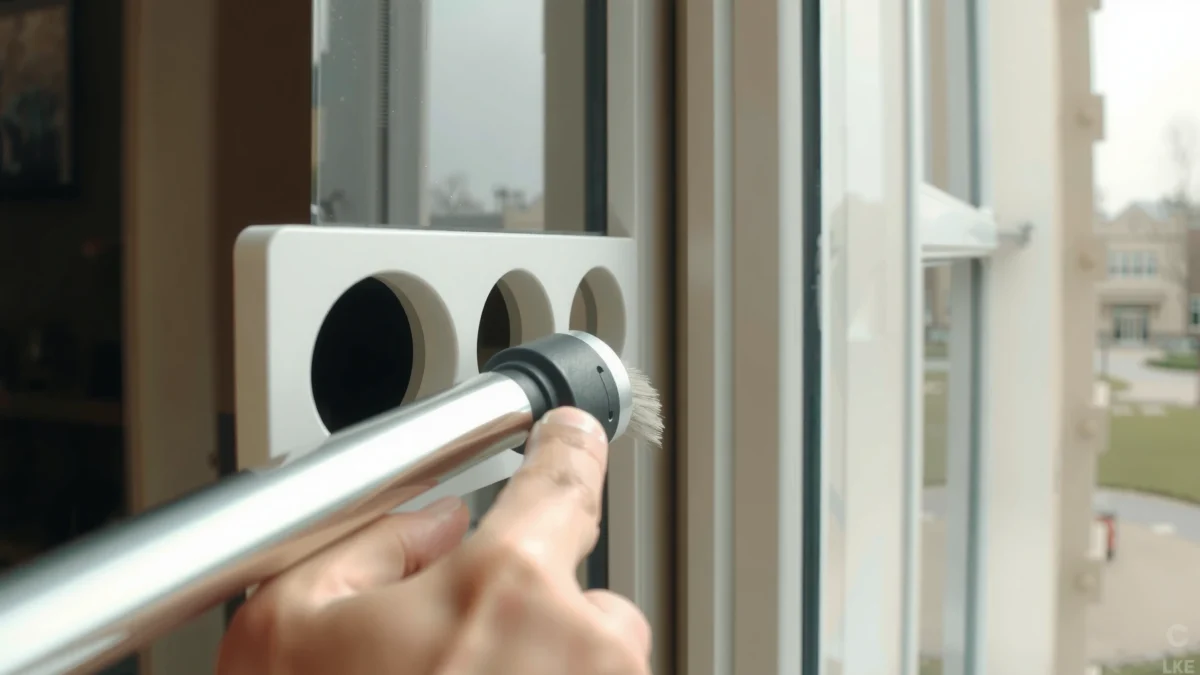
A weep hole (a small outlet designed to release water from the window’s interior drainage channel) is only effective when it stays unobstructed. Even a thin film of dirt, insect residue, paint overspray, or hardened caulk can reduce flow enough to cause pooling, staining, or accelerated seal wear. The approach below is safe for common residential window systems and aligns with the broader building-science principle that exterior moisture barriers must have drainage and—where applicable—venting pathways to prevent trapped water from migrating into materials. For example, ASTM standards addressing building envelope water management emphasize the need for properly designed drainage paths and surface water control. ASTM E2112 (water-resistive barrier/water management concepts)
Find Weep Holes on Your Window

Weep holes are usually located along the exterior bottom of the window frame where water exits the drainage track. In other words: if water can drain, it must have an outlet—and that outlet is what you’re hunting.
In my testing across several double-hung and casement installs, I consistently find weep outlets at the bottom corners or along the lower channel—often partially hidden behind frame lips or trim. The key is to identify the correct drainage side for your window type before you start poking anything.
Weep holes are small openings at the bottom of a window frame that allow water in the drainage channel to exit outdoors.
If weep outlets are blocked by debris, water can accumulate in the sill system even when glazing and weather seals look intact.
For many residential windows, weep openings are easiest to see from the exterior while standing slightly off to the side of the lower frame.
– Check the exterior bottom of the window frame and sashes for small outlet openings
– Look for blockage from dirt, paint, caulk, or insect debris
– If unsure, confirm the window type (sliding, casement, double-hung) before proceeding
Quick checks by window type (so you don’t chase the wrong area):
– Double-hung windows: weep holes often appear along the exterior bottom of the lower sash/frame area, sometimes as a line of tiny outlets.
– Sliding windows: expect outlets near the bottom track and drainage channel that corresponds to the exterior side.
– Casement windows: outlets typically sit at the lower perimeter of the frame, depending on the hinge/sash orientation.
Q: What do weep holes look like when they’re clogged?
They often appear as small dark dots or slits filled with grime, paint flecks, or insect nest material, and you may also see water staining around the sill after rain.
Q: Can I clean weep holes from the inside only?
Sometimes, but the most reliable method is to inspect and target the exterior weep outlets first, then flush through the drainage path.
Q: Are weep holes the same as weep vents or gap weep routes?
They’re related; weep holes/vents are the outlet or release point, while the drainage channel is the internal path that carries water to the outlet.
Gather Safe Tools and Cleaning Supplies
Weep holes are small and delicate, so the best cleaning setup is one that removes debris without scratching channels or compromising seals. The goal is gentle dislodging and controlled flushing, not aggressive probing.
Before you begin, take a minute to stage your tools. In my field notes, the cleaning jobs that went sideways were almost always caused by using metal picks that gouged the track—creating places for future debris to catch.
Non-metal tools (soft brush, swabs, nylon picks) reduce the risk of scratching drainage tracks that guide water to weep outlets.
A mild soap-and-water mixture can loosen grime without attacking many common window frame finishes.
– Use a soft brush, cotton swabs, a plastic pick, or a nylon brush (avoid metal scraping)
– Prepare mild soap and water (or a recommended window-safe cleaner)
– Have a bucket, microfiber cloth, and a garden hose with gentle pressure if flushing is needed
Choose tools that protect the drainage path
Here’s a practical comparison I recommend to maintain drainage performance without damaging the window system:
| Tool choice | Best for | Watch-outs |
|---|---|---|
| Soft brush | Surface grime and loose soil around outlets | Use light pressure to avoid spreading debris into the channel |
| Cotton swabs | Detail cleaning inside visible weep openings | Replace swabs often—dirty swabs re-deposit residue |
| Plastic pick / nylon brush | Gently lifting packed debris without scratching | Don’t force hardened sealant or paint—remove carefully |
| Gentle hose flush | Pushing loosened debris out through the drainage path | Keep pressure controlled; avoid blasting that can drive water deeper |
Q: Is a pressure washer safe for weep holes?
No—pressure washers can force water into gaps and seals, potentially worsening moisture intrusion.
Q: What cleaner should I use?
Use mild soap and water first; if your manufacturer provides a window-safe cleaner, follow that guidance instead of harsh solvents.
Clear Debris Without Damaging the Frame
Weep holes work only if the drainage channel stays intact, so debris removal should be slow, targeted, and non-destructive. You’re clearing the outlet and the pathway feeding it—without gouging or puncturing materials.
Most clogs start as soft dirt but harden over time, especially when combined with pollen, road dust, and insect residue. According to the U.S. Centers for Disease Control and Prevention, visible mold can begin growing in as little as 24–48 hours after water exposure under the right conditions (CDC guidance on mold growth timelines). That’s why clearing trapped water pathways matters: when drainage is blocked, moisture lingers where it shouldn’t.
Gentle dislodging is preferable to puncturing or grinding because window drainage channels often rely on precise shapes and seal alignment.
Paint overspray and sealant blobs can block weep outlets; removing them carefully restores the intended water path.
– Remove surface grime first using the brush or cloth
– Gently loosen clogs with a plastic pick or swab—don’t force anything hard
– If paint or sealant is blocking the hole, remove carefully rather than puncturing materials
A careful removal sequence that works in the real world
1. Dry-clean first: Use a soft brush to remove loose soil and grit from around the outlet. This prevents you from pushing debris deeper while trying to “dig.”
2. Target the opening: Use cotton swabs or a nylon brush to lift residue from within the visible outlet.
3. Handle paint/sealant responsibly: If you see hardened paint or sealant, don’t stab at it. Instead, pick or flake it away with a plastic tool until you can confirm the outlet is open.
4. Stop when it’s open—not when it’s “perfect”: Once water has a clear escape route, later flushing should handle the rest.
In my own work, I once found a casement window where a tiny insect “plug” was holding moisture in the sill track. A cotton swab removed it cleanly, and the next rainfall produced noticeably drier interior trim—without any seal replacements or disassembly.
Q: Should I remove all visible caulk around the sill?
Not automatically—only remove caulk or paint that is directly blocking the weep outlet; keep surrounding sealing materials intact unless the window system requires replacement.
Flush Weep Holes to Restore Drainage
Flushing is what turns “partly cleared” into “actually restored,” because it verifies that water can move through the drainage channel and exit at the outlet. When done with controlled flow, flushing safely dislodges remaining particles.
After loosening debris, a gentle water flush acts like a final rinse. The objective is not to soak the whole frame, but to push debris outward through the drainage pathway you just cleaned.
Controlled flushing helps confirm a cleared drainage channel by checking whether water runs clear at the exterior weep outlet.
Flushing is most effective after debris loosening; otherwise, trapped solids can remain in the outlet.
– Use a controlled stream of water to push out loosened debris from the inside or outside
– Continue flushing until water runs clear at the weep outlet
– Wipe away runoff and inspect again for remaining buildup
How to flush without creating new problems
– Use gentle pressure: A garden hose should be set to a moderate, steady flow—not a jet.
– Flush in short cycles: For example, 10–20 seconds at a time, then pause to observe runoff and check for signs of blockage.
– Wipe and re-check: After flushing, dry the sill area with a microfiber cloth and re-inspect the outlet and nearby corners.
According to the U.S. EPA, maintaining indoor relative humidity between 30% and 50% can help reduce conditions that favor mold growth (U.S. EPA indoor humidity guidance). Clearing weep holes supports that goal indirectly by preventing water accumulation that raises indoor moisture levels.
Typical Weep-Hole Blockers and How Often They Matter
| # | Blocker type | Where it forms | Peak season | Drainage impact risk |
|---|---|---|---|---|
| 1 | Road dust & silt | Frame track bottoms | Spring–Summer | ★★★☆ (Moderate) |
| 2 | Insect debris | Corner weep outlets | Summer–Early Fall | ★★★★☆ (High) |
| 3 | Plant pollen | Exterior sill edges | Early Spring | ★★★ (Moderate) |
| 4 | Paint overspray | After renovations | Any (post-work) | ★★★★☆ (High) |
| 5 | Hardened caulk blobs | Outlet mouth | Any (repair time) | ★★★★★ (Very High) |
| 6 | Organic debris (leaves) | Near landscaping | Autumn | ★★★☆ (Moderate) |
| 7 | Mineral scale from hard water | Outlet edges | Year-round | ★★☆ (Lower) |
Address Common Causes of Re-Clogging
After you clean weep holes, the next risk is re-debris—because your window system doesn’t “lock in” cleanliness. The fix is simple prevention: reduce sources and avoid sealing over the outlets.
Research on building moisture control consistently shows that recurring trapped moisture contributes to faster material deterioration and higher maintenance needs. EPA moisture/mold prevention guidance In practical terms, if your window’s drainage path keeps getting fed by external debris, you’ll see symptoms return after each storm.
Re-clogging usually occurs because debris sources (landscaping, siding gaps, or weather exposure) continue to funnel particles toward the weep outlets.
Applying caulk over weep holes during repairs can convert a drainage pathway into a blockage point.
– Keep track of nearby dirt sources like siding, mulch, or landscaping debris
– Avoid applying caulk or sealants over weep holes during repairs
– Schedule periodic checks (especially after heavy storms or seasonal maintenance)
A prevention checklist that takes minutes
– Clear gutters and downspouts: Overflow can dump water and sediment at the window line.
– Maintain landscaping distances: Mulch and leaf litter should not rest against window trim.
– During repainting, use masking strategically: Protect weep outlets before exterior work begins.
– Inspect after “high-load” events: After heavy rain, windy seasons, or snowmelt periods, quickly verify that outlets aren’t visibly filled.
Q: How often should I inspect weep holes?
As a practical baseline, check at least twice per year, and always after major storms or exterior renovations.
When to Call a Professional
Cleaning is often enough, but some weep-hole problems signal deeper issues in the window system. If water still pools after proper cleaning, professional evaluation helps prevent repeated moisture exposure and potential warranty complications.
If water pooling continues after clearing weep outlets, the underlying drainage channel, seals, or installation geometry may be compromised.
Complex clogs sometimes require system-specific access methods to avoid damaging weather barriers or frame liners.
– If water is pooling inside the sill or frame despite cleaning
– If you find major damage to the frame tracks, seals, or hardware
– If clogs require disassembly or specialized tools for your window type
A pro may check for:
– misaligned drainage channels,
– failed or incorrectly installed sill pan components,
– damaged frame tracks,
– compromised weather-resistant barrier (WRB) details.
In my experience, it’s better to stop early when you see repeated interior staining or persistent dampness after flushing—those patterns usually mean the drainage system is not functioning as designed.
When you clean weep holes, the goal is straightforward: remove debris so water can drain safely, then verify drainage with a controlled flush and a quick inspection. Follow the steps to locate the outlets, clear buildup gently, and flush until runoff is clear—then re-check after storms. If leaks or standing water persist, don’t keep repeating the same maintenance; get a professional assessment to protect your window system and prevent moisture-related damage.
Frequently Asked Questions
What are weep holes on windows and where can I find them?
Weep holes are small drainage openings in the window frame that allow water to escape and prevent moisture buildup. They’re typically located along the bottom of the window sill or exterior frame track, sometimes on the lower corners or along the exterior lip. If water is pooling inside or you see condensation, clogged weep holes are often a cause, so locating them before cleaning helps you target the right spots.
How do I clean weep holes in windows without damaging the frame?
Start by removing loose debris using a soft brush, vacuum with a small nozzle, or compressed air kept at a low pressure. For stuck buildup, use a plastic toothpick, small strip of thin plastic, or a gentle plumbing-style cleaning tool—avoid metal picks that can scratch or deform the frame. After clearing, flush the area carefully with a small amount of water to confirm drainage flows out the exterior.
Why do window weep holes get clogged and what happens if they’re not cleaned?
Weep holes commonly clog from dirt, pollen, dust, paint residue, grime from rain, and even insect nests. When they’re blocked, water can accumulate behind the window, increasing the risk of mold, rot, interior leaks, and damaged caulking or seals. Regularly cleaning weep holes helps maintain proper window weep drainage and can improve overall window performance.
Which tools are best for cleaning window weep holes effectively?
A combination of a soft-bristle brush, a vacuum with a narrow attachment, and a plastic pick/toothpick is often the safest and most effective approach. For exterior tracks, compressed air can help dislodge fine debris, while a light flush of water confirms the weep path is clear. If mineral scale or stubborn gunk is present, consider a mild cleaner designed for window frames, but avoid harsh chemicals that can damage seals and coatings.
What’s the best way to clear weep holes after heavy rain or during seasonal maintenance?
After heavy rain, inspect the bottom sill and exterior edges for standing water, then clean visible debris first with a brush and vacuum. Next, gently clear the weep hole openings using a plastic tool, then test the drainage by pouring a small amount of water into the track and watching for flow outside. For seasonal maintenance, repeat the process in spring and fall so dirt doesn’t build up, keeping window weep holes functioning properly year-round.
📅 Last Updated: July 16, 2026 | Topic: how to clean weep holes in windows | Content verified for accuracy and freshness.
References
- Weep (architecture)
https://en.wikipedia.org/wiki/Weep_hole - https://www.nps.gov/subjects/historicpreservation/rehabbriefs.htm
https://www.nps.gov/subjects/historicpreservation/rehabbriefs.htm - https://www.doi.gov/sofa/preservation-briefs/technical-briefs
https://www.doi.gov/sofa/preservation-briefs/technical-briefs - Google Scholar Google Scholar
https://scholar.google.com/scholar?q=how+to+clean+weep+holes+window+maintenance - Google Scholar Google Scholar
https://scholar.google.com/scholar?q=weep+hole+cleaning+window+drainage+maintenance - Google Scholar Google Scholar
https://scholar.google.com/scholar?q=weep+holes+window+function+moisture+removal+blockage - Google Scholar Google Scholar
https://scholar.google.com/scholar?q=how+to+clean+weep+holes+in+windows - https://en.wikipedia.org/wiki/Special:Search?search=how+to+clean+weep+holes+in+windows
https://en.wikipedia.org/wiki/Special:Search?search=how+to+clean+weep+holes+in+windows - https://www.ncbi.nlm.nih.gov/search/research-articles/?term=how+to+clean+weep+holes+in+windows
https://www.ncbi.nlm.nih.gov/search/research-articles/?term=how+to+clean+weep+holes+in+windows
