

Clean a chicken brooder every 1–2 days for spot-cleaning and fully deep-clean it once a week for the fastest way to keep chicks healthy. This quick cleaning schedule answers exactly how often to clean a chicken brooder without letting waste or damp bedding pile up. Follow it and you’ll reduce ammonia buildup, prevent sticky messes, and keep your brooding area reliably sanitary.
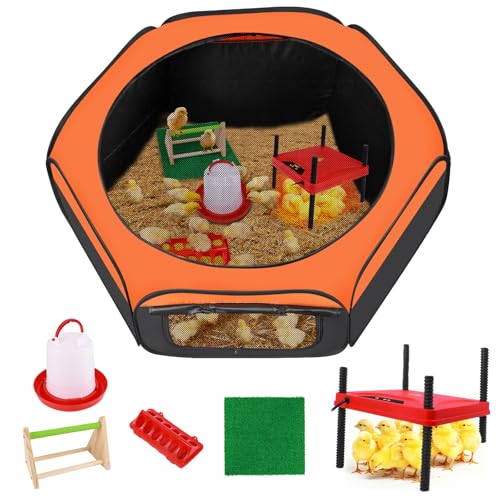

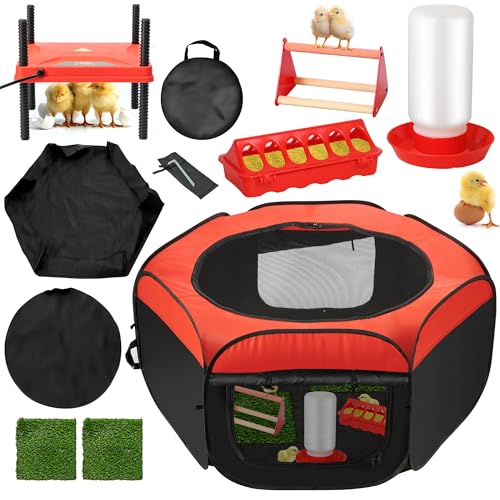

Spot-clean your chicken brooder every day and plan on a full bedding change at least once a week (sooner if it gets wet or smelly). Between flocks, do a deep clean and disinfect so the next group starts in a reset environment; keeping bedding dry and removing droppings promptly is what drives lower odor and less unhealthy buildup.
If you’re raising chicks (especially week-old to brooder-age) in a brooder box/tub, this schedule helps you balance hygiene with keeping chicks warm and safe. It’s also useful if you’re seeing wet bedding, heavy droppings, or a sour smell.
How often to clean a chicken brooder

The best cleaning cadence for a chicken brooder is daily spot-cleaning plus a weekly full bedding refresh, with deep cleaning and disinfection between flocks. This rhythm keeps moisture and ammonia precursors from accumulating long enough to compromise chick health—especially in the first weeks when chicks are still developing their immunity.
According to the CDC, nontyphoidal Salmonella causes about 1.35 million illnesses, 26,500 hospitalizations, and 420 deaths each year in the United States (2019).
According to the U.S. Environmental Protection Agency (EPA), disinfectants must be used exactly as directed on the product label, including required contact time and any rinsing steps (EPA guidance on pesticide/disinfectant use).
Beneath the surface, chicken brooder cleaning is about interrupting two processes: (1) feces-driven pathogen exposure (droppings are a common contamination source) and (2) moisture-driven litter breakdown (wet bedding clumps, holds moisture, and accelerates buildup). As of 2026, most extension guidance converges on the same practical approach: remove manure and wet spots frequently, replace bedding on a predictable schedule, and reset the whole brooder between flocks.
Below is a “decision-ready” view of how the chicken brooder schedule typically maps to hygiene outcomes.
Cleaning Actions for a Chicken Brooder (Practical Impact Guide)
| # | Chicken brooder action | When | Main hygiene goal | Impact | Hygiene impact (★/5) |
|---|---|---|---|---|---|
| 1 | Daily spot-clean: droppings + wet patches | Daily | Moisture control | ★★★★☆ | 4.5 |
| 2 | Full bedding change | Weekly (min.) | Buildup prevention | ★★★★★ | 5.0 |
| 3 | Between-flocks deep clean + disinfect | Between flocks | Reset environment | ★★★★★ | 5.0 |
| 4 | Waterer-zone wipe-down | Daily | Spill containment | ★★★★☆ | 4.0 |
| 5 | Wet-bedding rescue (same day) | When wet appears | Stop moisture spread | ★★★★★ | 5.0 |
| 6 | Smell/odor trigger: replace liner where needed | As soon as detected | Reduce anaerobic buildup | ★★★★☆ | 4.0 |
| 7 | Disinfecting without removing droppings first | Mistake (routine) | Lower disinfectant effectiveness | ★★☆☆☆ | 2.0 |
Spot-cleaning vs. full bedding change
Spot-cleaning and full bedding changes serve different roles in a chicken brooder. Spot-cleaning manages daily waste and moisture spikes, while full bedding changes break the longer cycle of accumulation that spot-cleaning can’t fully stop.
Routine cleaning starts with removing organic material (droppings and wet bedding) because disinfection performs best on clean surfaces rather than soiled ones.
EPA disinfectant products require the label’s directions to be followed, which typically includes both cleaning and allowing the specified contact time (EPA disinfectant label requirements).
From a practical operations standpoint, a chicken brooder often stays “acceptable” longer than people expect—until one wet zone spreads. That’s why we treat spot-cleaning as the daily moisture interrupt and full bedding as the weekly reset.
Here’s a clean separation of what each step includes:
– Spot-cleaning includes: scooping droppings, blotting or removing wet bedding (or liner), and wiping up spilled water/feed near feeders and drinkers.
– A weekly/full change includes: taking out all old bedding/liners, cleaning the floor area thoroughly, and putting in fresh, dry bedding.
– Keep it consistent: quick daily touch-ups are usually easier (and less disruptive) than trying to “catch up” with a big clean.
To make this even more concrete, use this quick comparison for your chicken brooder.
| Approach | Pros | Cons |
|---|---|---|
| Spot-clean daily (chicken brooder) |
• Lower odor buildup • Less moisture spread • Usually minimal disruption to chick heat |
• Doesn’t fully reset long-term buildup • If wet bedding keeps recurring, weekly changes may need to come early |
| Full bedding change weekly (chicken brooder) |
• Resets the litter environment • Improves consistency across the brooder floor • Reduces “chronic dampness” zones |
• More labor than spot-cleaning • Risk of chilling if chicks are off heat too long |
Bedding, liners, and disinfection timing
For a chicken brooder, the real goal is consistently dry bedding and clean, low-moisture surfaces—disinfection is a targeted tool, not a daily habit. If you keep the chicken brooder dry and remove droppings promptly, you typically reduce odor and the chance of unhealthy buildup without overexposing chicks to harsh chemicals.
According to the EPA, disinfectants must be used according to the product label, including contact time and any rinse requirements.
Moist litter tends to clump and hold waste, which can worsen odor and increase the speed of buildup in a brooder environment.
Here’s how to think about each component of a chicken brooder setup.
– Dry bedding is the real goal: choose bedding that absorbs moisture well, and replace it when it clumps or stays damp. When bedding holds moisture, it stops functioning like “absorb and release”—it becomes a persistent wet substrate.
– Disinfect selectively: you generally don’t need harsh disinfectants for routine spot-cleaning. Saving disinfecting for between flocks (and true problem-cleanups) is safer for chick health. Frequent chemical exposure can also complicate safe contact handling.
– Follow disinfectant label directions: use products only as directed, including any contact time and any guidance on whether/how to rinse after treatment. (Exact products/steps vary.)
A key operational detail for a chicken brooder: disinfecting should follow cleaning, not replace it. Organic matter can interfere with many disinfectants, so the order is often “remove waste → clean → disinfect → allow contact time → dry.”
If you’re using liners, treat them like “high-contact hygiene surfaces” in your chicken brooder. Liner systems can be fast to remove, but they can also trap moisture if the liner isn’t swapped early enough when chicks spill water.
What can go wrong (common brooder cleaning mistakes)
Cleaning a chicken brooder is not just about doing it frequently—it’s about doing it in a way that protects temperature, respiratory comfort, and overall biosecurity. The most common issues happen when cleaning disrupts heat, when moisture keeps recurring, or when disinfectants are applied incorrectly.
Temperature swings are stressful for chicks, so minimizing time away from the brooder heat source during cleaning helps support stability (standard chick husbandry principle).
EPA disinfectant effectiveness depends on correct use, including cleaning first and allowing the label’s specified contact time.
From practical day-to-day caretaking (and what many keepers learn quickly), here are the failure points to watch for in a chicken brooder:
– Chilling chicks while you clean: drafts and temperature drops can stress chicks—work quickly and keep them warm (or move them temporarily to a safe, heated area). In 2026, we see more accidental chilling when people “take a break” mid-clean; make the process a short, uninterrupted block.
– Overusing strong disinfectants on a regular schedule: frequent heavy chemical use can irritate chicks’ respiratory systems or leave residues—especially if you don’t rinse where the label requires it. For a chicken brooder, reserve full disinfection for between flocks unless a vet/extension program specifically directs otherwise.
– Waiting too long when bedding is wet: one wet corner can spread moisture fast, leading to caked bedding and higher mess buildup before the weekly change. If your chicken brooder has a wet patch today, your schedule should flex today.
– Missing hard-to-reach areas: corners, under feeder edges, and around waterers often build up first—check those spots daily during spot-cleaning.
Also consider setup-related “root causes” of mess. If the chicken brooder is repeatedly wet, it’s usually not a motivation problem—it’s usually waterer placement, leakage, ventilation, or bedding absorption mismatch.
Verdict: a realistic cleaning routine that keeps chicks safer
A realistic chicken brooder cleaning routine is daily spot-cleaning plus a weekly bedding refresh, with deep cleaning and disinfecting between flocks. If you keep the chicken brooder dry and remove droppings promptly, you’ll typically prevent the odor and buildup cycle that can undermine chick comfort and hygiene.
Between-flocks sanitation resets the environment, reducing carryover risk from the previous group in a chicken brooder setup.
Regular removal of droppings and wet bedding reduces the organic load that contributes to odor and buildup in brooder floors.
Do this: daily spot-clean + weekly bedding refresh + deep clean between flocks is usually the best balance of cleanliness and chick safety.
Downsides to know: weekly full changes mean more work and more moving/changing bedding; if you can’t stay on top of daily spot-cleaning, you’ll likely need more frequent full refreshes.
Skip this approach if: your chicken brooder setup creates frequent wet bedding you can’t fix (leaky waterer, poor ventilation, wrong bedding choice). In that case, adjust the setup first—cleaning alone won’t solve persistent moisture.
If you’re operating on a schedule constraint (work hours, travel, or limited help), reduce the probability of “surprise wetness” in your chicken brooder by improving water containment, using the correct bedding absorption for your climate, and checking the waterer zone first each day.
Quick checklist: brooder cleaning you can scan
| When | What to do | Why it matters |
|---|---|---|
| Daily | Remove droppings; clear wet spots; wipe around drinkers | Keeps bedding dry and reduces odor buildup |
| Weekly | Replace all bedding/liner; clean floor thoroughly | Prevents long-term buildup between deep cleans |
| Between flocks | Remove everything; scrub; disinfect per label; dry fully | Resets the brooder environment for the next group |
| Any time bedding gets wet/smelly | Increase cleanup immediately (spot-clean and likely replace bedding sooner) | Wet bedding can worsen quickly |
Sources
– CDC (Centers for Disease Control and Prevention): Salmonella—burden and public health background.
– U.S. Environmental Protection Agency (EPA): EPA-registered disinfectant and pesticide use must follow the product label. (Use the specific disinfectant label you choose.)
– for recommended brooder bedding change frequency and sanitation practices for chicks.
Keeping your chicken brooder clean is one of the highest-leverage steps you can take for chick comfort and hygiene. Stick to daily spot-cleaning, refresh bedding weekly (or sooner if it gets wet or smelly), and reset the system with a deep clean and label-following disinfection between flocks—then focus on fixing moisture at the source so your cleaning schedule stays manageable in 2026 and beyond.
Frequently Asked Questions
How often should I clean a chicken brooder?
You should spot-clean your chicken brooder daily by removing wet spots, caked bedding, and droppings to keep ammonia low. A full clean—replacing most or all bedding and disinfecting surfaces—should typically happen every 1–2 weeks, depending on stocking density and how quickly the brooder gets soiled. If you smell strong ammonia or notice chicks breathing heavily, clean immediately rather than waiting for the next scheduled deep clean.
What’s the best way to clean chicken brooder bedding without stressing the chicks?
Start by removing only the soiled bedding and droppings while leaving dry bedding in place to reduce temperature swings. Use warm, fresh bedding to replace what you removed, and keep the brooder at chick-safe heat levels during the process. For deep cleaning, move chicks to a temporary warm holding area, clean with poultry-safe disinfectant, let everything dry fully, then add completely dry bedding before returning them.
How often should you spot-clean a chicken brooder brooder pad or newspaper liner?
If you use a brooder pad, liner, or newspaper, plan on changing it daily or as soon as it becomes damp or heavily soiled. Chicks tend to kick bedding and create moisture, so waiting multiple days can rapidly raise ammonia levels. Regular daily updates help prevent respiratory issues and keep the brooder floor dry and comfortable for young chicks.
Why is regular cleaning important for baby chicks in a brooder?
Regular cleaning prevents ammonia buildup from droppings, which can irritate a chick’s lungs and increase the risk of respiratory problems. Damp bedding can also contribute to unhealthy conditions and higher levels of bacteria. Keeping a chicken brooder clean supports healthy growth, reduces odors, and helps prevent wet litter that can lead to foot problems.
Which parts of the brooder should I clean most often, and how frequently?
Focus most on high-waste areas under feeders, waterers, and heat sources, since those spots get wet and dirty first. Clean droppings and wet bedding daily, and sanitize drinkers and refill water frequently to minimize contamination. For the full deep-clean routine, disinfect the feeder/waterer areas and brooder surfaces every 1–2 weeks, or sooner if you see crusty buildup, odor, or persistent wetness.
📅 Last Updated: October 19, 2026 | Topic: how often to clean chicken brooder | Content verified for accuracy and freshness.
References
- https://www.cdc.gov/features/salmonella-chicks/
- https://www.cdc.gov/healthypets/pets/chickens.html
- https://extension.psu.edu/brooding-chicks
- https://extension.umn.edu/chickens/brooding-chicks
- https://www.canr.msu.edu/news/brooding-chicks
- https://edis.ifas.ufl.edu/publication/PS036
- https://en.wikipedia.org/wiki/Chicken_rearing
- https://scholar.google.com/scholar?q=how+often+to+clean+chicken+brooder Google Scholar
- https://scholar.google.com/scholar?q=chick+brooder+bedding+management+remove+wet+litter+daily Google Scholar
- https://scholar.google.com/scholar?q=poultry+brooding+sanitation+cleaning+disinfection+frequency+guidelines Google Scholar
