

To remove mud from a wooden shoe rack fast, you need a careful clean-and-dry sequence that won’t swell the wood or damage the finish. Follow the quickest steps: scrape loose mud first, then clean with a damp cloth and a mild soap solution, and finish by drying thoroughly and conditioning if needed. If you stick to this method, you’ll get your rack visibly clean without leaving stains, grit, or lingering odors.
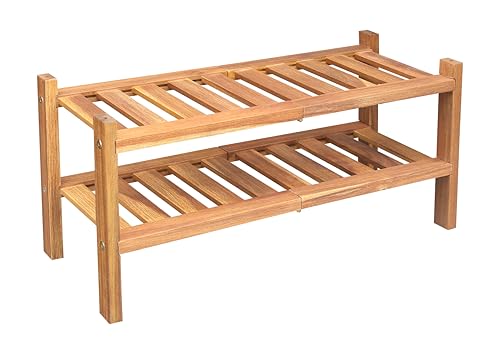


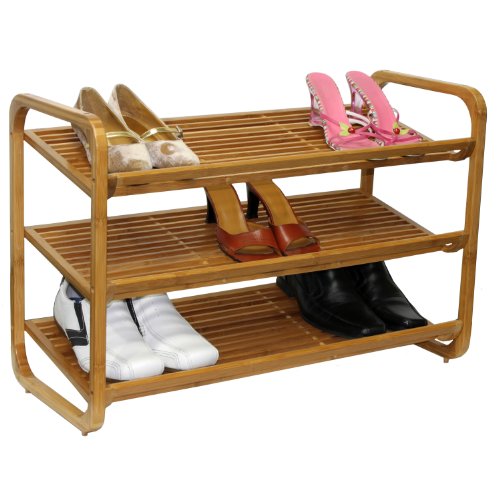
Scrape off dry mud first, then wipe the surface with a damp cloth using mild soap (not soaking). For stuck grit, use a soft brush, then dry thoroughly—wood warps fast when it stays wet. This guide walks you through cleaning mud from a wooden shoe rack safely, without damaging the finish.
If your shoe rack has a sealed finish, unsealed wood, or removable mats/trays, the approach is slightly different. This is for anyone dealing with outdoor/muddy shoes, rainy-season splashes, or frequent track-in dirt.
Gather Supplies (So You Don’t Soak the Wood)

You don’t need harsh cleaners to clean a wooden shoe rack after muddy shoe traffic; you need controlled moisture and finish-safe tools. In practice (as of 2026), the goal is to remove particles first, then use damp—not wet—wiping to lift residue.
According to the USDA Forest Products Laboratory’s *Wood Handbook*, shrinkage and dimensional movement are driven by moisture changes in wood (especially below the fiber saturation point).
ASTM moisture-testing methods describe oven-drying at 103°C ±2°C to constant mass, underscoring that “drying” is a measurable, moisture-removal process—not just quick rinsing (ASTM International, D4442, 2019).
Using lightly damp cloths reduces the risk of saturating wood seams and joints compared with pouring or soaking, which can drive moisture deeper into end grain.
What to grab (and what to skip)
The supplies below are designed to protect both the wood and any topcoat (varnish, lacquer, or a sealant) on your wooden shoe rack.
– Use a soft-bristle brush, microfiber cloths, and mild dish soap or wood-safe cleaner.
– Have clean water, a small bowl, and a dry towel ready for fast follow-up drying.
– Avoid strong degreasers, bleach, and high-pressure cleaning—those can strip finish or drive moisture deeper.
Quick compatibility check (sealed vs. unsealed)
Before you start, inspect the rack finish:
– Sealed finish: Usually has a consistent sheen and resists water spotting.
– Unsealed/unfinished wood: Often looks more porous/matte; it can darken quickly from moisture.
– Removable mats/trays: Clean them separately to reduce how much muddy water reaches the frame.
From a practical standpoint, the safer default for a wooden shoe rack in rainy seasons is “dry scrape + controlled damp wipe,” then air-dry fully.
Remove Dry Mud Without Scratching
You’ll protect the finish best by removing dry mud before you introduce water to your wooden shoe rack. If you wet the mud first, you effectively turn grit into abrasive paste that’s much harder on varnish and stains.
Scraping dry mud first prevents abrasive particles from being ground into the finish when you later wipe with a cloth.
Wood “end grain” and joints absorb moisture more readily than flat surfaces, so getting debris out before damp wiping reduces the amount that can wick into seams.
A plastic scraper (instead of metal) reduces the chance of gouging soft topcoats and sanding through thinner varnish layers.
The dry-first method
– Let mud dry fully if possible, then gently scrape with a plastic scraper or old credit card edge.
– Brush away loosened dirt with a soft brush before any water touches the rack.
– Focus on joints, corners, and shelf edges where mud packs in.
Best places to concentrate
On a typical wooden shoe rack, mud collects where airflow and contact points meet:
– Shelf lips and edges (wheels of mud build up)
– Side rails and perforations (gunk hides in micro-gaps)
– Corners near the bottom (mud falls and then dries)
If you’re cleaning a rack after a wet day, aim to remove as much solid material as possible first—even if it means doing two short dry passes before you ever wipe.
Clean Mud Residue Carefully (Damp, Not Wet)
You should clean muddy residue using a damp cloth and mild soap—never by soaking your wooden shoe rack. This approach lifts residue while limiting the moisture your wood absorbs and the swelling/warping it may cause.
The USDA Forest Products Laboratory notes that wood movement is tied to moisture content changes, which is why “damp wiping” is safer than soaking.
Mild soap works mainly by loosening surface-bound grime; repeated gentle wiping is typically safer than increasing chemical strength on finished wood.
Soap left behind can attract more dust; a second wipe with clean, damp water removes residue without saturating the rack.
Step-by-step residue removal
– Dampen a microfiber cloth (or lightly dampen the brush) with soapy water—wipe, don’t flood.
– For greasy-looking marks, repeat gentle wiping rather than increasing soap strength.
– Immediately wipe again with a clean, damp cloth to remove soap residue.
What “not soaking” looks like in real terms
When you wring out your microfiber cloth, it should feel damp—not dripping. If you see water tracking toward joints, you’re likely using too much moisture. For a wooden shoe rack, the fastest way to avoid damage is “small moisture + fast drying,” not “more water to do it all at once.”
Get Stuck Grit Out of Details
You can usually remove packed grit from rails and seams without damaging your wooden shoe rack by using soft, targeted brushing. Avoid aggressive rubbing—finish wear happens quickly on edges and textured areas.
Mud grit acts like sandpaper when it’s worked repeatedly into a finish, so loosening it with a small soft brush protects the surface.
ASTM’s moisture-determination method highlights that water content in wood is measurable and removable by controlled drying—meaning excess moisture from seams should be minimized.
Using lightly damp tools (not wet ones) reduces wicking into gaps and helps prevent “hidden wet spots” that later turn into staining.
Tools and technique for crevices
– Use a soft brush (toothbrush-sized for crevices) to work grime loose along rails and gaps.
– If you use a cotton swab, keep it lightly damp and avoid spreading water into seams.
– Don’t “rub harder” on a worn finish—stop and switch to lighter passes if the finish dulls.
Avoid “finish fatigue”
If your wooden shoe rack has a glossy lacquer or varnish, repeated friction can make spots look dull. That doesn’t always mean the finish is failing—sometimes it’s just surface wear. When you notice dulling, slow down, switch to smaller strokes, and prioritize drying.
Dry Thoroughly to Prevent Warping or Staining
You prevent the majority of long-term damage by drying your wooden shoe rack completely after cleaning. Wood warps and stains mainly when moisture lingers—especially in joints, end grain, and shelf edges.
According to the USDA Forest Products Laboratory (*Wood Handbook*), fiber saturation is around 28–30% moisture content (wood basis), and movement/staining risk increases when moisture lingers and then dries unevenly.
Airflow is the practical counterpart to “oven-drying” methods in ASTM standards: it accelerates moisture removal without adding new chemical exposure.
Tilting or spacing a rack so air reaches seams reduces trapped moisture and helps prevent dark “wicked” stains.
– Pat dry with a towel, then leave the rack in airflow (open window, fan, or airy room).
– Don’t put it back immediately with wet shoes touching the wood.
– If moisture is trapped in joints, tilt or space the rack so air can reach all sides.
Moisture bands that help explain warping behavior (quick reference)
Wood Moisture Content Bands Linked to Dimensional Risk (Wood basis)
| # | Moisture content band | Typical situation | Dimensional movement driver | Stability outlook |
|---|---|---|---|---|
| 1 | 0–5% MC | Oven-dry reference state | Large movement possible if MC rises from dry | ★★★☆☆ |
| 2 | 6–9% MC | Common indoor-equilibrium range | Movement occurs mainly with further drying/wetting | ★★★★☆ |
| 3 | 9–12% MC | Typical indoor equilibrium for many homes | Lower risk if rack stays near equilibrium | ★★★★★ |
| 4 | 12–18% MC | Wet days / damp wiping residue | More shrink/swell risk during uneven drying | ★★☆☆☆ |
| 5 | 18–25% MC | Moisture trapped in seams/joints | Higher movement potential as MC drops below saturation | ★☆☆☆☆ |
| 6 | 25–30% MC | Near fiber saturation point | Approaching the threshold for maximum shrink behavior | ★☆☆☆☆ |
| 7 | ≥30% MC | Fiber saturation or wetter | Shrink/swell from bound water is limited above this point | ★★★☆☆ |
*Note:* This table focuses on dimensional movement behavior associated with moisture content, not on biological risks. Primary concepts are consistent with USDA wood science and the moisture-content framework in wood care references (USDA Forest Products Laboratory, Wood Handbook, 2010).
What Can Go Wrong (And How to Avoid It)
You can prevent most failures by avoiding over-wetting and by treating trapped moisture as the real threat—not the visible mud. When a wooden shoe rack isn’t sealed or dries unevenly, it can warp, stain, or dull quickly.
Over-wetting drives water into end grain and seams, where it’s harder to evaporate evenly and more likely to cause dark staining.
Metal scraping tools can gouge topcoats and expose raw wood, which then stains more readily under muddy water.
Harsh cleaners and vigorous rubbing can dull lacquer/varnish by removing or eroding the surface finish.
– Over-wetting the wood: even “just wiping” can soak edges—use lightly damp cloths and move fast.
– Scratches from tools: metal scrapers can gouge; stick to plastic or softer tools.
– Finish damage: harsh cleaners or vigorous rubbing can dull lacquer/varnish—test a hidden spot first.
– Persistent odor or dark spots: mud can stain as it dries; repeated gentle cleaning plus thorough drying usually works better than one aggressive attempt.
Common mistakes vs. safer alternatives (parse-friendly)
| Mistake | Why it backfires | Safer approach |
|---|---|---|
| Soaking the rack to “get it clean” | Increases moisture uptake and uneven drying → warping/staining risk | Dry scrape → damp wipe → rinse-wipe with a lightly damp cloth → air-dry |
| Using degreasers/bleach | May strip finish or change how wood absorbs water and dirt | Use mild soap or a manufacturer-approved wood-safe cleaner |
| Rubbing grit harder after it’s wet | Turns residue into abrasive paste; increases finish wear | Loosen with a soft brush first; then wipe gently |
Sealed finish vs. unsealed wood: what changes
With a sealed wooden shoe rack, surface cleaning usually works quickly because the topcoat limits absorption. With unsealed wood, moisture darkens faster and can linger in pores—so you rely even more on dry scrape and on drying immediately after each damp pass.
Verdict: Stick to Dry Scrape + Light Damp Wipe (Skip If…)
This method is the safest baseline: scrape dry mud, wipe with mild soap on a lightly damp cloth, rinse-wipe, then dry completely. The downside is that heavily dried, deeply embedded mud may require multiple gentle rounds and careful brush work.
Skip this approach (or pause and test carefully) if the rack’s wood is clearly unsealed/damaged, flaking, or you’re unsure what finish it has—confirm whether the rack is sealed/finished by checking manufacturer instructions.
For finished wooden surfaces, mechanical removal (scraping/soft brushing) before wet wiping reduces abrasion and helps preserve the topcoat.
Wood warping is driven by uneven moisture changes; drying with airflow reduces the chance that one side stays wetter.
If a finish is compromised (peeling, flaking, or bare patches), stronger cleaners or soaking can accelerate damage, so verification is important before deeper cleaning.
When to pause and get advice
If you see any of these on your wooden shoe rack, stop and test cautiously:
– Finish is lifting or flaking
– Water causes immediate darkening that doesn’t fade after drying
– Strong musty odor remains after thorough drying
In those cases, a finish-safe restoration method may be needed (often guided by the manufacturer or a professional refinisher).
Quick Checklist (Save This)
Use this scan-friendly sequence for rainy-season cleanups when your wooden shoe rack gets daily track-in dirt.
– [ ] Let mud dry (if you can)
– [ ] Scrape loose mud gently (plastic scraper)
– [ ] Brush debris from crevices
– [ ] Wipe with mildly soapy, lightly damp cloth
– [ ] Wipe again with clean damp cloth (remove soap)
– [ ] Dry with towel + air-dry fully
The “dry scrape first” rule reduces abrasive action from muddy grit and limits moisture uptake in joints.
The “final wipe to remove soap” step helps prevent sticky residue that attracts future dirt.
Sources
– USDA Forest Products Laboratory, Wood Handbook (Wood as an Engineering Material) (2010)
– ASTM International, ASTM D4442 (2019), standard method for determining wood moisture content
Keeping your wooden shoe rack clean is mostly about controlling moisture. In 2026 (and any rainy season), the reliable sequence is dry scrape → soft brush → damp, soapy wipe → damp rinse-wipe → thorough air-drying—so you remove mud without inviting warping or finish damage.
Frequently Asked Questions
What’s the safest way to remove dried mud from a wooden shoe rack?
Let the mud dry fully, then gently scrape it off with a plastic scraper or an old credit card to avoid gouging the wood. For remaining residue, lightly dampen a soft cloth with warm water and wipe in the direction of the wood grain. Dry immediately with a clean towel and allow the rack to air out completely before putting shoes back.
How do I clean mud off a wooden shoe rack without damaging the finish?
Use minimal moisture—avoid soaking the wood or using a dripping wet cloth. Mix a small amount of mild dish soap into warm water, then wipe lightly with a microfiber cloth and remove soap traces with a second cloth dampened with plain water. Dry thoroughly and, if the finish looks dull, apply a compatible wood-safe conditioner or polish after the surface is fully dry.
Why does mud keep coming back on my wooden shoe rack, and how can I prevent it?
Mud often reappears because grit remains in pores, seams, or cracks and gets spread each time shoes are placed on the rack. After cleaning, inspect for residue in corners, and consider using a soft brush to dislodge trapped dirt before wiping. For prevention, place a washable mat or shoe tray under the rack and wipe shoe soles before setting them on the wood.
How should I clean thick, caked mud from between slats of a wooden shoe rack?
Start with dry scraping, then use a soft-bristle toothbrush or small detailing brush to work warm soapy water into the gaps without saturating the wood. Wipe up loosened mud with a cloth and re-wipe with a barely damp cloth to remove soap. Dry each slat thoroughly—use a fan if needed—so trapped moisture doesn’t cause swelling or warping.
Which cleaning method is best for mud stains on an oiled vs. sealed wooden shoe rack?
For sealed wood, you can usually use mild soap and water sparingly, followed by thorough drying, since the topcoat helps resist water penetration. For oiled wood, avoid harsh cleaners and excess water; instead, clean with a lightly damp cloth and a gentle soap solution, then let it dry fully and reapply a small amount of wood oil or conditioner to restore protection. If stains persist, test any product in a hidden area first to prevent discoloration.
📅 Last Updated: October 26, 2026 | Topic: How to Remove Mud From a Wooden Shoe Rack | Content verified for accuracy and freshness.
References
- Wood
- https://en.wikipedia.org/wiki/Wood_rotting
- https://www.britannica.com/science/wood
- https://www.who.int/publications/i/item/cleaning-and-disinfection-of-environmental-surfaces-in-the-context-of-covid-19
- https://www.cdc.gov/coronavirus/2019-ncov/community/disinfecting-building-facility.html
- https://www.epa.gov/mold/mold-remediation-what-you-need-know
- https://extension.umn.edu/household-help/cleaning-hardwood-floors
- https://scholar.google.com/scholar?q=how+to+remove+mud+from+wood+furniture Google Scholar
- https://scholar.google.com/scholar?q=cleaning+wood+furniture+mild+soap+water+drying Google Scholar
- https://scholar.google.com/scholar?q=wood+water+damage+drying+recommendations+home+care Google Scholar

[…] maintenance. Weekly, dust with a microfiber cloth, then use a wood-safe cleaner (or a slightly damp cloth) and let the table fully dry to prevent residue buildup. For ongoing protection, apply a suitable […]