

Want to keep a wooden shoe rack clean longer? These five prevention tips are the fastest route to cutting down dirt buildup, water spots, and lingering odors before they start. Follow this plan and you’ll extend the life of your rack while keeping it looking freshly maintained with the least effort.
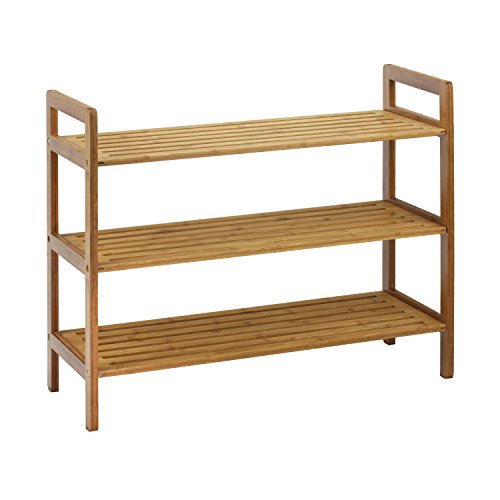



A wooden shoe rack stays cleaner longer when you stop grime before it settles: manage moisture from shoes, reduce dust contact, and use finish-safe cleaning habits. Follow these 5 prevention tips (not just spot-cleaning) so stains, odors, and sticky buildup don’t get a chance to set in.
If your rack is finished (painted/varnished/oiled) and you want it to look good between deeper cleans, the steps below are designed for day-to-day maintenance. If it’s unfinished or damaged, you’ll want to adjust—some prevention habits still help, but cleaning and drying rules can change.
The 5 prevention tips that keep a wooden shoe rack clean longer

The best way to keep a wooden shoe rack looking new is to prevent moisture and residue from ever reaching the wood surface (and especially its joints). Here are five prevention-first habits that reduce stains, odors, and that “sticky dust” film that shows up so quickly on shoe storage wood.
– Key prevention goal: keep water, dirt grit, and shoe residue from reaching the wood finish (or getting into joints).
Mold can start growing on damp materials within 24–48 hours after water damage, so drying discipline directly impacts odors and discoloration. (U.S. EPA)
Maintaining indoor humidity between 30–50% is a widely recommended approach to reduce mold risk, which matters when shoes bring in moisture. (U.S. EPA)
1) Let shoes dry before they hit the rack
Quick answer: Store shoes on the rack only after they’re dry to the touch. This single habit prevents the fastest pathway to dulling finishes and dark patches: trapped moisture.
Moisture + wood finish is a common reason shoe racks start looking “aged” before they should. Even if your rack has a varnish or paint layer, moisture can still concentrate along slats and seams where condensation collects. Over time, that moisture can lift a subtle haze from the topcoat, attract dust, and encourage odor-causing buildup.
In humid climates or during rainy seasons, your prevention system needs a staging step. Instead of placing wet shoes immediately on the rack, route them to a “dry-first” location (a nearby, ventilated spot) or use a dedicated shoe dryer routine before storage. Keep the rack itself for dry footwear only, and you’ll reduce both visual staining and smells that can linger in wood finishes.
If shoes are damp when placed on furniture, condensation forms where air flow is limited—corners and slat gaps become the first trouble spots.
Allowing items to dry before storage reduces the chance that residues (sweat, oils, dirt) polymerize into sticky films on contact surfaces.
Practical move (finish-safe): After you bring shoes in, open them (remove inserts if you can) and let air reach the interior for a short period before storage.
2) Add a barrier that catches grit (without trapping moisture)
Quick answer: Use a removable, breathable barrier that collects dirt—but don’t use something that stays damp. The barrier should be easy to shake, brush, or vacuum.
Shoes track two things that make wooden racks look dirty quickly: dry grit and fine dust. Grit can scratch or dull finishes, while fine dust mixes with shoe residue (skin oils, sweat, rubber dust) to create that “dirty sheen” people often mistake for permanent staining. A barrier interrupts that chain by capturing debris before it reaches the wood.
However, barrier material choice matters. A thick plastic liner might stop dirt transfer, but it can also trap moisture underneath—especially if you’re storing shoes that aren’t perfectly dry yet (which happens more than anyone wants to admit). The best barrier is removable and breathable, so it functions like a filter without creating an airtight “micro-sink” for damp air.
Mats and liners help prevent grit transfer, but non-breathable layers can increase localized humidity and promote musty odors if shoes aren’t fully dry.
Removable barriers support cleaning frequency because you can treat the liner separately instead of over-cleaning the wood surface.
Finish-safe rule: If your barrier gets damp or smells musty, replace it or switch to a more breathable option—and address your “dry-first” routine at the same time.
3) Do quick dust control on a schedule
Quick answer: Wipe the rack regularly with a dry or barely-damp cloth so dust doesn’t build into a residue film. Scheduled dust control is faster (and gentler) than occasional deep scrubbing.
Dust alone looks harmless, but when dust blends with shoe residue, it becomes a stubborn, slightly oily layer. That layer clings to wood grain and finish edges, which is why the rack often looks “dirty again” only days after a cleaning. Prevention works because you stop the mixing stage early.
Make dust control predictable. Focus on the areas that collect debris first: shelf edges, corners, slat undersides, and any lip where shoes repeatedly brush the surface. A consistent routine also reduces the chance you’ll feel tempted to use stronger cleaners “just this once,” which can shorten the life of a finish.
From my experience maintaining furniture in entryways, the racks that stay clean longest are the ones we wipe in under two minutes—without waiting for grime to turn into dark patches.
Using minimal moisture for finished wood reduces the risk of finish dulling and moisture migration into seams.
Cleaning before dust becomes residue-laden lowers the need for aggressive products that can degrade protective coatings.
Simple approach: Dry wipe first. If needed, use a cloth that’s only lightly damp—then immediately buff dry.
4) Reduce shoe residue with a simple “wipe-off” habit
Quick answer: Brush off loose dirt from soles before shoes go on the rack—then remove any sticky residue before it spreads to the wood.
Even indoor shoes pick up dust. Outdoor shoes bring in grit that can grind against finish surfaces and create visible streaks. Spend about 10 seconds removing loose dirt before storage: a quick brush, scrape, or wipe prevents abrasive particles from settling into wood grain.
Sticky residue is a different problem. Some materials (certain soles, athletic shoe coatings, or residue from floor treatments) can leave a tacky film that transfers easily. If you notice residue transfer, treat it as a prevention issue, not a “later cleaning” issue. Wipe the residue off promptly using finish-safe methods rather than soaking the rack or using strong solvents that may damage varnish, paint, or oil.
Shoe sole residue transfers faster to textured surfaces than to smooth ones, so pre-cleaning reduces adhesion on slats and grain lines.
Short, consistent sole-prep (seconds, not minutes) reduces the amount of grit that becomes embedded in finish edges.
Finish-safe habit: If you use any cleaner at all, use a cleaner that matches your finish type and avoid flooding.
5) Keep the wood finish protected
Quick answer: Treat the finish like your primary defense—use finish-safe cleaners and avoid soaking. Then reapply only what the manufacturer specifies.
A shoe rack’s durability depends on its protective layer. Painted and sealed finishes are different from oiled finishes: each responds differently to moisture and chemicals. The prevention plan works best when you align your maintenance methods with the actual finish chemistry on your rack.
– Sealed finishes (paint/varnish/shellac-like topcoats): The goal is gentle cleaning and drying so you don’t stress the top layer.
– Oiled/waxed finishes: The goal is keeping the oil/wax barrier intact without washing it away or introducing excessive water.
If you don’t know the finish type, treat it as an “unknown finish” and start gentlest—dry wipe, then minimal moisture if needed. Don’t assume that a product safe for one wood finish is safe for another.
For reapplication timing, follow the manufacturer’s schedule for your specific finish system. If you’re unsure, use your product label or the rack’s original care guidance.
Reapplying protective coatings only as specified helps maintain surface integrity without over-wetting joints and seams.
Avoiding excess moisture prevents swelling or finish haze, especially near edges where liquids can creep under coatings.
What can go wrong (and when prevention won’t be enough)
Prevention reduces dirt and odor dramatically, but it can’t fully overcome every scenario that drives staining and grime. The biggest failure points are moisture exposure, a barrier that traps damp air, and structural damage (scratches/chips/unsealed edges) that lets residue penetrate.
Higher humidity increases mold risk; EPA guidance commonly flags RH at 60% and above as a condition that supports mold growth. (U.S. EPA)
Even small, repeated dampness events can add up because mold can begin within 24–48 hours after materials become wet. (U.S. EPA)
Common prevention breakdowns
1. “More cleaning” instead of drying discipline
Wood doesn’t like frequent wet cleaning. Even if you wipe “carefully,” repeated moisture exposure can dull finishes or promote warping around edges and slat supports.
2. A liner/mat that stops dirt but traps moisture
Some liners reduce visible dust, yet still create a damp layer under shoes. If you ever notice damp smells, condensation, or that “wet basement” odor coming from the barrier, switch to a more breathable setup and increase how often you dry and refresh the barrier.
3. Damage that gives grime entry points
Scratches, chips, and unsealed edges are not just cosmetic. They’re pathways for shoe residue to soak in and for moisture to linger. Prevention helps, but you may still need careful spot-cleaning and—eventually—finish repair.
Pros/cons snapshot: barriers and moisture behavior
| Option | Pros | Cons |
|---|---|---|
| Breathable fabric liner (removable) | Catches grit; easier to shake/clean; less likely to trap damp air | Needs periodic cleaning; can still hold odor if shoes stay wet |
| Impermeable plastic liner | Strong dirt barrier; easy wipe-down | Higher risk of trapped moisture and musty odors under shoes |
| No liner (dry-first only) | Lowest moisture-trap risk; simplest maintenance | More direct exposure to grit and residue; requires more frequent dust control |
Moisture Conditions That Matter for Shoe-Rack Odor & Staining (EPA/CDC, 2024–2026)
| # | Moisture signal | Numeric threshold | What it drives | Prevention priority | Impact rating |
|---|---|---|---|---|---|
| 1 | Recommended indoor RH range to reduce mold risk | 30–50% | Lower mold-support conditions | High | ★★★★★ |
| 2 | Condition that supports mold growth | ≥60% RH | More likely mold colonization | Critical | ★☆☆☆☆ |
| 3 | Time window for mold to begin after wetting | 24–48 hrs | Odor + discoloration risk | Critical | ★★☆☆☆ |
| 4 | Typical temperature conditions for mold growth | 40–100°F | Growth supported when damp | Moderate | ★★★☆☆ |
| 5 | Dampness duration that increases likelihood of mold | ≥24 hrs | Higher contamination probability | High | ★★☆☆☆ |
| 6 | Target humidity for condensation avoidance | 30–50% | Less surface dampness | High | ★★★★☆ |
| 7 | Moisture prevention principle applied to storage areas | Dry-first | Prevents “wet → growth” chain | High | ★★★★★ |
Note on the table: Star impact ratings reflect how directly each moisture signal maps to shoe-rack prevention (not a lab measurement of your specific rack).
Verdict: the prevention approach is worth it—if you match the rack’s finish
Prevention is the best way to keep a wooden shoe rack clean longer because it reduces the two main causes of buildup: moisture and transferred residue. The downside is that it requires a routine (dry shoes first, quick wipes, barrier maintenance), and it may not fully stop staining if your rack is already damaged or frequently exposed to wet shoes.
EPA and CDC guidance converge on moisture control as the foundation for preventing mold-related odors and discoloration in indoor materials. (U.S. EPA; U.S. CDC)
Finish longevity improves when you avoid soaking finished wood and focus on low-moisture, finish-compatible cleaning methods.
We recommend this plan if:
– Your rack is finished (sealed with paint/varnish) or regularly maintained.
– You can consistently dry shoes before storage.
Skip or adjust the plan if:
– The rack is unfinished/bare wood and you’re relying on “wipe with a damp cloth” as your main method—unfinished wood often needs different care.
– The rack has active damage (peeling finish, moldy spots, deep warping). In that case, you’ll likely need a repair or refinishing step before prevention can work long-term.
Best-practice fit check (the “match the finish” rule): If your rack is sealed, use gentle, non-soaking cleaning. If it’s oiled or waxed, prioritize re-barriering per the manufacturer’s schedule. If it’s unknown or damaged, reduce moisture exposure first and consider professional refinishing guidance.
Quick scan checklist (save this)
| Prevention step | What to do | How often |
|---|---|---|
| Dry-first rule | Place shoes on the rack only when dry to the touch | After rainy/wet use; otherwise as needed |
| Use a barrier | Keep a removable, breathable liner/mat under shoes | Check weekly; shake/clean as needed |
| Dry dust control | Wipe off dust before it mixes with residue | |
| Sole wipe habit | Brush off loose dirt from soles before storage | Every time you bring in outdoor shoes |
| Finish protection | Use only finish-safe products; don’t flood the surface |
Sources
– U.S. Environmental Protection Agency (EPA). “Mold Prevention: Tips for Keeping Your Home/Mold.” (Moisture control, humidity guidance, and mold onset timing)
– U.S. Centers for Disease Control and Prevention (CDC). “Mold” resources. (General mold growth conditions and moisture dependence)
Keeping your wooden shoe rack clean longer comes down to one practical idea: stop moisture and residue at the source. If you dry shoes first, catch grit with a breathable barrier, and stick to finish-safe wipe-downs, you’ll prevent the buildup cycle that causes stains, odors, and sticky dust—so the rack stays presentable with less work over time.
Frequently Asked Questions
What’s the best way to prevent dirt and dust from building up on a wooden shoe rack?
Use a regular dry-dusting routine with a soft microfiber cloth or a vacuum brush attachment to remove grit before it settles into the wood grain. Place the shoe rack away from open windows, entry mats, or high-traffic airflow where dust gathers fastest. For extra protection, consider adding felt pads or a washable liner on the rack surface so mud and debris don’t directly contact the wood.
How can I stop shoe odors and moisture from damaging my wooden shoe rack?
Keep shoes dry before placing them on the rack by letting wet footwear air out in a ventilated area first. Wipe the rack after use if shoes are damp, and consider using breathable shoe bags, liners, or moisture-absorbing products like charcoal sachets. Avoid leaving shoes in the rack for long periods without airflow, since trapped moisture can lead to warping, swelling, and musty smells in wooden storage.
Why should I use protective coating on a wooden shoe rack, and which type works best?
A protective finish helps seal the pores of the wood, making it harder for spills, humidity, and grime to penetrate. For most wooden shoe racks, a clear polyurethane or water-based wood sealant is a strong choice because it creates a durable barrier without soaking in deeply. If your rack already has a finish, clean it thoroughly first, then test the product in a small hidden area to ensure it doesn’t haze or discolor the surface.
How do I clean a wooden shoe rack without stripping the finish or leaving streaks?
Use a gentle method: lightly dampen a microfiber cloth with a mild wood-safe cleaner and wipe with the grain, then dry immediately with a clean towel. Avoid soaking the rack, harsh degreasers, or abrasive pads that can scratch wood and reduce the protective layer. For stubborn buildup, use a soft brush to lift debris, then follow with quick drying to prevent moisture from lingering.
Which daily habits help extend the life of a wooden shoe rack and keep it looking new longer?
Rotate the types of footwear placed on the rack—remove boots with heavy mud first and avoid storing dripping or very wet shoes. Use mats or trays at the base so water drips don’t directly hit the wood, and keep the rack in a low-humidity location for better long-term protection. Finally, do quick spot checks for spills and wipe them promptly, since prevention is the fastest way to avoid stains and long-term cleaning on wooden furniture.
📅 Last Updated: October 26, 2026 | Topic: How to Keep Your Wooden Shoe Rack Clean Longer: 5 Prevention Tips | Content verified for accuracy and freshness.
References
- https://www.cdc.gov/mold/default.htm
- Mold | US EPA
- Mold
- Wood-decay fungus
- Wood preservation
- Humidity
- Varnish
- https://scholar.google.com/scholar?q=wooden+shoe+rack+cleaning+prevention+mold+humidity Google Scholar
- https://scholar.google.com/scholar?q=shoe+storage+moisture+odor+microorganisms+ventilation Google Scholar
- https://scholar.google.com/scholar?q=wood+coatings+finish+moisture+protection+fungal+decay Google Scholar

[…] a wooden study table clean longer? Follow these 7 prevention tips designed to stop everyday dust, water spots, and grime before they set in, so you spend less time scrubbing and more time studying. You’ll […]