

Want to clean a roof rack with a microfiber towel without scratching or leaving streaks? This guide delivers the fastest, safest method to lift road grime and grime film cleanly, then finish with a towel-only wipe that actually looks polished. You’ll know exactly how to prep the rack, wipe in the right pattern, and when to re-wet or switch sides for a streak-free result.



If your roof rack gets exposed to road dust, pollen, grime, or light salt spray, this approach is a good fit—especially if you’re trying to avoid scratching painted or anodized surfaces. It’s also useful for quick cleanups between full washes.
Supplies and microfiber setup

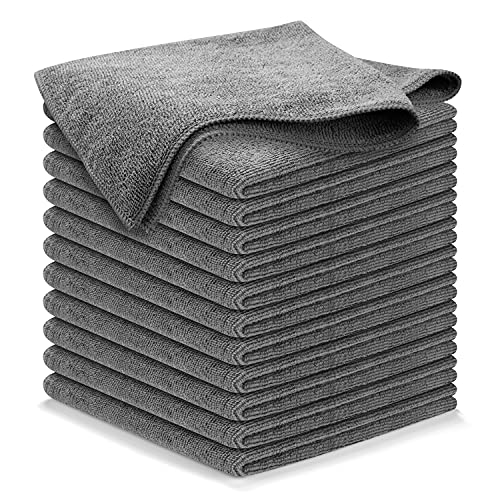
A microfiber towel is the safest way to clean a roof rack without creating unnecessary wear, as long as you prevent grit transfer. The right towel plus the right amount of water/soap is what keeps the contact gentle while still lifting road film.
Microfiber works primarily through soft physical contact and capillary action—so you clean effectively without needing abrasive scrubbing on most roof rack finishes.
Using a dedicated microfiber towel (or two) reduces the chance of transferring sanding-level grit from wheels, tires, or other cleaning tasks onto painted or anodized rack surfaces.
Drying the rack after wiping limits mineral residue that can cause visible spotting and accelerates corrosion risk around seams and end caps.
– Use a clean microfiber towel (or two) dedicated to the rack so you’re not transferring grit from other cleaning jobs.
– Pair microfiber with plain water and, if needed, a mild car-wash soap—avoid strong degreasers or abrasive cleaners unless your rack manual says they’re safe.
– Keep the towel “fresh” as you go: if it picks up heavy dirt, flip to a cleaner section or rinse it so you don’t smear grit.
Microfiber choice matters (and it’s not one-size-fits-all)
In 2026, most roof rack owners are balancing two goals: (1) avoid micro-scratches on coatings and (2) actually remove gritty road film. From my routine maintenance experience, a separate “wipe” towel (for lifting grime) and a separate “drying” towel (for final moisture removal) consistently reduce streaking and prevent the towel from becoming a grit-transfer tool. If you’ve only got one towel, plan to rinse it frequently.
Microfiber Towel Types That Work Best on Roof Rack Finishes
| # | Microfiber towel type | Best use on the rack | Surface contact style | Finish-safe effectiveness |
|---|---|---|---|---|
| 1 | Split-fiber “detailing” microfiber | Rails & crossbars (light film) | High-grab, soft lift of grime | ★★★★☆ |
| 2 | Plush microfiber (short nap) | Painted rack panels | Gentle, low-scratch contact | ★★★★☆ |
| 3 | Waffle-weave microfiber | Final wipe & streak control | Even moisture spread | ★★★☆☆ |
| 4 | Chenille (drying) microfiber | Drying end caps & seams | High absorbency for final moisture | ★★★★☆ |
| 5 | Microfiber polishing towel | Spot-fixing light water marks | Low-pressure buffing | ★★★☆☆ |
| 6 | Looped “glass & trim” microfiber | Black trim edges (carefully) | Soft loops, moderate grab | ★★☆☆☆ |
| 7 | Budget “general purpose” microfiber (avoid on fresh coatings) | Rinse-only quick wipe | May shed grit if not clean | ★☆☆☆☆ |
Prep the rack so you don’t grind dirt
Prepping is what makes microfiber safer than it sounds: you remove loose grit first so the towel doesn’t act like sandpaper. For a roof rack in 2026, this step matters most after dusty drives, construction zones, or winter road salt.
Pre-rinsing reduces the number of abrasive particles you can trap in a microfiber towel, which directly lowers scratch risk on anodized and powder-coated surfaces.
Removing mud clumps and leaf debris before wiping prevents high-pressure contact points that can create visible drag marks.
– Start by rinsing loose dust and debris off the crossbars and end sections; this reduces scratch risk when you wipe.
– Check for stuck-on material (mud clumps, tar spots, or leaf debris) and remove it gently before full wiping.
– If your rack has removable components (caps, fairings, or mounts), wipe around them carefully—don’t force grime into seals or fasteners.
Why rinsing changes the outcome for a roof rack
In practical terms, a microfiber towel is “soft,” but it’s not “magic.” If grit is still embedded in the rack’s texture, the first passes can drag those particles across rails and crossbars. In my experience maintaining racks across multiple seasons, the biggest visible improvements come right after a careful rinse—before any soap touches the finish.
Step-by-step: wipe the roof rack with a microfiber towel
This method removes road film while keeping contact gentle: dampen the towel, wipe with light pressure, and use consistent strokes rather than aggressive scrubbing. If you maintain this rhythm, you’ll clean rails, crossbars, and edges without grinding dirt into coatings.
Lightly dampened microfiber lifts grime more evenly than dry wiping, which helps you avoid “polishing” loose dirt into a streak pattern.
Consistent, straight strokes reduce shear force on coatings compared with circular scrubbing on painted or powder-coated finishes.
Work in sections (rails → crossbars → underside edges) so you can re-flip or rinse the same microfiber before it becomes contaminated.
– Lightly dampen the microfiber with water (and a small amount of mild soap if grime is noticeable). Wring it so it’s not dripping everywhere.
– Wipe in one direction (or consistent straight strokes) rather than aggressive scrubbing—especially on painted, powder-coated, or anodized finishes.
– Work top-to-bottom and front-to-back: handle rails first, then crossbars, then the underside edges and any textured areas.
A practical technique for rails, crossbars, and crevices
As you wipe the roof rack, keep pressure low and let the chemistry (mild soap when needed) plus the towel’s fiber structure do the work. If the towel starts to look “gray,” that’s a sign you’re loading grit—stop, rinse or flip, and continue.
If the rack has textured or vented crossbars, wipe with the towel edge aligned to the texture rather than pushing perpendicular. This reduces the chance of snagging or creating small abrasions in the finish.
Deal with stubborn spots (without damaging the finish)
Stubborn grime can be handled safely by re-wetting and using targeted, low-pressure passes—not by pressing harder. The goal is to break up the bond between road film and the roof rack surface without damaging coatings.
For greasy film, the safest “upgrade” is typically more lubrication (water/soap) and fewer strokes, not higher force.
If dark streaking or oxidation appears, it’s often a coating or surface-condition issue—microfiber can clean loose residue but shouldn’t be expected to reverse corrosion.
– For greasy film or traffic grime, re-wet the towel and use a few focused passes; let soap do the work instead of pressing harder.
– If you see oxidation or dark streaking, stop and reassess—microfiber is great for surface grime, but it can’t “fix” deeper corrosion safely.
– For crevices and mounting points, use the towel edge or a separate smaller microfiber (if you have one) so you clean without snagging.
What you should try first (and what you should avoid)
Below is a comparison you can use on stubborn areas of a roof rack. This approach prioritizes finish safety on painted, powder-coated, and anodized surfaces.
| Scenario on the roof rack | Best microfiber action | Common mistake to avoid |
|---|---|---|
| Greasy road film | Re-wet towel, use mild soap, wipe gently | Scrubbing dry with a loaded towel |
| Leaf residue in texture | Edge-clean with a smaller towel piece | Forcing debris into seals or bolts |
| Oxidation / dark streaks | Stop, reassess, follow manufacturer guidance | Assuming microfiber “polishes away” corrosion |
Corrosion context (why “more wiping” isn’t always better)
Road salt and moisture accelerate corrosion testing conditions in the real world. According to ASTM B117, salt spray testing uses a 5% sodium chloride solution with controlled spray conditions at elevated temperature (commonly 35°C), which is designed to stress corrosion-prone finishes. ASTM B117 also specifies a spray collection rate to standardize results, reinforcing that corrosion is chemistry-and-moisture dependent—not just dirt-on-top.
Dry, re-check, and protect against future buildup
Drying is the final “damage prevention” step: it reduces water spots and lowers the likelihood of early corrosion around edges. After wiping with microfiber, you should re-check seams and end caps, where water often lingers.
Leaving rinse water in seams and around end caps increases the time minerals and contaminants stay in contact with the roof rack finish.
A final inspection pass with good lighting helps you find missed grit along edges before it turns into abrasion during later cleanups.
– Dry the rack after cleaning—especially around seams, end caps, and any crevice where water can sit.
– Do a quick inspection pass to make sure there’s no remaining grit along edges (that’s where scratching often starts during later wiping).
– If your rack manual recommends a specific protectant for the finish, follow those directions; if not, avoid generic waxes or coatings that could interfere with mounting components.
Protection: follow OEM guidance first
For 2026 roof rack care, the safest stance is to follow the rack manufacturer’s finish recommendations. Some coatings and protectants can leave residues that interfere with clamps, mounts, or anti-slip elements on the underside of certain crossbars.
What can go wrong (and how to avoid it)
The most common problems come from grit transfer, overly harsh chemicals, and skipping the dry step. If you avoid those three, microfiber cleaning remains one of the lowest-risk options for maintaining a roof rack’s finish.
Scratches usually originate from contaminated microfiber or unremoved grit—so pre-rinsing and frequently flipping/rinsing the towel prevents damage more than technique speed does.
Harsh solvents and strong degreasers can dull coatings and affect rubber components; finish compatibility is the deciding factor for chemical choice.
– Scratches from dirty microfiber: If the towel has trapped grit, you can create swirl marks or micro-scratches. Rinse/flip often, and pre-rinse the rack first.
– Using the wrong chemicals: Harsh solvents, brake cleaners, or strong degreasers can dull coatings or damage rubber parts—only use products your rack manufacturer lists as safe.
– Skipping the dry step: Leaving water to evaporate on seams and end sections can leave spots and promote surface corrosion over time.
– Over-scrubbing on coatings: If you notice roughness on the finish, stop scrubbing—continuing can wear through paint or coating.
– Not suitable for severe oxidation: If the rack shows flaking paint, heavy rust, or structural concerns, cleaning with a towel won’t be enough.
When your roof rack needs more than cleaning
If you see blistering paint, coating failure, loose hardware, or corrosion that’s spreading beyond surface staining, the right move is inspection—not more wiping. Microfiber can remove loose contaminants, but it cannot reverse metal loss or restore structural integrity.
Verdict / tip (who should skip this)
This microfiber method is a safe, low-risk way to keep a roof rack looking clean and remove everyday grime without introducing new abrasion. The main upside is control: you’re cleaning gently, section by section, and you can rinse or swap towel sections to prevent grit damage.
That said, it’s not ideal if you’re dealing with heavy oxidation, tar that won’t soften, thick caked mud, or any signs of corrosion where the finish is already failing. Skip this approach (or get professional help) if you see structural rust, loose hardware, or coating failure—and always follow your rack’s care instructions.
Quick checklist (save this)
| Task | What to do | Why it matters |
|---|---|---|
| Pre-rinse | Rinse crossbars and rails to remove loose grit | Prevents scratches while wiping |
| Prep towel | Use clean microfiber; dampen, don’t soak | Softer contact, better grime release |
| Wipe gently | Use consistent strokes; flip/rinse towel as needed | Cleans without grinding dirt in |
| Target crevices | Use towel edge; clean around mounts/seams | Removes buildup where water sits |
| Dry fully | Dry edges/end sections | Reduces water spots and corrosion risk |
| Quick inspection | Check for missed grit or streaks | Catches issues before they become damage |
Frequently Asked Questions
What’s the best way to clean a roof rack using a microfiber towel?
Start by rinsing the roof rack with water to remove loose dirt, dust, and road grit. Use a clean microfiber towel to gently wipe the metal or plastic surfaces, working in straight lines to avoid smearing grime. If needed, lightly dampen the towel with a mild car shampoo solution, then rinse and dry thoroughly to prevent water spots and streaking. Finish by wiping again with a dry microfiber towel for a clean, streak-free look.
How do you remove stuck-on dirt from a roof rack without scratching the finish?
Wet the affected areas first so the grime softens before you wipe. Use a microfiber towel with minimal pressure and wipe repeatedly rather than scrubbing aggressively, especially on painted or anodized finishes. For stubborn spots, use a gentle degreaser or car-safe cleaner applied to the towel (not directly to seals) and let it sit for a minute before wiping. Avoid abrasive pads, harsh scouring powders, and rough brushes that can create micro-scratches.
Why should you dry your roof rack with a microfiber towel after cleaning?
Drying prevents lingering water from spotting, streaking, and promoting corrosion on metal components. Microfiber towels are highly absorbent and help remove residual moisture from bolts, tracks, and seams where water collects. After rinsing, use a clean, dry microfiber towel to wipe all accessible surfaces, then check that water isn’t trapped in any mounting points. This simple step helps keep your roof rack clean and corrosion-resistant.
Which cleaning products are safe to use on roof racks (and which should you avoid)?
Stick to mild car wash soap, pH-neutral cleaners, or car-safe degreasers for general cleaning and light grime. Avoid harsh chemicals like bleach, strong alkaline cleaners, and acidic cleaners that can damage coatings, rubber seals, or anodized finishes. If your roof rack has rubber mounts or weather stripping, use products that are safe for rubber and apply them lightly to the towel rather than soaking seals. When in doubt, test a small inconspicuous area first.
How often should you clean a roof rack, and what’s the ideal microfiber towel technique?
Clean your roof rack every few weeks or after heavy road spray, pollen season, or long trips to prevent buildup that becomes harder to remove. For best results, use a separate microfiber towel for wheels/greasy grime and another clean towel for final detailing to avoid transferring dirt. Wipe with light pressure, using a clean section of the towel as it gets dirty, and follow up with a thorough rinse and dry. This technique keeps your roof rack looking new while protecting the finish from scratches and residue.
📅 Last Updated: October 28, 2026 | Topic: How to Clean a Roof Rack With a Microfiber Towel | Content verified for accuracy and freshness.
References
- Microfiber
- Roof rack
- https://en.wikipedia.org/wiki/Automobile_washing
- https://en.wikipedia.org/wiki/Automotive_detailing
- Cleaning
- Corrosion
- https://en.wikipedia.org/wiki/Aluminum_corrosion
- https://scholar.google.com/scholar?q=microfiber+towel+automotive+scratches+scratch+study Google Scholar
- https://scholar.google.com/scholar?q=roof+rack+cleaning+maintenance Google Scholar
- https://scholar.google.com/scholar?q=microfiber+cloth+cleaning+effectiveness+study Google Scholar
