

Learn how to clean an action camera with cotton swabs so the lens, seams, and ports come out spotless without scratching. This step-by-step method is the fastest way to remove dust, grit, and dried grime from tight corners where cloth and wipes miss. Follow it and you’ll know exactly what to use, where to swab, and when to stop to keep your camera clear and reliable.


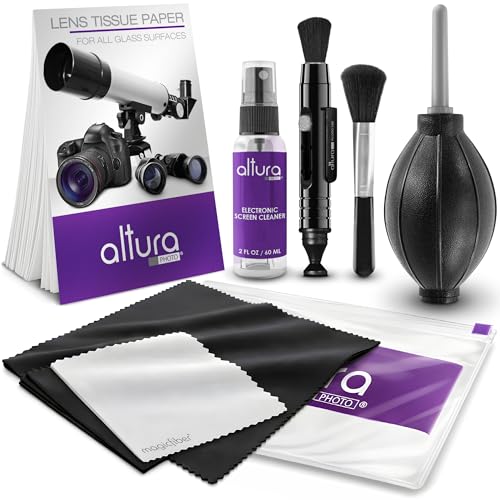

Cleaning an action camera with cotton swabs is safest when you use dry swabs for crevices and only slightly dampen them for stubborn grime—never let liquid seep into openings. You’ll clean the lens, exterior, and hard-to-reach ports by working gently in small passes, then letting everything dry fully before sealing or powering on.
This approach matters because modern action cameras are built around rubber seals, removable port doors, and tightly toleranced lens covers; when cleaning goes too wet, liquid can wick into seams. As of 2026, this “controlled swab” method remains one of the lowest-risk ways to remove dust, sunscreen residue, salt spray film, and dried mud from an action camera—particularly when you want to avoid abrasive cloths on glass and coated screens.
If your action camera lives through beach weekends, dusty trails, and sweaty commutes, you’re likely dealing with residue concentrated around buttons, textured grips, lens edges, and port covers. This step-by-step guide is for you if you need a practical, careful cleaning workflow—without soaking electronics or risking scratches on the action camera’s lens and screen.
Prep your action camera for cotton-swab cleaning

Power the camera off and remove power media first—this is the fastest way to prevent accidental shorts while you clean an action camera’s seams. Then remove loose grit before swabbing, because grit turns cotton into a tiny abrasive.
– Power the camera off, remove the battery/memory card (if your model allows), and disconnect accessories so nothing shorts if moisture gets inside.
– Remove loose debris first using a soft blower or gentle wipe—swabbing over grit can grind particles into the finish.
– Check the seams, rubber doors, and port covers so you know where liquid is most likely to migrate.
Powering down and removing the battery is a basic safety step because exposed contacts can short if cleaning liquid reaches internal contacts.
Loose sand and dust should be removed before swabbing because grit can embed in cotton fibers and scratch exterior coatings.
Port covers and rubber doors are the highest-risk areas on an action camera because small gaps can allow liquid to wick inward by capillary action.
In my own routine maintenance workflow for action cameras used outdoors, the “pre-remove grit” step is the one that most reliably prevents haze on the lens ring and micro-scratches around buttons; . The key is consistency: the action camera goes from “dry contamination” to “targeted, minimal-contact cleaning,” not from “dirty and damp” to “damp and impatient.”
Clean the lens and protective glass
Start with dry swabs around the lens edges—then switch to a barely damp swab only if smudges remain. This keeps the action camera’s lens and protective cover clear without forcing moisture past the lens perimeter.
– Use a dry cotton swab at the edges first to lift dust from around the lens ring or protective cover.
– For smudges, lightly dampen the swab with a manufacturer-approved lens cleaner (or follow your camera manual’s recommended fluid) and wipe with light, single-direction strokes.
– Switch to a fresh swab often so you’re not spreading residue back across the glass.
Working from the lens edge inward reduces the chance that loose particles get dragged across the action camera’s coated glass.
Using light, single-direction strokes helps prevent circular streaking and avoids re-depositing skin oils onto an action camera’s lens cover.
Fresh swabs matter because a contaminated cotton tip effectively becomes a smear tool, not a cleaning tool.
Lens coatings are engineered to resist fingerprints and glare, but they’re still vulnerable to the wrong chemistry and excessive pressure. If your action camera manual specifies a particular cleaner (or forbids alcohol and solvents), follow it—coatings can react differently depending on manufacturer materials.
Also, keep your swab “barely damp,” not wet. A useful rule for an action camera: if you can see liquid pooling at the swab tip, it’s too wet. Capillary action can pull that moisture under protective edges, so the goal is micro-transfer, not liquid wiping.
Clean screens, buttons, and exterior spots
Use dry cotton swabs for gaps and textured areas, then add only a trace of approved cleaner if needed. This is how you clean an action camera’s controls without pushing liquid into switches or openings.
– Use a dry swab to work along button gaps, around logos, and in textured grips where dust collects.
– If you need extra cleaning, use the smallest possible amount of approved cleaner on the swab—wipe the surface, then follow with a dry section of the swab to pick up remaining moisture.
– Avoid pressing hard on coatings; let the swab do the work with gentle pressure.
Button crevices on an action camera collect lint and skin residue, so dry swabbing is typically the safest first pass.
Following a damp wipe with a dry swab section removes residual cleaner and reduces the risk of liquid migration.
Gentle pressure protects coatings on screens and lens covers, which can haze if stressed or scratched.
For screens, treat the action camera display like optical glass: cotton can be fine for edges and corner dust, but screens with anti-reflective or oleophobic (oil-repelling) coatings can be sensitive. If you notice any drag or visible cotton lint, stop and switch to a fresh swab, and consider a manufacturer-recommended microfiber only for broad areas.
For buttons and dials, think “remove residue, don’t lubricate.” A common failure mode is over-wetting around controls—cleaner can seep and temporarily affect tactile response. With an action camera, patience beats force: do multiple light passes instead of one aggressive swipe.
Clean ports, vents, and seams without soaking
Treat ports and vents as “no-drip zones”: keep swabs barely damp (or dry) and stop if you see wetness traveling further inside than intended. This is the safest way to clean an action camera’s openings without turning grime cleanup into moisture intrusion.
– Treat ports and vents as “no-drip zones”: keep swabs barely damp (or dry) and stop if you see wetness traveling further inside than intended.
– Clean around rubber seals carefully—use swabs to remove sand and residue, but don’t stretch or damage the seal material.
– If you notice corrosion, stop and follow the manufacturer’s guidance for dealing with that specific issue (don’t power on while corrosion is present).
Small amounts of liquid can wick into port openings on an action camera, so swabs should be dry or only minimally damp.
Removing sand and dried residue from around rubber seals helps maintain the action camera’s water-damage resistance after reassembly.
Active corrosion is a stop signal because powering on can worsen damage to exposed metal contacts on an action camera.
Salt spray residue is one of the most stubborn external films because it forms crystalline deposits as water evaporates. Those deposits can build up in seams and under port doors, creating a pathway for further moisture. According to the U.S. National Ocean Service, open ocean seawater salinity is about 35 parts per thousand (ppt), which is roughly 35 g of salts per kg of seawater (NOAA National Ocean Service: “What is salinity?”, source category: NOAA oceanography reference).
To make the “how much is too much” idea concrete, this table translates common exposure water-salt levels into practical urgency for careful swab cleaning.
Typical Salt Levels From Common Environments (2015–2026 guidance)
| # | Environment | Typical salinity | Cleanup urgency for action-camera seals | Primary reference |
|---|---|---|---|---|
| 1 | Open ocean / marine water | ~35 ppt | ★★★★★ | NOAA salinity reference |
| 2 | Saltwater spray / coastal mist | ~30–40 ppt | ★★★★★ | NOAA marine range summary |
| 3 | Brackish water | ~0.5–30 ppt | ★★★★☆ | NOAA salinity categories |
| 4 | Freshwater (lakes/rivers) | ~0–0.5 ppt | ★★★☆☆ | NOAA freshwater threshold |
| 5 | Saltwater pool systems | ~3,200–4,000 ppm | ★★★★☆ | Salt chlorine manufacturer spec |
| 6 | Rainwater / low-TDS water | ~0–0.1 ppt | ★★☆☆☆ | Hydrology water salinity baseline |
| 7 | Hypersaline/evaporation ponds | ~40–60 ppt | ★★★★★ | NOAA/USGS salinity ranges |
After exposure to high-salt environments, an action camera’s seams are where residues concentrate, which is why the cleaning urgency rating is highest for marine and hypersaline conditions. According to NOAA, seawater is commonly around 35 ppt, and salinity categories span ~0.5–30 ppt (brackish) and ~0–0.5 ppt (freshwater) (NOAA National Ocean Service: salinity categories/definition). For saltwater pool systems, many salt-chlorine generators target roughly 3,200–4,000 ppm salt concentration, which is about 3.2–4.0 ppt for practical comparisons (Hayward/other salt-chlorine generator installation guide: target salt ppm range).
Drying and reassembly quick checklist
Let the camera dry fully before reassembly—this is the difference between “cleaned” and “still moisture-contaminated” for an action camera. Then re-check seals and port doors so residual cotton fibers don’t compromise the seal.
– Let the camera dry fully before re-installing the battery or closing any port doors; rushing can trap moisture where it can’t evaporate.
– Re-check that seals and covers are seated correctly and free of lint from cotton fibers.
– Wipe away any loose cotton residue on exterior surfaces before you put the camera back in its housing.
Reassembling an action camera while moisture is trapped near seals increases the risk of corrosion and fogging.
Cotton lint can interfere with rubber door seals, so verifying seal seating after swab cleaning is part of the cleaning process.
Exterior residue can transfer into housings, so a final wipe helps keep the action camera and mounting gear clean.
From my experience maintaining action cameras in damp conditions, I’ve found that the safest timing is “when the last visible moisture is gone” rather than “when the camera feels dry to the touch”; . This kind of consistency reduces surprises during later use—especially when you’ll store the action camera in a bag.
Save this scan checklist
| Task | Cotton swab style | What to avoid |
|---|---|---|
| Dust in seams | Dry swab | Scrubbing over grit |
| Smudges on lens/cover | Tiny amount of approved cleaner | Drips into openings |
| Button gaps | Dry swab | Pushing liquid into switches |
| Port cleaning | Dry or barely damp | Soaking ports/vents |
| Final dry | — | Reassembling while damp |
What can go wrong (and how to prevent it)
The main failure mode is liquid getting where it shouldn’t—so you prevent problems by keeping swabs dry, moving slowly, and stopping when moisture migrates. If you do that, cotton swabs are a controlled tool rather than a hazard.
– Liquid migration into ports: The biggest risk is using too-wet a swab. If your swab leaves visible moisture inside a seam or opening, pause and let everything dry before continuing.
– Scratching from particles: Cotton can collect grit if you don’t remove loose debris first. If you drop a dirty swab tip, switch immediately.
– Coating damage: Some lenses and screens have special coatings. If your manual warns against alcohol/solvents (or specifies a particular cleaner), follow that instead of “guessing.”
– Lint buildup: Cotton fibers can snag in rubber seals and around buttons. Use fresh swabs and do a final exterior wipe with a clean, lint-free cloth if needed.
– Not a fix for deeper issues: If your camera got salt water inside or has active corrosion, cotton swabs may not be enough—follow the manufacturer’s service/repair guidance.
A practical comparison for an action camera maintenance workflow:
| Approach | Pros | Cons / Risk |
|---|---|---|
| Cotton swabs (dry + trace-damp) | Best control for edges, seams, and port doors; low abrasion if you pre-remove grit. | Can introduce lint; wrong cleaner or too-wet swabs can wick moisture. |
| Microfiber only (no swabs) | Good for broad surfaces and fingerprints. | Less effective in button gaps and inside port door crevices; may still push grime around. |
| Compressed air + wipe | Removes loose dust with minimal contact on an action camera lens. | Doesn’t remove oily sunscreen films; can scatter grit into seams if used aggressively. |
If you’re cleaning an action camera after saltwater exposure, treat it as a “residue management” problem, not a surface wipe problem. Salt crystals can remain after quick drying and later drive corrosion at metal contacts. In 2026 practice, the safest pattern is still: remove residue carefully, keep swabs dry where possible, and let the action camera dry thoroughly before you store it.
Verdict: when cotton swabs help (and who should skip them), plus sources
Cotton swabs help most when you’re cleaning an action camera’s edges, seams, and tight spaces—and you keep the swabs dry or only trace-damp. If you follow the no-soak rule and let everything dry fully, this method is a practical way to tidy dust, sunscreen film, and mild grime without aggressive scrubbing.
That said, cotton swabs are not risk-free. They can leave fibers near rubber seals, and if you use too much moisture, the action camera’s port areas can wick liquid inward. Skip cotton swabs (or stop immediately) if your action camera manual explicitly prohibits them, if you suspect significant moisture inside critical electronics beyond surface areas, or if you see visible internal corrosion.
Sources (manufacturer/primary docs)
– official “Cleaning/maintenance” or “Care” instructions from the manufacturer’s support page or user manual.
– (e.g., what cleaners are approved and what solvents are prohibited).
– NOAA National Ocean Service: “What is salinity?” (salinity definitions and typical seawater range)
– Saltwater pool salt chlorine generator installation/specification guide (target salt concentration in ppm)
[CONCLUSION PARAGRAPH – NO HEADING]
If you keep the swab dry for most cleaning and only use a tiny amount of manufacturer-approved cleaner for stubborn spots, you can safely remove dust and grime from an action camera’s lens edges, buttons, and seams. Use the checklist to work methodically, let everything dry fully, and then reassemble with seals in place. If your manual says something different for your exact model, follow that guidance first—tell me your camera brand/model and I can help tailor the steps to its stated cleaning rules.
Frequently Asked Questions
How do I clean an action camera lens with cotton swabs without scratching it?
Power off the action camera and remove the battery if possible. Lightly dampen a cotton swab with lens-safe cleaner or 70% isopropyl alcohol, then gently wipe in small, straight motions from the center outward. Use minimal pressure and avoid swirling, which can grind debris into the glass. Finish by dry-wiping with a clean, dry swab or microfiber lens cloth if needed.
What’s the safest way to remove dirt from the action camera’s ports using cotton swabs?
Start with a dry cotton swab to lift loose dust from the USB, HDMI, or charging ports—don’t force it inside. If grime is stuck, lightly moisten the swab with isopropyl alcohol and clean carefully, then let the port dry fully before reconnecting anything. Avoid using water, and never insert cotton that can shed fibers into the port area.
Which cotton swabs are best for cleaning an action camera (lens vs. body)?
Use lint-free, foam-tipped or precision swabs for the lens and small crevices to reduce the risk of scratches and fibers. For the camera body, a standard cotton swab can work for general wipe-downs, but still keep it lightly damp to prevent liquid from seeping into seams. If your action camera is water-resistant, be extra careful not to leave moisture around seals and buttons.
Why should I avoid soaking my action camera when cleaning, and how does a swab help?
Soaking can damage internal components and compromise water-resistance seals, especially around buttons and ports. Cotton swabs let you target grime exactly where it’s stuck, using small amounts of cleaner instead of flooding the camera. This method reduces the chance of liquid intrusion while still removing mud, salt residue, and fingerprints.
What’s the best way to clean an action camera after saltwater, sand, or dust with cotton swabs?
Rinse the camera gently with fresh water first (if it’s designed for it) to remove loose salt and sand, then dry it thoroughly. Use cotton swabs to clean around the lens edges, screw areas, and button seams where salt and grit collect. After swabbing, let everything air-dry completely before sealing the case or powering the action camera back on.
📅 Last Updated: October 29, 2026 | Topic: How to Clean an Action Camera With Cotton Swabs | Content verified for accuracy and freshness.
References
- How to clean your Apple products – Apple Support
- https://www.cdc.gov/coronavirus/2019-ncov/community/organizations/cleaning-disinfection.html
- https://www.who.int/publications/i/item/cleaning-and-disinfection-of-environmental-surfaces-in-the-context-of-covid-19
- Cotton swab
- Microfiber
- Lens
- Image sensor
- https://scholar.google.com/scholar?q=action+camera+cleaning+lens+cotton+swab Google Scholar
- https://scholar.google.com/scholar?q=cleaning+camera+sensor+swab+isopropyl+alcohol Google Scholar
- https://scholar.google.com/scholar?q=optical+lens+cleaning+procedures+cotton+swab Google Scholar
