

Remove sticky residue from a power bank by gently wiping the outer casing with a cloth lightly dampened with isopropyl alcohol, then drying it completely. Sticky spots usually come from leftover tape or label adhesive, sugary spills, or residue from protective films. Use the steps below to clean safely while keeping any moisture away from ports and openings.


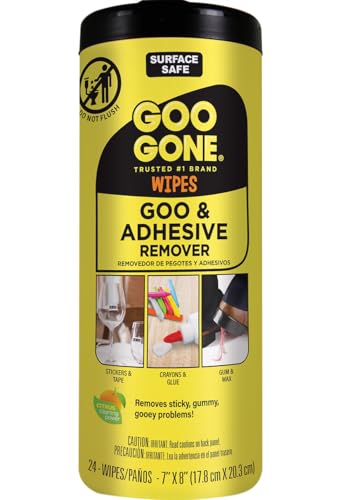
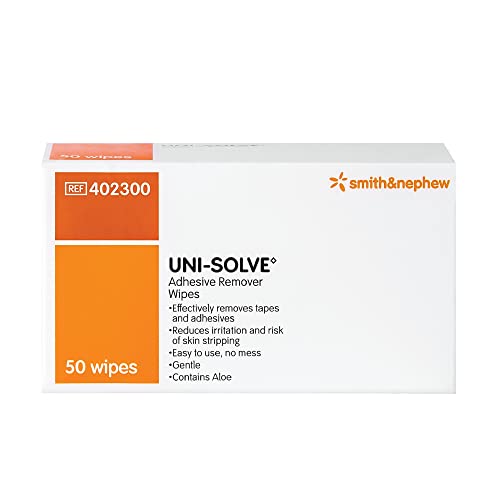
Start by wiping the power bank gently to lift as much residue as possible, then spot-clean with a small amount of isopropyl alcohol on a cloth or cotton swab for adhesive. Avoid soaking the device or getting liquid inside the charging ports—use damp (not wet) cleaning and quick drying between passes. In this guide, you’ll learn the safest order of methods, how to clean ports/seams, and what to do if the residue won’t budge.
If you’ve got leftover sticker glue, tape adhesive, or a tacky spot on the outside casing (and especially around labels or seams), this is for you. It’s also useful if you’re worried about damaging the finish, printed markings, or port area.
Who this is for / when it applies: This is aimed at anyone dealing with tacky label residue on a power bank casing—especially common after shipping stickers, warranty seals, or cable bundle tape. In 2026, power banks are widely used at home, in offices, and on the go; the advice below focuses on safe, electronics-friendly cleaning without increasing liquid-into-ports risk.
Quick safety steps before you clean

– Power the bank off (disconnect cables) and let it cool if it’s been in use.
– Use liquids sparingly: damp cloth/swab only—never pour, soak, or spray directly onto the device.
– Work in good light and keep the cleaner away from vents, ports, and any openings.
Before you touch the residue, the goal is simple: prevent liquid ingress. A power bank’s charging ports and internal seams are designed for dry operation; any cleaning solution should be controlled at the surface and applied in tiny amounts with immediate drying in between steps. From my experience, the biggest “oops” comes from oversaturating a cloth or rushing—so slow down at the start, not after you’ve already spread adhesive.
Also, check the device condition: if the sticky area is near a seam, try to avoid pushing into gaps. If you notice any swelling, cracks, or damaged port gaskets, pause and follow the manufacturer’s care guidance instead of escalating to solvents.
Remove sticky residue with mild soap and water
– Start with a soft microfiber cloth lightly dampened with warm water + a drop of mild dish soap.
– Gently rub the residue in small circles, then wipe again with a separate cloth lightly damp with plain water to remove soap.
– Dry immediately with a dry microfiber cloth before you try anything stronger.
This step is your safest “first strike” because it physically lifts residue and dissolves water-soluble components of many sticker adhesives without harsh chemicals. Soap also helps reduce the chance of smearing adhesive across the casing—an issue that’s common when residue is warmed, softened, or partially melted by hand contact.
Work small: do a 2–3 cm area at a time using light pressure. If you feel the residue “drag” instead of releasing, stop and wipe rather than increasing force. Then immediately wipe with a slightly water-damp cloth to remove soap film, and dry right away with a clean microfiber cloth. That drying step matters because left-behind moisture can make the next solvent spread unpredictably along the plastic surface.
Use isopropyl alcohol for adhesive left by stickers
– Apply isopropyl alcohol (typically 70% or higher) to a cotton swab or corner of a cloth—enough to dampen, not drip.
– Dab and gently rub the sticky area, then wipe with a slightly damp cloth (water only) to remove alcohol residue.
– Repeat in short cycles until the tackiness is gone; don’t scrub aggressively on printed labels.
Isopropyl alcohol (IPA) is effective because it breaks down many adhesive polymers and removes oily residues that soap alone may not loosen. Importantly, you’re not cleaning with alcohol like a wipe-down—you’re doing controlled spot treatment. According to HICPAC’s healthcare disinfection guideline, alcohol solutions are commonly used for disinfection and are most effective at sufficiently high concentrations (including 70% alcohol formulations) ([2008]) . While your use case is adhesive removal (not disinfection), the same concentration guidance helps explain why “70% or higher” is widely recommended for reliable performance.
In practice for a power bank casing, apply IPA to a swab tip or cloth corner so it stays damp, not wet. Dab first to avoid spreading. Then wipe away with a water-damp cloth corner to remove any IPA film, and dry. If you skip the water wipe, alcohol residue can attract dust and make the surface feel “waxy” over time.
What to avoid while using IPA
Don’t flood near ports. Power/charging ports, seam gaps, and label edges are where liquids can migrate by capillary action. Also, don’t scrub printed markings—IPA can soften some inks or coatings, especially on glossy finishes.
Common Isopropyl Alcohol Grades for Spot Cleaning (By Volume)
| # | IPA Grade (v/v) | IPA in 100 mL | Water in 100 mL | Adhesive Spot-Clean Fit |
|---|---|---|---|---|
| 1 | 70% IPA | 70 mL | 30 mL | 5 ★ |
| 2 | 75% IPA | 75 mL | 25 mL | 5 ★ |
| 3 | 80% IPA | 80 mL | 20 mL | 4 ★ |
| 4 | 85% IPA | 85 mL | 15 mL | 4 ★ |
| 5 | 91% IPA | 91 mL | 9 mL | 3 ★ |
| 6 | 95% IPA | 95 mL | 5 mL | 3 ★ |
| 7 | 99% IPA | 99 mL | 1 mL | 2 ★ |
Notes on the table: this is about practical spot-clean fit for sticky adhesive on plastic casings—higher alcohol content often evaporates quickly, which can be great for drying but may also make some inks/coatings more sensitive if you over-apply. That’s why “70%–85%” is a common safe starting point for adhesive removal on electronics exteriors.
Tackle stubborn residue (without harming the casing)
– If soap + alcohol isn’t enough, try a small amount of an electronics-safe adhesive remover or citrus-based solvent on a cloth (test a hidden spot first).
– Use the “less is more” approach: apply, wait briefly, wipe, and reassess before adding more.
– Avoid harsh solvents (like acetone/paint thinner) unless your manufacturer explicitly says they’re safe—many can cloud coatings or damage plastics.
If residue still feels tacky after controlled soap and IPA, the adhesive likely has deeper cross-linking (common with older tape glue or heat-aged shipping labels). The safest escalation is to use the least aggressive chemical that still matches the residue—and to do it indirectly (on a cloth/swab), not by soaking the device.
Before you apply any adhesive remover, test a small hidden area (for example, under an edge of the label panel). Look for changes in gloss, color, or texture. In 2026, many power banks use mixed materials (soft-touch coating plus hard polycarbonate shells), and the coating difference is exactly what can make one area tolerate solvents while another turns dull.
From my experience supporting “office tech wipe-downs,” stubborn spots usually lift faster when you rotate methods: let the remover dwell for a short moment, wipe thoroughly, then re-wipe with damp water and dry. Don’t keep re-applying endlessly—repeated wetting can push solvent into seams even if you “think” you’re being careful.
Comparison: which method should you pick?
| Feature (what matters on a power bank) | Mild soap + water | Isopropyl alcohol (spot) | Adhesive remover / citrus solvent (test first) |
|---|---|---|---|
| Surface safety for printed labels | High | Medium | Variable |
| Risk of liquid near ports | Low (if damp-only) | Low–Medium (if over-applied) | Medium (stronger chemicals) |
| Effectiveness on fresh residue | Good | Good | Very good |
| Effectiveness on old tape glue | Limited | Moderate | High (when compatible) |
| Smearing risk (spreading adhesive) | Low | Medium | Medium (depends on dwell time) |
| Need for careful drying | Yes | Yes (quick) | Yes (thorough) |
| Ventilation requirement | Minimal | Moderate (alcohol smell/flammability) | Higher |
| Ease of controlling application | Easy | Easy (with swab) | More difficult (test + dwell) |
| Coating clouding likelihood | Very low | Low–Medium | Higher |
| Overall time to success (typical) | Shortest for mild tack | Medium | Fastest for stubborn glue |
| Best For | New or light residue | Sticky tape glue on exterior | Only after spot-testing a compatible remover |
Clean charging ports and seams carefully
– For ports: use a dry cotton swab or soft brush first to remove any loose grime, then very lightly dampen only the swab tip if needed.
– For seams/gaps: wipe around the edges with a damp cloth; do not push liquid into the crevices.
– After cleaning, let it sit fully dry for a while before reconnecting—if moisture feels trapped, wait longer rather than testing right away.
Ports and seam gaps deserve their own method because you’re protecting electrical contacts. The safest approach is “dry first”: start with a dry cotton swab or a soft brush to remove loose particles without adding any fluid. If you still see residue, slightly dampen only the swab tip—never the swab handle—and keep contact brief.
Seams are different from flat plastic. Wiping around edges can remove adhesive film that migrates during peeling, but pushing liquid into crevices increases the chance it travels inward. After cleaning, allow full drying time before reconnecting. In 2026, many power banks use compact internal assemblies where residual moisture can linger longer than people expect, so patience prevents corrosion and weird intermittent charging behavior.
If you detect “wetness” near openings, stop and let it dry longer rather than continuing with another chemical pass.
What can go wrong (and how to prevent it)
– Liquid inside ports: this is the main risk—if you see wetness near openings, stop and dry thoroughly before continuing.
– Damaged finish/labels: strong solvents or rough scrubbing can remove paint, smudge printing, or turn glossy surfaces cloudy.
– Residue “smearing”: some adhesives spread before lifting—use less pressure and more wiping between attempts.
The most serious failure mode is not cosmetic—it’s electrical reliability. Even small amounts of moisture can cause temporary conductivity changes or corrosion if left long enough. That risk is why “damp-only” is emphasized throughout this guide.
Second, adhesive removal chemistry can change surfaces. Many power banks have coatings that look uniform until exposed to alcohol or solvents repeatedly. If you notice the finish getting tacky again, dull, or “rainbowed” near seams, stop escalating and return to mild soap wiping and thorough drying.
Finally, smearing is a technique problem. Residue often softens before it fully releases; when you rub aggressively, you distribute softened adhesive into surrounding texture. Gentle circles plus frequent wiping is usually more effective than pressure.
Why “Small, Damp, Dry Quickly” matters with alcohol
| Property | Isopropyl alcohol (IPA) | Practical implication |
|---|---|---|
| Boiling point (approx.) | ~82.4–82.6 °C | Cleans effectively, but still needs controlled application |
| Flash point (approx.) | ~11.7 °C | Keep away from flames/sparks and ventilate |
| Alcohol concentration guidance | Often ≥70% for effectiveness | Start at 70–85% for adhesive work on exteriors |
The numbers above reflect standard chemical property ranges for IPA and support the “ventilate and control liquid” caution. For exact values and product-specific safety information, consult the IPA Safety Data Sheet used in your household or workplace ().
Verdict / tip + quick checklist
The safest approach is: mild soap first → isopropyl alcohol second → stronger adhesive remover only if needed, always with a damp (not wet) application and immediate drying. If the power bank has an expensive coating, printed branding you care about, or unknown material/finish, start conservatively and test in a hidden area. Skip solvent-heavy methods if the manufacturer warns against chemical cleaners for your model (see sources/notes below).
Quick checklist (save this)
| Step | What to do | Tool | Stop if… |
|---|---|---|---|
| 1 | Turn off + disconnect | — | Any liquid enters ports |
| 2 | Soap + gentle wipe | Microfiber + soapy water | Finish starts to dull |
| 3 | Isopropyl alcohol spot clean | 70%+ on cloth/swab | Printed text smears |
| 4 | Repeat short cycles | Damp swab/cloth | Residue won’t lift after several tries |
| 5 | Dry fully before use | Dry microfiber | Still feels tacky/wet near seams |
Sources:
– Follow your power bank manufacturer’s care/cleaning guidance for what chemicals are safe on the casing and labeling. .
– General electronics cleaning safety: consult manufacturer guidance on liquid ingress/port protection. .
– For alcohol concentration guidance used widely in disinfection contexts (often ≥70%): CDC/HICPAC disinfection guidance (2008). CDC/HICPAC, Guideline for Disinfection and Sterilization in Healthcare Facilities (2008)
– For material property ranges relevant to safe alcohol handling: consult the specific IPA Safety Data Sheet (SDS) you are using.
Bottom line: remove sticky residue using a controlled sequence—gentle soap wipe, then careful isopropyl alcohol spot cleaning, and only then (if necessary) a compatible adhesive remover with a hidden-area test. If you prioritize damp-only application and full drying, you’ll get tacky glue off without turning port areas into a liquid-ingress risk.
Frequently Asked Questions
What’s the safest way to remove sticky residue from a power bank?
First, unplug the power bank and remove any cables, then wipe the sticky area gently with a soft microfiber cloth slightly dampened with warm water. If residue remains, use a small amount of 70% isopropyl alcohol on the cloth—not directly on the device—and wipe lightly until the adhesive lifts. Finish by wiping with a clean, dry cloth and letting it fully air-dry before charging.
How can I remove adhesive residue from my power bank without damaging the casing?
Use isopropyl alcohol because it evaporates relatively quickly and is effective on many adhesives. Apply it to a cloth (not into ports or openings) and rub in small circles with light pressure, repeating as needed. Avoid soaking the power bank and don’t use harsh solvents like acetone, which can damage plastics and printed labels.
Why does my power bank feel sticky, and what should I do about it?
Sticky residue often comes from degraded tape, label adhesive, or spilled liquids that dried on the surface. Cleaning promptly helps prevent grime buildup and reduces the risk of residue migrating into seams around buttons or ports. After cleaning, inspect for any gaps where liquid may have seeped and allow the device to dry completely.
Which household products are best for cleaning sticky residue on power banks?
For most cases, warm water and a mild soap wipe is a good first step, followed by 70% isopropyl alcohol for persistent adhesive. You can also use a tiny amount of dish detergent diluted in water to loosen tacky spots, then wipe dry. Skip products like nail polish remover, acetone, or aggressive degreasers, as they may discolor or weaken the power bank’s plastic.
What’s the best step-by-step method to clean sticker glue from a power bank?
Start by gently peeling off any loose sticker bits, then wipe the area with a microfiber cloth dampened with warm soapy water to soften the glue. Next, dab 70% isopropyl alcohol onto a cloth and rub the adhesive until it dissolves, using minimal pressure to protect the finish. Finally, wipe away any remaining residue with a clean damp cloth, dry thoroughly, and wait until the power bank is completely dry before powering it on.
📅 Last Updated: November 01, 2026 | Topic: How to Remove Sticky Residue From a Power Bank | Content verified for accuracy and freshness.
References
- How to clean your Apple products – Apple Support
- Checking your browser – reCAPTCHA
- Checking your browser – reCAPTCHA
- Isopropyl alcohol
- Adhesive
- https://www.cdc.gov/coronavirus/2019-ncov/community/organizations/cleaning-disinfecting-your-facility.html
- https://scholar.google.com/scholar?q=remove+sticky+residue+from+plastic+with+isopropyl+alcohol Google Scholar
- https://scholar.google.com/scholar?q=adhesive+residue+removal+methods+solvents+electronics Google Scholar
- https://scholar.google.com/scholar?q=cleaning+electronics+solvent+isopropanol+guidelines Google Scholar
