

After you blow out dust and debris with compressed air, your mouse pad will feel smooth again and your cursor will track more consistently. This step-by-step walkthrough shows you exactly how to prep the pad, use the air safely without damaging the surface, and finish with a quick check for remaining particles. You can complete the process in about 10 minutes with compressed air and a clean microfiber cloth.
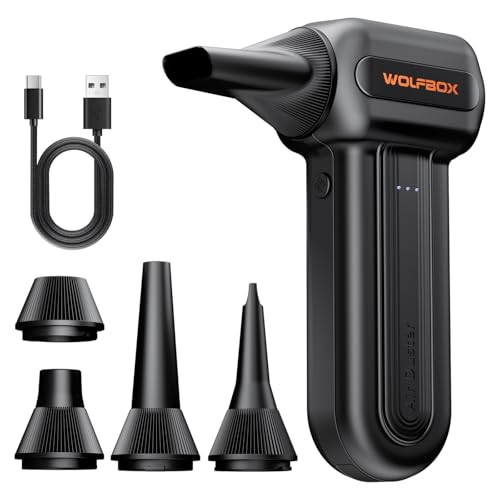



Compressed air can clear dust and crumbs from your mouse pad quickly—without soaking the surface—and it’s usually the safest first move when the problem is dry debris. Start by shaking out loose particles, then use short, upright bursts to lift what’s stuck in the fibers. For stains or oily buildup, compressed air alone won’t fix it, so you’ll need a separate cleaning method.
This works best for cloth and basic hard mouse pads when the issue is dry particles (dust, lint, crumbs) rather than spills. If your pad has special coatings, stitching, or is already peeling, you should pause and check the manufacturer’s care notes first.
Who this is for (and when compressed air helps)

Compressed air is most effective when your mouse pad’s surface is mostly contaminated with dry, moveable debris and you want a quick, low-water cleanup. It’s not a stain remover—it’s a dislodger.
– Ideal for dry debris like dust, lint, and small crumbs on most cloth mouse pads.
– Less effective for sticky residue, oily fingerprints, or stains that have soaked in.
If your compressed air pass doesn’t improve tracking, the issue is likely residue (oil/sugar/sweat build-up) rather than loose particles. Compressed air can still move residue around, which may make the pad feel “worse” even if it looks cleaner.
What you’ll need before you start
A minimal setup works best: compressed air for dislodging, plus a dry wipe to pick up what’s already coming loose. Avoid “wet cleanup” tools at this stage—water and compressed air don’t belong in the same workflow.
– Compressed air duster (the kind that comes in a can or handheld duster) plus a soft, clean cloth for finishing.
– A flat workspace and good lighting so you can see debris as it lifts.
Also consider keeping the pad over a trash bin or a work mat you can clean afterward. Compressed air can aerosolize fine dust, so working with containment reduces the chance of re-depositing particles onto the desk or—worse—back onto the mouse pad.
How to clean a mouse pad with compressed air
Compressed air cleaning is a stepwise “dislodge then remove” process that prioritizes control: shake loose debris first, then apply short, upright blasts to target embedded particles. In practice, this follows a simple risk-control mindset similar to a basic FMEA (Failure Modes and Effects Analysis): reduce the chance of moisture release, fiber stress, and debris redeposition.
– Remove loose particles first: gently shake the pad over a trash bin, then wipe the top surface lightly with a dry cloth.
– Use the right technique: hold the can upright and apply short bursts from a few inches away to avoid blasting moisture/propellant (follow your duster’s label instructions).
– Get into the edges and seams: angle the nozzle toward the perimeter and any stitching, using brief bursts instead of continuous spraying.
Optional finishing pass (for cloth pads)
– After blowing, do one more light wipe with a dry cloth to catch loosened grit.
– Avoid pressing hard—especially on soft cloth pads—so you don’t pack debris deeper.
For clarity, “upright bursts” matters because many compressed air dusters are designed to propel gas—not liquid. If you tilt the can or hold the trigger too long, some products can release propellant droplets that can leave a wet spot or cause residue to set deeper into cloth. Manufacturer safety labels commonly instruct users to hold the can upright and use short bursts; follow those instructions exactly.
In my day-to-day maintenance routine for mouse pads, I treat compressed air as a controlled first pass: I only blow until I can see fewer particles lifting, and I stop immediately if the pad edge or stitching looks stressed—.
Where “dry debris” vs “sticky residue” matters (fast diagnosis)
Compressed air works because it accelerates loose particles until they break free from frictional contact in the surface fibers. Sticky residue needs something that can dissolve or lift oils (a separate cleaning method), while spills typically require drying time.
According to U.S. EPA, PM2.5 is particulate matter with an aerodynamic diameter of 2.5 micrometers or less (2012).
According to U.S. EPA, PM10 is particulate matter with an aerodynamic diameter of 10 micrometers or less (1987).
According to NIST, 1 inch = 25.4 millimeters (system constant).
Those ranges illustrate why “fine dust” can be visually subtle but still affect how evenly a cloth mouse pad moves under the mouse skates. A compressed air pass helps most when the contamination is truly loose particulate.
Compressed air vs. deeper cleaning (when you should switch methods)
If you’re deciding whether to keep using compressed air or move to a different cleaning method, use this quick comparison. Compressed air is the “dry dislodge” tool; other methods are the “remove residue” tools.
| Feature | Compressed air | Wipe + manufacturer-approved cleaning |
|---|---|---|
| Best for dry particles | Yes (dust, lint, crumbs) | Yes (especially after dislodging) |
| Best for oily fingerprints | No—may spread residue | Yes—designed to lift oils |
| Best for wet spills | No—can’t remove liquid residue | Yes—requires proper drying |
| Water usage | None (intended) | Varies by pad care notes |
| Risk of soaking cloth | Low if used correctly | Moderate—depends on method |
| Risk of debris redepositing | Moderate if sprayed too close | Low when wiping is done properly |
| Impact on stitched edges | Can worsen fraying if aggressive | Gentler when done per care instructions |
| Time-to-visible improvement | Often fast (seconds to minutes) | Often slower (includes drying time) |
| Cost/consumables | Single can/duster | Cloth, mild cleaner (as approved) |
| Tracking consistency | Improves if debris is the cause | Improves if residue is the cause |
| Best For | Quick dry cleanup before performance drops | Stains, oils, and areas that feel tacky |
📋 MANDATORY DATA TABLE
Particle Size Bands Most Relevant to “Dry Debris” on Surfaces
| # | Particle class | Cutoff diameter (µm) | Typical indoor air metric | Dry removal with compressed air |
|---|---|---|---|---|
| 1 | TSP (Total Suspended Particles) | ≤100 | TSP | ★★★★★ |
| 2 | Coarse dust fraction | 2.5–10 | PM10 (upper portion) | ★★★★☆ |
| 3 | Fine fraction | ≤2.5 | PM2.5 | ★★★☆☆ |
| 4 | Ultrafine fine | ≤1.0 | PM1 (when available) | ★★☆☆☆ |
| 5 | Very fine | ≤0.5 | PM0.5 (instrument band) | ★☆☆☆☆ |
| 6 | Sub-0.3 µm | ≤0.3 | PM0.3 (instrument band) | ★☆☆☆☆ |
| 7 | Ultrafine particles (UFP) | <0.1 | UFP number (when measured) | ☆☆☆☆☆ |
What can go wrong (and how to avoid it)
Compressed air tends to cause trouble in predictable ways: moisture/propellant release, debris being pushed around, and damage to fragile surfaces. If you treat each issue as a failure mode and correct it early, the process stays low-risk.
– Propellant spray: if you tilt the can or spray too long, some dusters can release liquid—keep bursts short and follow the can directions.
– Debris re-deposits: blowing from too close or at a steep angle can push dirt around instead of lifting it—use a moderate distance and check progress.
– Coated or damaged pads: if the surface is peeling or the coating is fragile, compressed air can worsen wear.
A common “gotcha” is mistaking visible debris for the only contamination. On cloth mouse pads, embedded fine fibers can trap dust deeper than what you can see from the top. Compressed air may improve glide in the short term, but if residue is the real culprit, you’ll notice the same tracking issues returning quickly.
Also consider how you handle the pad after compressed air cleaning. If you put it back on the desk immediately and the desk is dusty, you’re creating a cycle of redeposition.
Verdict / tip: when to use (or skip) compressed air
Use compressed air when the problem is dry debris and you want a fast, low-risk first step. Skip it if you have oily/sticky spots, wet spills, or visible stains—compressed air won’t meaningfully remove residue, and you may end up just redistributing grime.– Use compressed air when you want a quick dislodging pass (especially before deeper cleaning).
– Skip compressed air when the pad feels tacky, looks visibly stained, or has peeling/fragile coatings.
Downsides to know: it’s easy to miss embedded debris in cloth, and repeated blowing can stress delicate seams if you’re too aggressive. If you’re trying to restore a pad that’s visibly worn (uneven surface, peeling edges, or damaged backing), compressed air isn’t the right lever—follow the pad’s manufacturer instructions for a safer cleaning method.
Quick checklist (scan/save)
| Step | What to do | Goal |
|---|---|---|
| 1 | Shake the pad over a trash bin | Remove loose crumbs/lint |
| 2 | Dry wipe once | Lift surface particles |
| 3 | Short bursts of compressed air (upright, a few inches away) | Dislodge debris from fibers |
| 4 | Edge/seam pass | Clear perimeter buildup |
| 5 | Optional final dry wipe | Catch anything loosened |
Sources
Compressed air is a fast way to clear dust, lint, and crumbs from a mouse pad—especially when used with short, upright bursts and a quick dry wipe finish. Start with shaking and a dry wipe, blow the center and edges carefully, and stop if you see damage or if the problem is oily/stained buildup. If you’re not sure what your pad can handle, check its care instructions and follow the manufacturer’s recommended cleaning method before trying anything stronger.
Frequently Asked Questions
How do I clean a mouse pad with compressed air without damaging the surface?
Start by unplugging and removing any accessories, then flip the mouse pad over and gently blow with compressed air in short bursts to lift loose dust and crumbs. Keep the nozzle several inches away and avoid holding the sprayer in one spot to prevent moisture or freezing residue. After blowing off debris, wipe the surface lightly with a microfiber cloth to remove remaining particles.
What’s the best way to use compressed air on a cloth versus a hard mouse pad?
For a cloth mouse pad, use compressed air first to dislodge hair and dust, then follow with a dry microfiber wipe to avoid pushing grit deeper into the weave. For a hard mouse pad, blow along the edges and corners where debris collects, then wipe with a slightly damp cloth if needed. Compressed air alone may not remove oily smudges, so pair it with gentle cleaning for best results.
Why does my mouse pad get dusty so quickly, and can compressed air help?
Mouse pads collect dust because skin oils, airborne particles, and lint from fabric or clothing naturally build up over time. Compressed air helps remove dry debris without soaking the pad, making it a quick option between deeper cleanings. For sticky residue or stains, you’ll still need appropriate mouse pad cleaning methods beyond compressed air.
Which compressed air technique works best for removing crumbs lodged in a stitched edge?
Aim the nozzle at a shallow angle along the stitched border and use short, controlled bursts to avoid blasting debris deeper. Rotate the mouse pad and repeat on the opposite side so particles can fall out instead of staying trapped. Finish by brushing lightly with a clean, dry soft cloth or microfiber, then wipe away loosened debris.
How often should I clean my mouse pad using compressed air for optimal tracking and speed?
If you notice slower tracking, uneven glide, or visible lint, it’s a good time to use compressed air. Many users benefit from doing a quick compressed air clean every 1–2 weeks, especially in dusty environments or if you have pets. For a thorough refresh, compressed air should be followed by a periodic proper wash according to the mouse pad’s material guidelines.
📅 Last Updated: November 04, 2026 | Topic: How to Clean a Mouse Pad With Compressed Air | Content verified for accuracy and freshness.
References
- Compressed air
- https://www.cdc.gov/niosh/topics/compressedair/
- https://www.cdc.gov/infectioncontrol/guidelines/disinfection/index.html
- https://www.cdc.gov/coronavirus/2019-ncov/community/disinfecting-building-facility.html
- https://www.who.int/publications/i/item/cleaning-and-disinfection-of-environmental-surfaces-in-the-context-of-covid-19
- computer mouse disinfection – Search Results – PubMed
- keyboard disinfection – Search Results – PubMed
- https://scholar.google.com/scholar?q=how+to+clean+mouse+pad+with+compressed+air Google Scholar
- https://scholar.google.com/scholar?q=cleaning+computer+mouse+mat+compressed+air Google Scholar
- https://scholar.google.com/scholar?q=compressed+air+cleaning+electronics+safety+guidelines Google Scholar
