

Car leather seats can crack, fade, or turn tacky if you disinfect them with harsh sprays or too much moisture. The usual mistake is reaching for alcohol, bleach, or all-purpose cleaners that are not leather-safe. Follow a careful step-by-step method using the right wipes, a gentle leather cleaner, and conditioning afterward, and you can sanitize seats thoroughly in about 30 minutes without compromising the finish.



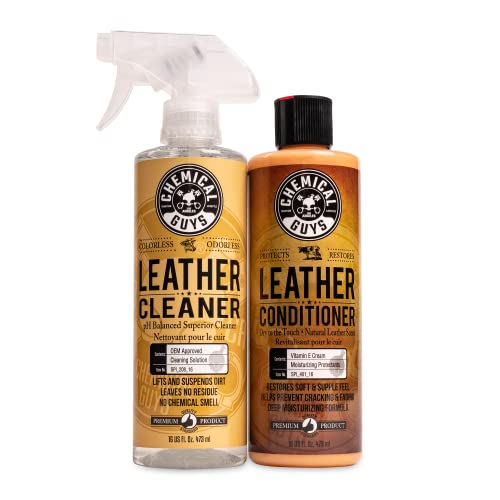
Disinfecting car leather seats is mainly about using a leather-safe cleaner/disinfectant after you fully remove dirt, then drying and conditioning to prevent cracking. This guide walks you through safe prep, disinfection options that won’t destroy leather finishes, and the finishing steps that keep seats looking normal.
If your seats get smudgy, smell musty, or you’re dealing with everyday germs (kids/pets/frequently touched areas), this is the right approach. If the leather is unsealed, peeling, or your goal is mold remediation, you’ll likely need a different plan—see the “What can go wrong” section.
Gather supplies and confirm it’s real leather

Use the right products from the start by confirming the seat material and verifying what the manufacturer allows. Leather finishes vary a lot, and “disinfectant-safe” can mean different things depending on whether you’re working with finished leather, an unsealed surface, or a leatherette/vinyl blend.
Start by checking your owner’s manual or the seat tag for cleaning and disinfection instructions. If the manual says “no alcohol,” “no solvents,” or “use only leather conditioner,” that’s your boundary. If the manual is missing, the safest fallback is to look for a product explicitly labeled as safe for leather (not just “safe for interiors”), and avoid anything with bleach. In 2026, EPA-registered disinfectants still rely on label-specific instructions—including contact time and whether residue must be removed—so treat the label as part of the procedure, not optional reading.
Next, confirm the seat type:
– Finished leather (most common in cars): Has a protective topcoat that helps repel moisture and makes wipe-down disinfection more predictable.
– Unsealed/low-finish leather: Can absorb liquids and may discolor or accelerate wear when disinfected.
– Leatherette/vinyl blend: Can tolerate more harsh cleaners, but the goal is still to avoid over-wetting seams and perforations.
For tools, plan for gentle removal and controlled application:
– Microfiber cloths (multiple for separate stages)
– A pH-balanced leather cleaner (for dirt/oils)
– A disinfectant labeled safe for leather (or specifically “safe for leather interiors”)
– Soft brush (optional) for texture/creases
– Clean, dry towel(s) for blotting if you accidentally over-wet
Disinfectant chemistry options that are commonly compatible with leather-safe, wipe-on use
| # | Disinfectant active (common formulation) | Typical strength | Finish safety rating | Best for |
|---|---|---|---|---|
| 1 | Ethanol-based disinfectant | 70% v/v | ★★★★☆ | Quick wipe disinfection |
| 2 | Isopropyl alcohol-based disinfectant | 70% v/v | ★★★☆☆ | Spot-touch disinfection |
| 3 | Hydrogen peroxide disinfectant | 0.5% w/v | ★★★★☆ | Odor & germ load management |
| 4 | Quaternary ammonium disinfectant (quat) | ~0.1% active | ★★★★☆ | Wipe-on, residue-aware use |
| 5 | Accelerated hydrogen peroxide (AHP) | 0.5% w/v (active) | ★★★★☆ | High-touch zones |
| 6 | Lactic acid disinfectant formulations | ~0.1–0.2% active | ★★☆☆☆ | Only if leather-safe label is explicit |
| 7 | Mixed-disinfectant interior cleaner | Label-specific | ★★★★☆ | Follow “safe for leather” instructions |
Note: Contact time and dilution must follow your specific product label. These chemistry-based options are included to help you choose the right category, not to override manufacturer instructions.
Clean first (before disinfecting)
Clean first because disinfectants generally work best on surfaces that are free of visible soil. If you skip cleaning, body oils, sunscreen residue, and embedded dust can protect germs and also increase the chance of staining or dulling your car leather seats.
Start with vacuuming: remove loose crumbs, grit, and pet hair so you don’t grind particles into the leather’s grain when you wipe. Next, use a pH-balanced leather cleaner to lift grime and body oils. Leather cleaners are usually formulated to be less aggressive than general-purpose detergents; they help avoid topcoat stripping while still breaking down grime.
After cleaning, follow the cleaner directions for whether you should wipe with a damp cloth. Then let the seats dry fully—wet leather plus disinfectant increases the risk of water-driven discoloration and can weaken seams over time.
From my experience, the fastest way to preserve appearance during disinfection is to slow down at this stage: make sure the leather is actually clean and mostly dry before you disinfect.
Disinfectants are judged by two variables: whether the surface is compatible with the chemistry and whether you respect the label’s dwell/contact time. According to the U.S. Environmental Protection Agency’s disinfectant guidance process, efficacy claims rely on the product meeting performance requirements under specified conditions, including label instructions for contact time (U.S. EPA disinfectant label guidance). That’s why the “clean first” step matters as much as the disinfectant selection.
Disinfect with leather-safe methods
Disinfect using a leather-labeled product so you kill germs without stripping the topcoat or over-drying the hide. The safest method is typically wipe-on application that stays controlled, then residue removal only if the label requires it.
Choose a disinfectant product that is explicitly labeled safe for leather, and follow the label’s dilution and contact time exactly (check the “Dwell time” or “Leave on for” line). If the label states a specific dwell time (for example, 1–10 minutes depending on the organism), you must keep the treated area visibly wet for that period. If you can’t keep it wet without soaking, use fewer passes and re-wipe in smaller sections.
Prefer wipe-on application over spray-and-blanket coverage. Spraying increases the odds that liquid runs into stitching, piping, and seams. It can also reach areas you don’t want disinfected (like foam edges) where moisture control is harder.
If you’re using disinfecting wipes, use firm, light pressure—don’t scrub aggressively. Some wipes leave residue; if the label indicates a residue-removal step, re-wipe with a clean, slightly damp microfiber cloth and then dry.
This approach aligns with how real-world germs behave on surfaces. For example, a peer-reviewed study found SARS‑CoV‑2 can remain viable on plastic and stainless steel surfaces for up to 72 hours under experimental conditions (van Doremalen et al., NEJM, 2020). Clean + labeled disinfectant contact is what closes that gap without damaging your car leather seats.
Which method protects leather best?
If you’re deciding between “leather-safe labeled disinfection” and “general household disinfecting,” the right choice is usually the one that explicitly accounts for leather finish compatibility.
| Feature | Leather-safe labeled disinfectant (recommended) | Household disinfectants without leather approval (riskier) |
|---|---|---|
| Surface compatibility | Designed to be safe on leather finishes when used as directed | Often formulated for nonporous hard surfaces; leather coatings may react |
| Residue control | Label may specify “wipe off” if needed to avoid tackiness | Residue can dull or feel sticky, attracting dust |
| Dwell/contact time | You can follow label dwell time without over-wetting | May require long wet dwell that soaks leather |
| Color stability | Less likely to lift dyes when used correctly | Higher risk of dye transfer or uneven lightening |
| Stitch and seam safety | Wipe-on reduces liquid migration into seams | Sprays run into seams and can weaken edges with repeated wetting |
| Odor after treatment | Typically neutralizes without trapping moisture | Can create lingering chemical odor or musty smell if moisture stays trapped |
| Leather drying behavior | Drying still required, but application is more controlled | Often over-wets, leading to brittleness and cracking risk |
| Ease of patch testing | More compatible with small test areas | Patch results can be unpredictable across seat sections |
| Maintenance compatibility | Works with routine conditioning to restore suppleness | May require more aggressive correction and can permanently affect finish |
| Overall result on car leather seats | Cleaner feel, reduced odor risk, and better visual retention | Higher chance of dulling, color shift, and “dry” texture |
| Best For | Everyday disinfection on intact, finished leather surfaces | Hard nonporous surfaces only, not leather seats |
Dry thoroughly and condition after treatment
Dry immediately and condition once dry to keep car leather seats supple. Disinfection is only half the job—moisture management and conditioning are what prevent cracking and fading over time.
Air-dry with windows cracked or ventilation running, especially if you used wipes or applied multiple passes. Avoid blasting heat directly onto the leather (no hot hair-dryer focus), because localized drying can create uneven texture. If you’re treating a full bench, work in sections so you can keep track of what’s already dry.
Once the leather feels completely dry to the touch (no cool dampness), apply a leather conditioner. This step replenishes oils and flexibility that cleaning/disinfection can strip from the finish. Use thin layers and buff off excess so conditioner doesn’t feel sticky or attract dust.
If your seats have any perforations, check for trapped moisture near the edges. According to general microbiology guidance on contamination and surface transmission, moisture and residues can help microorganisms persist longer in some scenarios—so dryness isn’t only cosmetic; it’s part of keeping car leather seats hygienic (CDC guidance on environmental cleaning for infectious agents).
What can go wrong (and how to avoid it)
You can avoid most problems by respecting material compatibility, controlling liquid quantity, and finishing with conditioning. The common failures here aren’t “bad luck”—they’re predictable mistakes that damage leather topcoats or leave moisture behind.
First, skipping the cleaning step is a performance problem. Dirt and oils can shield germs and reduce disinfectant contact effectiveness, so you end up with less safety and sometimes more staining.
Second, harsh chemicals are the biggest appearance risk. Bleach, strong solvents, and “spray-and-forget” cleaners not meant for leather can strip dyes or topcoat polymers, leaving a dull, uneven surface. Even when a chemical disinfects, it may still be incompatible with your leather’s finish.
Third, over-wetting and rushing drying can weaken seams. Car interiors cycle through heat and humidity, so repeated wetting can accelerate edge fraying. Instead, apply disinfectant as wipe-on layers and allow full air drying before conditioning.
Finally, treating unsealed or peeling leather can accelerate deterioration. If your seats are already cracking, flaking, or peeling, disinfecting won’t fix the underlying structural problem. Stop and reassess—sometimes the correct response is professional refurbishment or remediation.
Verdict: best-practice approach (and who should skip)
The best-practice way to disinfect car leather seats is clean first, then use a disinfectant explicitly labeled for leather, and finish with thorough drying plus conditioning. This method balances hygiene with finish protection, and it’s the most repeatable approach for intact, finished leather.
To choose quickly between “label-safe disinfection” and “shortcuts,” use this decision comparison:
| Criteria | Clean → leather-safe disinfectant → dry + condition | Skip cleaning / use unapproved chemicals |
|---|---|---|
| Germ control reliability | Higher when label dwell time is respected | Lower if soil blocks contact or dwell time can’t be maintained |
| Finish protection | Designed to preserve topcoat look and feel | Higher chance of dulling and color shift |
| Moisture risk | Controlled application; drying plan included | Over-wetting can trap moisture in seams |
| Conditioning effectiveness | Conditioner restores flexibility after cleaning/disinfection | May still leave leather dry if finish got stripped |
| Residue/tackiness | Residue removal follows label if required | Residue can attract dust and cause uneven sheen |
| Stitch/seam safety | Wipe-on reduces liquid migration | Sprays and soaking can creep into seams |
| Repeatability in 2026 | Label-safe approach works with most regular cleaning cycles | Likely to compound finish damage over time |
| Patch test outcomes | More predictable on intact, finished leather | May fail even after a small test if chemistry is incompatible |
| Best for “everyday germs” | Yes—especially high-touch areas on intact leather | Not recommended for leather seats |
| Verdict | Safer for appearance and hygiene when the leather finish is intact | Higher chance of long-term leather damage and inconsistent disinfection |
This method is the safest general way to disinfect car leather seats without turning the finish dull or brittle: clean first, use a leather-labeled disinfectant, then dry and condition. Skip this approach if your leather is already cracking/peeling, the upholstery is extensively damaged, or you need certified remediation for significant biological growth—those cases often require professional evaluation.
Quick scan checklist (save this)
| Step | What to do | Stop/Watch for |
|---|---|---|
| 1 | Confirm leather type + check manual | No compatible products listed |
| 2 | Vacuum debris | Don’t scrub grit into leather |
| 3 | Clean with leather-safe cleaner | Stains not lifting → reassess |
| 4 | Disinfect only after cleaning | Don’t soak; follow label contact time |
| 5 | Dry fully | Avoid direct heat |
| 6 | Condition once dry | Sticky feel or residue → buff/remove |
Frequently Asked Questions
How do I disinfect car leather seats without damaging the leather?
Start by vacuuming and removing loose dirt, then use a pH-balanced leather cleaner to disinfect gently. For disinfection, apply a light mist of 70% isopropyl alcohol onto a microfiber cloth (not directly onto the seat) and wipe small sections, allowing it to air-dry fully. Avoid soaking the leather, harsh bleach, or ammonia-based cleaners, since they can dry out leather and cause cracking.
What’s the best way to clean and disinfect car leather seats after spills or germs?
Blot spills immediately with a clean cloth, then clean the area with a leather-safe cleaner to remove residues that can trap microbes. After cleaning, disinfect by wiping the surface with a minimal amount of 70% isopropyl alcohol on a cloth, followed by a second pass with a damp cloth to remove any remaining film. Finish with a leather conditioner to restore moisture and reduce the risk of dryness.
Why is disinfecting car leather seats different from cleaning vinyl or fabric?
Leather is porous and can absorb chemicals, so aggressive disinfectants used on fabric or vinyl may damage the finish or alter the material. Leather also dries more easily than other interior surfaces, meaning frequent use of strong alcohols or detergents can lead to cracking. That’s why it’s important to use a leather-safe cleaner first and apply disinfectants sparingly, focusing on surface contact time and gentle wiping.
Which disinfectant is safe for car leather seats?
In most cases, 70% isopropyl alcohol is a commonly used option because it can disinfect effectively while being easier to control than harsher chemicals. Always test any disinfectant in a hidden area first and use it on a cloth rather than spraying directly to avoid over-saturation. If you prefer a dedicated approach, look for a “leather-safe” disinfectant or a leather cleaner with disinfecting properties, and confirm it’s suitable for leather in the label directions.
What’s the correct step-by-step process to disinfect car leather seats during cold and flu season?
Begin with vacuuming and wiping down the seats to remove dust and oils, since dirt can reduce disinfectant effectiveness. Clean using a pH-balanced leather cleaner, then disinfect high-touch areas (armrests, seat belts near the buckle, and headrest surfaces) with a cloth lightly dampened with 70% isopropyl alcohol, letting it air-dry completely. Finally, apply a quality leather conditioner to prevent dryness and keep the leather looking clean and protected.
📅 Last Updated: November 06, 2026 | Topic: How to Disinfect Car Leather Seats | Content verified for accuracy and freshness.
References
- https://www.cdc.gov/coronavirus/2019-ncov/prevent-getting-sick/cleaning-disinfection.html
- https://www.epa.gov/coronavirus/disinfectants-coronavirus-covid-19
- https://www.who.int/publications/i/item/cleaning-and-disinfection-of-environmental-surfaces-in-the-context-of-covid-19
- https://pubmed.ncbi.nlm.nih.gov/32171308/
- https://www.cdc.gov/infectioncontrol/guidelines/disinfection/index.html
- Leather
- Disinfectant
- https://scholar.google.com/scholar?q=disinfect+leather+surfaces+ethanol+quaternary+ammonium+benzalkonium Google Scholar
- https://scholar.google.com/scholar?q=virus+survival+on+leather+surfaces+%28SARS-CoV-2%29 Google Scholar
- https://scholar.google.com/scholar?q=car+interior+disinfection+leather+seats+cleaning+guidelines Google Scholar
