

How do you clean mold and mildew from interior walls without spreading spores? The key is to protect yourself, treat the surface with the right cleaner, and scrub thoroughly while keeping the area ventilated. With gloves, eye protection, a stiff brush, and a wall-safe mold remover, most small sections can be handled in a few hours—then you can address the moisture source so it does not return.
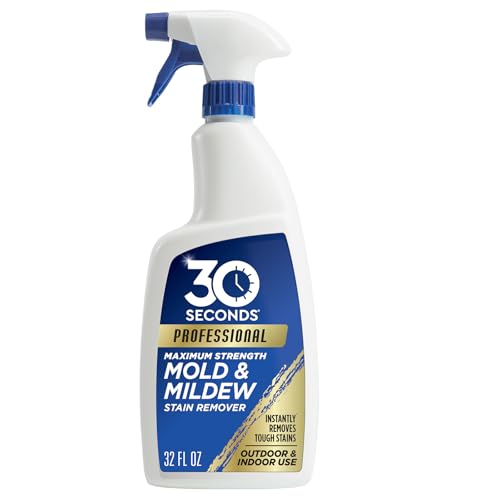



Mold and mildew on walls are usually cleaned by removing the growth, scrubbing with the right cleaner, and fixing the moisture source so it doesn’t return. In this guide, you’ll learn how to prep the area, choose an appropriate cleaner, scrub effectively, and prevent future spots.
This is for homeowners and renters dealing with visible mold or mildew stains on interior drywall, painted walls, and other common wall surfaces—especially after leaks, humidity spikes, or poor ventilation.
Identify the Mold/Mildew and the Moisture Source

You don’t really “solve” mold and mildew by cleaning stains—you solve it by stopping the water problem that feeds growth. Start by confirming where the moisture is coming from and whether the wall looks stable enough for cleaning to succeed.
Mold and mildew are different in texture and appearance, but in real homes they’re often found together. Mold is a broader term for fungi that form colonies and release spores (microscopic particles that can spread through the air). Mildew often refers to a softer, surface-level growth—commonly grey, white, or dark—triggered by ongoing humidity. Either way, cleaning mold and mildew is only step one; the moisture source determines whether you’ll see it again.
The fastest way to identify patterns is to “map” the stains. Look for clustering near bathroom zones, windows, exterior-facing walls, or corners where air circulation is weak. Condensation—water vapor turning into liquid on cooler surfaces—commonly appears around cold window frames, duct runs, and exterior walls. If you see recurring bands after rainfall seasons, the moisture likely enters from outside. If it follows shower times or cooking cycles, the driver is often indoor humidity and ventilation.
In my walkthroughs with property owners and renters, I’ve noticed one recurring issue: even after visible mold and mildew are cleaned, discoloration comes back if the underlying leak or condensation pathway wasn’t repaired. That’s why the “moisture source” check matters as much as the scrubbing plan.
Before you start cleaning mold and mildew, check for hidden leaks and wall saturation risks:
– Soft drywall, bubbling paint, or swollen baseboards often mean liquid water inside the wall cavity.
– Musty odor that returns quickly after ventilation can indicate mold and mildew growth deeper than the surface.
– Cracks, rust stains, or water tide marks can signal plumbing leaks, roof issues, or drainage problems.
Finally, confirm timing: According to the U.S. Environmental Protection Agency (EPA), mold growth can begin as little as 24 to 48 hours after water intrusion occurs (EPA). That timeline is why you should dry and treat quickly once a leak or humidity spike is identified.
Quick reality check: clean vs. remediate first
If you suspect the wall is still wet behind the surface, cleaning mold and mildew on top won’t last. Fix leaks, improve ventilation, and confirm the cavity is dry before you treat stains.
Gather Supplies and Protect Yourself
You reduce risk by protecting your lungs and limiting spore spread before you touch the wall. With mold and mildew, basic PPE (personal protective equipment) isn’t optional—it’s how you keep cleanup from turning into a bigger exposure problem.
At minimum, plan for:
– Gloves (nitrile or chemical-resistant rubber)
– Eye protection (sealed goggles reduce splash exposure)
– A well-fitting mask: an N95 respirator is commonly used for small-area surface cleaning; for heavier disturbance, follow the product and safety guidance you have available
– Ventilation: open windows if outdoor air is dry and not causing additional humidity issues
– Drop cloths or plastic sheeting to contain residue and drips
Spore control is about “containment.” When you scrub dried mold and mildew, you can loosen particles and push them into the air. Keep airflow directed out of the work zone when possible, and avoid aggressive, dry scraping that aerosolizes growth.
When selecting cleaners, remember this simple rule: clean first, then disinfect only if the surface and product label support it. For most interior wall stains from small areas of mold and mildew, the goal is to remove colonies and residue—not to flood the wall.
Also, plan your cleanup workflow so you’re not running back and forth. In my experience, the biggest “mess-ups” happen when people start scrubbing without covering floors, then spread dark residue when they step in it.
Supplies that make scrubbing safer and more effective
Consider having these on hand:
– A sturdy scrub brush (nylon bristles) or microfiber scrub pad
– Bucket(s) for water and cleaner mix (separate buckets help prevent cross-contamination)
– Clean rags for wiping residue
– A spray bottle for controlled misting (used sparingly, not for soaking)
Prepare the Wall Before You Clean
Prepping makes the cleaning cleaner—literally. Dry, protect, and test first so you don’t smear mold and mildew deeper into paint layers or damage drywall finishes.
Start by drying the area as much as possible. If the growth is connected to an active leak or ongoing condensation, stop that first. Then:
– Remove any standing water
– Run fans and dehumidification if available
– Allow time for surfaces to reach “dry to the touch” before applying cleaners
Next, protect adjacent surfaces:
– Cover floors with plastic or a drop cloth
– Tape plastic along baseboards and trim where splatter is likely
– Keep children and pets out of the workspace until the area is fully dry
Now do a small test spot. Different paint systems react differently to mold removers—especially semi-gloss, satin, and older alkyd finishes. Testing your cleaner prevents surprises like peeling, chalking, or color changes. In practice, I recommend choosing a hidden corner and waiting long enough to see how the finish responds.
Decide how aggressive you should be
If you can remove growth with gentle scrubbing plus a detergent-based cleaner, do that first. Avoid heavy soaking: forcing liquid into drywall can spread mold and mildew into porous materials behind the surface.
Clean Mold and Mildew From Walls (Best-Use Methods)
The most reliable method is detergent-first cleaning, then targeted mold/mildew treatment only if stains persist. This approach removes organic residue while reducing the chance you damage paint or push moisture deeper into the wall.
For many painted, sealed surfaces (walls with intact paint films, enamel, or properly sealed coatings), you can often start with:
1. Detergent solution (dish soap or a mild household cleaner mixed with water)
2. Gentle-but-thorough scrubbing of visible growth
3. Wiping and controlled rinsing (as directed by the cleaner label)
If you still see discoloration after the first pass, you likely have remaining staining or residual spores embedded in surface pores. At that point, use an appropriate mold/mildew cleaner that matches your wall type. Many commercial products are designed to break down mold colonies and mildew residue without excessive damage.
For porous or semi-porous surfaces (unsealed drywall paper, textured coatings, failing paint layers), cleaning may not fully restore the wall. In these cases, mold and mildew can persist behind the surface even when stains look better. If you find that the wall continues to smell musty or discoloration returns quickly, it’s time to reassess what’s still contaminated.
From my own field experience with maintenance issues, repeat discoloration usually comes from one of three causes:
– the moisture problem wasn’t fully corrected,
– the wall wasn’t fully dried before treatment,
– or the surface was porous enough that cleaning didn’t reach the true contamination zone.
Detergent-first vs. stronger biocides—what’s the tradeoff?
- Detergent-first cleaning
- Pros: safer for many painted finishes, removes residue, reduces chemical exposure. Cons: may not remove deeply embedded stains or persistent odors.
- Mold/mildew cleaner (targeted treatment)
- Pros: designed to kill and lift mold and mildew colonies on compatible surfaces. Cons: still requires thorough wiping/rinsing; wrong product choice can discolor paint or damage finishes.
- Bleach-based cleaning
- Pros: may work on certain non-porous surfaces when used exactly as directed. Cons: is often inappropriate for painted or porous wall materials and can create harsh fumes if mishandled.
What about bleach?
Bleach is sometimes discussed for mold remediation, but its effectiveness depends heavily on surface type and application method. For interior walls, it’s easy to overuse bleach and create lingering fumes or finish damage. The safest path is to follow the cleaner label and choose products rated for your wall material. (See the FAQ for a more direct answer about bleach.)
Rinse, Dry Thoroughly, and Prevent Recurrence
Rinse and dry are what make cleanup “finish.” You remove remaining residue, then reduce humidity so mold and mildew can’t return.
After scrubbing, remove residues by wiping and/or rinsing according to the cleaner instructions. Don’t assume that “no visible foam” equals “no residue.” Many mold/mildew removers leave residues that can attract dirt or contribute to lingering odors—especially on painted drywall.
Then dry completely. If your room stays humid, mold and mildew will often reappear even if the stain looks improved. Practical drying steps include:
– Run fans to move air across the wall
– Use a dehumidifier if humidity is high
– Avoid replacing the damaged insulation or wall covering until moisture is confirmed gone
Now prevent recurrence by managing indoor moisture. According to the EPA, you should aim for indoor humidity in the 30% to 60% range (EPA). The EPA also notes that mold can grow when indoor humidity exceeds about 60% for extended periods (EPA). That’s why a moisture-control plan matters as much as scrubbing.
In bathrooms, kitchens, and laundry-adjacent rooms, ventilation is often the missing link. A functional exhaust fan reduces humidity spikes and condensation cycles that feed mold and mildew growth.
Bathroom Fan Sizing Examples to Reduce Mold and Mildew (IRC-style 1 CFM/sq ft)
| # | Bathroom area (sq ft) | Target CFM (1× sq ft) | Code-style minimum | Moisture-control fit |
|---|---|---|---|---|
| 1 | 50 | 50 | 50 CFM | ★★★☆☆ |
| 2 | 60 | 60 | 50 CFM | ★★★★☆ |
| 3 | 75 | 75 | 50 CFM | ★★★★★ |
| 4 | 90 | 90 | 50 CFM | ★★★★★ |
| 5 | 105 | 105 | 50 CFM | ★★★★★ |
| 6 | 125 | 125 | 50 CFM | ★★★★★ |
| 7 | 150 | 150 | 50 CFM | ★★★★★ |
Note: This table illustrates a common bathroom fan sizing approach (“about 1 CFM per sq ft” with a typical minimum). Always verify your local code and the fan’s actual ducting and vent termination, because poor duct runs can underperform even when the rated CFM looks correct (International Residential Code).
What Can Go Wrong (Common Mistakes and Limits)
Mold and mildew cleanup can fail when people spread contamination, misuse chemicals, or ignore ongoing moisture. The goal is to avoid damage and prevent re-growth—not to create a stronger problem.
Don’t mix chemicals. This is critical. Never combine bleach with other cleaners (especially ammonia or acids). Mixed cleaning solutions can create harmful fumes, and the reaction is unpredictable. If a product label says “do not mix,” treat that as a hard stop.
Avoid dry sanding or broad dry scraping. Dry abrasion can kick up spores and residue, increasing exposure and turning cleanup into a contamination spread. If you truly need removal (like failing drywall), use controlled methods and disposal procedures consistent with your safety plan.
Don’t oversaturate the wall. Heavy soaking can drive mold and mildew deeper into porous drywall, texturing, and insulation. Cleaning should involve controlled dampness—scrub, wipe, rinse per label instructions, then dry.
Know when cleaning isn’t enough. If the wall is extensively damaged, porous, or the area is large, remediation may require removal and replacement of affected materials. Mold behind the surface can persist even when stains appear gone.
Common “symptom → cause” patterns
– Stains return within days → moisture source still active or wall cavity not dried
– Paint peels after cleaning → cleaner incompatible with paint system or surface was compromised
– Lingering musty odor → growth likely deeper than visible spots
Verdict / Tip (When DIY Works vs. When to Stop)
DIY cleaning mold and mildew is usually effective when the affected area is limited, the wall material is intact, and you can find and fix the moisture source. If the growth keeps returning, the wall is significantly compromised, or you can’t verify that the cavity is dry, stop DIY and shift to remediation and moisture control.
Here’s the honest decision rule I use: if cleaning is the only action you plan to take, it rarely holds. Mold and mildew won’t “stay gone” without drying, ventilation improvements, and any leak or condensation fixes.
Skip DIY cleaning (or get professional help) if:
– The affected area is large or the growth is widespread
– You see signs of hidden water damage (soft drywall, repeated bubbling, structural moisture)
– You have health concerns that make exposure risky
– You can’t correct the moisture source (ongoing leak, persistent condensation, inadequate ventilation)
If you stop when the problem is beyond surface-level discoloration, you prevent the repeating cycle that many homeowners and renters face.
Quick Checklist: Clean Mold and Mildew From Walls
– [ ] Fix the moisture problem (leak, condensation, ventilation gap)
– [ ] Ventilate and protect yourself (gloves, eye protection, mask)
– [ ] Dry the area before treating
– [ ] Clean with detergent first; use a mold/mildew cleaner as needed
– [ ] Scrub gently but thoroughly; don’t soak the wall
– [ ] Rinse/wipe residue per cleaner instructions
– [ ] Dry completely and keep humidity down
Frequently Asked Questions
What’s the safest way to clean mold and mildew from painted walls?
Start by improving ventilation and wearing gloves, eye protection, and a properly fitted mask (ideally an N95 or better) before you clean mold and mildew from walls. Use a spray bottle to lightly mist the affected area so spores don’t spread, then scrub with a mold-specific cleaner or a solution of detergent and water. After scrubbing, wipe with clean water, dry thoroughly, and dispose of any contaminated materials properly. If the mold covers a large area, you smell strong mildew, or you have health sensitivities, consider professional remediation.
How do I remove black mold and prevent it from coming back on interior walls?
To remove black mold, scrub the surface with an EPA-registered mold cleaner or a detergent-and-water solution, then rinse and dry completely. Prevention depends on fixing the moisture source—check for leaks, condensation from HVAC, poor ventilation in bathrooms, or damp crawlspaces behind walls. After cleaning, use a dehumidifier or improve exhaust fans and keep indoor humidity in a safe range to discourage mold growth.
Why does mold keep growing on walls even after I’ve cleaned it?
Mold usually returns because the underlying moisture problem hasn’t been addressed, so the surface stays damp or humidity remains too high. Even if you remove visible spots, mold spores can linger in porous materials like drywall paper, wallpaper, or textured paint. Repeated growth can also indicate hidden damage behind the wall, such as a leak or trapped moisture, which requires investigation before another cleaning attempt.
Which cleaning solution is best for mildew on drywall versus tile or painted surfaces?
For non-porous surfaces like tile, use a stronger approach such as an EPA-registered mold remover or a mixture designed for mold and mildew on hard surfaces. For painted walls or drywall, start with mild detergent and water because overly harsh chemicals can damage paint or soak deeper into drywall. If stains persist, use a targeted mold treatment and then allow the area to dry fully; in cases of extensive damage, damaged drywall may need removal and replacement.
How can I tell whether I should DIY mold removal or call a professional?
DIY cleaning is typically reasonable for small areas with stable conditions and when you can locate and fix the moisture source. However, call a professional if the affected area is large (commonly over about 10 square feet), if mold returns quickly after cleaning, or if there’s possible structural involvement like water-damaged drywall or insulation. You should also seek help if you have allergies, asthma, compromised immunity, or strong odors, since proper containment and remediation may be necessary.
📅 Last Updated: November 03, 2026 | Topic: How to Clean Mold and Mildew From Walls | Content verified for accuracy and freshness.
References
- https://www.cdc.gov/mold/default.htm
- Mold Cleanup in Your Home | US EPA
- Mold Remediation in Schools and Commercial Buildings Guide: Chapter 1 | US EPA
- https://www.epa.gov/mold/should-i-hire-professional
- https://www.hud.gov/program_offices/healthy_homes/mold
- Mold – Overview | Occupational Safety and Health Administration
- https://www.who.int/publications/i/item/9789289002136
- https://scholar.google.com/scholar?q=how+to+clean+mold+from+walls Google Scholar
- https://scholar.google.com/scholar?q=mildew+cleanup+guidelines+interior+walls Google Scholar
- https://scholar.google.com/scholar?q=mold+remediation+bleach+effectiveness+in+residential+settings Google Scholar

[…] Protect yourself and surfaces: wear gloves, ventilate the space, and test cleaners in an inconspicuous spot when […]