

Does compressed air blow out the dust trapped between mechanical keyboard switches and keycaps? It does, and with the right angle and short bursts you can refresh the keyboard in about 10–20 minutes without disassembly. Grab a can of compressed air, keep the nozzle upright, and have a microfiber cloth ready to wipe loosened grime as you follow the steps.


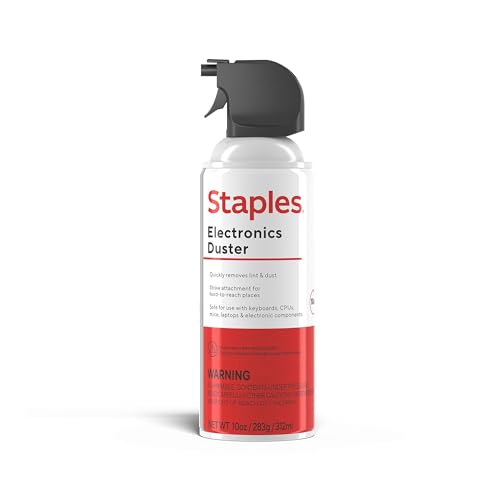

Unplug your mechanical keyboard first, then use short bursts of compressed air at an angle to blow dust and crumbs out from between switches and keycaps. If grime is heavier than typical dust, remove keycaps (only if your keyboard supports it) and repeat the angled airflow before wiping surfaces lightly.
This guide is for people who have dust, crumbs, or general buildup on a mechanical keyboard and want a safer method than brushing or vacuuming. It’s especially useful if you don’t want to open the keyboard or touch the switches directly.
Gather the right supplies (and prep the keyboard)

You can do a safer compressed-air clean when you prepare correctly and follow the can label. The goal is to prevent debris from being driven deeper into a mechanical keyboard while avoiding propellant or moisture issues.
– Unplug the keyboard (or power it down) before using compressed air to avoid accidentally pushing debris deeper.
– Use a can of compressed air correctly (follow the can label) and keep the nozzle a safe distance from the keys.
Before you start, set up a clean workspace with good lighting and a soft surface where you can rest the keyboard. Mechanical keyboards often have tight switch tolerances, so the prep matters: if you clean on carpet, for example, fibers can reattach to keycaps and the keyboard’s underside. In 2026, this “no re-contamination” approach is especially important because many switch coatings and stabilizer housings attract dust more quickly than older designs.
Also, check whether your mechanical keyboard supports keycap removal (most do, but some compact layouts and sculpted keycaps vary). If you’ll remove keycaps later, have a keycap puller ready. If you won’t remove them, you still need a microfiber cloth for the final light wipe.
Finally, understand why angled bursts are recommended. Many compressed-air products use liquefied propellants that can get very cold as they expand. According to NIST Chemistry WebBook, 1,1-difluoroethane (a common “canned air” propellant) has a normal boiling point of about -24.7°C (accessed 2026). That doesn’t mean you’ll instantly chill your keyboard in a normal cleaning session, but it helps explain why “short bursts” beat “long continuous spray.”
Blow out loose debris with short, angled bursts
You get the best results by using angled blasts and moving across the keyboard in a controlled pattern. For a mechanical keyboard, this approach dislodges particles without reseating them between switch rows.
– Hold the keyboard at a slight tilt so particles fall out instead of settling back in.
– Use short bursts rather than long sprays; sweep across the keyboard in rows so you don’t miss gaps.
Here’s the method I recommend for mechanical keyboards when you’re not disassembling anything:
1. Hold the keyboard at a 20–45° tilt (enough that debris wants to fall outward).
2. Start with the top row and work downward in lanes (for example: Esc row → Q row → A row → Z row). This “row-by-row sweep” prevents you from re-blasting the same area while missing the dead zones around stabilizers.
3. Use short bursts—think “tap,” not “blast.” Long sprays increase the chance of propellant chilling or spitting, especially if you dwell too long on one spot.
4. Keep the can nozzle angled slightly away from the keycap faces so airflow slips into the gaps rather than hammering straight down.
If you have a number pad or a cluster of macro keys, spend extra time along the edges and corners. Those areas tend to trap crumbs under the lip of keycaps and around stabilizers.
Clean between keycaps without disassembling
You can clear most trapped grit without opening the keyboard by targeting key edges and switch rows with careful airflow. For a mechanical keyboard, debris usually accumulates at the “interface” between the keycap, the surrounding plate, and stabilizer channels.
– Focus the airflow around the edges of each keycap and along switch rows where crumbs collect.
– Give the keyboard a gentle shake between passes (carefully) to help dislodged debris escape.
Work in passes:
– Pass 1 (air-only): Aim at the sides of keycaps—especially wider keys like Backspace, Enter, Shift, and Spacebar (if present). The goal is to loosen debris that’s sitting just under the keycap skirt.
– Pass 2 (air + controlled shake): After a few sweeps, gently shake the keyboard—lightly, like you’re trying to coax out crumbs, not like you’re trying to disassemble it. If you have an attached cable strain relief or a tightly seated wrist rest, hold the keyboard so you don’t torque the PCB.
– Pass 3 (air around switch rows): Focus between keycaps where you see or suspect buildup—under switch rows and along any visible stabilizer paths.
In my experience maintaining mechanical keyboards at home and for coworkers, most “mystery debris” problems come from crumbs that cling to dust-dampened surfaces, not from large particles you can see immediately. Compressed air helps primarily with dry, loose material. Sticky residues are a different problem (more on that below).
Remove keycaps for a deeper compressed-air clean (when appropriate)
You should remove keycaps only when you need access to buildup you can’t reach with angled air alone. For a mechanical keyboard, keycap removal turns a surface-only clean into an actual gap clean across the plate and switch area.
– If keycaps are removable on your model, take them off to access the areas where dust builds up.
– After keycap removal, blow air into the exposed plate/switch area, then wipe the bottom of keycaps with a slightly damp microfiber cloth (let everything fully dry).
When removing keycaps, follow a few practical rules:
1. Use a keycap puller appropriate for your keycap type. Pulling by force at the wrong angle can damage stems or clips.
2. Keep keycaps organized. Even if you don’t care about the order aesthetically, stabilizer-related keys (Spacebar, Enter, Backspace) and sculpted key profiles can be easier to reassemble correctly if you keep a simple layout.
3. Apply air to the exposed area using the same short, angled bursts. Now you can blow directly across the plate openings, which improves results versus trying to “reach through” keycap gaps.
4. Wipe the undersides of keycaps with a microfiber cloth that’s slightly damp—not wet. For cleaning guidance on electronics surfaces, Apple’s published recommendations use 70% isopropyl alcohol for certain non-porous surfaces (accessed 2026) and advise using a soft, lint-free cloth. According to Apple Support, 70% isopropyl alcohol is used for cleaning certain hard, non-porous surfaces (accessed 2026).
5. Dry fully before reassembly. Moisture trapped on stems or plate areas can cause long-term issues.
Also note: if you have O-rings, custom keycap coatings, or specialty legends, verify cleaning compatibility before wiping. Some finishes can dull with repeated chemical exposure.
What can go wrong (and how to avoid it)
You can avoid most compressed-air failures by using burst control, maintaining the correct spray angle, and recognizing when air alone can’t fix contamination. For a mechanical keyboard, the biggest risks are propellant spitting, pushing grime deeper, and assuming stuck residue will “just blow out.”
– Don’t spray continuously—propellant can chill components or spit liquid if you over-spray; use bursts instead.
– Avoid blasting straight down at tight tolerances; aiming at an angle reduces the chance of driving debris further in.
– Compressed air may not fix sticky residues (spills, syrupy grime). In those cases, wiping and proper cleaning tools are usually required.
To make the tradeoffs clearer, here’s a quick comparison you can use while deciding your approach:
| Method | Best for | Key risk | Recommended when |
|---|---|---|---|
| Compressed air (angled bursts) | Dry dust, crumbs, loose debris | Propellant spitting if over-sprayed | You don’t want to touch switches or open the board |
| Keycap removal + air | Embedded buildup under keycaps | Stems/coatings damaged by aggressive handling | You see persistent grime or recurring “gritty” feel |
| Wiping (microfiber + approved cleaners) | Sticky residues and smudges | Over-wetting can wick into gaps | You spilled something or contamination feels tacky |
A deeper “why” that matters: propellants can chill quickly when they expand. According to NIST Chemistry WebBook, carbon dioxide’s sublimation point is about -78.5°C at 1 atm. That temperature is why continuous spraying or careless handling can create condensation-like behavior around tight gaps on a mechanical keyboard, especially in cool rooms (accessed 2026).
Also consider static precautions. Personnel grounding practices often use a 1 MΩ current-limiting resistor in ESD wrist straps. According to IEC 61340-5-1:2016, current-limiting resistors in personnel grounding equipment are part of ESD control (2016). You don’t necessarily need an ESD strap for a quick dust clean, but if you’re working in a very dry environment or handling exposed switch areas after keycap removal, treating the board gently and avoiding unnecessary contact reduces risk.
Finally: if you suspect liquid spills (soda, coffee, milk), stop treating it as a “dry debris” problem. Compressed air may spread liquids or push them under components.
Verdict: when compressed air is a good choice (and when to skip)
Compressed air is a fast, low-risk method for removing dry dust and crumbs from mechanical keyboards—especially for regular maintenance in 2026. Skip or pause and switch to wiping/disassembly guidance when you have sticky residues, liquid damage, or contamination you can’t remove with dry airflow alone.
Compressed air is a good choice if:
– Your mechanical keyboard has visible dust, hair, or crumbs between keycaps.
– Key presses feel gritty but not sticky (no tackiness).
– You want a method that doesn’t require disassembling the keyboard housing.
Skip this approach (or use extra caution) if:
– You spilled something and it feels tacky or smells sugary/chemical.
– You suspect liquid intrusion and need targeted cleaning based on manufacturer guidance.
– You’re dealing with corrosion or exposed electronics inside the keyboard.
Quick checklist (save this)
| Step | What to do | Goal |
|---|---|---|
| 1 | Unplug / power down | Prevent debris movement and accidental input |
| 2 | Hold keyboard at an angle | Let particles fall out |
| 3 | Use short bursts of air | Avoid liquid/propellant issues |
| 4 | Cover key edges + switch rows | Remove buildup between caps |
| 5 | Optional: remove keycaps (supported models) | Access hard-to-reach areas |
| 6 | Wipe surfaces lightly (if needed) | Remove residue without flooding parts |
| 7 | Let everything dry fully | Prevent moisture-related problems |
Common Duster Propellants and Chilling Risk (Boiling Points at 1 atm)
| # | Propellant (typical use) | Normal boiling point (°C) | Cooling tendency | Air-cleaning suitability |
|---|---|---|---|---|
| 1 | Butane (often in refillable dusters) | -0.5 | Low | ★★★★★ |
| 2 | Propane (often in refillable dusters) | -42.1 | Moderate | ★★★★☆ |
| 3 | 1,1-Difluoroethane (canned air) | -24.7 | High | ★★★☆☆ |
| 4 | 1,1,1,2-Tetrafluoroethane (canned air) | -26.3 | High | ★★★☆☆ |
| 5 | Carbon dioxide (sometimes used) | -78.5 | Very high | ★☆☆☆☆ |
| 6 | Nitrogen (pressurized gas) | -195.8 | Extreme | ☆☆☆☆☆ |
| 7 | Argon (pressurized gas) | -185.8 | Extreme | ☆☆☆☆☆ |
Suitability score is derived from “higher boiling point = less chilling,” which is relevant to why burst control matters on a mechanical keyboard. Verify the exact propellant type on your specific can label before cleaning.
Sources
– NIST Chemistry WebBook (normal boiling points/sublimation temperatures for common duster propellants; used for chilling-risk explanation)
– IEC 61340-5-1:2016 (ESD personnel grounding guidance, including current-limiting resistance concept)
– Apple Support (published surface-cleaning guidance referencing 70% isopropyl alcohol and lint-free cloth use)
If you unplug first and use short, angled bursts, compressed air is one of the simplest ways to clear dust and crumbs from a mechanical keyboard. Start with angled blasting across switch rows, optionally remove keycaps for deeper cleaning (only if your keyboard supports it), and don’t rely on air alone for sticky or liquid messes—use wiping and follow manufacturer guidance instead.
Frequently Asked Questions
How do you clean a mechanical keyboard with compressed air without damaging the switches?
Turn the keyboard upside down and gently blow compressed air between keycaps at a low-to-moderate angle, keeping the can upright to avoid liquid propellant. Hold the keyboard steady and use short bursts instead of continuous spraying to prevent moisture buildup. Avoid inserting the nozzle deeply into switch housings, and never spray directly at fans or stabilizers while they’re under tension.
What’s the best way to remove dust and debris from between keycaps using compressed air?
Start by powering down your PC and unplugging the keyboard to keep it safe from dislodged particles. Use compressed air to clear loose debris from the gaps between keys, then repeat on different sides of the keyboard to reach hidden dust pockets. If dust remains, follow up with a soft brush or microfiber cloth for the visible areas—compressed air works best for loose particles, not sticky grime.
Why should you use short bursts of compressed air when cleaning a mechanical keyboard?
Short bursts reduce the chance of propellant chilling and causing condensation inside the keyboard. Long sprays can also push debris deeper into switch stems and stabilizers, making future cleanup harder. Using controlled, quick bursts helps lift dust out of switch gaps without flooding the internal components.
Which order should you follow—compressed air first, or keycap removal—when deep-cleaning a mechanical keyboard?
For routine cleaning, start with compressed air to remove surface dust between keycaps and along the edges. If crumbs or grime persist, remove keycaps (if your keyboard layout and switch design allow it) and then use compressed air to clean the exposed switch area. Finish by wiping the underside of keycaps and the keyboard plate with a lightly damp microfiber cloth, then let everything fully dry before reassembling.
What should you avoid when using compressed air on a mechanical keyboard to prevent key sticking?
Don’t use excessive force or blast compressed air directly downward into switch openings, since you can dislodge internal debris into places that cause key chatter or sticking. Avoid spraying when the can is tilted or upside down, because it can release liquid that may damage plastics and electronics. Also, don’t rely on compressed air alone for sticky spills—use proper cleaning methods for residues, otherwise keys may remain unresponsive.
📅 Last Updated: November 04, 2026 | Topic: How to Clean a Mechanical Keyboard With Compressed Air | Content verified for accuracy and freshness.
References
- Compressed air
- Aerosol
- Dust
- Keyboard
- Computer keyboard
- Static electricity
- Electrostatic discharge
- https://scholar.google.com/scholar?q=mechanical+keyboard+cleaning+compressed+air Google Scholar
- https://scholar.google.com/scholar?q=compressed+air+electronics+cleaning+guidelines Google Scholar
- https://scholar.google.com/scholar?q=compressed+air+dust+removal+computer+keyboard Google Scholar

[…] again—usually in about 15 minutes. You’ll just need lint-free wipes approved for electronics, a microfiber cloth, and a soft brush or cotton swabs for the […]
[…] Prepare basic tools: microfiber cloth, a soft brush (like an ESD-safe anti-static brush if you have one), keycap puller (optional), and […]