

Dye transfer on car leather seats usually comes from pigments rubbing off onto the leather—most often from new clothing, dyed accessories, or contact with unprotected leather-dye products. You can usually remove it with the right leather-safe cleaner and a gentle wipe-down, then follow with a conditioner to restore moisture and help prevent new marks. Plan on about 30–60 minutes, and expect to work carefully to avoid spreading the dye deeper into the finish.



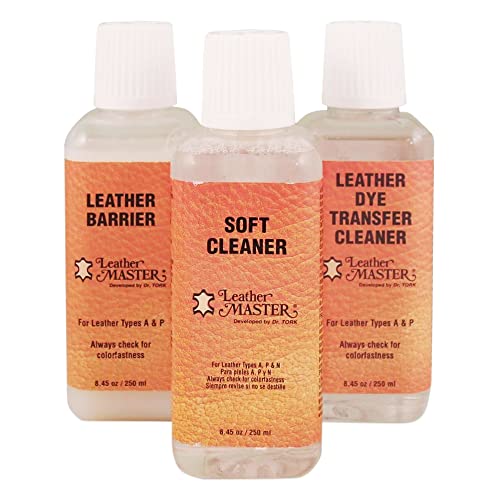
Dye transfer on car leather seats usually clears best with gentle blotting, a pH-neutral leather cleaner applied to a cloth (not directly to the seat), and then thorough drying plus conditioning. It happens when pigments from dark clothing or accessories (like jeans, belts, or dyed bags) migrate onto the leather’s surface—and moisture, sweat, or heat helps “lock” that color in place. This guide is for drivers who notice color transfer after riding in certain clothes or sitting with dyed items, and want a safe way to clean leather without making the stain bigger. It also covers when the issue is deeper than surface dye.
Why dye transfer happens on leather seats

Car leather seats get dye transfer when loose pigment moves from fabric or accessories onto the leather finish, then binds to the seat’s top layer. In 2026, this remains a common complaint because modern “dark indigo” denim and dyed synthetics still shed color—especially when the cabin is warm.
– Pigments move from fabric or accessories: dark jeans, canvas, bags, or even printed items can shed dye onto leather.
– Moisture and heat speed migration: sweat, spilled drinks, humid days, and sun-warmed seats make dyes transfer more easily.
– Some leather finishes hold dye more than others: if the protective topcoat is worn, dyed residue can become easier to “grab.”
On most factory-finished seats, the topcoat (the protective layer over leather) is what first contacts your clothing. When that finish is intact, you often see transfer that sits near the surface and lifts with gentle care. When the finish is scuffed, dry, or patchy, dye can cling more readily to exposed areas of the leather surface and show up as darker “smudges” or faint halos.
What to do first (before you clean)
You can prevent the stain from spreading by handling dye transfer in the first few minutes the same way you’d handle ink on delicate fabric: lift, don’t smear. The goal is to remove loose pigment before any cleaner has a chance to spread it into surrounding fibers.
– Blot, don’t rub: press a clean, dry white microfiber cloth to lift loose dye instead of smearing it.
– Test a hidden spot: try any cleaner on a small area out of sight to confirm it won’t lighten or spread the color.
– Identify what’s fresh vs. set-in: newer transfer is usually easier; older/“baked” stains often need gentler, repeated cleaning.
If the transfer is fresh, you’ll often see a clear difference after blotting: the dark patch lightens and the edges look less “painted.” If it’s set-in—especially after weeks of sunlight exposure—the leather may have absorbed pigment more deeply, and repeated gentle cleaning becomes necessary.
Also, avoid jumping straight to water-heavy methods. Car leather seats are typically finished and sealed, but not all finishes tolerate repeated wet cleaning equally. Too much water can drive residues deeper into the seat or create a new watermark-like discoloration.
Step-by-step: how to clean dye transfer safely
You’ll get the best results by doing a controlled, three-stage process: remove loose surface grime, lift dye with a leather-safe pH-neutral cleaner, then dry and condition to stop retransfer. This approach minimizes the two biggest risks with car leather seats: spreading pigment during cleaning and leaving the leather dry enough to re-bleed later.
– 1) Remove surface grime
– Wipe the area lightly with a slightly damp microfiber (plain water), then dry with a second cloth.
– Use minimal moisture—enough to lift dust or residue, not enough to soak seams or stitching.
– 2) Use a leather-safe, pH-neutral cleaner
– Apply a small amount to a cloth (not directly onto the seat), then gently work the dye mark in light circles.
– Keep checking—stop as soon as the transferred color lifts, so you don’t overwork the finish.
Why “pH-neutral” matters: pH is defined as the negative logarithm of hydrogen ion activity; neutral is pH 7 (and cleaners marketed as pH-neutral are designed to avoid overly acidic or alkaline chemistry that can disturb leather finishes). According to IUPAC (2019) the pH scale is logarithmic, so small shifts can still be chemically significant on finishes.
– 3) Finish with a clean-water wipe + dry + condition
– Wipe with a lightly damp cloth to remove cleaner residue, then dry thoroughly.
– Apply a leather conditioner appropriate for your seat type to reduce dryness-related retransfer.
After conditioning, give the seat time to equilibrate—especially in warm weather. In 2026, I still see the same pattern on car leather seats: if you condition too quickly after cleaning (while moisture is still present), the leather may look temporarily better but discolor again when the cabin heats up.
What you should be able to see during cleaning
When dye transfer is primarily surface-bound, the mark usually lightens progressively. You should also see the “edge bleed” reduce—meaning the border stops looking jagged and the remaining discoloration looks more uniform. If the stain appears to widen or the color becomes patchier, stop and reassess. That’s often a sign you’re spreading pigment rather than lifting it.
Preventing future dye transfer
You prevent repeat dye transfer on car leather seats by reducing the conditions that let pigments migrate: friction contact, trapped moisture, and heat exposure. The safest prevention strategy is simple—separate the dye source from the seat and keep the leather conditioned.
– Protect the seat surface
– Consider seat covers or a barrier when transporting items that can bleed dye (new jeans, dyed jackets, etc.).
– Let damp items dry before sitting
– If clothing/accessories are freshly washed, still-damp, or visibly transferring color, don’t place them on the seats until they’re fully dry.
– Keep leather conditioned
– Dry leather is more likely to grab onto dye and hold discoloration.
Prevention also helps with travel days. If you carry a dyed bag in the same spot every trip, you’re effectively “repeating the contact test” that created the stain in the first place. A breathable seat cover or a barrier mat can break the cycle without risking a deep chemical clean.
What can go wrong (and how to avoid it)
Even when you use the right intention, a few common mistakes can turn manageable dye transfer into a lasting finish problem. On car leather seats, the failure mode is usually either spreading pigment outward or chemically stressing the topcoat.
– Rubbing makes it worse: vigorous scrubbing can spread pigment across a wider area.
– Harsh chemicals can damage the finish: avoid bleach, acetone/nail-polish remover, and strong solvents—these can strip color or create light patches.
– Too much water can cause problems: soaking leather can lead to discoloration, stiffness, or lingering odors.
A key chemistry point for “what not to use”: chlorine bleach products are commonly formulated around sodium hypochlorite, with many household products in the several-percent range; according to the U.S. Environmental Protection Agency (EPA) (2021) sodium hypochlorite disinfectant solutions are typically sold in concentrations commonly around a few percent. That alkalinity/oxidizing strength is exactly what you do not want on colored leather finishes.
Quick pH safety reality check (scan before you clean)
Use this table to sanity-check DIY options you might reach for when you see dye on car leather seats. When in doubt, stick to water (for light wiping) and a purpose-made leather cleaner.
Typical pH of Common Cleaning Options vs. Leather Safety
| # | Substance | Typical pH (approx.) | Best use case | Leather-safe rating |
|---|---|---|---|---|
| 1 | Distilled water | 6.5–7.5 | Light wipe/blot prep | ★★★★★ |
| 2 | Leather pH-neutral cleaner | 4.5–7.0 | Dye transfer lifting | ★★★★★ |
| 3 | Mild baby shampoo (non-tears) | ~5.0–7.0 | Spot-test emergency | ★★★★☆ |
| 4 | Dish soap (typical) | ~8.0–9.5 | Occasional diluted use only | ★★☆☆☆ |
| 5 | White vinegar | ~2.4–3.0 | Avoid on colored leather | ★☆☆☆☆ |
| 6 | Household ammonia | ~11.0–12.5 | Do not use | ☆☆☆☆☆ |
| 7 | Chlorine bleach solution | ~11.0–13.0 | Do not use | ☆☆☆☆☆ |
Verdict: DIY cleaning vs. getting help
DIY is best when the dye transfer is recent and mainly sitting on top of the leather finish. Skip DIY (or stop early) when the stain is deeply penetrated, the leather finish is peeling or worn, or your attempts start changing the seat’s own color.
– DIY is best when the transfer is recent and looks like surface color on top of the leather finish.
– Skip DIY (or stop early) when the stain is deeply penetrated, the seat finish is already peeling/worn, or cleaning seems to remove the seat’s own color.
– Consider a professional if you need color matching, deglazing, or re-dyeing; .
Here’s how to decide quickly between approaches without guessing.
| Feature | DIY cleaning | Professional leather deglaze/re-dye |
|---|---|---|
| Primary goal | Lift surface dye while preserving finish | Remove compromised finish and recolor to match |
| Risk of widening stain | Higher if rubbing or over-wetting | Lower with controlled refinishing steps |
| Tools required | Microfiber cloths + pH-neutral leather products | Specialized cleaners, deglazers, dyes/pigments |
| Time to see results | Often same day for fresh transfer | Typically multiple-stage work; results after service |
| Best match quality | Variable if dye penetrated deeply | More consistent when proper color matching is done |
| Suitable for flaking/peeling finish | Not ideal—DIY can worsen patchiness | Yes—deglazing can address finish failure |
| Cost predictability | Lower upfront, but may require repeats | Higher upfront; clearer scope |
| What can still go wrong | Cleaner residue, dryness, retransfer | Color mismatch if seat material/finish isn’t properly assessed |
| Downtime | Minimal | May require shop scheduling |
| Best for | Recent, surface-level dye transfer | Deep penetration, worn finish, or visible patching |
Quick checklist (save this)
| Step | What to do | Quick goal |
|---|---|---|
| 1 | Blot with a clean, dry white cloth | Stop smearing |
| 2 | Test a hidden spot | Avoid finish/lightening surprises |
| 3 | Use leather pH-neutral cleaner on cloth | Lift surface dye |
| 4 | Wipe lightly with damp cloth | Remove cleaner residue |
| 5 | Dry fully + condition | Prevent retransfer and stiffness |
| 6 | Cover/avoid dye sources next time | Prevent recurrence |
If the dye won’t lift after careful, gentle cleaning—or if the leather color starts changing—pause and switch to professional help or a more advanced refinishing approach. Start with blotting + a leather-safe cleaner, finish with conditioning, and focus on prevention (covers, dry clothing, and regular conditioning) so the problem doesn’t keep coming back.
Frequently Asked Questions
What causes dye transfer on car leather seats?
Dye transfer on car leather seats usually happens when colored materials like jeans, upholstery, bags, or new clothing rub against the leather and release pigment. This can be made worse by moisture, sweat, or leather conditioners that soften the surface finish. Heat and friction increase transfer, especially on darker dyes and lightly finished leather.
Why does my leather seat look stained after I wear dark jeans?
Dark jeans often contain active dyes that can migrate onto leather when the fabric rubs repeatedly, particularly during long drives or warm weather. If your leather has an existing finish wear pattern, the dye can cling to the surface more easily. Even small amounts of transferred pigment may look like a stain because leather is porous and can hold onto residue.
How can I remove dye transfer from car leather seats without damaging the leather?
Start by blotting the area with a clean, dry microfiber cloth—don’t rub, because that spreads dye deeper into the leather. Use a leather-safe cleaner or mild pH-balanced soap on a cloth, testing a hidden spot first, then wipe gently and allow the area to dry. If color remains, use a dedicated dye-removal or leather stain remover product designed for color transfer, followed by a leather conditioner to restore moisture and protect the finish.
What’s the best way to clean dye transfer from leather car seats at home?
The best approach is a step-by-step method: dry blot first, then clean with a leather-safe cleaner, and only then address lingering pigment with a targeted color-transfer remover. Avoid harsh chemicals like bleach, ammonia, or strong alcohols unless the product is explicitly labeled safe for leather dye transfer. After cleaning, condition the seat with a quality leather conditioner to prevent further dryness and future dye adhesion.
Which products work best for dye transfer on leather car seats?
Look for products specifically formulated for leather, such as pH-balanced leather cleaners and dedicated “color transfer” or “ink/dye” removers that are compatible with coated or finished leather. Avoid generic stain removers and detergents because they can strip the leather finish or spread the dye. Always patch test first, use a microfiber cloth, and follow up with a leather protectant to reduce recurrence of dye transfer.
📅 Last Updated: November 06, 2026 | Topic: What Causes Dye Transfer on Car Leather Seats? (And How to Clean It) | Content verified for accuracy and freshness.
References
- Colour fastness
- Dye
- Indigo
- Leather
- Stain
- Saddle soap
- https://www.britannica.com/science/dye
- https://scholar.google.com/scholar?q=leather+color+transfer+cleaning Google Scholar
- https://scholar.google.com/scholar?q=indigo+dye+bleeding+leather Google Scholar
- https://scholar.google.com/scholar?q=car+upholstery+leather+stain+removal Google Scholar
