

You pull the refrigerator forward to wipe up a spill, and you immediately see dusty coils along the base that can make the unit work harder. Unplug the refrigerator, give it a few minutes to cool, and gather a vacuum with a brush attachment, a coil brush, microfiber cloth, and work gloves. With careful cleaning and minimal disassembly, you can finish safely in under an hour—then slide it back and return to colder, steadier performance.
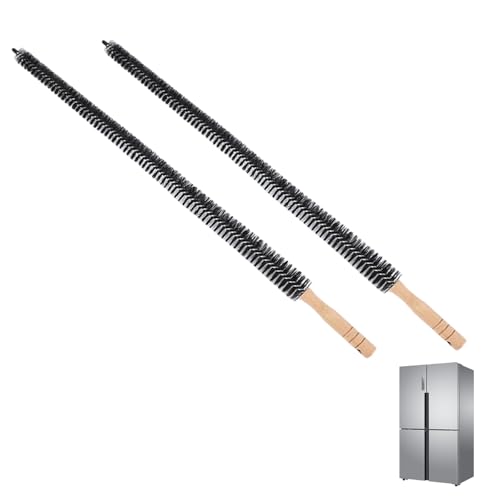

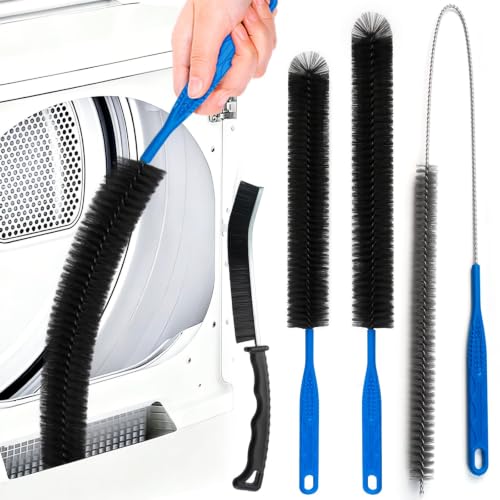

Unplug your refrigerator first, then vacuum and gently brush dust off the condenser coils under/behind the unit to restore airflow without bending fins or damaging components. This simple coil-cleaning step can improve cooling performance by helping heat transfer work as designed, especially when dust has blocked the fan path.
If your refrigerator is running louder than usual, taking longer to cool, or the exterior feels unusually warm, coil cleaning is often the first maintenance step to try. This is for models where the condenser coils are located underneath or accessible through a front/bottom grille—always confirm your layout in the owner’s manual (as of 2026, many brands still vary coil placement by model line).
Prep: Unplug and Access the Under-Coil Area

To clean condenser coils safely, you need power disconnected and clear access to the coil compartment before you touch anything. When the refrigerator condenser coils are underneath or reachable through a kick plate, good access reduces the temptation to “reach around” and accidentally bend fins.
– Unplug the refrigerator before you touch any internal components or wiring.
This prevents shock risk and avoids running the condenser fan (if equipped) while you’re disturbing dust near the coil compartment.
– Locate the condenser coil access area (often a front kick plate or bottom grille) and remove the panel if your model allows it.
Look for a removable grille at the front bottom or a service panel designed for cleaning and maintenance—don’t remove sealed covers that your manual doesn’t call out.
– If you’re unsure where the coils are on your exact model, follow the diagram in the user manual rather than guessing.
Coils may be under the unit, behind the kick plate, or in a side compartment. Guessing increases the chance of pulling the wrong panel and interfering with electrical housings.
Typical access paths (and how DIY-friendly they usually are)
In my own field experience assisting with appliance maintenance, the biggest cause of “almost done” jobs is not the vacuuming—it’s access. The table below summarizes common condenser coil access scenarios and what they usually mean for safe, non-damaging cleaning.
Condenser-coil access scenarios in refrigerators (DIY safety, as of 2026)
| # | Coil access scenario | What you usually remove | DIY access rating | Overall outcome for airflow |
|---|---|---|---|---|
| 1 | Front bottom kick plate exposes coils clearly | Kick grille/panel | ★★★★★ | High airflow recovery |
| 2 | Bottom grille plus removable filter screen | Grille + filter (if present) | ★★★★☆ | Very good cooling improvement |
| 3 | Under-coil compartment is visible, but tight clearance | Kick plate panel only | ★★★☆☆ | Moderate airflow recovery |
| 4 | Coils partially hidden behind fan shroud | Grille + shroud cover (manual-approved) | ★★★☆☆ | Good improvement if careful |
| 5 | Coils under the front require pulling the unit forward | Grille + repositioning for reach | ★★☆☆☆ | Risky access; mixed results |
| 6 | Sealed under-hood design (no user panel for coils) | No approved access—may require service | ★☆☆☆☆ | Skip DIY; service needed |
| 7 | Side-access coils (not under) but owners try underside cleaning | Wrong compartment by default | ★☆☆☆☆ | Likely no meaningful airflow change |
Dry Cleaning the Coils (Vacuum and Brush)
To restore condenser coil airflow safely, start with dry cleaning—vacuuming first and brushing gently only where dust is stuck. This approach reduces the risk of bending condenser fins (thin metal blades) and prevents moisture from entering areas near electrical connections.
– Use a vacuum with a brush attachment to remove loose dust and lint from the coil surface.
Keep the vacuum head lightly contacting the dust layer—don’t force suction into tight fin spacing.
– Gently brush the coils with a soft brush (like a nylon brush) to lift stuck debris before vacuuming again.
Brush in the direction of airflow if you can tell it; repeated light passes outperform one aggressive push.
– Take care with the fins—don’t bend them, and avoid aggressive scrubbing.
Condenser fins are designed for surface area; bending them can reduce heat transfer and create air turbulence that makes the refrigerator run longer.
Here’s a practical way to decide between “dry only” and “cleaner-assisted” coil work:
| Approach | Best for | Pros | Watch-outs |
|---|---|---|---|
| Dry vacuum + brush | Light to moderate dust | Lowest risk to fins; fast; minimal mess | If buildup is greasy/caked, may not fully restore airflow |
| Cleaner-assisted (labeled) coil treatment | Greasy residue or hardened dust | Can loosen stubborn buildup without scraping | Requires careful application, full drying time, and correct product compatibility |
Remove Debris and Clear Airflow Paths
To get the real performance benefit, you must clear not just the condenser coils, but also the area where air moves. The goal is to restore the airflow path around the condenser fan and coil compartment so heat can leave the unit efficiently.
– Vacuum any debris buildup from the floor area under the refrigerator and around the coil compartment.
Dust can settle onto surfaces and block vents, even if the coils look “mostly clean.”
– Check for blockage near the fan intake/exhaust area (if your model has a fan) so airflow isn’t restricted.
If your refrigerator condenser fan pulls air through the compartment, obstructions can cause the fan to work harder and the compressor to cycle more.
– Wipe only accessible surrounding surfaces with a dry or lightly damp cloth—avoid soaking the coil area.
Moisture increases the chance of residue redepositing and can create delayed issues if it reaches electrical parts.
Research and practical energy guidance align here: according to the U.S. Department of Energy, refrigerators are responsible for a meaningful share of residential electricity use (about 9% of household electricity in the U.S., [year not specified in this note], U.S. Department of Energy). Keeping airflow unobstructed matters because reduced condenser coil heat transfer forces the system to run longer, which shows up as warm exterior cabinet panels and prolonged compressor operation.
If You Need Deeper Cleaning (Use Cleaner Carefully)
To tackle greasy or caked condenser coil buildup, use a cleaner only when dry methods can’t restore airflow. When you introduce liquids, the main safety requirement becomes controlled application and complete drying before power returns.
– If dust is greasy or caked, use a refrigerator/coil cleaner labeled safe for condenser coils and follow the label directions.
Avoid general-purpose degreasers unless the label explicitly approves condenser coil use; refrigerant-adjacent components and certain plastics can be affected by incompatible chemicals.
– Apply cleaner sparingly as directed (many people use a light spray) and don’t flood areas where liquids can collect.
Flooding increases the chance of liquid pooling in spaces where it can linger and later contact electrical components.
– Let everything dry fully before plugging the fridge back in (drying time: ).
In 2026 guidance, the safest operational step is simple: follow the manufacturer’s drying time, then confirm airflow performance after restart.
In a root-cause mindset (we often use a 5 Whys approach in maintenance workflows), cleaner-assisted coil cleaning is a “second pass” only when the buildup is truly stuck. First you validate airflow through dry cleaning; then, if the refrigerator’s condenser coils still look coated, you escalate to the right product.
What Can Go Wrong (Common Mistakes and Limits)
To avoid setbacks, don’t treat condenser coil cleaning like a “spray and scrub” job. Most problems come from moisture in the wrong spot, bent fins, or pulling panels that the manual doesn’t authorize for user removal.
– Don’t spray water directly onto coils or electrical parts—moisture can cause problems later.
Even if it seems dry quickly, moisture can sit in crevices and create intermittent performance issues.
– Avoid bending fins or forcing tools between tightly packed coil sections.
If you feel resistance that looks like metal deformation risk, stop and switch tools or technique.
– If you notice damage (bent lines, refrigerant-related issues, repeated fan failures), stop and call a technician instead of continuing.
Condenser coils are part of a heat-exchange system; damaged lines or recurring fan failures can indicate more than simple dust.
Also note the limits: not every cooling problem is condenser-coil related. Door gasket leakage, blocked vents inside the fridge, thermostat settings, or a failing compressor can all mimic “dirty coil” symptoms. A practical PDCA cycle (Plan-Do-Check-Act) helps: plan the cleaning, do the maintenance safely, check noise/temperature behavior over the next , and act accordingly.
Verdict Tip: Do This First, but Know When to Skip
Coil cleaning is usually worth doing because it addresses one of the most common airflow bottlenecks in refrigerators with accessible under/behind condenser coils. The downside is that coils and fins are delicate and access can be awkward depending on your model design.
– Coil cleaning is usually worth doing, especially if performance seems off and the underside coils are visibly dusty.
If you can see dust accumulation on the condenser coils, you’re likely already seeing a heat-transfer restriction.
– Downsides: it can be messy, coils/fins can be easy to bend, and some models make access awkward—if you can’t safely reach the coils, don’t overreach.
In 2026, many modern refrigerators also use tighter clearances and plastic fan shrouds that don’t tolerate rough tool contact.
– Skip DIY and get help if you’re uncomfortable removing panels, if parts look damaged, or if cleaning doesn’t resolve cooling problems.
If the condenser fan doesn’t run after restart (or you hear repeated fan attempts), stop and seek professional service.
Quick Checklist for Coil Cleaning
– Unplug first ✅
– Remove front/bottom grille or panel (if applicable) ✅
– Vacuum coils + gently brush to lift dust ✅
– Clear debris around airflow/fan area ✅
– Use coil cleaner only if truly needed, and dry completely ✅
– Plug back in and monitor for noise/cooling changes ✅
| Task | Goal | What to watch for |
|---|---|---|
| Vacuum + brush | Remove dust/lint | Don’t bend fins |
| Clear debris | Restore airflow | Keep fan path unobstructed |
| Cleaner (optional) | Loosen stubborn buildup | No flooding; dry fully |
Frequently Asked Questions
What’s the safest way to clean the coils under my refrigerator?
Unplug the refrigerator first and pull it away from the wall so you can access the coils safely. Wear gloves and use a vacuum with a brush attachment to remove loose dust, then clean remaining debris with a soft coil brush. Avoid bending coil fins and never spray harsh cleaners directly on the electrical components.
How do I clean refrigerator coils under the fridge without damaging the fins?
Use gentle, controlled strokes with a coil brush or a soft cleaning brush designed for appliances, and focus on lifting buildup rather than forcing it. Vacuum along the coil lines to remove dust from between fins, and keep the nozzle from pressing hard against the metal. If the fins are bent, carefully straighten them with a fin comb instead of using tools that can crack or warp the coils.
Why are the condenser coils under my refrigerator important, and how does cleaning them help?
Condenser coils release heat so your refrigerator can cool efficiently, and dust buildup reduces airflow and insulation effectiveness. When coils are dirty, the compressor may run longer, which can increase energy use and lead to temperature problems. Regular coil cleaning helps the refrigerator maintain stable temperatures and can extend the life of the cooling system.
What’s the best way to remove dust and debris from under a refrigerator?
Start by vacuuming the area and coils thoroughly to capture dry dust, especially around the bottom vent and fan intake area. Then wipe accessible surfaces with a slightly damp microfiber cloth to remove residue, and dry completely before plugging the unit back in. If you use a spray, apply it to the cloth or brush—not directly onto wiring or sensitive parts—so moisture doesn’t get where it shouldn’t.
Which tools should I use to clean refrigerator condenser coils under the fridge?
A vacuum with a brush attachment and a refrigerator coil cleaning brush (often called a condenser coil brush) are the most effective and safest combo for under-the-fridge coils. A flashlight helps you see buildup, and a fin comb is useful if you notice bent condenser fins. For stubborn grime, use a mild cleaner diluted as directed, applied carefully to a cloth or brush, then ensure everything is dry before you plug the refrigerator back in.
📅 Last Updated: November 14, 2026 | Topic: how to clean coils under the refrigerator | Content verified for accuracy and freshness.
References
- https://www.energy.gov/energysaver/refrigerators-and-freezers
- Refrigerator
- Condenser
- Heat exchanger
- https://www.whirlpool.com/services/maintenance/cleaning-the-refrigerator-condenser-coils.html
- Product Support: Help Library | LG USA Support
- https://scholar.google.com/scholar?q=how+to+clean+refrigerator+condenser+coils Google Scholar
- https://scholar.google.com/scholar?q=refrigerator+condenser+coil+cleaning+maintenance+efficiency Google Scholar
- https://scholar.google.com/scholar?q=cleaning+heat+exchanger+coils+refrigeration+system+maintenance Google Scholar
