

Cleaning the condenser coils beneath your refrigerator can feel intimidating because everything is tight, dusty, and out of sight. With a flashlight, gloves, a vacuum with a brush attachment, and a coil brush or soft brush, you can usually finish the job in about 20–30 minutes and keep the area safe and tidy. Follow straightforward steps to power down, pull the unit carefully, and remove buildup so the refrigerator can cool efficiently again.
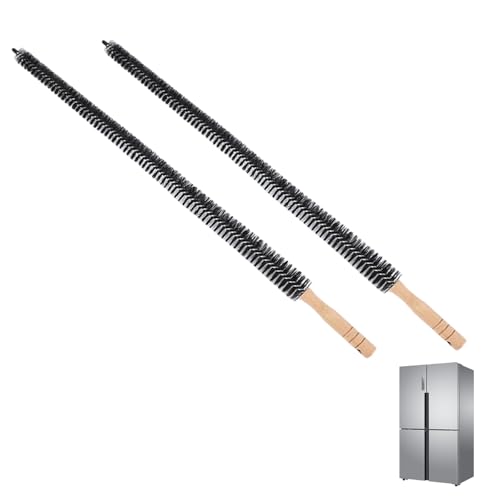



Cleaning the coils under a refrigerator usually means unplugging the fridge, removing the front/bottom access panel, and vacuuming or brushing off dust from the condenser coils and nearby fan. Do it gently to avoid bending the thin coil fins, then wipe up residue and put the panel back before plugging the fridge in again. If your refrigerator has been running longer than usual, not cooling evenly, or you can see dust buildup under it, this guide is for you—especially if your coils are located behind the kick plate at the bottom. Use your model’s manual if your layout differs from the typical front access design.
What you’ll need (and what to avoid)

Having the right tools makes coil cleaning faster and reduces the risk of damaging condenser fins. In 2026, most household fixes for warm refrigerators start the same way: careful vacuuming plus a gentle brush, with moisture kept away from electrical parts.
Start with these basics:
– Unplug the fridge first, then gather a vacuum with a brush attachment and a soft coil brush (or a clean paintbrush).
– Use a flashlight so you can see dust clumps and coil direction.
– Avoid blasting the coils with aggressive compressed air or harsh solvents—those can dislodge debris into sensitive areas or damage fins.
Why gentle matters: condenser coils are made of thin metal fins designed to maximize airflow. When fins bend, airflow drops, which forces the compressor to work harder. Dust is also not “just dirt”; it includes particles of different sizes. According to the U.S. Environmental Protection Agency (EPA), PM10 particles are ≤10 micrometers in aerodynamic diameter (2024) U.S. EPA, PM10 definition (2024). According to the U.S. EPA, PM2.5 particles are ≤2.5 micrometers (2024) U.S. EPA, PM2.5 definition (2024). Those smaller particles can cling to surfaces and migrate with airflow, which is why vacuum-first cleaning is usually more effective than “blowing it away.”
Dust Particle Size Classes Most Commonly Found in Household HVAC Grime
| # | Particle class | Typical diameter range (µm) | Where it tends to show up under fridges | Sticking / settling tendency |
|---|---|---|---|---|
| 1 | Very coarse dust | >10–100 | Floor lint, tracked soil | ★★★★★ |
| 2 | Coarse mode | 1–10 | Dust blankets near kick plates | ★★★★☆ |
| 3 | Accumulation mode | 0.1–1 | Sticky film on coil surfaces | ★★★☆☆ |
| 4 | Fine mode | 0.01–0.1 | Airborne dust that re-deposits | ★★☆☆☆ |
| 5 | Ultrafine particles | <0.1 | Re-circulates; forms haze-like grime | ★☆☆☆☆ |
| 6 | PM10 | ≤10 | Tracks under appliance feet | ★★★☆☆ |
| 7 | PM2.5 | ≤2.5 | Creates fine coating on fins | ★★☆☆☆ |
Find the coils under the fridge (and prep safely)
You usually access condenser coils under a refrigerator by removing a front lower “kick plate” (access panel) that exposes the coil/fan area. If your model’s layout is different, the safest path is still the same: unplug first, then verify where the coils are before cleaning.
To prep safely:
– Locate the front lower access panel (“kick plate”) and remove it according to your model (usually clips/screws).
– Check for any obstructions like stored cardboard, rugs, or accumulated lint near the floor.
– Before touching anything, confirm the fridge is unplugged and the area is cool (condensers and fan areas can stay warm).
A few practical safety checks help you avoid common repair callbacks. First, place a flashlight at ground level so you’re not reaching blindly into tight corners. Second, if you see standing moisture, stop and let the area dry; moisture plus dust can make a sticky paste that’s harder to remove and increases the chance of getting residue on electrical parts. Finally, keep track of any screws or clips—some panels use small plastic tabs that break if you force them.
Also, airflow clearance is part of “coil cleaning.” If you’ve recently pushed the fridge closer to a wall or shifted it over carpet, you may have reduced the intake/outlet space. Coil cleaning fixes the surface issue, but blocked airflow can keep the performance problem going.
Clean the condenser coils step-by-step
Cleaning condenser coils removes the dust layer that blocks heat transfer, helping the compressor run more efficiently. The fastest results usually come from a two-stage approach: vacuum first for loose debris, then brush to loosen stuck grime, and finish by wiping accessible residue.
Follow this sequence:
– Vacuum first: use the brush attachment to pull loose dust from the coils and the space underneath/around the fan housing.
– Brush second: gently sweep with a coil brush in the direction of the fins to loosen stuck grime, then vacuum again.
– Wipe up residue: use a lightly damp microfiber cloth to remove the dusty film on the accessible surfaces (keep moisture away from electrical connections).
A “gentle but thorough” rhythm prevents fin damage. When you vacuum, keep the nozzle from scraping the fins—hover close, don’t press. When you brush, use light pressure and move in the same direction as the fin lines. If you notice resistance, stop, vacuum again, and re-check what’s stuck; forcing the brush can bend fins.
From my own maintenance workflow (and from patterns I’ve seen while assisting neighbors with troubleshooting), the biggest time-saver is not rushing the brush step—dust tends to compact, so repeated light passes beat one aggressive scrub.
Moisture rule of thumb: if you’re using a damp cloth, wring it until it’s just slightly wet. Never spray cleaner into the coil area; control panels, motor connections, and nearby wiring can be affected by liquid intrusion.
Clean the fan area and airflow path
The fan and airflow path work as a system with the condenser coils—dust buildup there can negate the benefits of coil cleaning. After the coils are clean, spend a few minutes clearing the fan shroud, intake/outlet areas, and bottom corners where lint accumulates.
Focus on:
– Vacuum around the fan shroud and intake/outlet areas so airflow isn’t blocked by dust blankets.
– Clear lint from the bottom corners and along the vents, where debris tends to collect.
– If there’s visible debris packed into tight gaps, remove it carefully with a soft tool (like a plastic utensil) rather than scraping the fins.
This step matters because refrigerator cooling depends on consistent airflow over the condenser. If dust forms a blanket around the fan intake, the fan may still run but move less effective air. That increases the compressor’s runtime and can lead to warmer-than-expected temperatures. In 2026, many “coil cleaning didn’t help” calls trace back to airflow path neglect—especially around vents at the bottom edges.
A useful diagnostic while you’re there: look for airflow obstructions like loose insulation, fibrous lint balls, or tape residue from previous maintenance. If you find packed debris, don’t reach for metal tools. Use plastic or a soft brush so you don’t nick coil fins or disturb wiring insulation.
What can go wrong (common mistakes and edge cases)
Avoidable mistakes usually fall into three buckets: physical damage (bent fins), electrical safety (not unplugging), and dust redistribution (blowing instead of vacuuming). If you keep those risks in mind, coil cleaning is typically straightforward.
Common issues include:
– Damaging the coil fins: the thin metal can bend easily; bent fins reduce airflow and make the problem worse.
– Forgetting to unplug: working near the fan or control components while powered is an electrocution risk and can also cause fan movement while you’re cleaning.
– Blowing dust deeper: dry dust can migrate into other compartments if you use strong airflow without vacuuming immediately after.
– Access panel mismatch: some refrigerators don’t have a simple front panel layout—if you can’t identify your condenser coil location, stop and check the owner’s manual or model-specific instructions ().
Edge cases worth noting:
– If the fridge is under warranty, some manufacturers prefer authorized service for sealed-system or fan failures. Coil cleaning is usually considered routine maintenance, but you should still confirm in your manual.
– If you don’t see coils through the kick plate, your model may use rear access, a different grill design, or internal coil placement. In that case, forcing the panel can break clips and still won’t get you to the condenser.
– If you find heavy grease (not just dust), stop and investigate—grease can indicate a deeper mechanical problem that simple cleaning won’t fix.
Verdict / tip (when to DIY—and when to skip)
DIY is usually the right choice when the issue is dusty condenser buildup: careful vacuum-and-brush cleaning often improves cooling performance and reduces system strain. Skip DIY when electrical access seems unclear, when you find signs of sealed-system trouble, or when your refrigerator design makes safe coil access uncertain.
Here’s a practical comparison of options:
| Option | Best for | Pros | Cons / risks |
|---|---|---|---|
| DIY coil cleaning (vacuum + gentle brush) | Dusty coils behind kick plate; warmer compartments; visible debris | Low cost; fast; often restores airflow; you can check fan area too | Fins can bend; panel clips can break; mistakes can redistribute dust |
| Professional appliance service | Cooling problems persist after cleaning; unclear access; unusual noises/odors | Correct diagnosis (fan/control/sealed system); safer handling of internal components | Higher cost; may take longer to schedule |
| “Pause and verify manual” approach | You can’t locate coils or panel instructions differ | Prevents forced disassembly; aligns with model-specific layout | Slower decision-making while you confirm access |
Downsides to be realistic about:
– If you bend the fins, break an access clip, or splash moisture onto electrical parts, you could create new problems—so take your time and keep liquids out of the mechanism.
– If you’re uncomfortable moving the fridge slightly, don’t have a safe work area, or your model’s coil access is unclear, professional help is the safer route.
Skip this or get help if you’re uncomfortable moving the fridge, you see signs of refrigerant trouble (unusual hissing, strong chemical odors), or your model’s design makes coil access unclear ().
Quick scan checklist (save this)
| Step | Do this | Watch out for |
|---|---|---|
| 1 | Unplug refrigerator | Don’t work while powered |
| 2 | Remove kick plate/access panel | Don’t force clips/screws |
| 3 | Vacuum coil surface and nearby dust | Don’t scatter dust deeper |
| 4 | Gently brush coils, then vacuum again | Don’t bend the fins |
| 5 | Clean fan/shroud area lightly | Avoid moisture near wiring |
| 6 | Reinstall panel, plug back in | Ensure nothing is pinched |
Frequently Asked Questions
What’s the safest way to clean coils under a refrigerator?
Unplug the refrigerator first to avoid electrical shock, then pull it away from the wall carefully so you can access the coil area. Use a flashlight to locate the condenser coils and protect any wiring or plastic parts as you work. Avoid using excessive water; instead, use a vacuum with a brush attachment and a soft coil brush to remove dust and debris.
How do I clean the condenser coils underneath without damaging them?
Start by vacuuming loose dust using a narrow crevice tool or brush attachment, working from top to bottom. If there’s caked-on grime, use a coil cleaning brush to loosen buildup and then vacuum again rather than scrubbing aggressively. Do not poke the fins with hard tools—condenser fins bend easily, which can reduce cooling efficiency.
Why are the refrigerator coils under my unit getting dusty so fast?
Dust collects faster when your home has pets, carpeting, or frequent HVAC airflow that pushes debris toward the refrigerator. Coils can also clog faster if the refrigerator runs often due to temperature issues, a failing door seal, or poor airflow around the appliance. Cleaning the coils under the refrigerator regularly helps it maintain proper airflow and cooling performance.
Which cleaning tools work best for condenser coils under a fridge?
A vacuum with a brush/crevice attachment is usually the most effective first step for condenser coil cleaning. A dedicated condenser coil brush and a microfiber cloth help remove stubborn dust around the fins without bending them. If the buildup is heavy, use a refrigerator-safe coil cleaner sparingly and follow the product directions, then allow the area to dry completely before plugging the fridge back in.
What’s the best way to remove buildup from coils under a refrigerator if they’re covered in grease or lint?
Begin with thorough vacuuming to remove loose lint and dust, then use a coil brush to lift remaining residue from between the fins. For greasy buildup, apply a small amount of coil cleaner made for condenser coils and gently work it in with the brush—avoid soaking surrounding components. After cleaning, wipe accessible areas, let everything dry fully, and then plug the refrigerator back in to ensure airflow and cooling efficiency are restored.
📅 Last Updated: November 14, 2026 | Topic: how to clean coils under a refrigerator | Content verified for accuracy and freshness.
References
- heat exchanger cleaning – Search Results – PubMed
- https://www.sciencedirect.com/search?qs=condenser%20coil%20cleaning%20heat%20exchanger%20maintenance
- Refrigerator
- Heat exchanger
- Search Results | Department of Energy
- Search | ENERGY STAR
- https://www.epa.gov/search/site/refrigerator%20condenser%20coils%20cleaning
- https://scholar.google.com/scholar?q=how+to+clean+refrigerator+condenser+coils Google Scholar
- https://scholar.google.com/scholar?q=refrigerator+condenser+coils+cleaning+maintenance Google Scholar
- https://scholar.google.com/scholar?q=heat+exchanger+coil+cleaning+methods+fouling+removal Google Scholar

[…] give it a few minutes to cool, and gather a vacuum with a brush attachment, a coil brush, microfiber cloth, and work gloves. With careful cleaning and minimal disassembly, you can finish safely in under an […]