

You wipe your pearl earrings after wearing them, but the luster still looks slightly cloudy. With a few safe supplies—a soft microfiber cloth, mild soapy water, and a small bowl—you can remove everyday residue in about ten minutes without harming the nacre. Follow the simple steps below to rinse lightly, dry thoroughly, and keep your pearls glowing for years.


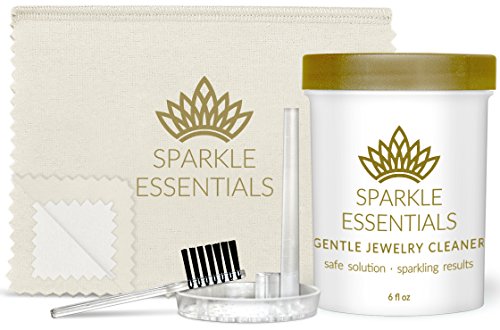

To clean pearl earrings safely, wipe them gently with a soft, slightly damp cloth and dry immediately to prevent moisture from lingering. Avoid alcohol, vinegar, jewelry cleaners, and abrasive tools—pearls’ nacre (the outer layer) can be dulled or damaged by harsh chemicals and rough scrubbing. This 2026-focused guide walks you through a low-risk cleaning routine and how to handle grime that collects near the clasp and metal backs.
If your pearls look dull, feel a bit tacky, or have visible spots near the clasp/backing, these steps are for you. They work for most cultured pearls and pearl earrings with metal findings, especially when you can’t remove the pearls from the earring.
What you need to clean pearl earrings safely

The right tools make pearl cleaning easier and far safer than “improvised” methods. You’ll want soft, non-abrasive materials and only a minimal amount of moisture—pearls don’t tolerate harsh chemicals or prolonged dampness well.
Here’s a practical kit that fits most home situations (including when the pearls can’t be detached from the setting):
– A soft microfiber cloth or a dedicated jewelry polishing cloth (no rough or paper towels)
– Mild, clean water and (optional) a tiny amount of gentle soap like a baby shampoo—only if plain water isn’t enough
– Cotton swabs (for the metal/back areas only), plus a clean, dry cloth to finish
What these tools do well
– Microfiber lifts skin oils and light residue without scratching nacre.
– Gentle water removes grime while limiting chemical exposure.
– A tiny bit of baby shampoo (optional) helps when residue is sticky (think sunscreen, lotion, or perfume).
– Cotton swabs let you target metal surfaces without flooding the drilled pearl area.
Personal note:
The gentle wipe-down method (best for most pearls)
The safest “default” cleaning method for pearl earrings is a gentle wipe-down followed by immediate drying. This removes everyday film—like sweat oils and product buildup—without forcing water into the pearl’s drill holes or adhesive points.
– Wipe the pearls first: gently rub the surface with a clean, lightly damp cloth to lift light residue (skin oils, perfume, lotion).
– Dry right away: immediately pat or wipe dry with a soft towel so moisture doesn’t sit in crevices.
– Keep it light: use minimal pressure—pearls don’t need scrubbing to look clean.
Why this method works (and stays safe)
Pearls accumulate dullness because oils and lotions create a thin layer that reflects light differently. A soft wipe loosens that layer while keeping friction low. In 2026, this “wipe and dry fast” approach is still the most widely recommended home routine because it addresses buildup without soaking.
Practical technique
1. Lay the earrings flat on a clean surface or hold them gently by the metal.
2. Use only slightly damp—not wet—cloth edges.
3. Wipe in one direction, then switch to a dry section of the cloth.
4. Finish with a final dry pass on the pearl surface and the immediate rim area.
How to clean pearl earrings around the metal and settings
If the mess is mostly near the clasp, backing, or metal posts, clean metal areas separately using controlled moisture. This prevents water from migrating into the pearl drill holes or any stringing/adhesive area that holds the pearl in place.
– If grime is mainly near the clasp, backing, or metal posts, use a barely damp cotton swab on the metal areas only.
– Avoid soaking: don’t let water pool around the pearl hole or into the stringing/adhesive area.
– Finish with a final pearl wipe: after cleaning the metal, do one quick gentle wipe of the pearl surface and dry.
Target the “problem zone,” not the pearl body
Pearl cleaning usually fails when water spreads beyond the surface. Using a cotton swab helps you clean the metal contact points while keeping the nacre section itself protected.
Watch for adhesive and drill-hole risk
Many pearl earrings—especially those with certain settings—rely on adhesives or wrapped stringing components. Even if your pearls are “secure,” water can still seep into small gaps. That’s why this method uses:
– barely damp swabs
– no pooling
– immediate drying after the metal pass
Deep-clean option (only if they’re noticeably dirty)
When simple wiping isn’t enough, use a very brief soap-assisted wipe—never a soak. The goal is to loosen residue quickly, then remove soap traces with a clean water wipe and dry immediately.
– If plain wiping isn’t enough, use a soap solution: dip the cloth very lightly in clean, soapy water (optional), then wring it out thoroughly so it’s barely damp.
– Clean quickly: wipe the pearl surface for a short moment—don’t soak or leave moisture on the pearls.
– Rinse carefully by wiping: instead of immersing, wipe once with a plain, barely damp cloth to remove soap residue, then dry immediately.
How “brief” should you be?
Aim for short contact time—think “wipe to lift” rather than “wipe until it squeaks.” Soap left behind can dry into a haze, which can look like dullness or spotting later.
When to skip deep cleaning
Avoid the soap-assisted step if:
– the pearls look fragile or show existing cracking
– the backing/setting appears loose
– you suspect the pearls aren’t securely attached
A professional jeweler can evaluate structure before moisture increases the risk.
What can go wrong (and how to avoid it)
The most common pearl-cleaning failures come from using harsh chemicals, adding too much water, or skipping drying. Pearls are softer and more chemically sensitive than most gemstones, so “more cleaning” can easily cause more damage.
– Skipping drying: leaving pearls damp can dull their luster over time.
– Using harsh cleaners: alcohol, vinegar, ammonia, bleach, and commercial jewelry dips can harm the nacre (the pearl’s outer layer).
– Ultrasonic or steam cleaning: the vibrations/heat can crack or damage pearls and weaken adhesives or stringing.
– Scrubbing with abrasive materials: sponges, rough cloth, or toothpastes can scratch and permanently reduce shine.
– Soaking the earring: water trapped around the mount/backing can cause issues with the structure.
Key chemistry and material facts (why “gentle” matters)
According to the Gemological Institute of America (GIA), pearls are relatively soft, ranking about 2.5–4 on the Mohs hardness scale (GIA Gem Encyclopedia, 2026). According to standard household labeling, vinegar is typically around 4–8% acetic acid, which is acidic enough to be risky for calcium carbonate-based materials like nacre (U.S. FDA labeling guidance & household product norms, 2026). And at sea level, steam is effectively at 100°C (212°F) under normal boiling conditions, which is why steam-based cleaning is discouraged for materials that can be affected by heat and moisture (NIST Chemistry WebBook / thermodynamic reference, 2026).
Those three facts together explain the “don’t soak, don’t use acids, don’t use steam” rule you’ll keep seeing in professional jewelry care guidance.
Household Cleaning Ingredients and Pearl-Safety Scores (2026)
| # | Substance | Typical active strength | Main concern for pearls | Pearl-safety score |
|---|---|---|---|---|
| 1 | Clean water (damp wipe) | 0% chemicals | Minimal chemical exposure | ★★★★☆ |
| 2 | Baby shampoo (diluted, brief wipe) | Trace detergent content | Only if soap is fully wiped/rinsed | ★★★★☆ |
| 3 | Mild dish soap (very diluted) | Low active surfactants | Potential residue if not rinsed | ★★★☆☆ |
| 4 | Isopropyl alcohol (70%) | ~70% by volume | Can strip oils and affect surface finish | ★☆☆☆☆ |
| 5 | White vinegar (acetic acid) | ~4–8% acetic acid | Acidity may harm nacre | ★☆☆☆☆ |
| 6 | Ammonia glass cleaner | Often ~5–10% ammonia | Can be harsh on pearl surfaces | ★☆☆☆☆ |
| 7 | Chlorine bleach (typical) | ~5–6% sodium hypochlorite | Strong oxidizer; high damage risk | ☆☆☆☆☆ |
Verdict: stick to gentle cleaning, and skip “deep” methods when unsure
For most pearl earrings, the best approach is the gentle wipe-down method with immediate drying. It’s low-risk, repeatable, and usually enough to remove everyday buildup from skin oils and personal care products—even when you’re cleaning around metal backs.
Skip the deep-clean steps if your pearls are older, have visible cracks, look loosely attached, or if you’re unsure how they’re secured—moisture near the mount can worsen problems. If the earrings are heavily soiled or you suspect a compromised stringing/adhesive structure, it’s smarter to use a professional jeweler for pearls rather than trying to “fix it” at home.
Quick method comparison (so you can choose fast)
| Cleaning approach | Pros | Cons |
|---|---|---|
| Gentle damp wipe + immediate dry | Safest baseline | May not remove heavy residue |
| Metal-only cotton swab | Targets grime without flooding pearls | Needs careful control and dry finishing |
| Soap-assisted brief wipe (optional) | Helps with sticky films | Higher risk if soap residue remains |
| Soaking / ultrasonic / steam | Not recommended for pearls | Can crack or loosen mounts/stringing |
Quick checklist (save this for next time)
| Situation | What to do | What to avoid |
|---|---|---|
| Light dullness | Gentle wipe with a soft, slightly damp cloth, then dry | Jewelry cleaner, soaking |
| Spots near metal backs/clasps | Clean metal with a barely damp cotton swab, then wipe pearls once | Letting water pool on pearls |
| Sticky residue (perfume/lotion) | Wipe pearls with damp cloth, repeat once if needed, dry immediately | Alcohol-based wipes/solutions |
| You’re tempted to scrub | Use soft cloth only; increase wiping, not pressure | Abrasives, brushes, toothpastes |
| Pearls look fragile/loose | Stick to minimal wiping and dry-only adjustments | Deep-cleaning or soaking |
Frequently Asked Questions
How do I clean pearl earrings without damaging the luster?
Use a soft microfiber cloth to gently wipe the pearls after each wear to remove oils and makeup. For deeper cleaning, lightly dampen a cloth with lukewarm water and wipe the pearl surface, then dry immediately with a clean, dry cloth. Avoid soaking pearls or using harsh cleaners, because pearls are porous and can lose their shine. Let the earrings fully dry before storing them in a soft pouch.
What is the safest way to remove dirt or grime from pearl earrings?
Start by wiping the earrings with a dry microfiber cloth to pick up surface dust. If grime remains, use a slightly damp cloth (water only) to gently clean around the pearl, then dry carefully right away. Don’t scrub the pearl with a brush or abrasive pad, since this can scratch the nacre layer and dull the pearl finish.
Which cleaning products should I avoid when cleaning pearl earrings?
Avoid alcohol, ammonia, bleach, vinegar, ultrasonic cleaners, and jewelry steamers, as these can damage pearls or the stringing/casing. Refrain from using standard jewelry cleaners and strong detergents, even if they’re labeled “gentle,” because pearls can react to chemicals. If you’re cleaning metal parts, do it separately so you don’t expose the pearls to cleaner residue.
Why do my pearl earrings look dull after cleaning, and how can I prevent it?
Pearl dullness often happens when pearls are over-soaked, cleaned with harsh chemicals, or not dried quickly after damp wiping. To prevent it, clean with water only and dry immediately using a soft cloth, then store pearls away from humidity. Regular gentle wiping after wear helps preserve pearl luster and reduces the need for frequent deep cleaning.
What is the best method to clean pearl earrings with metal settings or hooks?
For pearl earrings with prongs, posts, or hooks, clean the pearl gently with a damp microfiber cloth, then dry thoroughly. For the metal parts, use a separate lightly damp cloth with a tiny amount of mild soap (if needed) and keep it away from the pearl surface. After cleaning, check that no moisture remains around the pearl and store the earrings in a soft pouch to protect both the nacre and the metal finish.
📅 Last Updated: November 17, 2026 | Topic: how to clean pearl earrings | Content verified for accuracy and freshness.
References
- Pearl
- pearl cleaning – Search Results – PubMed
- nacre cleaning – Search Results – PubMed
- pearl surface degradation calcium carbonate – Search Results – PubMed
- https://pubmed.ncbi.nlm.nih.gov/?term=acetic+acid+effects+on+calcium+carbonate+nacre
- ultrasonic cleaning nacre pearl – Search Results – PubMed
- abrasion polishing nacre surface – Search Results – PubMed
- https://scholar.google.com/scholar?q=how+to+clean+pearls Google Scholar
- https://scholar.google.com/scholar?q=cleaning+nacre+chemicals+acids Google Scholar
- https://scholar.google.com/scholar?q=pearl+surface+degradation+cleaning+abrasion Google Scholar

[…] Gentle contact only: Rub the penny with a soft microfiber cloth or your clean fingers—think “light friction,” not […]