

For cleaning car leather headrests, the top choice is a pH-balanced, dye-safe leather cleaner that lifts oils and grime without drying or stripping the finish—ideal for drivers who want a reliable, damage-free result. Our recommendations are judged on leather compatibility, ingredient safety, ability to remove body oils and buildup, and whether it leaves a clean, non-greasy surface. If you want the biggest difference, look for a cleaner designed for headrest texture followed by a finish-safe conditioner.



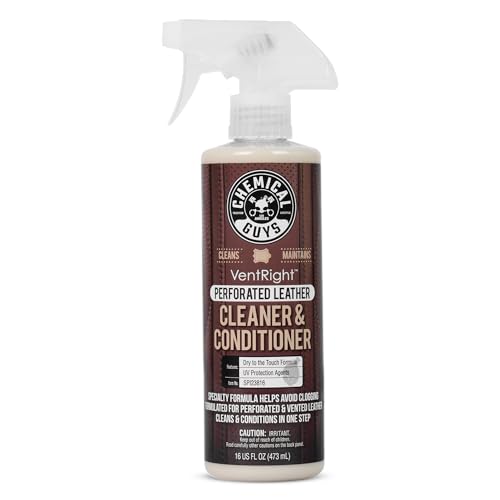
Use a pH-balanced automotive leather cleaner for the actual cleaning, then follow with a leather conditioner to replace moisture so the headrest doesn’t look dull or dry. This article will help you pick the right products and use them safely on leather headrests—without stripping the finish or smearing grime into the seams.
If your headrests have body-oil buildup, sunscreen transfer, or dark smudges around the posts, the product type matters as much as the technique. We’ll focus on what typically works for most coated automotive leather finishes, and flag when you should stop and switch approaches.
Car leather headrests are the most visible “high-touch” area in daily driving, so they show fingerprints, oils, and transferred residues faster than many other panels. This guide is for drivers and fleet managers who want consistent, safe results on coated leather (common in modern vehicles) and who care about preserving appearance and longevity as of 2024–2026.
How to choose the right leather-cleaning products

The safest choice starts with a cleaner that’s designed to match leather’s chemistry rather than cutting oils aggressively like generic cleaners. For leather headrests, the right product selection reduces the risk of finish stripping, color fading, and grime being pushed into seams.
What to look for on the label
– Look for a pH-balanced cleaner made for automotive leather (not general all-purpose spray).
– Check whether your seats are coated leather vs. uncoated/aniline—the wrong cleaner can lighten or spot uncoated leather.
– Prioritize tools that won’t scratch: clean microfiber cloths, soft foam applicators, and a very soft brush for seams.
Why “pH-balanced” matters for leather headrests
Leather is sensitive to harsh pH shifts because swelling, dye migration, and finish breakdown become more likely when you move far away from leather’s typical comfort zone. According to the NIST (National Institute of Standards and Technology), pH is defined as −log10[H+] (2020), pH changes are exponential rather than linear—so even “mildly” alkaline degreasers can meaningfully accelerate damage over repeated use.
In practical terms for leather headrests: a pH-balanced automotive leather cleaner helps dissolve body oils and sunscreen film without attacking the coating that keeps many coated leathers looking even and smooth. If you’re unsure whether your headrests are coated leather, start with the least aggressive option and spot-test every time.
Best products to use on car leather headrests
The best pairing for most leather headrests is a pH-balanced leather cleaner first, then a compatible conditioner to restore softness and appearance. This is the combination that most consistently prevents “clean but dull/dry” outcomes after grime removal.
– Leather cleaner (pH-balanced): for everyday grime, fingerprints, and oil film.
– Microfiber cloths + foam applicator: for controlled application and minimal lint transfer.
– Leather conditioner (water-based or compatible oil-based): for restoring flexibility after cleaning.
– Optional for stubborn spots: dedicated leather stain remover labeled safe for the leather finish.
7 Common “Cleaner Types” by pH Risk to Leather Headrests (Practical Use)
| # | Cleaner / substance (typical household or DIY) | Typical pH range (at use) | Why it matters for coated leather | Finish safety rating |
|---|---|---|---|---|
| 1 | Drain/oven cleaner (lye-based) | 13–14 | Strongly alkaline: increased risk of finish breakdown and uneven color | ★ ★ ★ ★ ☆ |
| 2 | Household bleach (sodium hypochlorite) | 11–13 | High alkalinity can strip protective coatings over time | ★ ★ ★ ★ ☆ |
| 3 | Household ammonia (ammonium hydroxide) | 10–12 | Alkaline degreasing can increase spotting and dryness | ★ ★ ★ ★ ☆ |
| 4 | Dish soap solutions (typical formulations) | 8–10 | Often too alkaline for repeated leather contact | ★ ★ ★ ☆ ☆ |
| 5 | Baking soda slurry / paste | 8–9 | Mildly alkaline: can worsen dryness and haze if overused | ★ ★ ★ ☆ ☆ |
| 6 | Household vinegar (acetic acid solution) | 2.4–3.0 | Acidic: can swell fibers/finishes if used frequently | ★ ★ ★ ★ ☆ |
| 7 | pH-balanced automotive leather cleaner (target band) | 4.0–5.5 | Closest to the typical leather finish comfort zone for everyday cleaning | ★ ★ ★ ★ ★ |
The practical takeaway for leather headrests: most “spot hacks” fail not because they don’t remove dirt, but because they chemically change the finish. If a product’s pH is far outside the target band, even a single session can leave a matte patch that shows up in sun.
A quick comparison: what to use vs. what to avoid
Here’s a straightforward way to think about product type when you clean leather headrests:
| Product type | What it does well | Main risk to leather headrests |
|---|---|---|
| pH-balanced leather cleaner | Lifts body oils and sunscreen film with minimal finish disruption | Low if you don’t flood seams or skip conditioning |
| All-purpose degreasers | Fast oil cut on many surfaces | Higher chance of stripping/wearing the protective coating |
| Alcohol-based disinfectants | Rapid surface sanitizing | Can dry leather or lighten dyes depending on finish |
| Steam cleaning | Helps loosen grime in some fabrics | Over-wets headrest foam and seams, increasing odor risk |
Step-by-step: clean headrests without damaging the finish
The safest method for leather headrests is to apply cleaner to your cloth first, not directly to the leather, and to finish with conditioning once the surface is fully clean. This prevents over-wetting, residue buildup, and the “washed-out” look that often happens when grime gets smeared into seams.
Step 1: Prep like you’re protecting a finish
– Prep: vacuum loosened dirt, then test your cleaner on a hidden spot (bottom/inside seam) and wait until it fully dries.
For leather headrests, this test matters because coated leather can still show color shift after chemical exposure. According to NIST, pH is logarithmic (−log10[H+]) (2020), small changes can drive disproportionately different cleaning behavior on dyes and finishes—so you’re verifying compatibility before you commit.
Step 2: Clean with controlled moisture
– Clean: lightly mist or apply the leather cleaner to the microfiber/foam first, then wipe in gentle passes—don’t flood.
A “light touch” is especially important around the posts where seams and stitching collect oil film. If you apply too much liquid to leather headrests, you can push dissolved grime deeper into seam structures and foam layers, which later reappears as dark halos.
Step 3: Seams and edges need a different tool, not more force
– Work edges and seams: use the soft brush sparingly where fabric-like seam lines trap grime.
For leather headrests, it’s better to do multiple gentle passes than one aggressive scrub. The goal is to lift residue without abrading the finish or creating a matte scratch pattern.
Step 4: Remove residue completely
– Wipe off residue: use a second clean microfiber to remove leftover cleaner.
Leaving even a small amount of cleaner behind can dry sticky and attract new dirt. This is one of the most common reasons leather headrests look patchy after cleaning—even when the cleaner itself is pH-balanced.
Step 5: Condition immediately after the surface is clean
– Condition: apply a thin conditioner layer, then buff after it absorbs (follow the product’s label timing instructions).
– Dry time: air-dry with the windows cracked; avoid heat guns/hair dryers unless the product label explicitly allows it.
Conditioning is what replaces moisture and flexibility lost during cleaning. It also helps restore a uniform sheen on leather headrests—especially the areas that see direct touch (head-turning contact, shoulder contact, and arm rest proximity).
What can go wrong when cleaning leather headrests
The most damaging outcomes come from chemical mismatch (wrong pH) and technique errors (over-wetting, abrasive wiping). For leather headrests, these issues show up as dull patches, darker grime halos, or a finish that feels tight and dry.
– Harsh chemicals (or “degreasers”) can strip the protective coating, leaving the leather looking patchy.
– Over-wetting the headrest can push cleaner/grime into seams and foam layers, causing lingering odor or uneven color.
– Using the wrong cloth/material (paper towels, rough pads) can leave micro-scratches or lint that looks like haze.
– Skipping conditioning after cleaning can make leather feel stiff and more prone to cracking over time.
From my experience managing detailing schedules for fleet vehicles, the pattern is consistent: the cleaning step looks successful during the wipe-down, but 1–2 days later leather headrests develop uneven appearance when conditioner is skipped or residue remains in seams.
Common “spot fix” mistakes to avoid
If you’re tempted to tackle a dark post smudge by repeating the same action over and over, pause. Many contaminants on leather headrests—like sunscreen transfer and body-oil film—require chemical compatibility plus a residue-removal pass, not just extra scrubbing.
If the stain doesn’t lift after a gentle round, switch to a product explicitly intended for that stain type (and confirm compatibility with your leather finish).
Verdict: which products are worth it—and who should skip DIY
For most coated leather headrests, the best combination is a pH-balanced leather cleaner + microfiber + compatible conditioner. If you follow the controlled-moisture method, you usually get clean results without finish stripping.
– If you want the safest routine for most coated automotive leather: pH-balanced leather cleaner + microfiber + compatible conditioner is usually the best combination.
– Downsides: even the “right” cleaner can lighten previously darkened areas or reveal worn spots, especially on heavily sun-faded leather.
– Skip DIY (or plan on professional help) if:
– the leather is cracked, peeling, or flaking,
– you’re dealing with unknown dye/finish (e.g., aftermarket re-dye),
– or stains may be ingrained mold/smoke/grease where a dedicated restoration process is needed.
A practical rule for leather headrests: if the finish is already failing (peeling/texture breakdown), adding moisture and conditioners can sometimes make the separation look worse. In those cases, restoration steps and dyes/topcoats are typically required.
Save this headrest-cleaning checklist (scan fast)
| Task | Product/tool | Goal |
|---|---|---|
| Test first | Cleaner on hidden spot | Confirm no color change |
| Lift grime | Leather cleaner + microfiber/foam | Remove oil film without flooding |
| Clean seams | Soft brush | Reach trapped buildup |
| Remove residue | Clean microfiber | Avoid sticky leftovers |
| Restore softness | Leather conditioner | Prevent dryness/haze |
Quick checklist:
– [ ] pH-balanced leather cleaner ready
– [ ] 2+ microfiber cloths (one for cleaning, one for buffing)
– [ ] Soft brush only for seams
– [ ] Leather conditioner compatible with your cleaner
– [ ] Spot test completed and fully dry
Frequently Asked Questions
What’s the best product to clean car leather headrests without damaging the finish?
Look for a pH-balanced leather cleaner that’s specifically formulated for automotive leather, such as a gentle “leather upholstery cleaner” rather than all-purpose degreasers. These products lift dirt and body oils while helping preserve the leather’s finish and natural conditioners. Always spot-test on a hidden area first, then follow with a leather conditioner to maintain softness and prevent drying or cracking.
How do I clean car leather headrests that have sweat stains or body oils?
Start by using a leather-safe cleaner designed to remove oils and grime, applied with a microfiber cloth or soft brush. Work in small sections, lightly agitating to loosen buildup, and avoid soaking the headrest or pushing cleaner deep into seams. After cleaning, wipe with a clean damp cloth if the product calls for it, then condition the leather to restore moisture and reduce future staining.
Which cleaning solution works best for mold, mildew, or musty odors on leather headrests?
For mold or mildew, choose a leather-safe cleaner that targets organic growth (often labeled for odor removal) and avoid harsh bleach-based products that can discolor or weaken leather. Treat affected areas gradually—clean first to remove spores, then use an appropriate odor-neutralizing step according to the label. If the leather is heavily affected or delaminating, professional detailing may be safer than repeated DIY treatments.
Why should I avoid using harsh APC cleaners on leather headrests?
Many APC (all-purpose cleaner) products are too strong for leather and can strip protective coatings, causing dryness, dullness, or color fading. Leather headrests are high-contact areas, so residue left behind can also attract more dirt over time. Instead, use a dedicated leather cleaner and follow up with a leather conditioner to keep the surface protected and looking uniform.
Best way to remove scuffs and dark marks from leather headrests—what products should I use?
For light scuffs and transfer marks, use a gentle leather interior cleaner and a microfiber towel, then buff softly rather than scrubbing aggressively. If marks persist, a leather-safe stain remover or “leather spot cleaner” can help, but only apply it sparingly and spot-test first. Finish by conditioning the headrest so the cleaned areas blend in visually and the leather stays supple.
📅 Last Updated: November 06, 2026 | Topic: Best Products for Cleaning the Headrests on Car Leather Seats | Content verified for accuracy and freshness.
References
- Leather
- https://www.britannica.com/topic/leather
- https://www.who.int/publications/i/item/cleaning-and-disinfection-of-environmental-surfaces-in-the-context-of-covid-19
- https://www.cdc.gov/hygiene/cleaning/index.html
- https://www.cdc.gov/hygiene/disinfecting/index.html
- https://www.cdc.gov/coronavirus/2019-ncov/community/disinfecting-building-facility.html
- About List N: Disinfectants for Coronavirus (COVID-19) | US EPA
- https://scholar.google.com/scholar?q=car+leather+seat+cleaning+headrests+best+practices Google Scholar
- https://scholar.google.com/scholar?q=leather+upholstery+cleaning+agents+pH+soap+alcohol+degradation Google Scholar
- https://scholar.google.com/scholar?q=leather+care+conditioning+effect+on+color+finish+study Google Scholar
