

You can clean a gaming headset with water only under strict conditions—but experts generally say you should not spray or soak it. The safest route is to power off the headset, wipe the exterior and ear pads with a lightly damp cloth (or a manufacturer-approved cleaner), and keep moisture away from mics, drivers, and charging ports. Want the short verdict on whether water is a safe option? Stick with the guidance below to avoid damage and restore hygiene without risking sound quality.



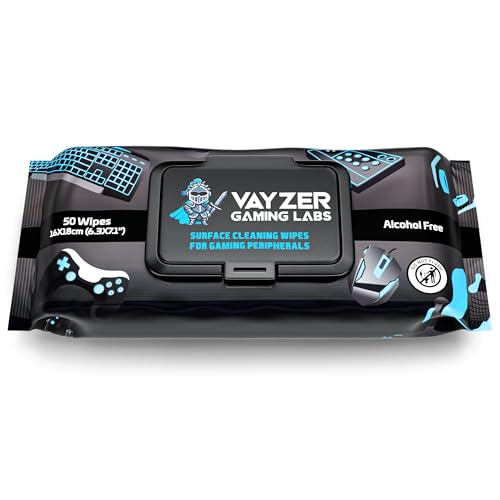
If you mean pouring or rinsing water over a gaming headset: usually, no. Experts recommend starting with a dry wipe to remove sweat and debris, then using only lightly damp cleaning on parts your manufacturer explicitly says are safe—followed by fully drying before you use the mic or listen through the drivers.
If your headset gets sweaty, dusty, or smudged from daily use, this is for you—especially if you’re tempted to “just rinse it.” The advice matters most when your model doesn’t have an official water-resistance rating (like an IP rating) or doesn’t specifically allow water cleaning in its manual.
What experts say about using water on gaming headset parts

Most experts agree that water cleaning is high-risk because the mic and speaker pathways are not designed like sealed appliances. Even when water seems to “stay on the outside,” moisture can travel into grilles and boom-mic openings where it can linger and cause long-term problems in a gaming headset.
According to IEC 60529:2013 (IP Code), the “X” in an IP rating means “not tested,” so an IPX4 headset does not automatically qualify as safe for rinsing or immersion.
According to IEC 60529:2013, IPX4 is tested against splashing water, while IPX7 is tested against immersion up to 1 meter for up to 30 minutes—two very different exposure conditions.
Because the IP tests assume a specific test setup, experts caution that cleaning water applied by a user may not match the conditions used in IEC 60529:2013.
Where water becomes a problem (quick risk mapping)
– The speaker openings and boom mic are the highest-risk areas for moisture damage and long-term odor/molding. A gaming headset’s audio path depends on tight tolerances and consistent acoustic behavior; moisture can disrupt that even if the headset powers on normally.
– Many manufacturers treat “wiping” and “lightly damp cleaning” very differently from rinsing/soaking—and they often only allow water on specific removable parts. In 2026, lots of gaming headset manuals still explicitly warn users not to flush or rinse speaker/mic openings.
– Always start by checking your exact model’s manual or warranty notes for cleaning instructions (especially whether it has an IP rating). If a gaming headset doesn’t list an approved cleaning method, the safest assumption is “water not supported,” particularly near the mic port, cable joints, and grille seams.
What “water-safe” actually means for a gaming headset
An IP rating (Ingress Protection) tells you what the enclosure survived in a standardized test, not what it will tolerate during everyday cleaning. With a gaming headset, the practical question isn’t only “can it handle moisture?”—it’s “can moisture reach the mic capsule or driver cavity, and can it fully evaporate afterward?”
If your headset has no IP rating, experts generally recommend treating all water exposure as unsupported for core electronics. If it does have an IP rating, you still need the manufacturer’s cleaning guidance, because cleaning tools (wet wipes, spray bottles, soaking pads) can introduce liquid in ways that a standardized water jet or splashing test doesn’t replicate.
IEC 60529 “Second Digit” Liquid Protection Levels Relevant to Headset Cleaning (X1–X7)
| # | IEC liquid rating | Water exposure tested | Headset cleaning implication | Protection strength |
|---|---|---|---|---|
| 1 | IPX1 | Vertically falling drops | Not a license to rinse; treat as “very limited moisture only” | ★☆☆☆☆☆☆ (1/7) |
| 2 | IPX2 | Drops when enclosure is tilted (up to a specified angle in test) | Still avoid cleaning liquids near mic/speaker paths | ★★☆☆☆☆☆ (2/7) |
| 3 | IPX3 | Spraying water (tilted conditions in test) | Wipes may be tolerated on some exteriors; rinse still discouraged | ★★★☆☆☆☆ (3/7) |
| 4 | IPX4 | Splashing water from any direction | Better for moisture exposure, not for speaker/mic flushing | ★★★★☆☆☆ (4/7) |
| 5 | IPX5 | Water jets | Still requires “approved cleaning only” around openings | ★★★★★☆☆ (5/7) |
| 6 | IPX6 | Powerful water jets | Higher tolerance to jets, but not equivalent to rinsing | ★★★★★★☆ (6/7) |
| 7 | IPX7 | Immersion (up to 1 meter for up to 30 minutes in test) | Even here, follow manual instructions—mic/driver sealing varies | ★★★★★★★ (7/7) |
The safest water-free cleaning routine (most models)
For most gaming headsets, the safest method is dry cleaning first, then minimal moisture only where the manual explicitly allows it. This approach reduces the chance that liquid reaches the boom mic internals or pools inside speaker cavities—two common failure points.
Dry microfiber wiping is often the default because it removes sweat oils without introducing free liquid into mic ports or speaker grilles.
Manufacturers commonly recommend cleaning with a soft, dry cloth and avoiding liquid near transducer openings; when liquids are allowed, they’re usually described as “lightly damp” and restricted.
A good cleaning workflow separates “debris removal” from “surface wipe,” which helps prevent grime from being pushed into mic and speaker openings on a gaming headset.
Step-by-step: dry-first routine that won’t compromise the mic
– Power the headset down and unplug it (wired) or remove it from charge/PC (wireless) before cleaning. This protects the microphone electronics and any charging contacts from accidental moisture.
– Remove loose debris first using a soft brush and/or gentle air flow; then wipe surfaces with a clean, dry microfiber cloth. For a gaming headset, this is crucial because dust and dried sweat can clump and act like an abrasive when you wipe.
– For smudges, use manufacturer-approved electronics cleaning wipes or a method listed in your manual; avoid getting liquid into mic vents or speaker grilles.
Dry cleaning “best practice” details (so you don’t spread grime)
– Use a soft-bristle brush (or a clean, dry makeup brush style) around the headband exterior and ear cushion seams. Keep pressure light—gaming headset plastics can scuff, and foams can tear.
– When cleaning the boom mic, wipe the exterior and the windscreen area gently. If the mic has a removable windscreen, handle it per the manual; otherwise, keep moisture off the microphone opening.
– If your headset uses a detachable cable, only clean the connector area with a dry wipe. Treat any connector pins/couplings as “no liquid.”
Quick comparison: dry-first vs rinse-first
Below is a practical contrast that matches how most headset warranties and care instructions are written in 2026:
| Approach | What you’re doing | Main risk to a gaming headset |
|---|---|---|
| Dry-first (recommended) | Brush + dry microfiber, only dampen allowed exterior surfaces | Low chance of liquid migrating into mic vents/speaker cavities |
| Rinse-first (usually unsafe) | Pour/spray water or soak components | Higher chance of moisture trapping, odor buildup, and audio/mic instability |
Pros/cons (what changes when you add water)
Pros (only when the manual allows it):
– Can remove sticky sweat film from outer hard plastics and some removable pads.
– Can improve comfort and hygiene for long sessions.
Cons (common downsides on gaming headsets):
– Moisture can be trapped near drivers or the boom mic, causing muffled sound or distorted voice.
– Materials like foam windings and cushion liners can hold bacteria/sweat residue after “surface drying.”
When water is acceptable: removable pads and hard surfaces
Water can be acceptable for a gaming headset only in narrow conditions: removable parts, specific materials, and explicit manufacturer permission. If you’re trying to “clean the whole headset with water,” experts would still consider that the wrong default.
If ear cushions are removable and the manual allows damp cleaning for that specific material, you can clean the cushions without rinsing the headset body.
Experts generally distinguish between “lightly damp wiping” and “rinsing/soaking,” because damp wiping is less likely to force liquid into mic vents or speaker grilles.
Even on a “water-tolerant” gaming headset, liquid exposure can be uneven—booms, cable joints, and internal seams often have different sealing than the ear-cup exterior.
What you can do with water (and what you should still avoid)
– If your ear cushions are removable and the manual allows it, you can clean them with a lightly damp cloth and a mild, non-abrasive cleaner—no soaking.
– Don’t run water directly over controls, seams, or microphone openings; keep moisture away from cables and internal housings. For a gaming headset, the controls cluster and boom pivot area are often where capillary action can draw moisture inward.
– Use this only when the manufacturer explicitly indicates the material (leatherette/fabric/foam) can handle damp cleaning—otherwise treat it as “no water.”
Material matters: leatherette vs fabric vs foam
Many gaming headsets use a combination of hard plastic shells and soft cushion materials. Treat each differently:
– Leatherette (synthetic leather): Often tolerates gentle damp wiping on the surface; avoid saturating seams where the base foam can absorb moisture.
– Fabric/cloth cushions: Usually require light contact with a damp cloth (or manufacturer-approved wipes). Soaking can leave lingering odor even after drying.
– Foam windings/inner liners: Often the most problematic. If your gaming headset has foam around speaker openings or under the windscreen, assume “no water” unless the manual explicitly says otherwise.
Drying rules (non-negotiable for gaming headset parts)
After any allowed damp cleaning:
– Let cushions and any damp external surfaces air-dry fully before reassembly.
– Keep the headset in a dry, ventilated space away from direct heat sources that could warp plastics or degrade foams.
– Don’t test audio immediately after cleaning; give the gaming headset time for any residual moisture to dissipate from tight crevices.
What can go wrong if you use water anyway
If you add water to a gaming headset beyond what the manual allows, the most common failures show up as sound or mic quality issues that develop over days. You may also notice odor problems once sweat residue starts to break down in damp materials.
Moisture trapped near audio drivers can change how sound couples through the grille, leading to muffling or crackling in a gaming headset.
Water in a boom mic path can reduce clarity and can introduce persistent noise if liquid reaches the microphone port or capsule region.
Even after a gaming headset “feels dry,” foam and cloth can retain moisture, which increases the risk of odor and mildew over time.
– Sound problems: moisture trapped near drivers can cause muffling, crackling, or intermittent audio.
– Mic issues: water in the boom mic/port can lead to distortion, reduced clarity, or persistent noise.
– Odor and damage over time: damp foam/cloth can hold bacteria/sweat and may develop mildew even after the headset “seems dry.”
– Warranty risk: some brands may deny coverage if the headset was cleaned with liquids contrary to the manual.
Edge cases that catch people (and teams) off guard
– Active sweat + “quick wipe”: If you wipe immediately after a sweaty session and keep a cushion damp, you can trap salts and oils that later smell worse.
– Compressed foam around openings: Some gaming headsets have foam layers that sit close to speaker or mic pathways. Even light dampness can migrate where you can’t see it.
– Alcohol-based cleaners: Even when alcohol evaporates, it can discolor some materials or drive moisture deeper into seams. If you’re not following the manufacturer’s recommended product list, a gaming headset may end up worse.
What to do if water happened anyway
If water exposure is accidental:
1. Power down/unplug immediately.
2. Keep the gaming headset dry and ventilated.
3. Follow the manual’s “liquid exposure” or “care” guidance if provided.
4. Wait until fully dry before testing mic/audio; if distortion persists, stop using the headset and consult the manufacturer.
Verdict: should you clean a gaming headset with water?
In most cases, you should not. Only use water if your headset’s documentation clearly allows it for specific removable parts—and even then, keep it minimal (lightly damp, not rinsed) and fully dry before use.
For most gaming headsets without an approved water-cleaning method, dry cleaning (brush + microfiber) is the lowest-risk route to remove sweat and dust.
Because IP ratings test standardized conditions (IEC 60529:2013), experts still recommend following the manufacturer’s cleaning instructions for a gaming headset—even when an IP rating is present.
When in doubt, treat the mic port and speaker grille openings as “no-water zones” on a gaming headset.
Who should skip water cleaning entirely
Skip water cleaning if any of these are true for your gaming headset:
– You can’t find the manual or cleaning/warranty terms.
– There’s no IP rating and no explicit “damp cleaning” guidance.
– Cushions or foam parts are not removable, or you’re unsure what’s behind the grille/windshield.
Downsides to know before you try any water method
– “Lightly damp” can still be enough to cause long-term odor if foam liners stay wet.
– Water cleaning increases the likelihood you’ll void warranty coverage if you misread what the manufacturer allows.
– Drying time becomes part of your schedule—sometimes 12–24 hours depending on materials and ventilation ().
Quick scan checklist (save this):
| Cleaning task | Use water? | Safer alternative |
|---|---|---|
| Speaker grille openings / mic port | No | Dry microfiber + gentle debris removal |
| Wired connection points, cable seams | No | Dry wipe only; avoid any liquid near ports |
| Removable ear pads (only if manual allows) | Only lightly damp | Mild cleaner on cloth; no soaking/rinsing |
| Headband exterior / hard plastic | Sometimes (if allowed) | Damp cloth on the outside only, then dry |
If you’re unsure about your model’s allowance, default to the water-free method first.
Sources
– IEC 60529:2013, Degrees of Protection Provided by Enclosures (IP Code) (IP digit definitions and “X/not tested” meaning)
You can clean a gaming headset without water in almost every situation, and that’s what experts recommend first—especially around the mic port and speaker openings. If (and only if) your manual explicitly allows it, use water sparingly on removable parts like ear cushions, then wait until everything is completely dry before using it again. Check your model’s cleaning/warranty guidance, start with dry cleaning, and use damp cleaning only when the manufacturer clearly says it’s safe.
Frequently Asked Questions
Can you clean a gaming headset with water without damaging it?
In most cases, you should avoid submerging a gaming headset in water or using heavy soaking, because moisture can seep into the drivers, microphone, and internal electronics. Experts generally recommend using minimal moisture—such as a lightly damp microfiber cloth—for the exterior, pads, and hard surfaces only. If your headset is not explicitly rated as water-resistant, stick to dry or lightly damp cleaning methods to reduce the risk of corrosion and audio issues.
How should you clean gaming headset ear pads if they’re sweaty or dirty?
For fabric or breathable pads, wipe them gently with a cloth lightly dampened with a small amount of mild soap and water, then let them fully air-dry before use. For leatherette or synthetic pads, experts suggest using a damp microfiber cloth and avoiding water pooling at seams or stitching. Never soak the pads—especially if they’re attached to the headset with exposed foam or glue—because trapped moisture can lead to odors and deterioration.
Why is using too much water on a gaming headset a bad idea?
Excess water can get into the headphone housing and microphone openings, which may cause crackling, muffled sound, or intermittent connectivity if a cable or detachable mic is involved. Even small amounts left to dry slowly can damage materials over time, especially around vents and joints. Many cleaning guides from audio specialists emphasize controlled, low-moisture cleaning to protect sound performance and extend headset lifespan.
What’s the best way to clean a gaming headset microphone without damaging it?
Start by turning the headset off and disconnecting it if possible, then use a dry microfiber cloth to remove surface dust and fingerprints. For grime, use a slightly damp cloth around the mic grille, or a cotton swab lightly moistened with water or isopropyl alcohol (only on the outside) to avoid dripping into the microphone element. Experts recommend letting the mic fully dry before testing, since moisture can affect voice clarity and cause background noise.
Which cleaning methods should you avoid when cleaning a gaming headset?
Avoid soaking the headset, spraying water directly onto drivers, and using aggressive chemicals or cleaners that can strip coatings. Don’t use soaking-wet wipes, compressed air on wet surfaces, or high heat (like hair dryers) because these can warp pads, damage adhesives, or force moisture deeper inside. If you’re unsure, follow the manufacturer’s care instructions or use a gentle, low-moisture approach for water-safe surfaces only.
📅 Last Updated: October 19, 2026 | Topic: Can You Clean a Gaming Headset With Water? What Experts Say | Content verified for accuracy and freshness.
References
- https://www.cdc.gov/coronavirus/2019-ncov/community/disinfecting-building-facility.html
- https://www.who.int/publications/i/item/cleaning-and-disinfection-of-environmental-surfaces-in-the-context-of-covid-19
- disinfecting headphones – Search Results – PubMed
- earphones cleaning alcohol disinfection – Search Results – PubMed
- reusable ear devices disinfection – Search Results – PubMed
- hearing aid cleaning moisture – Search Results – PubMed
- https://scholar.google.com/scholar?q=cleaning+headphones+water Google Scholar
- https://scholar.google.com/scholar?q=disinfecting+headphones+alcohol+hydrogen+peroxide Google Scholar
- https://scholar.google.com/scholar?q=consumer+electronics+disinfection+guidelines+do+not+immerse Google Scholar
