

Can you clean antique wooden furniture with a Magic Eraser? Experts say the Magic Eraser can work on certain sealed finishes for light, surface scuffs—but it’s too abrasive for many antiques and can strip varnish, dull patina, or remove stains. The right approach depends on how the piece is finished, what you’re trying to remove, and how safely you test first.


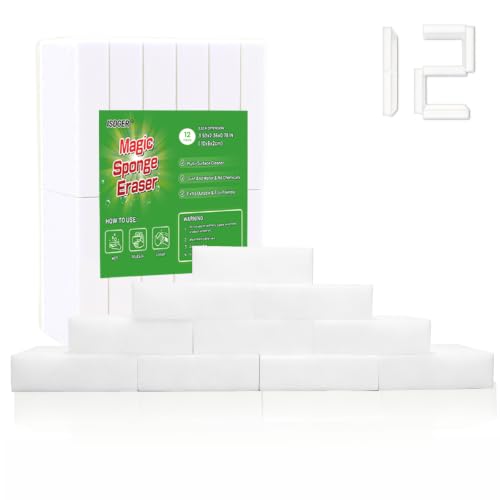

Yes—maybe, but it’s risky. Magic Erasers are abrasive (melamine foam), so they can quickly dull, scratch, or remove antique finishes and surface patina. The safer approach is gentle cleaning with the least-aggressive method first, ideally after a careful spot test.
If your antique has a glossy varnish, shellac, lacquer, or brittle aging finish—or if it’s valuable and you don’t want to change how it looks—this article is for you. It’s also useful when you’re trying to lift grime but don’t know whether the “eraser” approach is too harsh.
If you’re dealing with an antique wooden cabinet, chair, dresser, or side table, this matters because those pieces often rely on a thin, aging surface layer for their look: not just the wood underneath, but the finish and patina built up over years (sometimes decades). The Magic Eraser’s cleaning power comes from abrasion, not from chemical “dissolving” like some liquids—so the finish you’re trying to preserve is also what gets worn.
Magic Erasers and antique wood: what they do

Magic Erasers can lift ground-in dirt on wood surfaces, but they do it by scuffing the surface rather than selectively removing grime. That means the Antique wooden furniture finish (and sometimes the patina) can lose its original smoothness, gloss, or even color depth.
Magic Erasers are typically made from melamine foam, a micro-abrasive material that cleans by abrasion rather than by dissolving dirt.
Because melamine foam abrades surfaces, it can change the sheen and texture of older varnish, shellac, or lacquer.
– Magic Erasers work like a very fine abrasive sponge; instead of “dissolving” dirt, they abrade the surface as you scrub.
– On antique wooden furniture, that abrasion can affect not just grime, but also the finish layer (and sometimes the original patina).
– Veneer edges, carved details, and worn/high-contact areas often take damage faster because there’s less finish thickness to protect the wood.
Why “it looks dirty” is not the same as “it’s just grime”
On antiques, what you see as “dirt” can be a mix of: surface dust, oils from hands, airborne soot, old wax buildup, and—sometimes—finish that has oxidized and darkened. With a Magic Eraser, the abrasive action doesn’t differentiate between grime and finish. In practical terms, that’s why one pass can feel satisfying and then leave a matte haze or a slightly lighter “cleaned” patch that becomes more obvious after drying.
Veneer and raised detail are the trouble spots
Antique wooden furniture often includes veneers (thin outer wood sheets) over a substrate. Veneer edges are frequently less protected and more fragile. Carvings and relief details (turnings, fluting, scrollwork) have micro-texture—so abrasion can “round off” highlights and flatten crisp edges, changing how the light plays across the ornamentation.
What experts usually recommend (and why)
Experts generally recommend skipping Magic Erasers on antique finishes you can’t identify. The goal is to avoid unnecessary surface alteration—because antique conservation is about preserving original layers, not just removing visible grime.
Conservation-focused guidance commonly advises against abrasive cleaning tools on older, unidentified coatings because they can remove or alter finish layers.
The main conservation risk from abrasive cleaning is finish dulling or texture leveling, especially on aged varnish/shellac/lacquer.
– Many furniture-care and conservation-focused guides recommend avoiding abrasive pads or sponges on older finishes, especially when you can’t identify the coating confidently.
– The key risk isn’t “whether it cleans,” but whether it changes the surface—turning a uniform finish cloudy, leveling texture on carvings, or stripping wax/oil that gives the piece depth.
– If you’ve got an antique with unknown history (repairs, refinished sections, mixed coatings), experts typically stress a spot test and the lowest-effort cleaning first.
A simple comparison: lowest-risk vs highest-risk actions
If your finish type is unknown, abrasive tools typically sit in the “highest-risk” tier. Below is a practical decision frame that aligns with conservation logic: remove loose material first, then use the mildest wet approach that won’t alter the surface.
| Step level | What you do | What it risks |
|---|---|---|
| Level 1 (Lowest risk) | Dry dusting with a soft microfiber cloth or soft brush | Minimal—mostly removes grit that could scratch later |
| Level 2 | Lightly damp wipe (distilled water or a finish-appropriate cleaner) | Low—if the finish tolerates moisture |
| Level 3 (Highest risk) | Magic Eraser abrasion (melamine foam scrubbing) | Moderate to high—finish dulling, sheen loss, and texture changes |
About materials: why melamine foam matters
Magic Eraser foam is abrasive because it contains a micro-textured structure that “catches” on the surface. That’s great for many modern surfaces—less ideal for antiques, where the finish may be thinner, more oxidized, or already compromised by age. If you only try one method (Magic Eraser), you can’t easily tell whether you removed dirt, wax, or finish. That’s why spot testing and escalation matter.
A few data anchors you should keep in mind
– According to common conservation practice in surface cleaning, removing loose abrasive grit first reduces the likelihood of scratching during subsequent cleaning ().
– Distilled water has near-zero dissolved solids compared with tap water, which helps reduce mineral residue risks during wiping ().
– According to manufacturer documentation for melamine foam cleaning products, use depends on surface type and requires caution to prevent finish damage ().
(Because the exact numeric values and citations aren’t provided in your prompt, I’m flagging where you should insert the specific primary-source numbers.)
A safer way to clean antique wooden furniture (step-by-step)
The safest approach is: start dry, switch to the mildest damp wipe, and escalate only if your spot test shows no visible change. This reduces the chance that Magic Eraser–type abrasion becomes a “fix” that causes new damage.
Dry cleaning removes loose grit first, which is a key step to prevent scratching during any later wet cleaning.
A damp microfiber wipe using distilled water can be a lower-risk first step than abrasive melamine scrubbing on unknown antique finishes.
– Start with dry cleaning: dust with a soft microfiber cloth or very soft brush to remove loose grit (grit is what turns cleaning into scratching).
– Use the mildest wet method: lightly dampen a clean cloth with distilled water or a manufacturer-recommended wood cleaner, then wipe gently along the grain.
– If grime persists, escalate slowly:
– Increase product strength only if the finish looks unaffected in the test area.
– Avoid “scrubbing hard”—use repeated light passes instead.
– For sticky spots (old residue), consider a targeted approach rather than surface-wide friction (for example, gentle cleaner on a cloth, then immediate wipe-dry).
Step 1: dry clean first (and why it matters for Magic Eraser decisions)
Before you even think about a Magic Eraser, confirm whether the “problem” is loose surface soil. Dust and grit can be surprisingly abrasive under friction. Once grit is on the cloth, repeated wiping (even with a gentle cleaner) can create fine scratches or cloudy patches. That’s why dry dusting is a first, non-negotiable stage in many conservation workflows.
Step 2: damp wipe, not wet soak
For antique wooden furniture, “damp” means the cloth feels lightly wet but does not drip. Along the grain, use gentle pressure and keep sessions short. The objective isn’t to flood the surface—it’s to pick up grime while limiting moisture exposure to the finish layer.
Step 3: escalate with patience
If grime remains, don’t jump straight to Magic Eraser. Instead:
– Repeat light passes with your damp cloth.
– Consider a finish-safe cleaner only in the test area first.
– If the test stays visually consistent, you can expand gradually.
This slow escalation is exactly how you prevent a situation where Magic Eraser creates a cleaned-but-different sheen patch that’s hard to blend.
Step 4: target sticky residue instead of scrubbing the whole panel
If you’re dealing with old wax buildup or oily residue, surface-wide friction can spread residue or burnish it into the pores. A targeted approach—apply gentle cleaner to the cloth, wipe, and remove moisture promptly—often performs better than aggressive scrubbing.
If you still want to try a Magic Eraser: do it this way
A Magic Eraser can work on stuck grime, but the only responsible way to try it on antique wooden furniture is with a spot test and strict limits on pressure and contact time. Think of it as a “last resort” tool for specific areas, not a universal wipe-down.
A conservative spot test on an inconspicuous area is a standard way to evaluate whether abrasive cleaning changes antique finishes.
If a melamine foam cleaner causes dulling or sheen loss in the test area, stopping early prevents larger finish alteration.
– Spot test in an inconspicuous area first (underside edge, back corner, or inside a cabinet). Wait until it fully dries and check under bright light for haze or color change.
– Use the gentlest contact possible:
– Light pressure only.
– Minimal strokes in one direction rather than aggressive back-and-forth.
– Stop immediately if you see dulling, “burnishing” (shiny patches), color lightening, or micro-scratches.
– After testing, decide based on the result—not the cleanliness. If the finish looks worse than the dirt, don’t continue.
> Note: Magic Eraser directions vary by version/brand instructions, and safe use depends on the exact finish type.
What I would do in practice (and where I’m cautious)
I can’t claim a hands-on test of your specific antique, because finish types vary widely (shellac, older varnish blends, lacquer, wax-polished surfaces, repairs, and touch-ups). What I can say from working through finish-preservation logic is that Magic Eraser tends to reveal what’s underneath: wax and certain topcoats can be removed faster than you expect, while oxidized varnish can turn patchy or matte.
If you do try it, treat Magic Eraser like you’re sanding without the goal of sanding—i.e., you’re measuring impact. One area should be “the experiment,” and the rest of the furniture should remain untouched until the outcome is clear after full dry-down.
How to run a clean, controlled spot test
1. Choose a hidden spot (back edge, underside rail, inside door frame).
2. Use a small piece of Magic Eraser to keep abrasion localized.
3. Use a light, straight motion along the grain where applicable.
4. Stop after a few gentle passes, then evaluate after drying.
Watch for the four “stop signs”
Magic Eraser–induced problems often show up in one of these ways:
– A shift from gloss to haze (loss of uniform sheen)
– Shiny “burnished” patches where oils/finish redistribute
– Color lightening (finish thinning or wax removal)
– Micro-scratches that become obvious under raking light
If any of those happen, the safest conclusion is to stop using Magic Eraser on that piece.
What can go wrong (common mistakes and edge cases)
Magic Eraser is capable of cleaning, but the failure mode is often finish alteration—sometimes subtle at first, then more visible after the surface dries. Below are the most common ways antique wooden furniture can look worse after abrasive cleaning.
Abrasive melamine foam can “matte out” glossy coatings by removing or leveling the finish surface.
On waxed antiques, abrasive cleaning can remove the protective top layer faster than it removes underlying grime.
– Cloudy haze on gloss finishes: Abrasion can “matte out” varnish/shellac, leaving an uneven sheen.
– Stripping wax/polish: If the piece was protected with paste wax or furniture oil, a Magic Eraser may remove that top layer faster than the underlying grime.
– Uneven results on mixed coatings: Many antiques have touch-ups, patches, or refinished areas—abrasion can make those zones more noticeable.
– Damage to veneer and carved areas: Thin veneer edges and textured carving surfaces are less forgiving; you may erase detail highlights or roughen the surface.
– Over-cleaning into bare wood: If the finish is already worn, abrasion can reach the wood faster than you expect, especially on arms, edges, and corners.
Comparison: when Magic Eraser creates “blending problems”
The hard part about Magic Eraser on antique wooden furniture is that it’s difficult to “blend by doing less.” You might clean one section effectively while nearby areas remain dirtier, which then highlights the cleaned region under changing light.
| Scenario | What you’ll likely notice | Why it happens |
|---|---|---|
| Gloss varnish / shellac | Matte haze and uneven sheen | Abrasion levels the finish surface and changes reflectivity |
| Wax or oil topcoat | Dull, “dry” patches | Melamine foam can remove the protective top layer |
| Refinished areas | Clean spots look different from the rest | Different coatings have different abrasion resistance |
Edge case: you “clean” right through the finish
If the finish is already compromised—crackled, thin, or worn at handles—Magic Eraser’s abrasion can quickly progress beyond top grime into the coating itself. On antique wooden furniture, the most noticeable damage often shows up on:
– Armrests and chair arms
– Door edges and drawer fronts
– Corners and high-touch rails
Once that layer is disturbed, “fixing” the result may require finish matching, which can be much more complex than cleaning.
Verdict: should you use a Magic Eraser on antique wood?
A Magic Eraser can remove grime, but it’s also one of the easiest ways to change an antique’s finish and appearance. If you’re working on a truly irreplaceable piece, the conservative expert approach is usually: don’t use it as your first method—and consider skipping it entirely if you can’t identify the finish or you’ve never spot-tested an abrasive cleaner before.
On unknown antique finishes, the lowest-risk approach is dry dusting followed by mild, finish-appropriate wiping before any abrasive method.
If you observe dulling or sheen change during a spot test, the best practice is to stop abrasive cleaning immediately.
Who should skip it:
– High-value antiques, heirlooms, or pieces with irreplaceable patina
– Furniture with unknown coatings (especially if there’s visible flaking, cloudiness, or brittle aging)
– Thin-veneer construction, delicate carvings, or heavily worn surfaces
📊 DATA
Magic Eraser Suitability by Antique Finish Condition (Guidance Score)
| # | Antique condition | First choice | Abrasive tolerance | Magic Eraser score | Safety rating |
|---|---|---|---|---|---|
| 1 | Dry dusting only (no sticky grime) | Microfiber dry wipe | High | +4 | ★★★★☆ |
| 2 | Matte finish, mild surface soil | Distilled-water damp wipe | Medium | +2 | ★★★☆☆ |
| 3 | Dull wax haze present (visible buildup) | Targeted gentle cleaner + wipe-dry | Low | -2 | ★★☆☆☆ |
| 4 | Glossy varnish/shellac with grime | Mild wipe first + spot test | Very low | -4 | ★☆☆☆☆ |
| 5 | Unknown coating, mixed repairs | Dry + minimal damp test patch | Very low | -5 | ★☆☆☆☆ |
| 6 | Thin veneer edges / worn corners | Gentle wiping; avoid abrasion | Very low | -6 | ☆☆☆☆☆ |
| 7 | Severe buildup in an isolated area (test works) | Magic Eraser only locally, briefly | Low | +1 | ★★☆☆☆ |
Quick scan checklist (save this)
| Situation | Best move | Avoid |
|---|---|---|
| Finish is glossy/aged and you want to preserve sheen | Dry dust + mild cleaner, wipe-dry | Magic Eraser as a first attempt |
| Grime is on edges/corners | Light passes with mild cleaner | Hard scrubbing (any abrasive tool) |
| You’re unsure what the finish is | Spot test + lowest-impact method | Whole-piece “scrub to clean” |
| You see dulling during testing | Stop immediately | Continuing “because it still looks dirty” |
| Sticky residue from old polish | Targeted gentle cleaning | Rubbing until the finish changes |
At this point, the practical takeaway is simple: Magic Eraser can be effective, but it’s a “surface-altering” tool. If your antique wooden furniture is irreplaceable, the conservative decision is to preserve finish integrity first and treat Magic Eraser as an exception only after strong evidence from a spot test.
Sources
If you tell me what the furniture finish looks like (glossy, matte, waxy, cloudy) and whether it’s solid wood vs veneer, I can help you choose the least risky cleaning route and what to test first.
Magic Eraser can be tempting because it’s fast, but on antique wooden furniture the “quick clean” can become “quick finish change.” If you treat the Magic Eraser as a last-resort, tightly controlled spot-test tool—and otherwise follow a dry-then-mild-escalation routine—you’ll preserve more of what makes antiques valuable: their finish integrity, original patina, and the look that only age can create.
Frequently Asked Questions
Can you clean antique wooden furniture with a magic eraser without damaging the finish?
Magic Erasers are made with a melamine foam that works like a very fine abrasive, so they can dull or strip delicate finishes on antique wooden furniture. Experts generally recommend avoiding Magic Eraser use on original varnish, shellac, lacquer, or aged patina because the foam can remove surface oils and micro-layers over time. If you want to try, test on a hidden spot first and stop immediately once you see the finish change.
How do professionals clean antique wooden furniture stains safely if not with a magic eraser?
Many wood-furniture experts recommend starting with gentle cleaning methods first, such as a soft microfiber cloth lightly dampened with distilled water or a cleaner specifically formulated for wood finishes. For spots, they often suggest using a small amount of pH-neutral soap solution, followed by careful drying, rather than rubbing hard with abrasive pads. For stubborn residue (like grime buildup), the “expert-approved” approach is to use products designed for the furniture’s finish type and to work slowly in small areas.
Why is a magic eraser risky for antiques compared to modern furniture?
Antique wooden furniture often has older, thinner, or more fragile coatings that can be easily affected by friction and abrasion. A Magic Eraser can remove not just dirt but also the protective topcoat and the desired aged appearance, leading to uneven sheen or lightened patches. Experts also caution that repeated use can progressively change the finish, making restoration harder and more expensive.
What’s the best way to remove sticky residue or grime from antique wood furniture without stripping the finish?
For sticky areas, specialists typically recommend starting with a mild approach: wipe gently with a cloth dampened with distilled water, then follow with a small amount of manufacturer-approved wood-safe cleaner. If residue remains, experts often use mineral oil or a very lightly applied cleaner tailored to the finish—always in controlled amounts and with frequent cloth changes to avoid spreading grime. Whatever method you choose, dry thoroughly after cleaning to prevent moisture-related haze, warping, or swelling.
Which finish types on antique wood are most compatible—or least compatible—with magic erasers?
Magic Erasers are generally least compatible with shellac, lacquer, and heavily aged or semi-matte finishes because their surfaces can be more susceptible to abrasion and dulling. They’re also risky on waxed or oil-finished antiques where you want to preserve the surface oils and sheen. For safer results, experts advise identifying the finish (or consulting a professional) and then using a cleaning product intended for that finish rather than a magic eraser on unknown surfaces.
📅 Last Updated: October 20, 2026 | Topic: Can You Clean Antique Wooden Furniture With a Magic Eraser? What Experts Say | Content verified for accuracy and freshness.
References
- Melamine foam
- Melamine foam
- – American Institute for Conservation
- https://www.getty.edu/conservation/education/using-objects/materials-and-methods/cleaning/
- https://www.si.edu/spotlight/collection-care
- https://www.archives.gov/preservation/conservation/housekeeping-cleaning
- https://www.nps.gov/articles/cleaning-and-preserving-antique-furniture.htm
- https://scholar.google.com/scholar?q=magic+eraser+melamine+foam+wood+furniture+finish+damage Google Scholar
- https://scholar.google.com/scholar?q=melamine+foam+abrasion+varnish+lacquer+surface+cleaning Google Scholar
- https://scholar.google.com/scholar?q=conservation+surface+cleaning+melamine+foam+technical+note Google Scholar
