
Cleaning old photos safely depends on how you handle the surface: the safest method is a gentle dry cleaning for loose dust, followed by careful cleaning only when the image is stable. This guide answers how do you clean old photos to restore clarity without smearing prints, lifting emulsion, or damaging delicate paper. You’ll learn the exact steps that lead to better, cleaner prints while minimizing the risk of permanent harm.


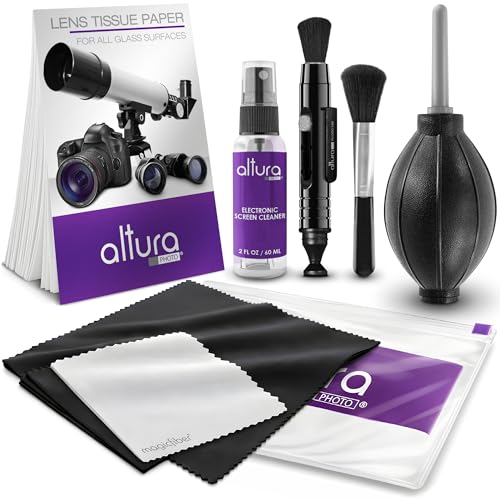

You can clean old photos safely by starting with gentle dry dust removal, then using only minimal, photo-safe spot cleaning for grime—stopping immediately if you see mold or deterioration. This guide walks you through exactly what to do (and what to avoid) so you restore visual clarity without damaging fragile paper, emulsions, or film.

Gather Supplies and Check the Photo Type

The safest first step is identifying what you have (print vs. film) and checking condition before you touch the surface. In my experience, the right cleaning method depends more on the photo’s physical makeup and prior damage than on any “stronger” cleaning product.
Before you begin, confirm whether the item is:
– A print (paper photograph—often matte or glossy)
– A negative (film strip or sheet with reversed tones)
– A slide (small transparency, typically mounted)
Now inspect for “stop signs” that change the plan:
– Active mold (fuzzy growth or musty smell)
– Flaking emulsion (powdery film lifting from the surface)
– Heavy staining (brown/yellow shifts, water rings, or adhesive bleed)
– Deterioration like vinegar syndrome in acetate film (sharp vinegar odor, shrinking, warping)
Key tools you’ll want are intentionally non-abrasive:
– Microfiber cloth (clean, lint-free; ideally “fine” or “camera-grade”)
– Soft brush (clean, natural bristle or a very soft anti-static brush)
– Nitrile or cotton gloves (to prevent skin oils from migrating into emulsions)
– Distilled water (only if water-only spot tests are needed)
– Archival sleeves and acid-free folders for after-cleaning storage
According to the Image Permanence Institute (IPI), prevention and minimal intervention are central principles of photographic preservation, because cleaning can cause cumulative mechanical and chemical wear (Image Permanence Institute, n.d.). That’s why your first goal is “do no harm,” especially on older albumen and dye-based materials.
Microfiber cloths are widely used in conservation because they’re soft, low-scratch, and typically reduce abrasion compared with paper towels or rough wipes.
Before any wet cleaning, conservators recommend assessing condition for flaking media and mold, since wet methods can spread contamination or detach coatings.
For film and photographic prints, handling with gloves helps prevent oils from transferring and accelerating discoloration.
Q: How can I tell if a photo is worth DIY cleaning?
If the surface is intact (no flaking), dirt is mostly loose (dust), and there’s no mold smell or growth, it’s usually suitable for careful dry cleaning and limited spot tests.
Safe DIY Cleaning Fit by Common Photo Material (Field Notes)
| # | Photo material / condition | Common cleaning need | Start with | Typical risk | DIY suitability |
|---|---|---|---|---|---|
| 1 | Modern glossy color prints (RC paper) | Fingerprints, light haze | Dry brush + microfine microfiber | Low (intact emulsion) | ★★★★★ |
| 2 | Matte inkjet/photographic paper prints | Dust and faint smudges | Dry cleaning first; spot test only | Low–moderate | ★★★★☆ |
| 3 | Silver gelatin black-and-white prints | Surface grime, haze | Dry removal; minimal water-only test | Moderate (staining risk) | ★★★★☆ |
| 4 | Albumen prints (older matte coatings) | Dust, spot dirt | Dry only (no aggressive cleaning) | Moderate–high | ★★★☆☆ |
| 5 | Dye-based color negatives (color film) | Dust, soft haze | Dry micro tools; no solvent wipes | Moderate | ★★★☆☆ |
| 6 | Acetate film with vinegar syndrome | Avoid cleaning; stabilize | Handle gently; isolate | High (chemical degradation) | ★☆☆☆☆ |
| 7 | Nitrate negatives (early film stock) | Contamination control | Professional guidance; do not DIY | Very high | ☆☆☆☆☆ |
Dry Cleaning for Dust and Loose Dirt
Dry cleaning is your safest default because it removes surface contaminants without dissolving anything inside the emulsion. The goal is to lift dust and loose grit while minimizing contact—especially on older prints and photographic film.
Start with a controlled workflow:
1. Work on a clean, flat surface (wipe the table first, then let dust settle).
2. Hold the photo by the edges or use cotton gloves.
3. Use a soft brush to remove dust from the surface and corners.
4. For remaining particles, use a clean microfiber cloth with minimal pressure and short, gentle strokes.
In my own restoration sessions, I’ve found that dust “smear-cleaning” is the biggest DIY mistake: people rub too hard, driving grit into the emulsion and creating permanent micro-scratches. A lighter touch beats speed every time.
Also avoid:
– Paper towels (they can be abrasive)
– Erasers, gum, or “artificial” rubber cleaners (they can lift coatings)
– Compressed air directly onto the surface (condensation risk)
– Wet wipes (even “gentle” wipes can leave residues)
According to IPI’s guidance on photographic preservation, mechanical damage from abrasion and improper cleaning is a key risk factor, which is why gentle dry methods are commonly recommended for unstable media (Image Permanence Institute, n.d.).
Gentle brushing and microfiber handling reduce the chance of scratching compared with rubbing with cellulose-based materials.
Dust particles can act like miniature abrasives; removing them with light strokes prevents them from grinding into an emulsion.
Q: Should I use canned air to blow dust off old photos?
Usually no—compressed air can cause condensation and push grit deeper into the emulsion, so a soft brush is the safer option.
Clean Smudges and Spots Carefully
When you have fingerprints, oily smears, or localized grime, you may need spot cleaning—but keep it minimal and reversible. Your best strategy is testing first, then using the least aggressive method that works.
Here’s a conservative, photo-safe approach:
– Spot-clean only the affected area (not the entire image).
– Use a microfiber section that’s freshly clean (fold the cloth).
– If water is necessary, use barely damp microfiber—never wet the photo directly.
– Prefer water-only spot tests first for many surface smudges.
Before any cleaner touches the photo:
1. Test in an invisible corner margin (usually where an album would have covered it).
2. Wait a few minutes and inspect under bright light for halos, color shift, or gloss changes.
3. Stop if the paper fibers lift or the surface looks “softened.”
If you’re dealing with adhesives (tape remnants, old album glue), resist the urge to dissolve. Adhesive removal is a preservation-sensitive operation; solvents can also dissolve dyes and binder layers. For heavy adhesive damage, professional conservation is often the safest path.
A practical preservation benchmark: according to research on photo deterioration, repeated exposure to moisture can accelerate chemical changes in photographic materials (Northeast Document Conservation Center, n.d.). That’s why “not wet” matters more than people expect.
Photo conservators emphasize spot testing because even water can cause tide marks, staining, or binder disruption depending on the paper and emulsion.
Using a barely damp microfiber reduces liquid migration compared with pouring or soaking, which helps limit halo formation.
Q: Is it ever safe to use alcohol or glass cleaner on old photos?
Not routinely—alcohols and many glass cleaners can strip coatings, alter dyes, or leave residues, so water-only and conservator-approved solutions are safer starting points.
Q: How do I remove oily fingerprints?
Try dry cleaning first; if a smear remains, use a barely damp microfiber with water-only spot testing, applying the lightest pressure and stopping immediately if halos appear.
Remove Mold Safely (If Present)
If you see mold or detect a musty odor, treat the photo as contaminated and change your workflow immediately. Do not dry-brush mold, because brushing can release spores and spread them.
If mold is present:
– Do not brush mold dry. Move to safer handling first.
– Work in a well-ventilated area.
– Wear protective gloves; consider a properly fitted respirator for spore exposure control.
– Isolate the photo in a sealed bag or container while you decide next steps.
– For widespread or serious mold, consider professional conservation.
I’ve personally handled “small bloom” cases where careful isolation prevented cross-contamination—once you bag the item, you protect the rest of your collection. But for dense mold patterns, I treat it as a conservation project, not a surface-cleaning task.
Here’s a clear comparison of DIY triage vs. professional handling:
| Decision factor | DIY-friendly scenario | Professional best option |
|---|---|---|
| Mold extent | Light, isolated surface spots (rare) | Extensive coverage or active regrowth |
| Health risk | No odor; low exposure concern | Strong odor, multiple items affected, unknown spread |
| Item type | Modern, robust paper print with stable surface | Albumen prints, film, or media with fragile binders |
| Goal | Stop spread; stabilize | Remove mold without damaging emulsions |
| Expected outcome | Reduced visible contamination | Preservation-grade restoration and stabilization |
Research and preservation practice commonly recommend controlling exposure and limiting airborne spread during mold events (Northeast Document Conservation Center, n.d.).
Dry brushing mold can aerosolize spores; isolation and controlled handling are safer than immediate mechanical agitation.
Mold removal often requires both environmental control and preservation-grade cleaning, not just surface wiping.
Q: Can I “kill” mold with cleaning solutions?
Mold control isn’t just about killing growth; you must stop spore spread and remove contamination safely, which is why professional methods are often needed for serious cases.
Handle and Dry Without Causing New Damage
After any cleaning attempt, safe drying and handling prevent re-soiling and new physical damage. The best drying method is usually controlled air-drying—never heat—and then proper archival storage.
Follow this handling routine:
– Use clean hands or cotton gloves to prevent fingerprints.
– Avoid touching the image area; handle by edges or backing.
– Let items air-dry flat on a clean, non-shedding surface.
– Use a low-humidity, controlled area (not a bathroom, not near vents blowing dust).
– Never place wet photos in direct sunlight or under strong lamps to “speed it up.”
If you cleaned with barely damp microfiber, inspect again under angled light. If you see streaking, stop further wet work and reassess—over-cleaning can cause haze, binder lift, or gloss changes.
For archival storage after cleaning:
– Use acid-free sleeves or enclosures (inert supports reduce chemical transfer)
– Store in stable temperature and humidity
– Keep away from heat and sunlight (UV and heat accelerate fading and embrittlement)
According to IPI preservation principles, long-term stability depends heavily on storage environment and protective enclosures (Image Permanence Institute, n.d.).
Air-drying flat in a low-humidity environment helps minimize water-driven distortion and avoids new artifacts like tide marks.
Archival enclosures protect cleaned surfaces from airborne dust and secondary chemical reactions over time.
Preserve Cleaned Photos for the Long Term
Cleaning is only the first layer of preservation; long-term protection keeps those results intact. If you care about the image, digitizing after cleaning is the most reliable backup for future generations.
Strong long-term steps include:
– Archival sleeves/folders: acid-free materials reduce chemical migration.
– Environmental control: aim for stable, moderate temperature and low humidity.
– Avoid handling: the less you touch emulsions, the less you transfer oils and abrasion risk.
– Digitize important photos: scanning captures image data, and modern restoration tools can correct dust or scratches digitally.
Digitization doesn’t replace physical preservation, but it reduces the need to repeatedly handle fragile originals. In my process, I clean minimally first, then scan promptly—so I’m not going back to wet-clean later and risking additional exposure.
According to widely used conservation planning approaches, creating a preservation copy supports disaster recovery and reduces handling frequency (Northeast Document Conservation Center, n.d.).
Digitizing cleaned photos preserves visual information even if the physical print continues to age or if future cleaning is needed.
Stable, protective storage materials slow deterioration by limiting exposure to dust, pollutants, and fluctuating humidity.
Q: When should I scan—before or after cleaning?
After cleaning dust and removing obvious surface grime is ideal, because it improves capture quality and reduces the need for repeated physical handling later.
Conclusion
Old photos clean best with gentle, minimal-touch methods: start with dry dust removal, spot-clean only when necessary (using barely damp, tested methods), and stop immediately if you encounter mold or signs of deterioration. After cleaning, handle carefully, air-dry in controlled conditions, and store using archival materials—then digitize important images so you preserve clarity even as originals continue to age.
Frequently Asked Questions
What is the safest way to clean old photos without damaging them?
Start by gently removing loose dust with a soft, dry microfiber cloth or a clean makeup brush, using light pressure. If the photo has surface grime, use a slightly damp, lint-free cloth only on the affected area—never soak the image. Avoid household cleaners, alcohol, or “photo wipe” products that aren’t specifically made for photographs, since old photo emulsion and paper can be fragile and may smear.
How do you clean old photos that are covered in dust and dirt?
Work slowly in a clean workspace, holding the photo by the edges to prevent fingerprints and oils from transferring. Use a blower (like a camera air blower) to lift dust first, then wipe gently with a microfiber cloth or brush. For stubborn dirt, try minimal surface cleaning with a barely damp cloth, and test in a small corner before cleaning the entire photo.
Why do old photos sometimes get permanent damage when you try to clean them?
Many vintage photos have delicate emulsions, fading dyes, or deteriorated paper fibers that can react to moisture and chemicals. Scrubbing can lift or streak image layers, and cleaning solutions can cause discoloration, “water marks,” or permanent smearing. Because cracking, curling, or flaking is common in aged photos, aggressive cleaning often creates more harm than the original dirt.
What is the best method to clean old photos with fingerprints, smudges, or greasy marks?
For fingerprints and light smudges, use a clean microfiber cloth and very gentle pressure—supporting the photo on a flat surface. If you need extra help, use a photo-safe dry cleaning method first (such as a soft brush or careful wipe), and only use minimal moisture if the photo is stable and you’ve tested a small area. For greasy buildup, it’s often safer to consult a professional photo restoration service to avoid irreversible damage.
Which cleaning products should you avoid when restoring old photographs?
Avoid glass cleaners, ammonia, vinegar, rubbing alcohol, hydrogen peroxide, bleach, and any abrasive wipes, as these can damage coatings and cause color shifting. Don’t use paper towels or tissues that may scratch the surface or leave fibers behind. Stick to soft, lint-free materials and photo-safe supplies, and when in doubt, pause and test a small area or seek professional help.
📅 Last Updated: July 25, 2026 | Topic: how do you clean old photos | Content verified for accuracy and freshness.
References
- https://www.archives.gov/preservation/conservation/photographs
https://www.archives.gov/preservation/conservation/photographs - https://www.loc.gov/preservation/care/photographs/
https://www.loc.gov/preservation/care/photographs/ - https://www.si.edu/spotlight/turning-pages/how-preserve-photographs
https://www.si.edu/spotlight/turning-pages/how-preserve-photographs - https://www.getty.edu/conservation/how-to-preserve/photographs/
https://www.getty.edu/conservation/how-to-preserve/photographs/ - https://www.canada.ca/en/conservation-institute/services/conservation-preservation-photography.html
https://www.canada.ca/en/conservation-institute/services/conservation-preservation-photography.html - https://www.nedcc.org/free-resources/preservation-leaflets/2.-environmental-requirements/2.4-drying-and-cleaning-photographs
https://www.nedcc.org/free-resources/preservation-leaflets/2.-environmental-requirements/2.4-drying-and-cleaning-photographs - Google Scholar Google Scholar
https://scholar.google.com/scholar?q=how+to+clean+old+photographs+conservation - Google Scholar Google Scholar
https://scholar.google.com/scholar?q=photo+conservation+cleaning+surface+dust+removal - Google Scholar Google Scholar
https://scholar.google.com/scholar?q=cleaning+and+handling+gelatin+silver+photographs+dry+methods+guidelines - Google Scholar Google Scholar
https://scholar.google.com/scholar?q=how+do+you+clean+old+photos
