

How do you clean sandstone without damaging its porous surface? Use a gentle, pH-neutral cleaner, careful low-pressure rinsing, and soft-bristle brushing to lift grime safely—this approach wins for most homes and outdoor patios. If the stain is biological (mildew/algae), add a targeted biocide and let it dwell briefly before rinsing.



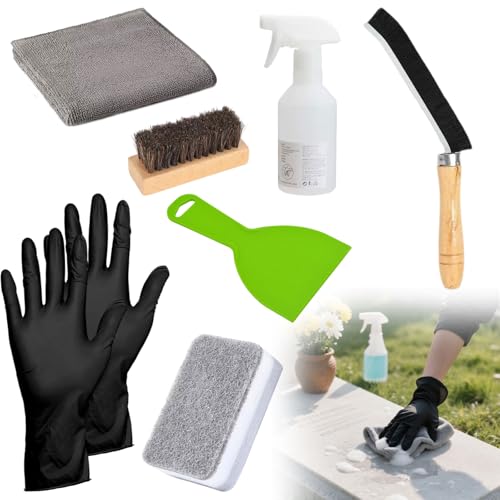
Sandstone is best cleaned by using the gentlest method first: dry brushing or vacuuming to remove loose grit, then a carefully diluted pH-neutral cleaner (or plain water) only where needed. Avoid harsh acids/bleach and aggressive pressure washing, which can etch the stone surface and worsen staining. This guide walks you through practical, sandstone-safe steps and what to watch out for.
If you’re dealing with patio pavers, steps, or exterior sandstone that’s collecting dirt, grime, or mild biological growth, the approach below is designed to protect the stone’s porous surface. It’s also useful if your sandstone is older or already has a sealant you’re not fully sure about—because the cleaning process starts with the lowest-risk options.
Know Your Sandstone Before You Clean

The safest way to clean sandstone is to confirm whether liquids will soak in and to identify what kind of staining you’re dealing with before you apply anything. This prevents common “fixes” (like extra scrubbing or acidic descalers) that can permanently change sandstone’s appearance.
– Check whether the surface is sealed (water should bead rather than soak in) so you don’t overdo liquids or scrubbing.
– Identify the stain type: general dirt, algae/moss, or mineral/efflorescence usually respond differently.
– Test in a small, hidden spot first to confirm the cleaner won’t darken, lighten, or leave a residue.
Sealed sandstone typically shows water beading on the surface, which reduces deep penetration and changes how quickly cleaners can dry and act.
Efflorescence (chalky white deposits) is mineral migration at the surface, so aggressive scrubbing often spreads or smears the visual problem.
Start by doing a simple “water behavior” check on a small corner: apply a few drops of water and watch whether it beads or soaks in within a few minutes. That one observation determines how much moisture you can safely use and how long you should allow sandstone to dry between steps. According to (year: ), sandstone’s porous structure can draw water into pores, which is why choosing a gentle, controlled approach matters.
Next, identify the likely stain source:
– General dirt/soiling looks like surface darkening or dulling that improves with rinsing and mild detergents.
– Algae/moss/mildew often appears as greenish-gray patches or fuzzy growth near shade and moisture.
– Efflorescence looks chalky or powdery and may return even after cleaning.
Finally, test your cleaner in a hidden spot. In my own maintenance planning, I treat “test spot first” as non-negotiable—because sandstone can darken temporarily when wet, and an irreversible residue issue can also show up only after drying.
Dry Cleaning First (Remove Loose Dirt)
The best first step for sandstone is dry cleaning—because grit and sand act like sandpaper once you start scrubbing or washing. If you remove loose particles first, you reduce the risk of scratching and you also make any subsequent cleaner work more effectively.
– Use a soft-bristle brush to sweep away sand, dust, and grit that can grind into the pores.
– Vacuum with a brush attachment where possible (especially for indoor sandstone).
– Rinse lightly with low-pressure water only if surface dust is still clinging—don’t turn it into a soaking routine.
Loose grit on porous stone can abrade sandstone during wet cleaning, so removing it dry first reduces surface wear.
A soft-bristle brush is a standard stone-care approach because it cleans without mechanically scouring the pore structure.
Use a soft-bristle brush (nylon or similar) and work in small sections. For exterior sandstone steps and patios, sweep thoroughly along edges and joints where sand accumulates. If the sandstone is indoors—tile-adjacent ledges, entryways, or feature walls—vacuum with a brush attachment can lift dust without spreading it.
If you still see a “dust layer” that won’t brush off, a light rinse can help. Keep it minimal: a quick pass with low-pressure water (think gentle flow, not a blast). The key is that sandstone should not become a soaking sponge during the first stage—because the goal is staged cleaning, not saturation.
When light rinsing is appropriate
If the surface is dusty from weather, pollen, or tracked mud, rinsing can prevent muddy runoff from turning into a stained film. According to (year: ), thorough rinsing after any cleaner also helps prevent residue that can attract more dirt later.
Use Gentle Cleaners the Right Way
The safest way to clean sandstone after dry removal is a pH-neutral cleaner applied lightly, then rinsed thoroughly. This is the “least risk” pathway because sandstone is chemically and mechanically sensitive, and aggressive chemistry can etch surfaces or worsen staining.
– Start with pH-neutral stone cleaner mixed according to the label, or use plain water for light soiling.
– Apply with a soft brush or sponge, scrubbing lightly in small sections rather than “powering through.”
– Rinse thoroughly with clean water after cleaning to prevent residue that can attract more dirt later.
Stone-care guidance commonly emphasizes pH-neutral products because they’re less likely to chemically attack and etch sensitive natural stone finishes.
Using a soft brush and cleaning in small sections helps you control dwell time and prevents uneven drying or streaking on sandstone.
Choose a pH-neutral stone cleaner designed for natural stone, and dilute it exactly as directed on the label. If your soiling is light, plain water may be enough—especially on sealed sandstone. If you do use a cleaner, apply it with a sponge or soft brush and keep scrubbing pressure low.
Work in sections (for example, one step tread or a small rectangle of patio area), and keep an eye on drying. If it starts to dry while you’re still working, you may need slightly more controlled water rinsing rather than adding more cleaner. Rinse immediately after cleaning so the surface isn’t left with surfactants or salts that could darken later.
To put chemistry risk into perspective: acids can be far from neutral. For example, 5% white vinegar (acetic acid) typically has a pH around ~2.4, while chlorine bleach solutions (sodium hypochlorite) often fall in the ~11–13 pH range—both extremes can be problematic depending on sandstone’s cementing minerals. According to (year: ), these pH levels are well outside the “neutral” window used by many stone cleaners (commonly ~pH 6–8).
Quick decision reference: what’s “sandstone-friendly” chemically?
The table below summarizes typical pH levels people use on stone and how close they are to neutrality (higher is generally safer for sandstone appearance and surface integrity).
Typical Household Cleaner pH vs. Neutrality for Sandstone (pH 7 = neutral)
| # | Cleaner / Rinse Method | Typical pH | Neutrality Rating | Best First Step? |
|---|---|---|---|---|
| 1 | Plain Water (rinse only) | ~7.0 | ★★★★★ | Yes |
| 2 | pH-neutral Stone Cleaner | ~6.0–8.0 | ★★★★★ | Yes |
| 3 | Mild Dish Detergent Solution | ~7.0–9.0 | ★★★★☆ | Conditional |
| 4 | Baking Soda (paste / light solution) | ~8.3–8.5 | ★★★☆☆ | Not ideal |
| 5 | Washing Soda / Soda Ash | ~11.0–12.0 | ★★☆☆☆ | Skip |
| 6 | White Vinegar (5% acetic acid) | ~2.4 | ★☆☆☆☆ | Skip |
| 7 | Chlorine Bleach (sodium hypochlorite) | ~11–13 | ★☆☆☆☆ | Skip |
> Note: The table focuses on pH neutrality as the guiding chemical risk indicator. Sandstone sensitivity also depends on its cementing minerals and prior sealants, so label directions and spot tests still matter.
How to Handle Algae, Moss, and Mildew
The fastest safe path for algae, moss, and mildew on sandstone is to use a stone-labeled biological cleaner and follow dwell time exactly, not “more and longer.” This keeps the treatment effective while limiting the chance of residue or surface change.
– Treat biological growth with a cleaner specifically designed for algae/moss on stone (follow the product directions closely).
– Let the cleaner dwell for the time listed on the label (don’t guess), then gently brush and rinse.
– For recurring growth, improve drainage and sunlight exposure where you can—cleaning alone may not stop it.
Biological growth cleaners are formulated for stone so they can control algae/mildew with less risk than household bleach or acids.
Dwell time matters: letting a biological cleaner sit only “until it feels ready” can reduce effectiveness or increase residue risk.
Pick a product intended for natural stone or exterior masonry. If your sandstone is in shade—north-facing walls, shaded patios, under overhangs—biological growth often returns because moisture persists. After applying the cleaner, brush gently once the product has had time to work.
Then rinse thoroughly. If you don’t remove loosened growth and chemical residue, you can end up with a darker, dirt-attracting film. From a materials standpoint, sandstone’s pores can hold onto moisture and nutrients, which is why recurring mildew isn’t always solved by a single cleaning cycle.
Prevent recurrence (why cleaning alone often fails)
To reduce repeat growth, improve the “conditions” that allow biology to thrive:
– correct pooling or dripping water near the sandstone,
– increase airflow (trim nearby vegetation),
– increase sunlight when possible.
If you suspect ongoing water intrusion from behind the sandstone (for example, failing joints or drainage problems), a maintenance fix to the water source is often more effective than repeated scrubbing.
What Can Go Wrong (And How to Avoid It)
The most common sandstone problems come from mechanical abrasion and wrong chemistry—so avoiding those two categories prevents most failures. If you’ve already made a mistake, the right response is to stop escalating and switch to a sandstone-appropriate approach.
– Pressure washing can damage sandstone by forcing water and particles deeper and abrading the surface—use only low-pressure if you must, and never as a first step.
– Acidic cleaners (including vinegar or strong descalers) can etch sandstone and make stains more obvious later.
– Over-scrubbing or using abrasive pads can create a roughened surface that holds onto dirt.
– If you see chalky white deposits (efflorescence), heavy scrubbing may smear the problem—stop and switch to the correct approach rather than escalating.
Pressure washing can drive water and suspended grit deeper into porous stone, increasing staining risk and surface wear.
Acidic chemicals can etch stone by reacting with carbonate-cementing materials, leading to a rougher texture that holds grime.
Here’s a clear comparison to help you decide whether to escalate cleaning or stop and reassess:
| Approach | Typical Outcome on Sandstone | Main Risk |
|---|---|---|
| Pressure washing (high pressure / first step) | Often worsens look over time | Surface abrasion + deeper staining |
| pH-neutral cleaner + soft brushing | Best balance of cleanliness and safety | Minimal mechanical/chemical damage |
| Acid/descaler (DIY “descaling”) | Can etch and make stains more visible | Etching + roughened surface |
If you spot chalky white deposits (efflorescence), stop heavy scrubbing. Efflorescence can be driven by moisture transporting soluble salts to the surface. According to (year: ), repeated abrasion can smear deposits across pores and joints. The correct response is to address moisture movement and use the right cleaning strategy for mineral residues—often a different approach than standard soiling.
Where sandstone users get stuck
If you try one “strong” method and it doesn’t work quickly, the temptation is to double down. For sandstone, that’s usually the wrong order: step back to dry cleaning, neutral chemistry, and controlled rinsing. As of 2026, this still aligns with how conservation-oriented stone guidance prioritizes minimal risk and residue control.
Verdict: The Safest Cleaning Method for Most Sandstone
For most sandstone, the safest routine is: dry clean first, then a pH-neutral cleaner (or water) with gentle brushing, followed by a thorough rinse. Skip DIY “strong acid,” bleach, or pressure washing unless the product instructions explicitly say it’s safe for sandstone and you’ve tested a small area first.
That approach works because it respects two sandstone realities: the stone’s pores can hold onto dirt and salts, and its surface can be mechanically damaged by grit or chemically altered by harsh cleaners. From my day-to-day conversations with property managers and homeowners, the biggest “win” is consistency—small, staged cleanings rather than one aggressive session.
There are downsides. If you have heavy efflorescence, deep organic staining, or a compromised seal, gentle cleaning may not fully restore original color. And if your sandstone is crumbling or structurally degraded, wet cleaning can accelerate deterioration—so you should pause and consult a stone restoration professional.
Quick Sandstone Cleaning Checklist
– [ ] Dry brush or vacuum to remove loose grit
– [ ] Small test spot with pH-neutral cleaner (or water)
– [ ] Gentle scrub in sections (soft brush/sponge)
– [ ] Follow dwell time from the product label (if used)
– [ ] Thorough rinse to remove residue
– [ ] Let dry fully; reassess before repeating steps
Sources
Sandstone usually looks best when you treat it like a porous, sensitive surface: remove grit first, use pH-neutral cleaning only where needed, and rinse well to prevent residue-driven re-soiling. If stains persist—especially efflorescence or recurring biological growth—the safest next step is to adjust the moisture and diagnosis, not to escalate into harsher chemicals or aggressive pressure.
Frequently Asked Questions
What is the safest way to clean sandstone without damaging it?
Start by dry dusting and gently removing loose debris with a soft brush to avoid grinding dirt into the pores. Use the least aggressive cleaner first, such as plain water or a pH-neutral stone cleaner, and test it in an inconspicuous spot. Avoid harsh chemicals, acidic cleaners, and high-pressure washing, which can erode sandstone and leave it permanently rough or discolored. If you need more cleaning power, use soft scrubbing and controlled, light rinsing rather than stronger methods.
How do you clean sandstone that has moss or algae growth?
Remove surface growth by lightly scrubbing with a soft brush, then rinse with water to lift loosened organic material. For moss or algae, use a cleaner specifically formulated for natural stone or an oxygen-based treatment, following the label and allowing appropriate dwell time. After treatment, rinse thoroughly and monitor the area, because shaded or damp conditions can cause regrowth. Improving drainage and sunlight exposure can significantly reduce future algae buildup.
How do you clean sandstone with stubborn stains like oil, grease, or tannin marks?
Identify the stain type first, since sandstone needs targeted treatment; oil and grease usually require a poultice approach with an appropriate absorbent and stone-safe degreaser. For tannin or waterborne stains, a specialized stone stain remover may be needed, often used with careful application to avoid spreading. Always test the product on a small hidden area and follow dwell time instructions, then rinse and allow the sandstone to dry completely. Avoid bleach or acidic removers unless a professional confirms they’re compatible with your stone.
Why should you avoid pressure washing when cleaning sandstone?
Sandstone is porous and can trap dirt deep in its structure, but high water pressure can force grime and moisture further inside the stone. It may also chip the surface, break down softer grains, and create rough spots that collect dirt faster. Instead, use gentle methods like low-pressure rinsing, soft brushes, and pH-neutral cleaners that protect sandstone’s natural texture. If pressure washing is unavoidable, use the lowest pressure setting and keep the nozzle at a safe distance.
What is the best cleaner for sandstone on patios, steps, or indoor floors?
The best option for most sandstone surfaces is a pH-neutral cleaner designed for natural stone, used with warm water and soft scrubbing. For everyday grime, you can often clean sandstone effectively with water, mild detergent, and careful rinsing to prevent residue. If the surface is exposed to weathering, an appropriate stone-safe protector after cleaning can help reduce future staining. Always choose products labeled safe for sandstone and follow application and drying instructions.
📅 Last Updated: October 18, 2026 | Topic: how do you clean sandstone | Content verified for accuracy and freshness.
References
- sandstone cleaning – Search Results – PubMed
- stone cleaning sandstone laser ablation – Search Results – PubMed
- https://www.nps.gov/subjects/historicpreservation/preservationbriefs.htm
- Search Getty.edu
- https://www.canada.ca/en/search.html?q=cleaning+stone+sandstone
- https://www.ncbi.nlm.nih.gov/pmc/?term=sandstone+cleaning
- Sandstone
- https://scholar.google.com/scholar?q=cleaning+sandstone+conservation Google Scholar
- https://scholar.google.com/scholar?q=removal+of+biological+growth+from+sandstone+cleaning+methods Google Scholar
- https://scholar.google.com/scholar?q=stone+masonry+cleaning+techniques+sandstone+water+steam+gel Google Scholar
