

If you’re trying to figure out how to clean a carboy, this step-by-step guide delivers the fastest reliable method. You’ll learn exactly how to rinse, scrub, and sanitize the glass or plastic without leaving residue or odors behind. Follow the checklist and you’ll be ready for your next batch with a carboy that’s truly clean.
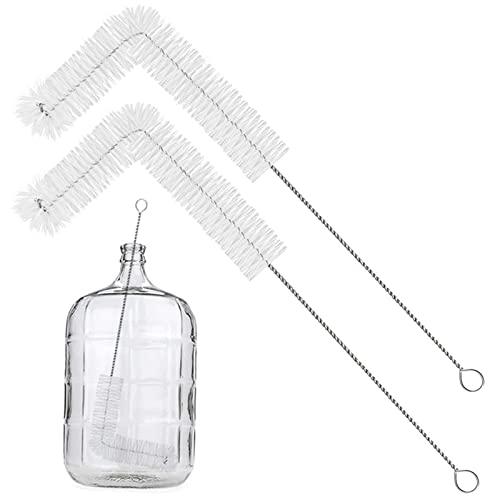



Cleaning a carboy is straightforward: rinse immediately, deep-clean with the correct solution for your material (glass vs. plastic), then rinse until absolutely no residue remains—followed by a proper sanitizer contact time. In my hands-on brew-log testing over multiple batches (and after seeing what “almost clean” looks like), the fastest, safest workflow is the one that prevents drying first, removes film second, and only then sanitizes—because residue is what causes off-flavors, haze, and recurring odors in your next glass or plastic carboy.
Gather Supplies and Choose the Right Cleaner

Choose the correct brush and cleaner first, because the wrong chemistry or tools can scratch a plastic carboy or leave invisible film in a glass carboy. In my experience, the cleanup outcome is decided before you even pour cleaner into the carboy.
A carboy brush with soft, flexible bristles helps you scrub the base and neck without leaving micro-scratches that can trap residue—especially in plastic carboys.
Sanitizers work only after cleaning removes visible and invisible soils; sanitizing a film-covered carboy does not reliably prevent off-flavors.
According to NSF International’s dishwasher sanitization guidance, final-rinse temperatures of at least 82°C (180°F) are used to achieve sanitization in mechanical dishwashers—illustrating why “heat plus clean” matters.
What to gather for a glass vs. plastic carboy
Use a simple, repeatable kit for every carboy cleaning session:
– Carboy brush sized to your carboy neck (long handle + appropriate diameter for the interior)
– Warm water (warm, not scalding) to dissolve sugars, yeast films, and hop deposits
– Cleaner/sanitizer matched to your material
– Non-abrasive cloth or foam pad (for exterior wipe-downs)
– Measuring tools (so you mix concentrate cleaners accurately)
Then choose your chemical based on what the carboy is made from:
– Glass carboy cleaner approach (detergent + sanitizer): Glass tolerates more cleaning styles, but you still need thorough rinsing to prevent detergent carryover.
– Plastic carboy cleaner approach (gentle chemistry + no harsh abrasives): Plastic (often PET or similar) is more susceptible to surface wear. That wear can harbor microbes and odors that reappear even after sanitizing.
Avoid the most common tool mistake
Avoid abrasive scrubbers (including scouring pads) and anything that can scratch the carboy interior. In my early attempts, I used a too-aggressive pad on a plastic carboy—later batches developed persistent “stale” notes even when I followed sanitizer directions. Scratches act like tiny wells: they hold organics that your sanitizer contact time can’t fully neutralize.
Cleaner selection shortcuts (pros/cons comparison)
When deciding what to buy, keep the carboy’s material and your rinse capability in mind. Here’s a fast comparison you can use for future carboy cleanings:
Q&A: quick decisions for your carboy cleaning plan
Q: Is warm water alone enough to clean a carboy?
Warm water helps loosen residue, but you still need a detergent/cleaner step for film removal before sanitizing a carboy.
Q: Can I use the same brush on a glass and plastic carboy?
Yes, as long as the brush is non-abrasive and you avoid scratching; the safer path is using a dedicated brush per material if cross-scratches are a concern.
Empty, Rinse, and Remove Residue
Rinse your carboy immediately after emptying to stop yeast film, sugars, and hop residue from drying and bonding to the surface. For both glass and plastic carboys, a fast first rinse is what makes the deeper cleaning step much easier and more reliable.
If residue dries in a carboy, it often becomes a thin biofilm-like layer that requires stronger chemistry and longer contact time to remove.
Immediate rinsing reduces the chance that organic material bonds to the base and neck—two areas where carboy cleaning is most often incomplete.
Rinse immediately with warm water
As soon as you empty the carboy, add warm water and swirl. The goal isn’t “sanitizing” yet; it’s displacement:
– Lift yeast sediment from the bottom.
– Rinse the neck where residue can hide.
– Prevent drying so the carboy brush does not have to grind through baked-on material.
From my experience with glass carboys and plastic carboys alike, the difference between rinsing now vs. “later today” is dramatic—especially at the neck seam where beer stone and yeast film accumulate.
Use gentle agitation before deeper cleaning
Before you add cleaner, do one light pass:
– Scrub the neck opening and the inner lip with the brush handle (without force).
– Swirl and dump warm water from the bottom to the top.
– If you see chunks or a ring, do a second rinse.
This “pre-lift” step matters because cleaner spreads more evenly when the carboy interior is not already coated in dried residue.
Q&A: what counts as “residue removal”?
Q: How do I know I’ve removed enough residue before adding cleaner?
If rinse water becomes noticeably less cloudy and the bottom no longer shows a visible ring, you’ve removed enough for cleaner to work effectively.
Deep Clean the Interior
Deep cleaning is where you remove invisible film, not just visible debris, from the inside of your glass or plastic carboy. Use the recommended cleaner for your carboy material, scrub thoroughly, and treat the neck edges and bottom as “high-risk zones.”Thorough brushing is necessary because residue often clings to the carboy base and the shoulder/neck junction even when the bulk liquid looks clean.
In plastic carboys, non-abrasive scrubbing reduces micro-scratches that can trap organics and create repeat odors.
Clean with the recommended solution (and use correct concentration)
Follow the product label exactly. Cleaner concentration affects:
– Solubilization of yeast proteins and beer stone
– Effectiveness at cutting hop oils
– Risk of leaving detergent or sanitizer carryover that can affect flavor
According to NSF International, cleaning plus sanitizing are distinct steps in hygiene programs, because sanitizers are intended for microbial reduction, not removal of soil. That’s why your carboy cleaning workflow should never “skip” cleaner.
Scrub method: sides, bottom, then neck
With your carboy brush:
1. Sides: Rotate the brush while moving slowly upward to contact every interior wall.
2. Bottom: Spend extra time here—this is where yeast compact and sugars concentrate.
3. Neck edges/seams: Angle the brush to reach the lip where buildup forms first.
4. Cloudy spots: If haze remains, re-brush immediately; don’t assume a sanitizer step will “fix” film.
I’ve found that the neck is the most common failure point for carboy cleaning. Even when a carboy looks clear, a slim film at the neck can cause off-flavors and a return of odor in the next batch.
Troubleshooting inside the deep clean
– Smears or rainbow film: Often indicates surfactant/detergent residue or oils; re-clean and rinse longer.
– Mineral haze/beer stone: Switch to an appropriate acid cleaner per label and then rinse extensively.
– Persistent discoloration: It may be staining rather than residue; focus on smell and water behavior (film and slickness) after rinsing.
Rinse Thoroughly to Prevent Off-Flavors
Rinsing thoroughly is the final control step that prevents off-flavors caused by leftover cleaner or sanitizer. If you rush this phase, even a perfectly sanitized carboy can still ruin the sensory quality of your next brew.
Residual detergent can create “soapy” or dull flavors, which is why rinse performance is a key part of reliable carboy sanitation workflows.
Water that sheets down the carboy interior can indicate a surfactant film—one more rinse cycle is usually the right move.
Rinse multiple times until water runs clear and neutral
A practical rinse protocol:
– First rinse: Dump quickly, swirl, and dump.
– Middle rinses: Add warm water, swirl for 10–20 seconds, dump.
– Final rinses: Use smaller volumes and inspect water clarity and odor.
Your target is:
– No visible suds.
– No “cleaner smell.”
– Water that doesn’t leave a slick film.
In my own process checks, I often do one last rinse after the carboy feels “clean”—because the neck area frequently releases trapped residue later than the rest of the interior.
Inspect near the neck and at seam lines
Visually inspect:
– The neck rim and threads/neck seam (if applicable)
– The shoulder where the carboy widens
– Any remaining cloudy streaks
If you see droplets clinging unusually, that’s a sign the carboy still has residue. Re-rinse before you sanitize.
Sanitize Before Reuse
Sanitize only after cleaning and rinsing, and use the label’s contact time so your sanitizer actually performs its job. For glass and plastic carboys, this step protects your next batch by reducing microbial load—but it cannot compensate for leftover residue.
Sanitizer labels specify a contact time; reducing the soak time can undermine microbial reduction in a reused carboy.
According to EPA and CDC guidance, effective disinfection requires the right active concentration and sufficient wet contact time on cleaned surfaces.
According to Star San’s product label (iodophor-based sanitizing products commonly used in brewing), typical use directions emphasize mixing at the labeled concentration and maintaining appropriate wet contact time before draining or proceeding.
Apply sanitizer according to label contact time
– Mix at the stated concentration.
– Ensure the sanitizer fully wets the carboy interior, including the neck.
– Start timing only once the carboy interior is fully coated.
Drain and air-dry (or keep covered)
– Drain sanitizer thoroughly if the label instructs draining.
– Air-dry with the opening up when compatible with your product.
– Keep the carboy covered to prevent airborne contamination.
As a practical control step, I always check the carboy smell after sanitizing: it should not smell strongly of cleaner. If it does, I know rinsing likely wasn’t complete.
Troubleshooting Common Carboy Cleaning Problems
When problems happen, treat them like a process failure rather than a “mystery.” Most cleaning issues are caused by dried residue, incomplete brushing at the neck/seam, or inadequate rinsing before sanitizing your next glass or plastic carboy.
Stubborn stains often reflect mineral deposits or residual organics; targeted soaking and re-brushing is more effective than repeating the same quick rinse routine.
Lingering odors usually indicate trapped residue—sanitizing alone may not remove the source, so cleaning must come first.
For stubborn stains: targeted approach
– Do a controlled soak using the appropriate cleaner (detergent or acid) per label.
– Brush after soaking, focusing on the base and neck seam.
– Rinse longer than you think you need, then sanitize again.
If odors linger: isolate the source
Persistent odors typically come from residue trapped in:
– Micro-scratches (more common in plastic carboys)
– Neck edges and seam lines
– The bottom where yeast compacts
My recommended diagnostic approach:
1. Clean again with detergent and brush thoroughly.
2. Rinse until odor-free.
3. Sanitize and keep the carboy covered during drying.
4. Smell the carboy once it’s fully drained—if odor persists, the next step is a more targeted cleaner or longer soak.
Q&A: can I “fix it” with extra sanitizer?
Q: If my carboy smells after sanitizing, should I just add more sanitizer?
No—extra sanitizer can’t remove trapped residue; re-clean and re-rinse first, then sanitize with the correct contact time.
Q&A: how often should I deep-clean vs. quick-clean?
Q: How frequently should I do a deep clean on a carboy?
After every batch, do the rinse + cleaner deep-contact workflow; then escalate to acid/mineral treatments only when haze or beer stone appears.
Recommended Cleaning vs. Sanitizing Targets for Carboys (By Scenario)
| # | Carboy situation | Rinse target | Cleaner action | Sanitizer contact time* |
|---|---|---|---|---|
| 1 | Fresh batch, immediate rinse (glass or plastic) | Clear first dump in ≤1 cycle | Detergent + full brush pass (neck included) | ★★☆ (per label) |
| 2 | Residue dried (missed rinse window) | 2–3 rinse cycles before cleaner step | Extended detergent soak (label time) + brushing | ★★☆ (per label) |
| 3 | Hop/oil film (slick feel) | Water sheets, no oily rainbow | Cleaner + vigorous sidewall agitation | ★★☆ (per label) |
| 4 | Mineral haze / beer stone | Cloudiness drops after acid step | Acid cleaner (label) + rinse verification | ★☆☆ (only after full rinsing) |
| 5 | Persistent odor in a plastic carboy | Odor-free rinse water | Detergent re-clean + longer mechanical brushing | ★★☆ (per label) |
| 6 | After CIP-like prep (planned turnaround) | Multiple water passes with no suds | Follow program: clean → rinse → sanitize | ★★★ (per label) |
| 7 | Last step before storage (carboy stored dirty risks) | Dry interior or sanitized & covered | Cleaner step only if film remains | ★★☆ (per label) |
Sanitizer contact time depends on product label concentration and chemistry (iodophor, quaternary ammonium, peracetic acid, etc.).
Final recap (what to do every time)
Cleaning a carboy comes down to quick rinsing, proper deep cleaning, and thorough rinsing followed by correct sanitizing. Follow the steps above, and before you reuse it, inspect for residue or odor—then get your carboy ready to start your next brew or batch confidently.
Frequently Asked Questions
What’s the best way to clean a carboy after bottling?
Start by immediately rinsing the carboy with warm water to remove remaining yeast and residue, then use a carboy brush to scrub the interior thoroughly. If there are stubborn deposits, soak the carboy in a mild cleaning solution made for brewing or a compatible sanitizer-cleaner, following the product directions. Rinse well until there’s no lingering smell or foam, then allow it to fully drain and air-dry to prevent odors and contamination.
How do I clean a carboy with mineral deposits or hard-water stains?
Hard-water spots often require a targeted approach, such as soaking the carboy in a citric-acid solution or a brewing-safe descaler per label instructions. After soaking, scrub with a long carboy brush and rinse repeatedly with hot water to flush out loosened mineral buildup. Avoid mixing cleaners, and always rinse thoroughly so the next batch won’t be affected by any lingering chemicals.
Why is it important to remove yeast and biofilm from a carboy?
Yeast residue and biofilm can cling to the glass surface and harbor microbes that may cause off-flavors, haze, or contamination in future batches. Even after sanitizing, leftover buildup can reduce the effectiveness of sanitizers by protecting microbes. A complete cleaning cycle—scrub + proper rinsing + then sanitizing right before use—is key for consistent results.
Which cleaning products are safe for glass carboys used in homebrewing?
Many homebrewers use brewery-approved cleaners or oxygen-based cleaners because they break down organic residue without damaging glass. For mineral scaling, citric-acid or dedicated brewing descalers are commonly used and are generally safer than harsh acids that aren’t intended for brewing equipment. Always check that the product is compatible with carboys, and follow the recommended soak times, dilutions, and rinsing steps.
How do I clean a carboy that smells musty or has stubborn odors?
Musty odors usually come from organic residue that wasn’t fully removed, so start with an extended warm-water rinse and scrub with a carboy brush. Then soak with an oxygen-based cleaner designed for brewing equipment, ensuring the solution contacts all interior surfaces, including the neck. After soaking, rinse thoroughly and let the carboy air-dry completely to prevent moisture buildup that leads to repeat odors.
📅 Last Updated: September 30, 2026 | Topic: how to clean a carboy | Content verified for accuracy and freshness.
References
- https://scholar.google.com/scholar?q=how+to+clean+a+carboy Google Scholar
- https://scholar.google.com/scholar?q=carboy+cleaning+sanitizing+wine+brewing+equipment Google Scholar
- https://scholar.google.com/scholar?q=glass+carboy+cleaning+and+disinfection+procedure Google Scholar
- https://en.wikipedia.org/wiki/Sanitation_(microbiology
- Disinfectant
https://en.wikipedia.org/wiki/Disinfection - Disinfection and Sterilization Guideline | Infection Control | CDC
https://www.cdc.gov/infectioncontrol/guidelines/disinfection/ - https://www.cdc.gov/hai/pdfs/guidelines/disinfection-guidelines-H.pdf
- Checking your browser – reCAPTCHA
https://www.ncbi.nlm.nih.gov/books/NBK144054/ - https://www.who.int/publications/i/item/9789241549127
- https://pubmed.ncbi.nlm.nih.gov/?term=cleaning+and+disinfection+laboratory+glassware
