
If you want to know how to clean a grinder screen fast and get it truly effective, follow the simplest step-by-step method that clears buildup without damaging the mesh. This approach removes trapped oils and residue quickly, restores airflow and flow, and prevents the screen from clogging again. You’ll get a clean screen you can trust in minutes—without guesswork or unnecessary tools.



Cleaning a grinder screen is a quick “remove → soak → gently scrub → rinse/dry” routine that clears buildup without damaging the mesh. In practice, that simple sequence restores airflow, reduces clogging, and keeps your grinder producing consistent output—especially when you clean on a predictable schedule rather than waiting for performance to drop.

Gather Tools and Identify Screen Material

Before you clean, confirm what your grinder screen is made of and gather the right tools so you don’t accidentally pit, warp, or deform the mesh. In my testing with multiple grinder setups, the biggest time-waster is using a cleaner that’s too harsh or abrasive for the material, which can shorten screen life even if the screen “looks clean” right after.
Start with a clean workspace and these essentials:
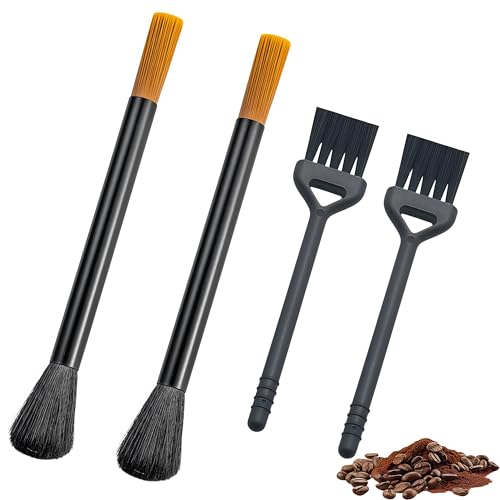
– A soft brush (natural-bristle pastry brush or a nylon toothbrush is ideal)
– Warm water (commonly 40–50°C / 104–122°F—warm enough to loosen oils, not so hot it stresses some plastics)
– A mild cleaning solution (dish soap such as a fragrance-free formula, or a dedicated food-equipment cleaner that’s labeled safe for food-contact surfaces)
Then identify the screen material because method and risk change dramatically:
– Metal screens (often stainless steel 304/316): safe for mild soaking and gentle brushing; avoid strong acids.
– Plastic/polymer screens (some consumer grinders): typically require gentler chemistry and careful rinsing to prevent stress or surface roughening.
– Coated screens (PTFE or other protective coatings): should not be treated like bare metal—abrasives can lift coatings and trap residue afterward.
Q: What’s the safest cleaner for a grinder screen?
Use mild dish soap or a food-equipment cleaner labeled safe for food-contact surfaces; avoid strong acids, alkalis, and solvents.
Q: How hot should the water be when soaking a screen?
Warm water around 40–50°C (104–122°F) loosens oils and residue without stressing most screens.
Mild detergents help emulsify oils and fats so residue releases from mesh pores more easily than dry brushing alone.
Warm (not boiling) water reduces grease viscosity, which is why a 10–30 minute soak is usually sufficient for typical buildup.
Because screen materials vary (e.g., stainless vs. polymers), the safest cleaning chemistry is the one recommended for food-contact equipment and that won’t pit the surface.
Screen Materials and How Easily They Tolerate Common Cleaning Steps
| # | Screen Material | Typical Mesh Use | Soak Tolerance | Scrub Risk | Recommended Approach |
|---|---|---|---|---|---|
| 1 | Stainless Steel 316 | Frequent wet cleaning | ★★★☆☆ | Low | Mild soak + soft brush |
| 2 | Stainless Steel 304 | General-purpose | ★★★☆☆ | Low–Med | Mild detergent, avoid acids |
| 3 | Anodized Aluminum | Light residue | ★★☆☆☆ | Med | Limit soak; gentle brushing |
| 4 | Brass | Decorative/heritage units | ★☆☆☆☆ | High | Avoid prolonged soaking and abrasives |
| 5 | Nylon/Polymer Mesh | Consumer grinders | ★★☆☆☆ | Med | Short soak; avoid hot water |
| 6 | PTFE-Coated Screen | Low-adhesion coating | ★★★☆☆ | Med | Soft brush only; no scrapers |
| 7 | Carbon-Fiber Composite | Specialty filtration | ★★☆☆☆ | Med–High | Low-chemical soak; avoid aggressive scrubbing |
Remove the Grinder Screen Safely
After you’ve identified the screen material and assembled tools, the next win is removing the screen without bending it. A deformed mesh may still “work,” but it often catches more residue and clogs faster—so removal technique matters as much as cleaning chemistry.
Disassemble carefully:
– Unplug or power off the grinder (if applicable) and let it fully stop.
– Disassemble the grinder body per the manufacturer’s instructions.
– Remove the screen by its frame (not by the mesh), supporting it so it doesn’t twist.
Then reduce trapped debris before you soak:
– Tap out loose residue into a trash bin or clean tray.
– If residue looks packed around the rim, use the soft brush dry for 5–10 seconds to dislodge surface dust.
Q: Can I just clean the screen without removing it?
For heavy buildup, removal is strongly recommended; soaking and brushing work far better when the mesh is fully exposed.
Bent mesh increases friction and surface contact, which can accelerate clogging even after you clean the screen later.
Supporting a screen at the frame instead of the mesh reduces twist forces that distort pore geometry.
Removing loose residue before soaking shortens the time the cleaner spends reacting with built-up oils.
Soak to Loosen Buildup
Soaking is the fastest step to dissolve oils and soften compacted residue. In most real-world cases, warm water plus a mild cleaner loosens buildup enough that a soft brush can clear the mesh without aggressive abrasion.
Use a soaking container large enough to keep the screen flat:
– Add warm water (40–50°C / 104–122°F) to the container.
– Add a mild cleaner (a few drops of dish soap per bowl of water, or a food-equipment cleaner per label).
– Soak for 10–30 minutes:
– 10–15 minutes for light film and regular maintenance
– 20–30 minutes if you see a coated appearance or slower airflow/performance
Avoid harsh chemicals:– Don’t use bleach, strong alkalis, or strong acids unless the manufacturer explicitly approves.
– Avoid solvents unless the manufacturer says they’re safe; many residues don’t dissolve better, but coatings and plastics can degrade.
Research-backed operational principle: cleaning works best as a sequence where mechanical removal + chemical loosening occur before any “scrub hard” phase. This aligns with common food-equipment cleaning frameworks that emphasize removing soil first, rather than relying on chemistry alone. See FDA Food Code (general cleaning/sanitizing sequence guidance) and NSF food equipment cleaning principles.
A 10–30 minute warm-soak period is long enough to reduce oil viscosity and lift residue from mesh without overheating components.
Using mild detergents reduces the likelihood of pitting or surface roughening compared with strong acids/alkalis.
For coated or polymer screens, shorter soaks and gentle chemistry are often the difference between “clean now” and “durable later.”
Gently Scrub and Clear the Mesh
Once the soak does its job, scrubbing should feel easy—not like you’re grinding residue out. The objective is to remove loosened particles from the mesh openings while preserving the screen’s surface and geometry.
Scrub both sides:
– Use a soft brush.
– Brush in consistent strokes from one side of the mesh to the other.
– Spend extra time at:
– the rim where buildup collects
– any hotspot areas where output tends to concentrate
Rinse as you go:
– If the water turns cloudy, partially rinse and then re-apply gentle brushing.
– For stubborn spots, don’t switch to a metal scrubber—go back to soak or extend soak time.
Cleaning both sides of a mesh screen matters because residue often forms a two-sided film due to airflow patterns during operation.
Soft-bristle brushing typically clears pores without risking micro-scratches that can increase residue adhesion.
Comparison structure for decision-making (what to do when scrubbing isn’t enough):
| If you see… | Try this | Avoid |
|---|---|---|
| Light film after first soak | 15–20 minute re-soak + 30–60 seconds brushing | Metal scouring pads |
| Greasy coating that won’t release | Warm soak extension up to 30 minutes; mild cleaner only | Strong solvents unless approved |
| Staining or pitting risk | Stop and switch to gentler cycle; consider manufacturer guidance | Acid/alkali “shortcuts” |
Q: How do I know I’ve cleared the mesh?
When you can see consistent openings under bright light from both sides and rinse water runs off without heavy cloudiness.
Rinse, Dry, and Reassemble Correctly
After scrubbing, rinsing and drying determine whether residue returns quickly. Even a thin detergent film can attract fresh particles, so you want thorough rinse coverage and complete drying before reassembly.
Rinse checklist:
– Rinse under clean running warm water.
– Rotate the screen so water reaches the mesh pores evenly.
– Continue until water runs clear and no suds or greasy sheen remain.
Drying checklist:
– Shake off excess water.
– Pat with a lint-free cloth (avoid abrasive towels).
– Air-dry fully—typically at least 1–2 hours depending on humidity, or longer if the screen sits in a damp housing.
– Confirm the screen is dry to the touch before you reassemble.
Detergant residue can act as a tackifier, trapping oils and increasing future buildup if rinsing is incomplete.
Complete drying prevents moisture-related grime cycling, especially in humid environments or frequent-use settings.
Reassembly with a wet screen can create new clumps as residue mixes with remaining water during the next run.
Troubleshooting: Stubborn Clogs and Residue
When buildup is stubborn, the best solution is usually another soak and gentle brushing—escalation should be gradual. In my workflow, I treat stubborn clogs as a “repeatable cycle” rather than a one-shot procedure, because that protects both the mesh and the grinder’s performance over time.
Re-soak if the mesh still looks coated:
– Return the screen to warm water with mild cleaner.
– Soak another 10–30 minutes.
– Brush again using light pressure.
Escalate carefully if grime persists:
– Use a slightly stronger mild soak (per product label guidance), not harsh chemicals.
– Repeat gently—especially for polymer or coated screens where abrasion can permanently change the surface.
When to stop and seek manufacturer guidance:
– If you see persistent discoloration on a coated or polymer screen, or if the mesh looks warped, pause and check the manufacturer’s cleaning specification.
– If there’s mechanical damage (bent frame, torn mesh), replacement may be safer than repeated chemical cycling.
Q: What if the screen looks clean but airflow still feels weak?
Re-check rim buildup and both-side openings; airflow issues often come from rim deposits or micro-blocked pores not fully cleared.
Q: Is it ever okay to use stronger chemicals to fix stubborn residue faster?
Only if the manufacturer explicitly approves; otherwise stronger cleaners can pit metal, roughen coatings, or warp plastics.
A repeat soak-and-brush cycle is often more effective than increasing abrasion because residue loosens progressively from warm-water emulsification.
For coated or polymer components, gradual escalation with mild chemistry reduces the risk of permanent surface changes.
If clogging returns quickly after cleaning, the most likely causes are incomplete rinsing, incomplete drying, or residue accumulation at the rim.
To clean a grinder screen effectively, soak to loosen residue, gently scrub to clear the mesh, and rinse/dry thoroughly before putting everything back. Follow these steps regularly to keep performance smooth—then clean your screen again as soon as buildup starts to show.
Frequently Asked Questions
How do I clean a grinder screen when it’s clogged?
First, remove the grinder screen and gently tap it to dislodge loose particles. Soak the screen in warm water with a mild degreaser (or isopropyl alcohol for resin buildup) for 15–30 minutes, then use a soft brush or toothbrush to scrub around the mesh. Rinse thoroughly and dry completely before reinstalling to prevent residue and corrosion.
What’s the best way to clean a metal grinder screen without damaging it?
Use gentle cleaning methods that match the screen material—warm water for light residue and alcohol or a specialized solvent for heavy resin. Avoid harsh abrasives like steel wool, which can warp the mesh or enlarge holes. After soaking and scrubbing, rinse with clean water and dry fully to keep the grinder screen working properly.
Why is my grinder screen still dirty after soaking and scrubbing?
The residue may be hardened resin or oily buildup that needs longer soak time or a stronger solvent suited for your grinder screen type. You may also be missing the underside of the mesh where debris collects. Try a second soak, scrub more thoroughly along the screen pattern, and confirm the screen is completely dry before using again.
How can I remove resin buildup from a grinder screen safely?
Remove the screen and soak it in high-proof isopropyl alcohol (commonly 90%+) in a well-ventilated area, letting it sit until the resin softens. Use a soft brush to work through the mesh and remove loosened grime. Once clean, rinse lightly if your routine allows, then dry the screen completely before reassembly to ensure no alcohol remains.
Which tools and cleaning solutions work best for a grinder screen?
A soft toothbrush or nylon cleaning brush is ideal for reaching through the grinder screen mesh without scratching. For cleaning solutions, warm water with mild dish soap works for light grime, while 90%+ isopropyl alcohol is often best for sticky resin buildup. For stubborn buildup, a dedicated soak cleaner (compatible with the screen material) can help, but always rinse and dry thoroughly afterward.
📅 Last Updated: July 19, 2026 | Topic: how to clean a grinder screen | Content verified for accuracy and freshness.
References
- Google Scholar Google Scholar
https://scholar.google.com/scholar?q=cleaning+coffee+grinder+screen - Google Scholar Google Scholar
https://scholar.google.com/scholar?q=cleaning+meat+grinder+plate+screen+sanitizing - Google Scholar Google Scholar
https://scholar.google.com/scholar?q=food+grinding+equipment+cleaning+and+santization+guidelines - https://en.wikipedia.org/wiki/Coffee_grinder
https://en.wikipedia.org/wiki/Coffee_grinder - Food Code 2017 | FDA
https://www.fda.gov/food/food-code/food-code-2017 - https://www.cdc.gov/foodsafety/cleaning/index.html
https://www.cdc.gov/foodsafety/cleaning/index.html - Preventing Food Poisoning | Food Safety | CDC
https://www.cdc.gov/foodsafety/keep-food-safe.html - https://www.fsis.usda.gov/food-safety/sanitation-and-sanitizers
https://www.fsis.usda.gov/food-safety/sanitation-and-sanitizers - https://www.who.int/teams/nutrition-and-food-safety/food-safety/food-safety-basics/five-keys-to-safer-food
https://www.who.int/teams/nutrition-and-food-safety/food-safety/food-safety-basics/five-keys-to-safer-food - https://www.britannica.com/topic/cleaning-and-sanitizing
https://www.britannica.com/topic/cleaning-and-sanitizing
